Locking an Excel worksheet is the most practical thing to do when you share an excel file with your other team members. Cause, of course, you want to ensure the data and formula you entered are safe.
I don’t wanna input negative thoughts, but in corporate culture, there will be people to sabotage your work. Besides, someone might mistakenly delete your formula. Either way, your whole work will be jeopardized.
Just create a spreadsheet template where only you’ll select the editable cells. You can also make the workbook cells password-protected to avoid possible data loss.
In this article, I’ll make sure you learn the exact process of sealing cells in Microsoft Excel. Bare with me till the end of the article, and you’ll be able to lock MS Excel cells on your own.
How to Lock All Cells in Microsoft Excel
When you protect an excel workbook, all cells get locked. You don’t need to lock a particular cubicle. Follow further guidelines if you don’t know the procedure to lock every cell in Excel.
By default, when you activate password-protected cells from the alignment section, every cell is locked. So, you can’t edit or delete a cell reference until you unlock the protection.
Here are the steps to close every spreadsheet for editing:
- Open your Excel workbook or the one your boss shared access to modify.
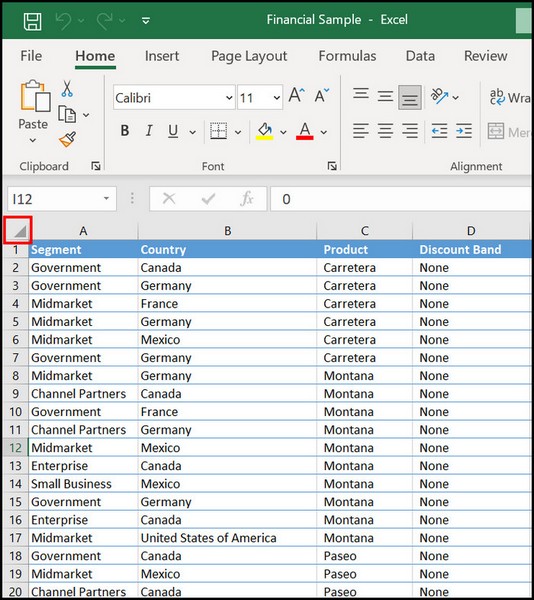
- Click on the All button to select every available cell in the worksheet.
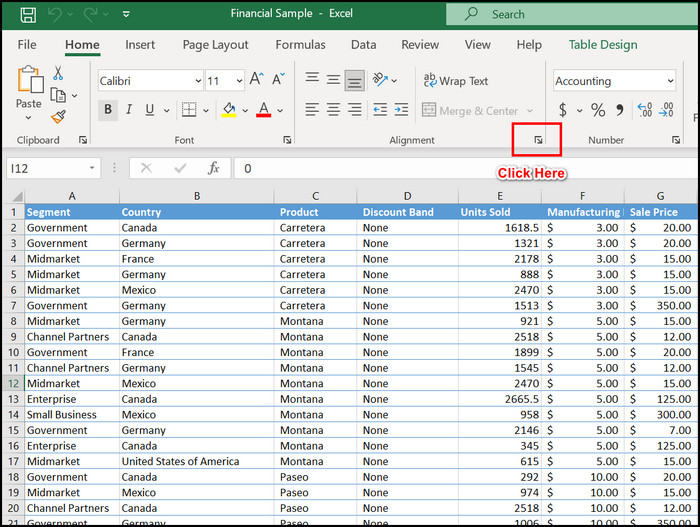
- Select the Alignment setting (expansion icon) on the sheet’s Home tab. A new window named Format cells will pop up.
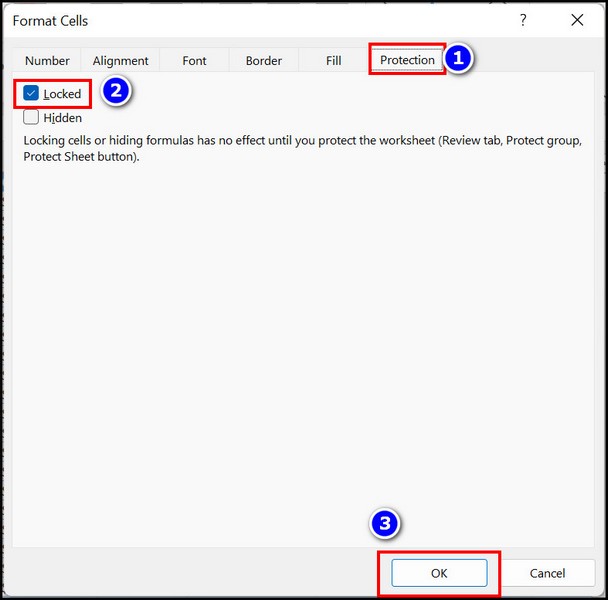
- Move to the Protection tab in the new window.
- Tick on the Locked section; after that, click Ok.
Every cell is protected now. Remember, when you protect every cell in Excel, the person you share the spreadsheet with will not be able to edit the sheet.
Here’s a complete guide on how to Lock and Unlock Cells in Excel.
How to Lock a Specific Cell in MS Excel
Imagine a scenario where you don’t want certain cells in the excel sheet not to be changed by someone who has spreadsheet access. You can mark the particular cells and lock them to avoid further modification.
Specify those cells in the process that I’m going to share next.
Here are the steps to lock a specific cell in Microsoft Excel:
- Select all cells in the spreadsheet.
- Press Ctrl and deselect the cells that you don’t want to lock.
- Press Ctrl + 1 A new window named Format cells will pop up.
- Go to the Protection tab and tick on the Locked menu.
- Click Ok once you lock the preferred cells.
- Go to the review tab and click on Protect Sheet from the ribbon.
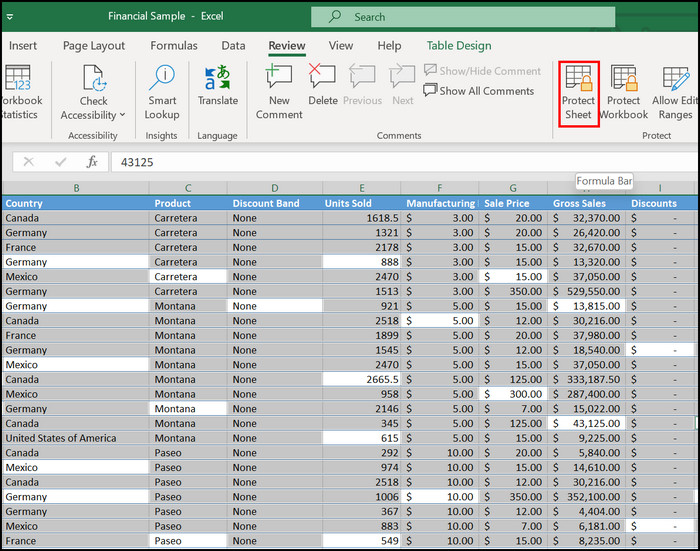
- Hit on Ok to save the changes.
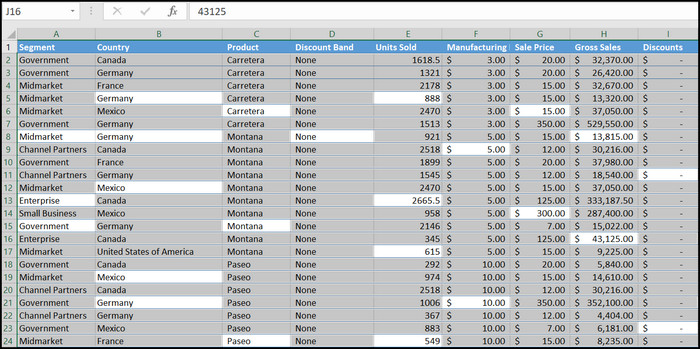
Example to lock specific cells: Here on my excel sheet, I marked the top 13 rows and 5 columns. From those, I deselected a few cells. As I was going to lock the remaining cells, I pressed Ctrl + 1 together. Format cells popup window appeared. I clicked on the Locked menu from the protection tab and saved the settings.
That’s how you cancel editing permission for a specific cell. Check out the next section if you want to lock cells that contain formulas.
Check out our separate post on Fix Microsoft Excel Freezing or Slow.
How to Lock Excel Formula Cells
Let’s be honest here’ suppose you’re busting your head managing the excel worksheet that’s going to meet its deadline. And suddenly, you hit the backspace or delete key on the formula cell.
That will totally change the look of excel data to an erroneous one. So, it’s safe to lock the cell references with a formula.
Here’s the procedure to lock a cell in a formula:
- Select all the cells in your spreadsheet.
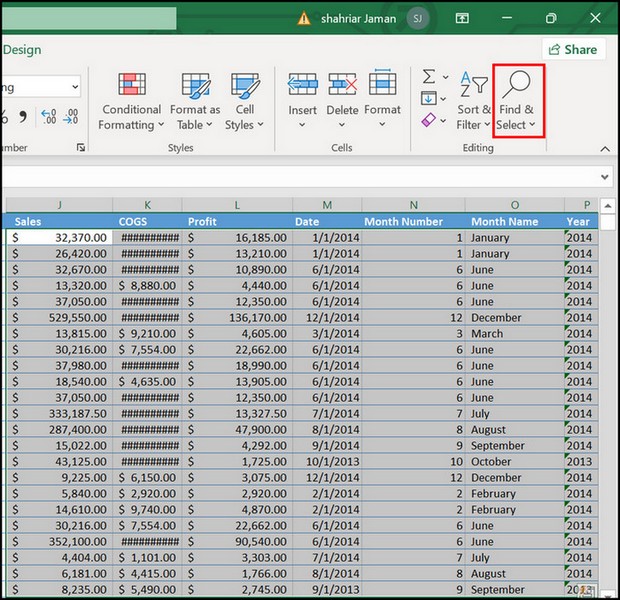
- Click on Find & Select in the Home tab.
- Select Go to Special from the drop-down menu.
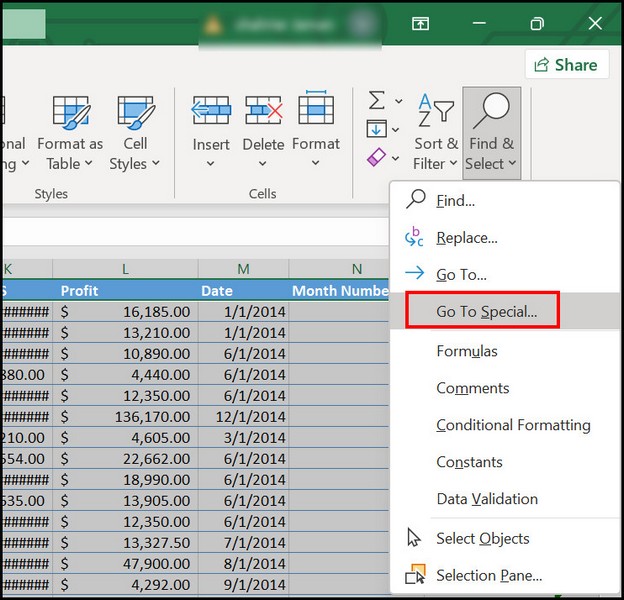
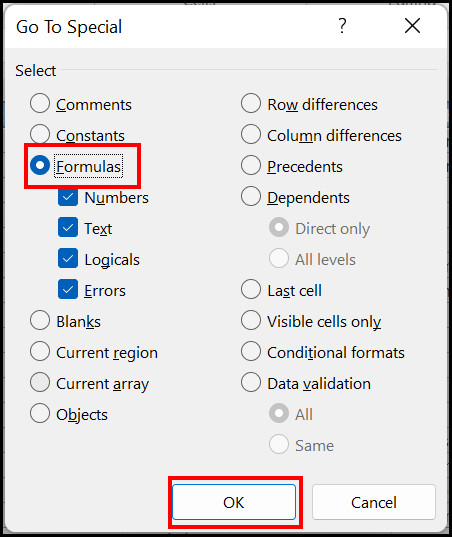
- Click on the Formulas radio button from the Go to special dialogue, and click Ok.
- Press Ctrl + 1 to open the Format cells.
- Navigate to the Protection tab and select the locked option.
- Click Ok to save the changes.
Note: Try this method only if you want to lock the formula cells.
However, check out the following section if you want to lock Excel cells in Mac.
Here’s a complete guide on how to Copy Values Without Formulas on Excel.
How to Lock Cells to protect them in Excel for Mac
It’s pretty normal to encounter mistakenly changing or moving important data from Excel. It’s best if you protect the cell references by locking them. By locking, I mean not giving access to move the data from their respective place.
Previously, while using Microsoft Office on Mac, I faced this issue numerous times. Check out the following steps that I’m going to share next.
Here are the steps to lock cells in Mac Excel:
- Select the cells that you want to lock.
- Press COMMAND + 1 on the Format menu.
- Go to the Protection tab.
- Make sure that the Locked check box is selected.
- Move to the Review tab on excel.
- Click on Protect Sheet and type a password for the sheet or workbook
- Retype the password under Verify.
Note: By default, all cells have the Locked formatting unless you previously turned it off.
So, how does it feel to complete your work in Microsoft Excel successfully? I know; it feels amazing.  Would you like to know how to reverse the work you’ve done so far? Follow the upcoming sections.
Check out our separate post on How to Install Macro in Excel.
Locking Excel Sheet Isn’t Necessary Anymore? Unlock the Cells
Sealing cell data is a must when you need to protect them. But if you can make sure the data needs no further protection, you can unlock the Excel cells. It requires a few steps to unlock cells in Excel.
Follow further instructions if you want to unprotect cell data error-free.
Here’s the process to Unlock cells from Excel:
- Open the excel sheet that is protected.
- Select the range of data you want to unlock.
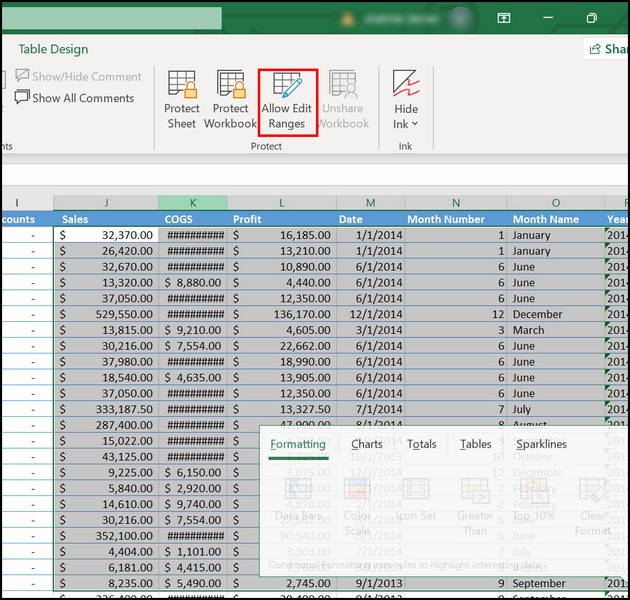
- Move to the Review tab; in the Protect group, select Allow Edit Ranges.
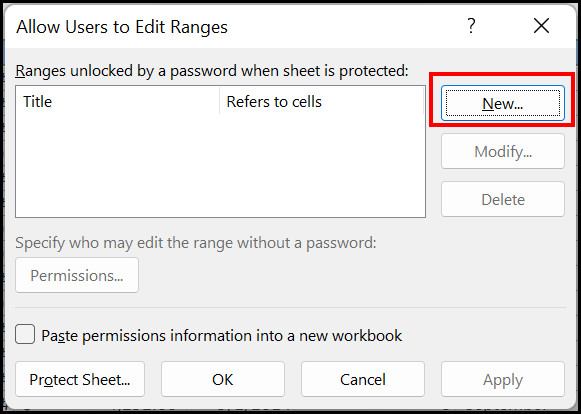
- Click on New when the Edit ranges window appears.
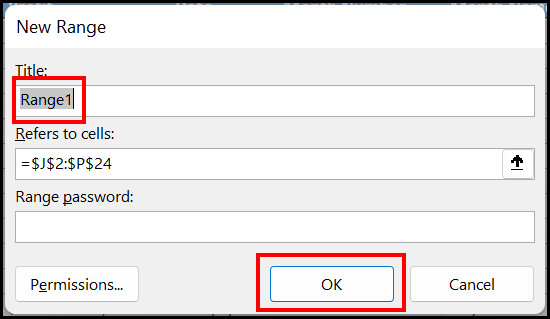
- Type a name for the range of cells you want to unlock. As you selected the range of cells earlier, you don’t have to type the reference of the range. Just double-check if the cells are accurate.
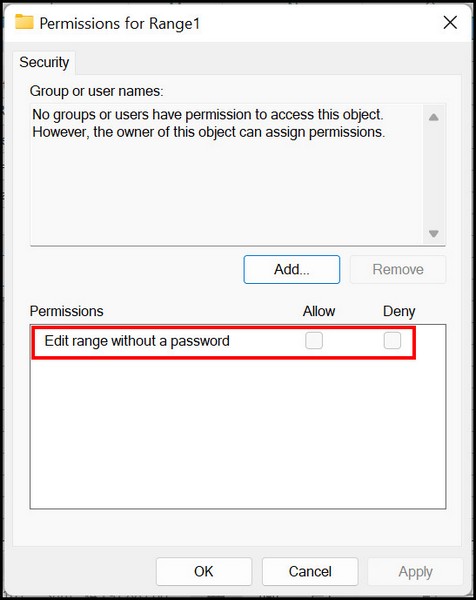
- Click on Permission from the bottom.
- Click on Add, and type the user name to who you want to edit the cell.
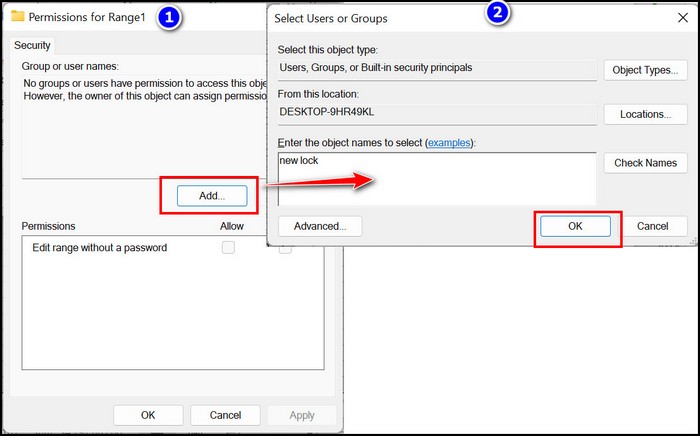
- Select Allow or Deny in the permission box.
- Select Ok to save the changes.
You are all set. Now that your excel cells are unlocked, anyone who has proper access will be able to modify/delete the cell value/ formats. And most importantly, you’ll find out if any accidental error occurs.
Now, have any further questions regarding excel data locking? Check out the following section.
Frequently Asked Questions
How do you F4 in Excel on a Mac?
F4 command key (for Windows) is used to emphasize a cell. In Mac, you can use Command + T (⌘ + T)to select the cell value.
How do I lock a cell in Excel?
Go to the Home tab > alignment group > format cells > On protection tab click on locked check box > click ok.
How do you lock a cell number on a Mac?
Select the table you want to lock > click on the Format button (brush icon) > select the Arrange tab > tap Lock. After that, wherever you click on that table, it will appear as if it’s one object. You are not able anymore to select cells, rows, or columns.
Wrapping Up
Throughout this article, I’ve described numerous ways to lock an Excel sheet. I think if you follow the instructions from this article, you’ll possibly be able to lock multiple excel cells without any trouble.
However, you know I’m here to help if anything goes south. Just comment on your issue down here.
Also, don’t forget to let me know which method helped you to protect your Excel data.