Do you need a dedicated GPU to handle all the high graphics-intensive work and an integrated one to deal with all the low-workload apps?
Yes, you can set the default graphics card for individual apps & games in your Windows 11 PC.
Setting up a default GPU is a pretty straightforward process, and anyone can do that. To know how to do that, read along till the end of this article.
So, let’s get started!
Check out our separate post on best graphics card for i7-10700K.
How to Set Default GPU for Apps & Games in Windows 11
There are two best ways to set the default GPU for apps & games in Windows 11. One way is to set the default graphics card from the Windows Settings app, and the other is from the dedicated GPU settings app. Integrated or dedicated, you can choose any GPU for particular apps.
If your PC has a dedicated GPU, you can choose that graphics card for highly graphics-intensive works like rendering videos, gaming, creating animations, etc. You can choose the integrated one for performing regular tasks like using Office-related apps, watching videos, and surfing the internet.
From your curious mind, you might want to know the memory differences between the dedicated & integrated GPU. You should research a bit to know the memory specification of both of them before selecting one.
After that, you can follow the methods below to know how to set the default GPU in Windows 11.
Here are the steps to set the default GPU for apps & games in Windows 11:
1. Set Default Graphics Card from Windows 11 Settings App
There are many graphics-related settings in the Windows 11 Settings. You can set up multiple displays or change the refresh rate from the Settings app. Like these, one can set the default graphics card for specific apps or games from here.
Here are the steps to set the default graphics card from Windows 11 Settings app:
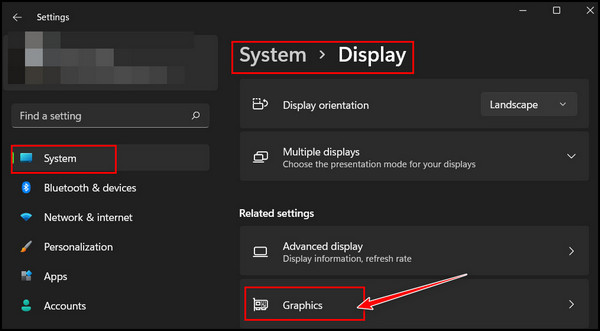
- Press the Windows key + I to launch Windows Settings.
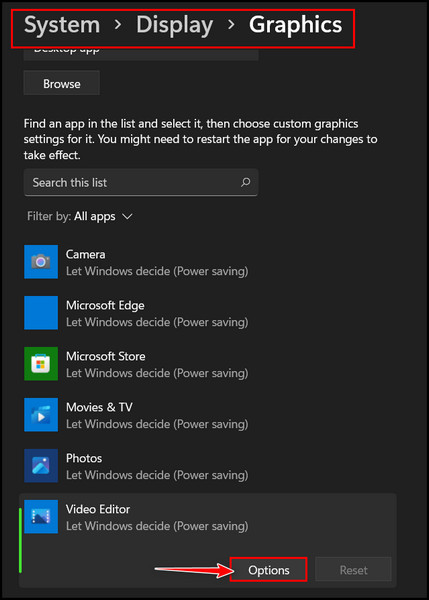
- Navigate to System > Display > Graphics.
- Click on the app from the list.
- Select the Options button.
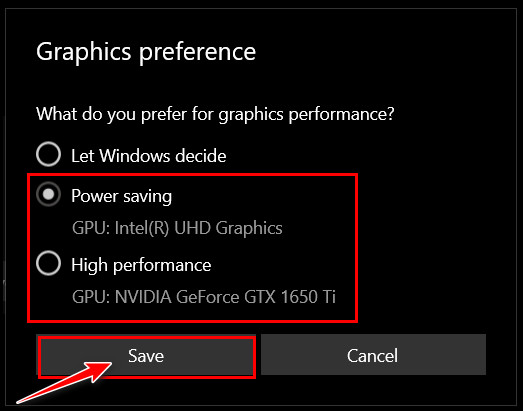
- Choose any of the following options to select the default GPU:
- Select the Power saving option to set the integrated GPU as default.
- Select the High performance option to set the dedicated GPU as default.
- Click the Save button to finalize the selection.
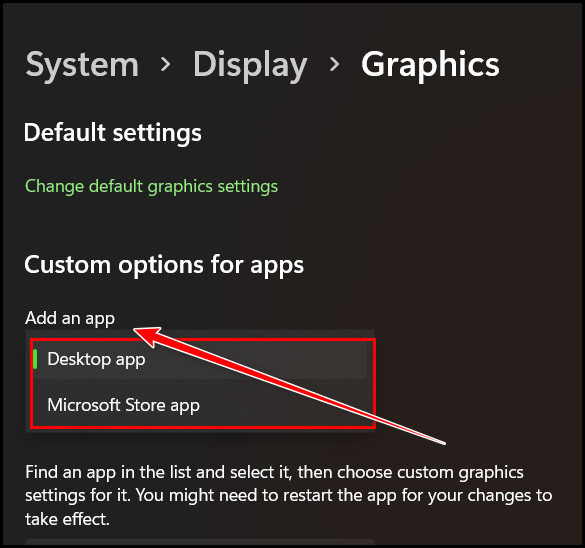
In case you don’t see the app enlisted for which you want to set the default GPU, you can select the app by browsing for it.
- Click the drop-down icon of the Add an app section.
- Choose the Desktop app or Microsoft store app.
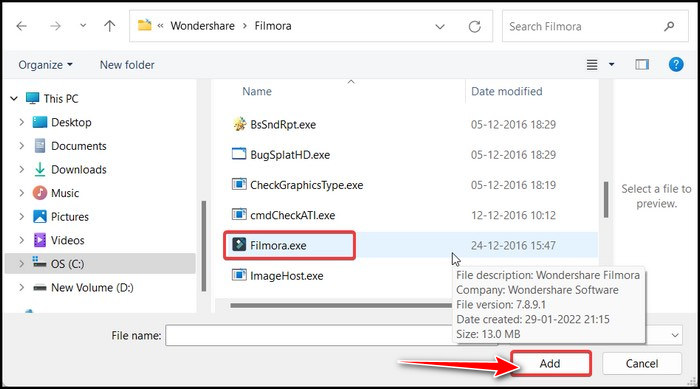
- Select the Browse button, and it will open file explorer.
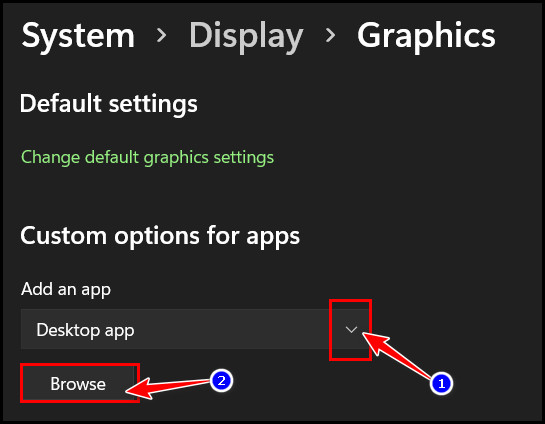
- Browse for that app’s .exe file and select it.
- Click on the Add button.
After adding the app, it will appear on the app list. From there, select the app by clicking on it. Then click on the Options button and choose Power saving or High performance option to choose the integrated or dedicated GPU.
Read more on best Ryzen 9 5950X graphics cards.
2. Set Default Graphics Card Using the Dedicated GPU App
Gaming laptops have integrated and dedicated graphics cards, but you must install the dedicated GPU separately on the desktop PC. Nvidia and AMD are two giant GPU manufacturers. You can set the default graphics card for specific apps from the dedicated graphics card app.
As you divide the workload on both, the dedicated GPU’s lifespan will increase by a good margin. To know how long GPUs last, you can research this too by spending a little time.
Note: To change the Settings from the dedicated app, you must install the specific driver for that particular GPU.
Let’s look at the steps to set the default graphics card from the dedicated GPU app. I will show the steps for the NVIDIA GPU, but for AMD GPU users, the steps are similar except for some.
Here are the steps to change the default GPU from the dedicated GPU app:
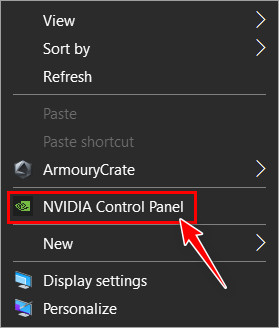
- Right-click on the Desktop and choose the NVIDIA Control Panel.
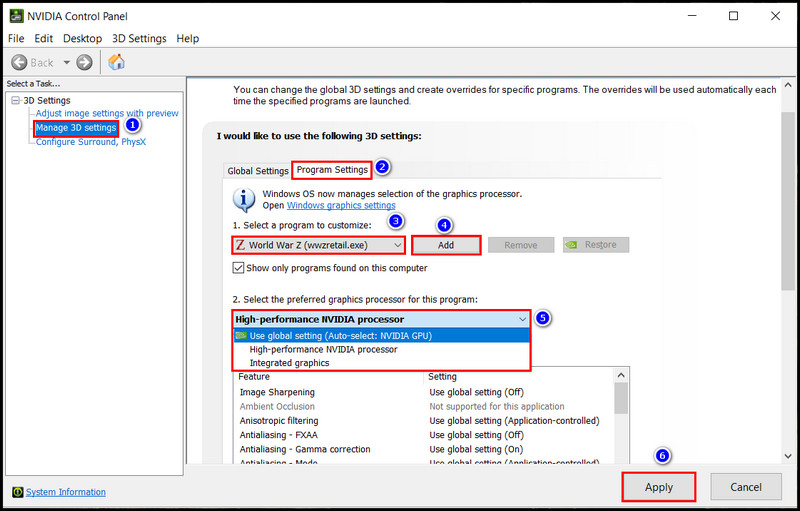
- Click Manage 3D Settings and go to Program Settings.
- Choose the desired app or game from the Select a program to customize section.
- Select the Add button after choosing one.
- Click the drop-down icon from the Select the preferred graphics processor for the program.
- Choose any option from the followings:
- High-performance NVIDIA processor.
- Integrated graphics
- Hit the Apply button afterward.
To choose the integrated GPU as the default, select Integrated graphics. Otherwise, choose the High-performance NVIDIA processor option to select the dedicated one.
What should you Prefer for Graphics Performance?
The graphics performance requirement is mainly based on the workload. High graphical intense workload requires more GPU processing power. As we all know, dedicated ones are superior to integrated ones in delivering performance and other aspects.
Powerful GPU processors require more power to deliver high performance. But before buying a powerful GPU, you must check the CPU compatibility with the GPU.
You should select the Power saving option to use the integrated graphics processor. These integrated ones are less powerful and draw less power from the PSU. You can assign this one as a default GPU to handle daily task-related apps.
But to handle high graphical workloads like making animation with Blender, rendering videos, or playing high-resolution games, a dedicated GPU is a must. For that, select the High performance or the High-performance NVIDIA processor option from the Windows Settings or NVIDIA Control Panel, respectively.
FAQs
How can I set Nvidia as my default graphics card in Windows 11?
To set NVidia as your default graphics card in Windows 11, go to the Nvidia Control Panel > 3D Settings > Manage 3D Settings. Next, select the Program Settings tab > Preferred graphics processor option from the Global Settings tab. Finally, choose the High-performance Nvidia Processor from the list and click the Apply button.
How can I change the default graphics card in Windows 11?
You can change the default graphics card for Windows 11 by the following steps:
Go to Graphics Settings and choose Desktop App from the Add an app section. Then select the preferred app or game and click Options after selecting the app. Afterward, choose the preferred GPU to set it as the default one and click the Save button.
Does Windows 11 have better graphics?
Yes, Windows 11 have better graphics because of the Auto HDR feature in Windows 11, it will provide more enriched graphics than its previous versions. This Auto HDR automatically enhances gaming performance with pleasing visuals.
Wrapping Up
Having a dedicated graphics card is common now these days to handle high-graphical based workloads and games. Sometimes you don’t need a powerful GPU to handle basic tasks and apps.
To solve this, selecting the default graphics for specific apps or games is a must. In this article, I have shown the two best ways to achieve this. I hope you get those methods and the steps within easily.
Don’t hesitate to knock me for further assistance regarding GPU-related issues. Good luck!