Outlook is a personal information manager application comprising webmail, calendaring, contacts, and tasks services. It allows users to obtain all email accounts and calendars in one convenient place.
In conjunction with thousands of outstanding features, Outlook offers a splendid facet known as Shared Mailbox. Using the shared mailbox feature, a group of people can monitor and send emails from a public email alias.
When individual replies to an email sent to the shared mailbox, the recipient can only see the shared mailbox address instead of the individual user.
In this article, I have pointed out how anyone can open and use a shared mailbox in Outlook. Keep reading till the end to learn everything about the shared mailbox.
Check out our separate post on how to Fixed Outlook: Your Mailbox is Over Its Size Limit Message
A shared mailbox gives users the ability to send and receive emails from a different mail address instead of the main email ID. Before using a shared mailbox, you should know some essential facts about the shared mailbox.
Here is the list of the facts that you should know:
- You must set up the shared mailbox before using it.
- Outlook should be configured with a Microsoft 365 account.
- You must have permission from the administrator to access the shared mailbox.
- You have to configure the shared mailbox to allow external access.
- You need an email address associated with the shared mailbox.
- The shared mailbox must need a display name.
After knowing all the essential facts about using a shared mailbox, you can now move to the subsequent methods to open and use a shared mailbox in Outlook.
Read the new post on how to fix Outlook Rules Not Running on Shared Mailbox
You can not add or open a shared mailbox in Outlook without the permission of the admin. After getting the permission, you can easily open a shared mailbox in Outlook by following the steps below.
Here are the steps to open a shared mailbox in Outlook:
In Windows
If you are using the desktop app version of Outlook in Windows, follow the below step-by-step guide to add a shared mailbox in Outlook successfully.
Here are the ways to open a shared mailbox in the Windows Outlook app:
- Launch Outlook application.
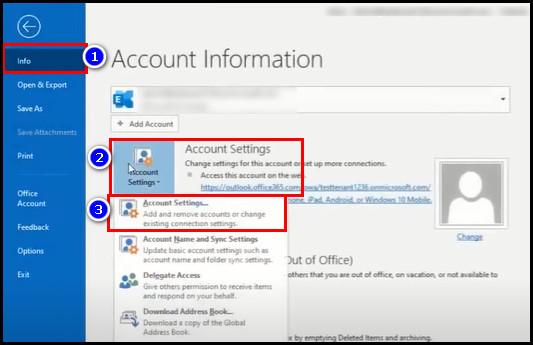
- Select File from the ribbon.
- Choose Account Settings and click on Account Settings from the menu.
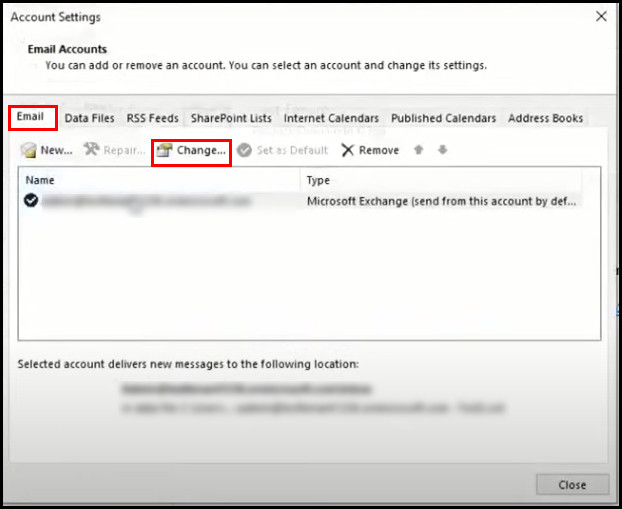
- Go to the Emails tab.
- Click on Change when the correct account is highlighted.
- Navigate to More Settings > Advanced > Add.
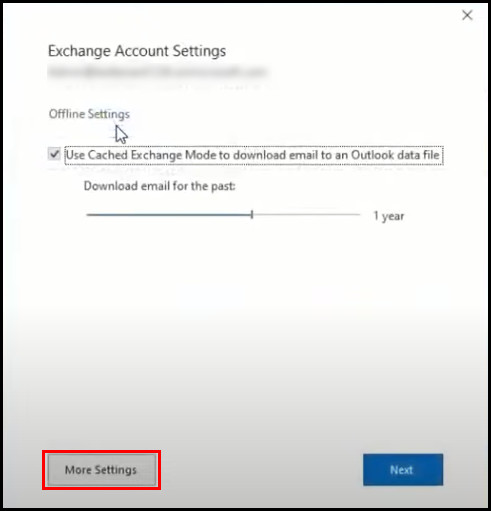
- Enter the email address.
- Select OK > OK.

- Move to Choose Next > Finish > Close.
You have successfully added the shared mailbox in your Outlook application. Now you can efficiently send or receive emails from your shared mailbox.
Also, check out our separate post on how to Recall an Email in Outlook
In macOS
If you are using Outlook on macOS, follow the steps below to add or open a shared mailbox in the Outlook application.
Here are the ways to open a shared mailbox in the macOS Outlook app:
- Launch Outlook application.
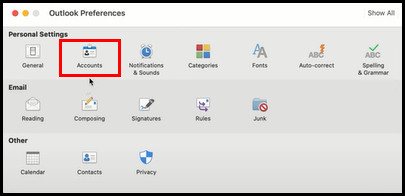
- Click on the Tools to show the Tools ribbon.
- Select Accounts.
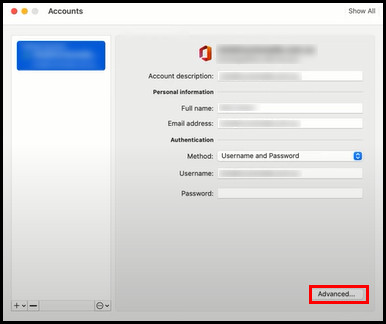
- Click on your email address and select Advanced.
- Switch to the Delegates tab.
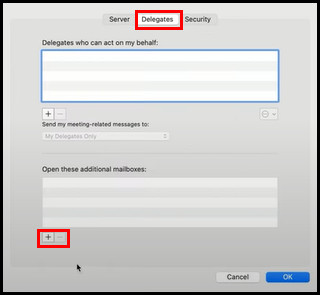
- Click + icon from the Open these additional mailboxes: section.
- Enter your shared mailbox’s email address and select it from the list.
- Select Add > OK.
- Close the Accounts window.
- In case you obtain a message starting with Outlook was redirected to the serve.
- Tick the Always use my response for this server.
- Click on Allow.
Following this process will add your shared mailbox in the macOS Outlook app. You can now send or receive emails without difficulties using your shared mailbox.
Related our new guide post: Outlook Recall Email Message that You Sent
In Office 365 Online
If you are an Office 365 Online user, opening a shared mailbox in your account is a straightforward process. Go through the below steps to add a shared mailbox in Office 365 Online.
Here are the ways to open a shared mailbox in Office 365 Online:
- Go to the Office portal.
- Use your Drexel credentials to log in.
- Click on the Outlook tile.
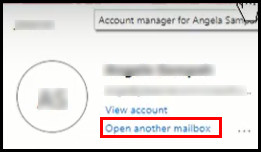
- Select the account icon from the top right corner.
- Click on Open another mailbox.
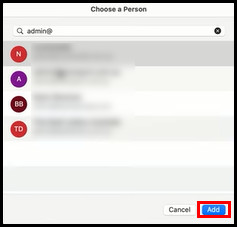
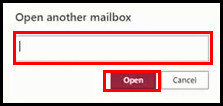
- Enter your shared mailbox’s email address and select it from the list.
- Select Open.
After following the above steps, now you can effortlessly send or receive emails from your shared mailbox.
Also related to this guide is how to Automatically Forward Emails in Outlook
1. Send Emails
After successfully adding the shared mailbox in Outlook, you can easily send emails using your new mail ID. While sharing emails from a shared mailbox, your primary email ID remains hidden. Follow the below instruction to send emails from a shared mailbox.
Here are the methods to send mail from a shared mailbox:
- Launch Outlook application.
- Click on the New Email.
- Navigate to Options > From (in case From field is not available on the visible interface).
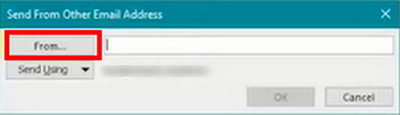
- Click on the From in the message and select the shared email address. If the address is unavailable, select Other email address and type the address.
- Select OK.
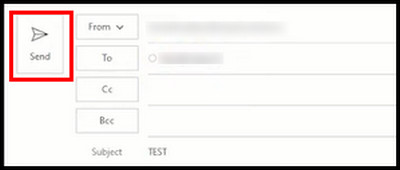
- Press the Send button after completing the message.
After adding a mail address for the first time, you never need to add the mailing address again. The recipients will only see the shared mail address whenever you send a message using the shared mailbox.
Check our new guides on how to Turn off Outlook’s Junk Email Filter
2. Reply to the Received Emails
When you receive any emails in your shared mailbox, you can reply to them from your shared mail address without difficulty. Follow the below instruction to respond to the received emails.
Here are the steps to reply to the received emails:
- Launch Outlook application.
- Open the received mail you want to reply to.
- Locate From field at the top of the message.
- Select the name of your shared mailbox.
- Click on Send after completing the message.
When you reply to any mail using your shared email address, the recipients will see the shared mail ID instead of your primary email address.
Related guides on how to Enable or Disable Autosave Emails in Outlook
Frequently Asked Questions
How do I switch between mailboxes in Outlook?
You can easily switch between mailboxes in Outlook by navigating to File > Account Settings > Change Profile. The Outlook will close automatically. Now you should relaunch Outlook, and you can select the desired mailbox from Choose Profile Dialog.
Why can’t I see a shared mailbox in Outlook?
You have recently been added if you can’t see your shared mailbox in Outlook. You must restart Outlook to see the shared mailbox. It is because Outlook needs some time to update the changes.
How do you tell if an email is a shared mailbox?
You can effortlessly notice a shared mailbox because it appears as an individual mailbox in Outlook and Outlook on the web. Shared mailboxes offer the functionality of a standard mailbox without any license.
A Final Thought
The shared mailbox feature in Outlook can be handy for managing several email accounts within one application. When working with a group of people, you can easily hide your identity by sending emails from a public email address.
Before starting to configure your shared mailbox, learn about the essential directions about the shared mailbox. After doing so, you can follow the methods I described in the previous part of my article.
Do you still have any confusion or queries about the shared mailbox? Don’t forget to refer to the comment below.