Microsoft Word lets you hide any word, line, or image in a document, so you can read or print your document as if the text isn’t there.
Hiding text is as simple as it gets. You can do it in many different ways in MS word. As a public speaker for over 5 years, this feature helps me immensely and will help you too after reading this article.
All the methods to hide text in Word are included in this article. So hop on and follow the method of your choice to hide the texts/images in MS Word.
How to Hide Text or Image in Microsoft Word
Microsoft Word uses the formatting option to hide text. You will find that MS Office applies don’t-display-this-text formatting marks to hide your text instead of deleting it. This process is similar to making your text Bold, italic, or color-changing.
Here are the 3 different methods for hiding text or images in MS Word:
For Windows
MS office has included different ways to cloak the text in Windows operating system. All the methods are rapid and easy to execute. But not all procedures work for all the MS Word versions.
However, in the latest version of MS Office (Office 2021), You can use any of these ways. And Method 2 Works for all the versions of Microsoft Word (2003, 2007, 2010, 2013, 2016, 2021).
In this method, I will show you to hide your text using the Home menu. Method 01 works best in Word 2013, 2016, 2019, and 2021.
Here are the steps to hide texts or images using the home menu method:
- Select your Text (Press CTRL+A to select all the text in the Document).
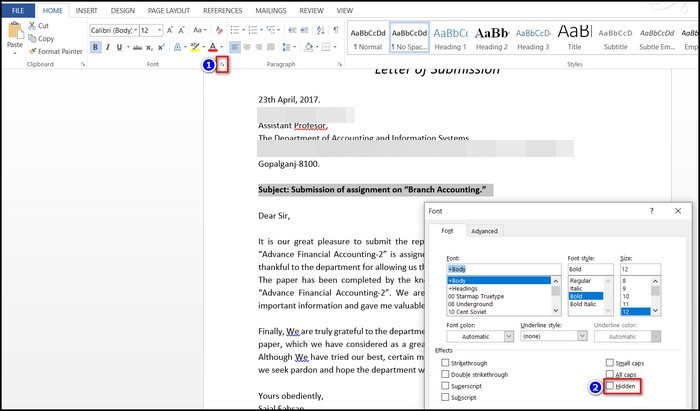
- Tap the Home menu.
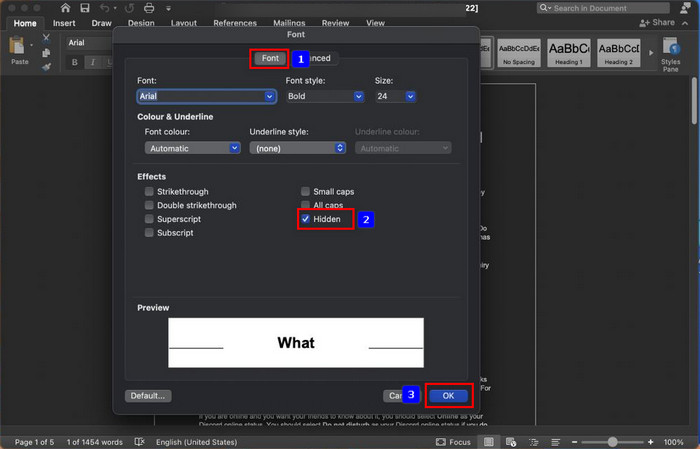
- Click the Expand icon In the Front Section in the Home menu.
- Tick mark the Hidden box > Press Ok.
After Pressing Ok, the selected text will be hidden in the document.
Follow our guide on how to Insert Word Page Numbers in MS Word.
Method 2: Front Option Method
Method 2 works in all the Office versions released till date. After a right-mouse click, a pop-up menu appears in any document on MS Word.
Here are the steps to hide texts or images using the Front option:
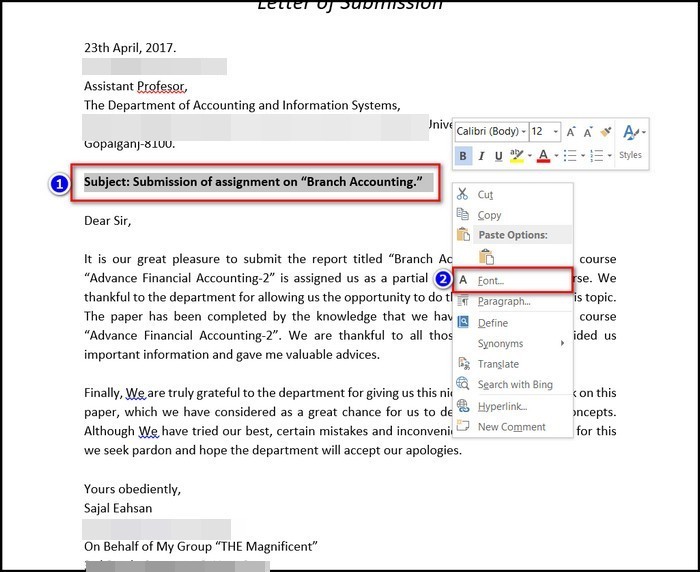
- Select the text you want to hide.
- Right-click anywhere on the document.
- Click Front and check the Hidden box.
- Select Ok.
After that, you will see the selected text has vanished from the document.
Also, check out our separate post on how to make only one page landscape in Word.
Method 3: Using Keyboard Shortcut
Using a Keyboard shortcut is the fastest way to hide your selected text. But you have to memorize the shortcut key to execute this procedure.
Here are the steps to hide texts or images with a Keyboard shortcut:
- Select the text you want to hide.
- Press CTRL + SHIFT + H.
And it’s done. The text is hidden right before your eyes.
Furthermore, you can hide images using this method. But you have to select a text/line also with the image to execute the steps. Otherwise, any of the above procedures won’t work on images.
For MacBook
Microsoft Office is also available on the MacBook. But text hide settings are a bit different for Mac OS Word.
Here are the steps to hide text in MS Word MacBook:
- Select the Word or line to hide.
- Right-click on the line or word > Select Font or Tap Format from the menu bar.
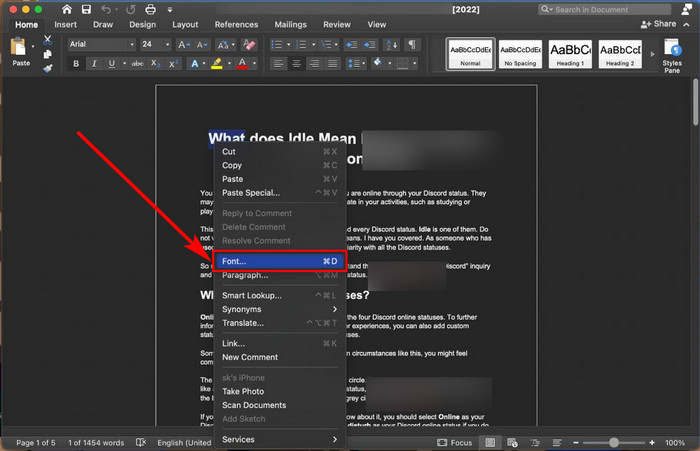
- Tick mark the Hidden option.
- Click OK.
This will hide your text on the Mac version of your MS Word.
Check out the easiest way to enable equation editor in Microsoft Word.
You can see which text has been hidden by using a keyboard shortcut or selecting an option in the Home Menu. But the MacBook Version of MS Word is quite different.
Here are the steps to see the Hidden Text or Image in MS Word:
For Windows
Most Word users come from the Windows segment, and the rest from the Mac segment. Seeing MS Word’s hidden text is relatively easy on Windows.
Here are the steps to see the Hidden Text or Image in MS Word (Windows):
- Open the document.
- Click Home.
- Tap the P-like icon.
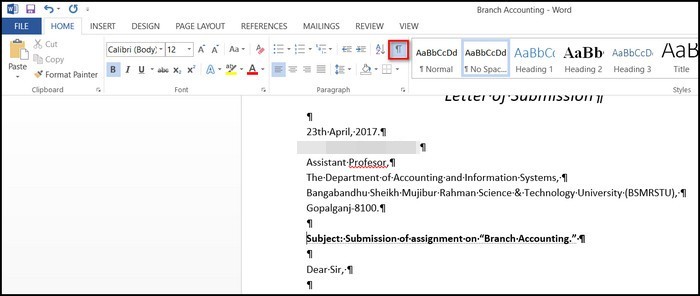
Else, press CTRL+SHIFT+8.
And you will see the hidden text appears with an underline. Then you can select those hidden texts for further usage.
Quickly check out our epic guide on how to enable word wrap in notepad.
For MacBook
For the MacBook, MS Word settings are slightly different from the Windows version. To see the hidden text, you need to use the preference menu.
Here are the steps to see the Hidden Text or Image in MS Word Mac:
- Click the Word menu > Select Preferences.
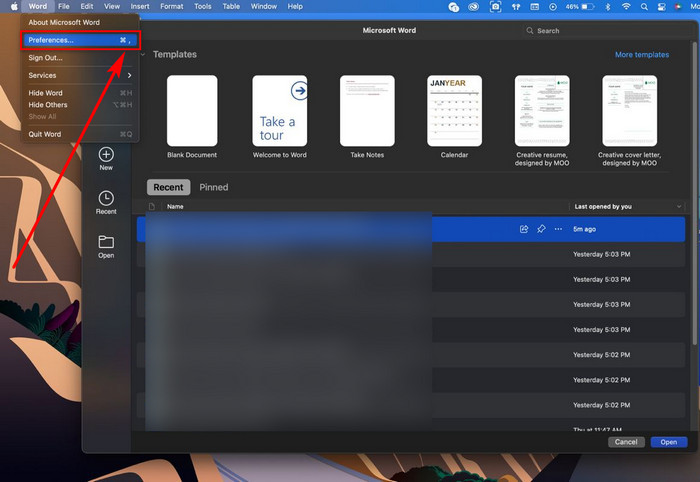
- Tap View.
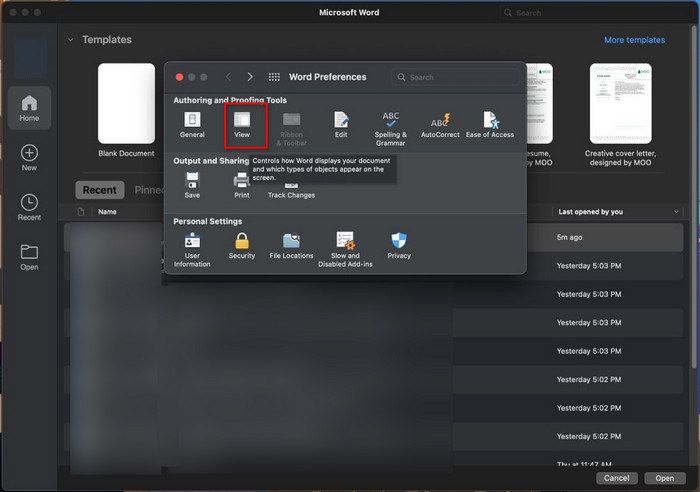
- Tick mark the Hidden text to show hidden text.
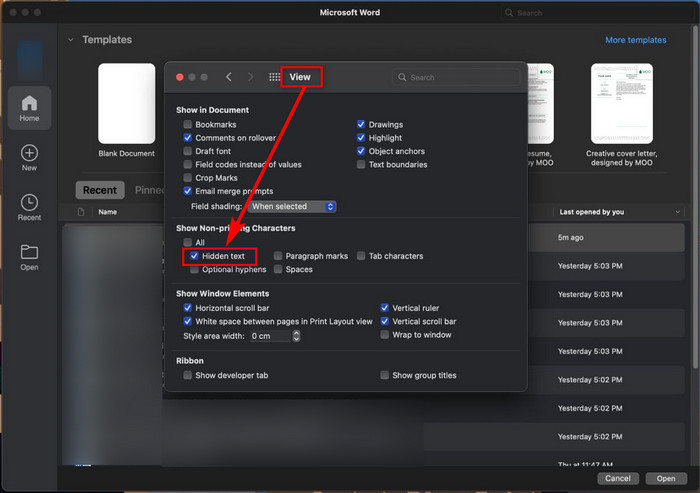
And you will see the hidden text in any document.
Additionally, you can unhide the text in Microsoft Word just by unchecking the Hidden box in the front option or keyboard shortcut. But you have first to enable viewing Hidden Text in MS Word.
Here are the steps to Unhide text in Microsoft Word:
- Select the hidden text.
- Press the Expand icon or Right-click on text > Select Front.
- Uncheck the Hidden box.
- Press OK.
After this, you will see the hidden texts have become unhidden.
Have some time to spare? Quickly check out our epic guide on why can’t I copy paste in Microsoft Word.
Generally, when you try to print a document, your hidden texts are excluded. But there’s a way to print the hidden texts with the document.
Here are the steps to print your document with hidden text:
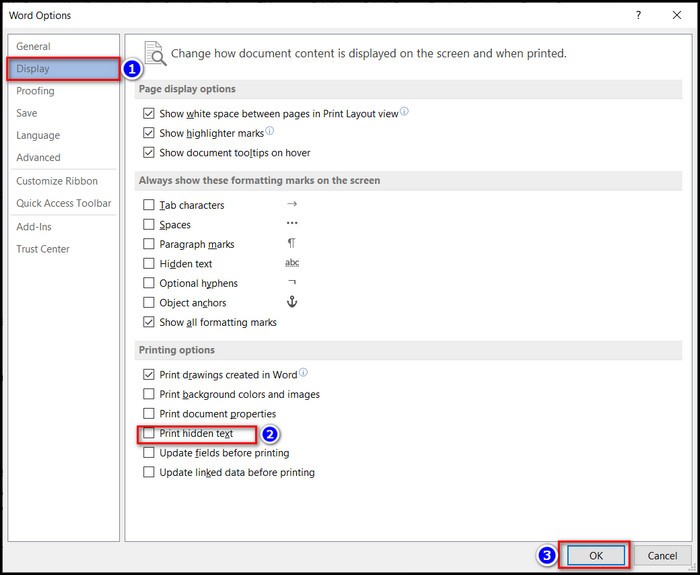
For Windows
- Tap File > Select Options.
- Pick the Display option (On Left).
- Mark Print hidden text under Printing options.
- Click OK.
- Print your document.
For MacBook
- Select Word > Preferences.
- Tap Print.
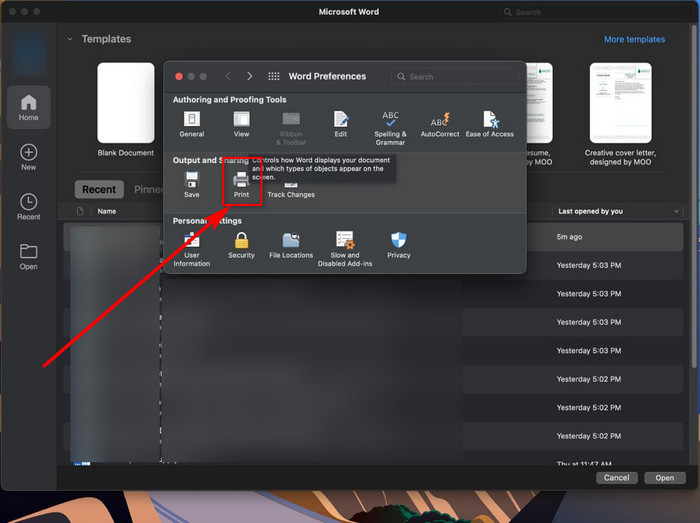
- Mark the box for Hidden text in Include in Print Version.
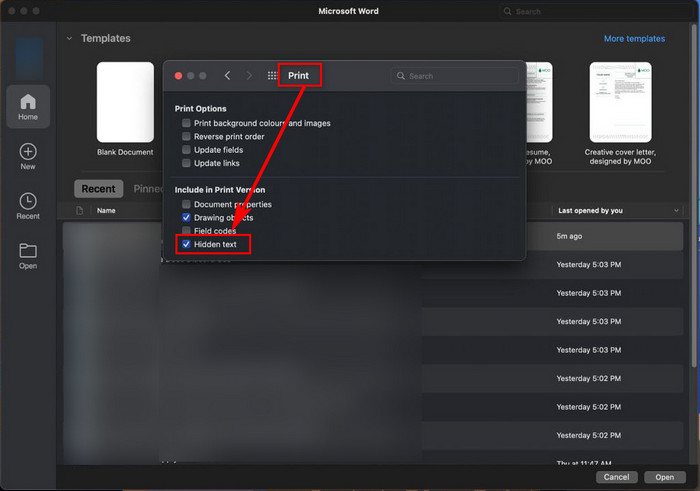
- Close preferences > Print your document.
Check whether the hidden text is included in the printed version. If they are included, the process is done without any error.
Conclusion
To sum up, you can hide the text or images using the Home Menu method, Front Option method, or Keyboard Shortcut. Among those solutions, the Front Option method works on all the Office versions, and the latest MS Office 2021 supports all three.
I’m sure now you can easily hide the text in any MS Word file without breaking any sweat. Also, follow my steps to see the hidden text, unhide the text, or print a document with that hidden text described above.
Comment which method you used to hide your text in Word below.