File History is one of the most useful and advanced built-in backup tools in Windows 11/10. It helps users to back up different versions of particular files or all the files regularly on your system.
Usually, the File History utility stores various versions of the files in the Desktop folder, Pictures, Documents, Videos, Music, and even your OneDrive offline file. When the original files are deleted or damaged, this utility allows users to restore the different backup versions of the files.
However, the system sometimes throws the error message: Could not clean up File History data, Element Not Found. while the system cannot find the backup file and clean up File History data.
If you encounter the same error message on your Windows 11 system, follow the solutions that I listed in this post to resolve the issue.
Let’s get started without further ado.
Why Does the File History Element Not Found Error Occur?
The File History element not found error occurs on Windows 11 due to bug issues on the File History feature, out of drive space, or system drive not functioning correctly. Also, the corrupted system file is one of the leading causes of the error.
Now, you know the possible reasons for the File History cleanup element not found error on your Windows 11 PC. Let’s discuss the issue to learn more about the problems.
Here are the reasons for the cleanup File History element not found error:
Bug Issue
The bugs in the File History utility are the first and most common reason for the error. Microsoft confirmed that a bug appearing on the File History utility creates the error.
Out of Space
If your storage drive where you create the File History backup is ruined out of space, there is a huge possibility you can encounter the error issue on your system.
Storage Drive Issue
A corrupted or damaged storage drive is another common culprit for creating the File History cleanup element not found error issue in your system.
Corrupted System File
If your system file is corrupted, you may encounter an error on your Windows 11 because when it is corrupted, it conflicts with different programs and creates various errors.
Check out our separate post: Windows 11 Remote Desktop Authentication Error.
How to Fix Windows 11 File History Element Not Found Error
The element not found in the File History is a typical error for Windows 11/10 users. Many Windows users reported to the Microsoft community that they encountered this error in their system.
There are some possible reasons for the error I already mentioned and described in the earlier section. So, you already know the reasons for the error.
Here, I will show you some proven and effective solutions to resolve the error on your Windows 11. Let’s dive into the deep.
Here are the steps to fix the File History element not found error on Windows 11:
1. Increase Storage Drive Space
The first effective and practical method to fix the error is to increase your storage space by cleaning up your drive. You need to clean up your storage drive because the File History utility cannot create your files backup when the storage is full.
So, clean up your drive to increase your primary storage space to resolve the error issue. To increase your drive space, you can delete the unnecessary temporary files, previous versions of Windows update files and logs, etc.
Here are the steps to clean up your drive on Windows 11:
- Open Windows File Explorer and select This PC.
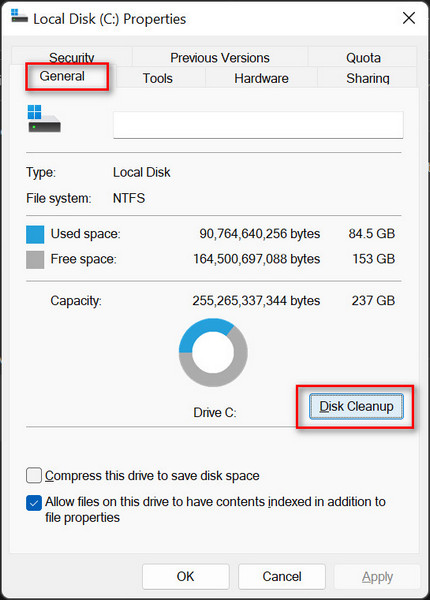
- Right-click on your system drive and choose Properties.

- Click on Disk Cleanup under the General tab to open the Disk Cleanup window.
- Select the unnecessary and temporary files on the list and click OK to delete.
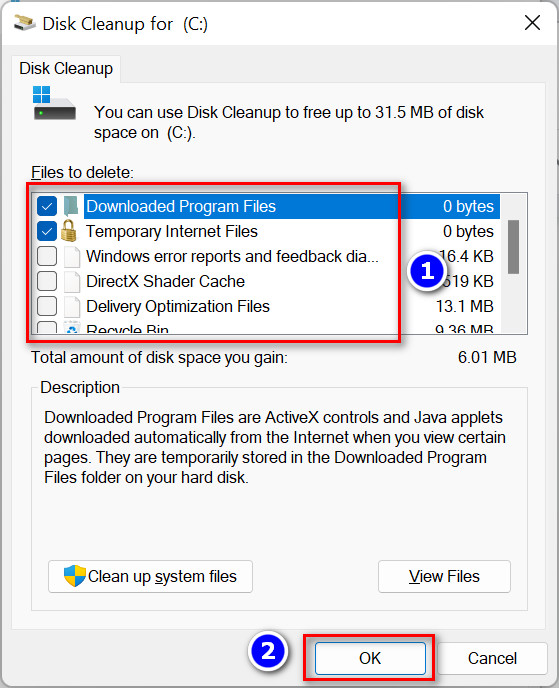
- Wait a few seconds to complete the process.
- Open the Disk Cleanup window again and click on Clean up system files under the General tab.
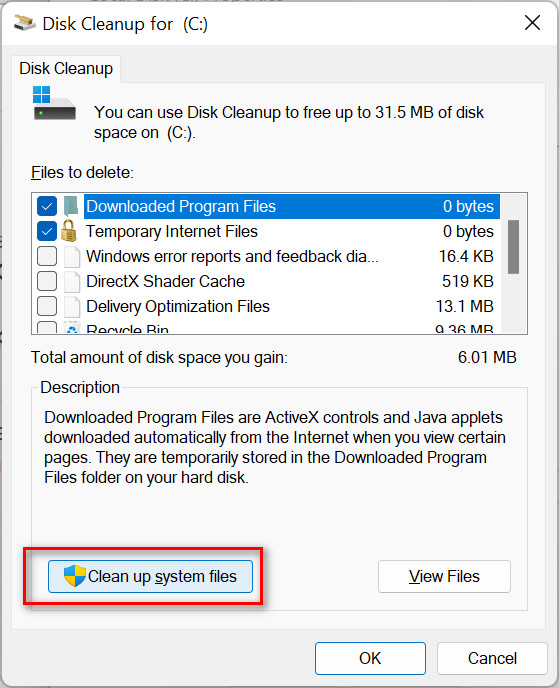
- Select the large unnecessary and temporary files on the list, such as Windows Update Cleanup, and click OK to delete the files.

- Wait until the process is complete. It takes a while to delete the files. After cleaning up your drive, your storage space is increased.
- Check to see whether your problem is solved. If not, follow the next solutions.
Read more on how to Fix Windows 11 Install Error 0x800f0922.
2. Disconnect Your USB Peripherals
Another effective method to fix the cleanup element not found in the File History error is disconnecting all your external USB peripherals from your PC and trying to perform the File History Cleanup again.
Removing all the USB drives and devices connected to your PC helps you resolve your error because sometimes the USB peripherals discourage you from running some processes on your system.
3. Reset File History
If you use an external drive to store the File History backup files, disable the File History from the Control Panel, then remove the drive.
After removing the external drive, restart your PC and connect the drive again. Turn on the File History and perform the File History Cleanup to ensure your problem is solved.
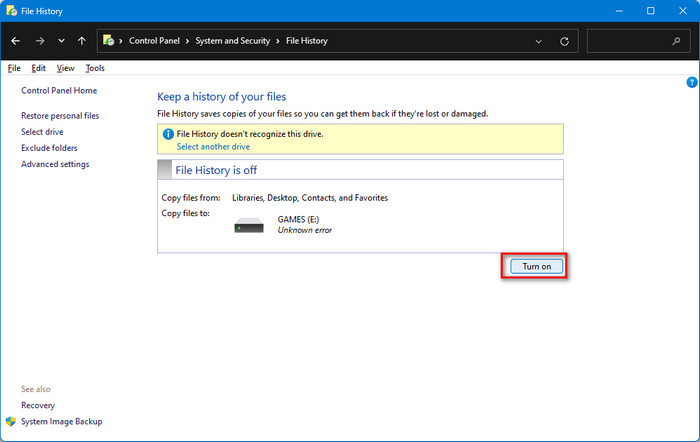
Here are the steps to disable and enable the File History:
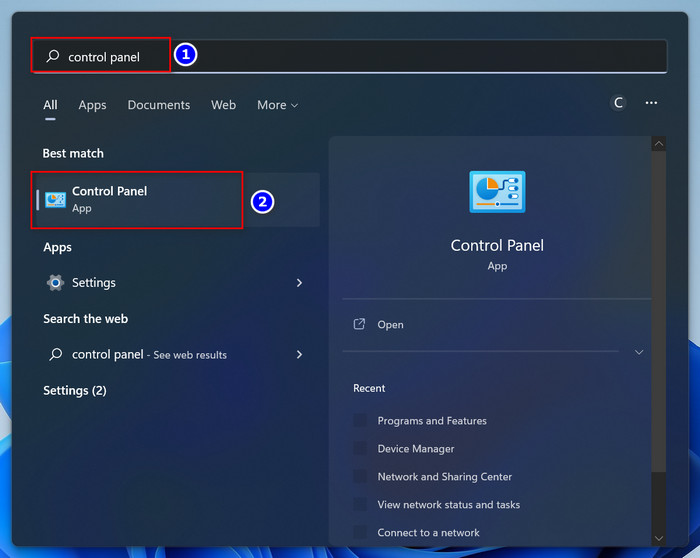
- Open the Windows Search panel by pressing Windows+S on your keyboard.
- Type control panel and hit the Enter key to open the Control Panel.
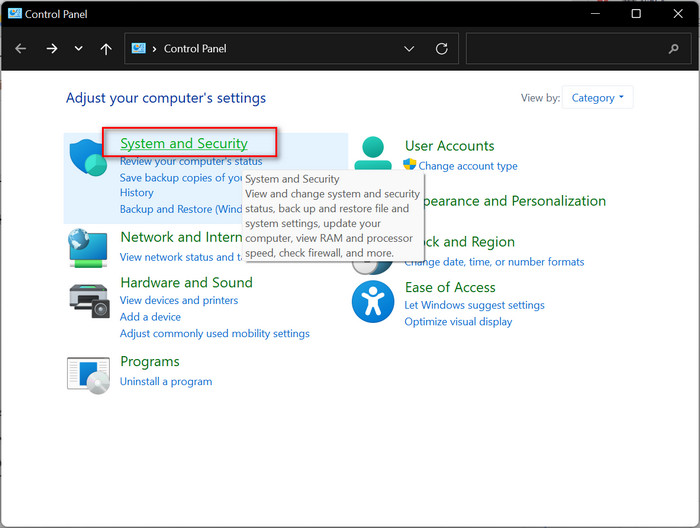
- Select System and Security.
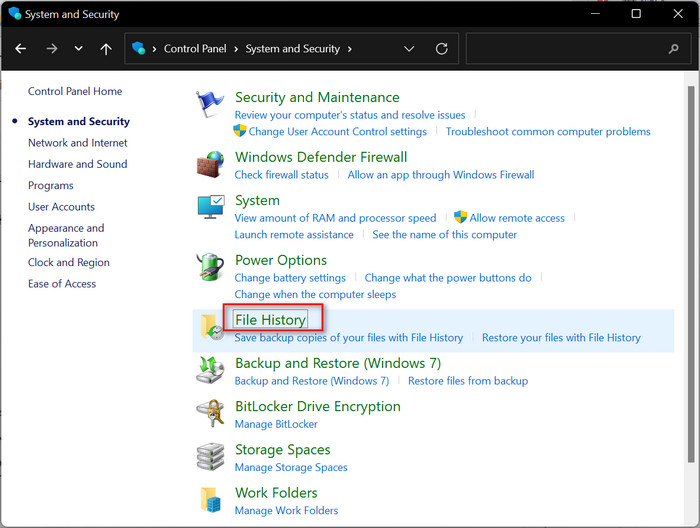
- Select File History.
- Click on the Turn Off button to disable the File History.
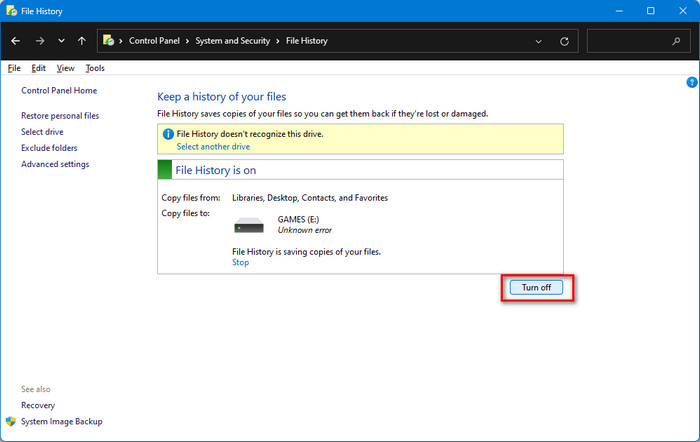
- Click on the Turn On button to enable the File History.
Check out the easiest way to Fix Yahoo Mail App Error 0x8019019a on Windows 11/10.
4. Clear up File History files
You can remove your old File History files to resolve the error on your Windows 11 PC. Delete your File History files that are older than 30 days to clean your History Files. Follow the steps below to clear up the File History files.
Here are the steps to clear up the File History files on your Windows 11:
- Open the Windows Search panel by pressing Windows+S on your keyboard.
- Type cmd and click on the Run as administrator to open the Command Prompt as an admin privilege.
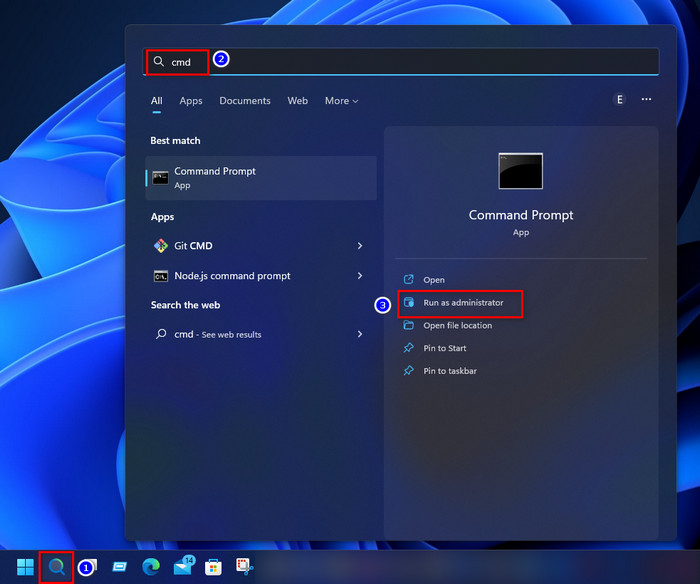
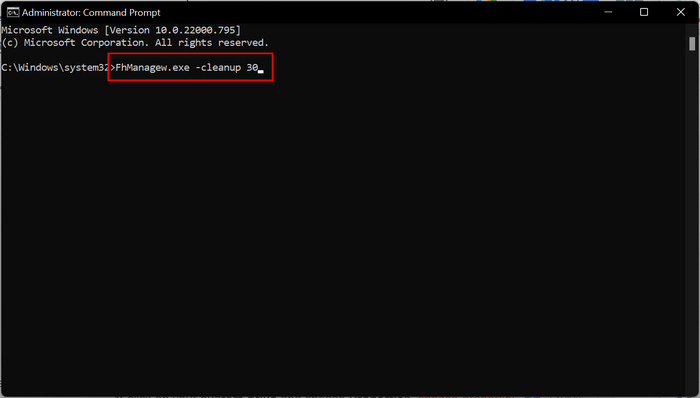
- Enter the following command to delete the File History files older than 30 days.
- FhManagew.exe -cleanup 30
5. Repair Your Drive
You may also try to repair your corrupted drive to fix the cleanup element not found in the File History error on your Windows 11 PC. Repairing your drive helps you fix all drive-related issues that usually create the error.
Here are the steps to repair your drive on Windows 11:
- Open Windows File Explorer and select This PC.
- Right-click on your system drive and choose Properties.
- Click on Check under the Tool tab.
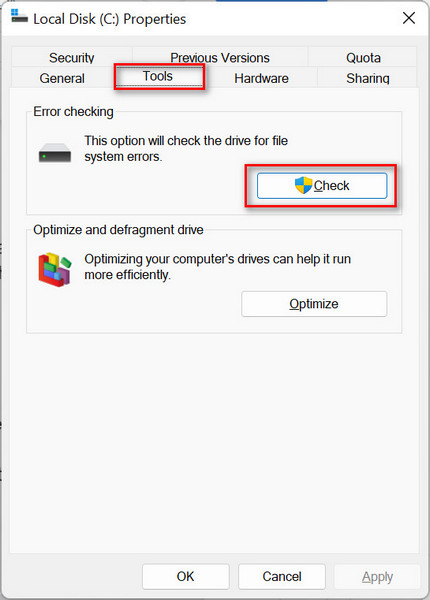
- Click on Scan Drive on the Error Checking window to start the drive repairing process.
- Wait until the scanning process is running.
- Follow the on-screen instructions to fix the issues if any error is found.
6. Repair Your System Files
Run the System File Checker (SFC) and the Deployment Image Servicing and Management (DISM) utility to scan and repair your corrupted system files to resolve your error.
Here are the steps to run the SFC and DISM utility on Windows 11:
- Open the Windows Search pan by pressing Win+S on your keyboard.
- Type cmd and click on the Run as administrator to open the Command Prompt as an admin privilege.
- Enter the following command to run the SFC tool:
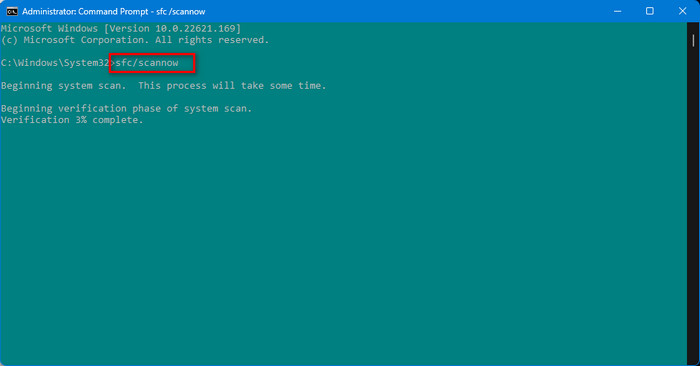
- sfc/scannow
- Wait until the scanning process is finished.
- Check to see whether your user profile loading error is solved. If not, enter the following command to run the DISM tool:
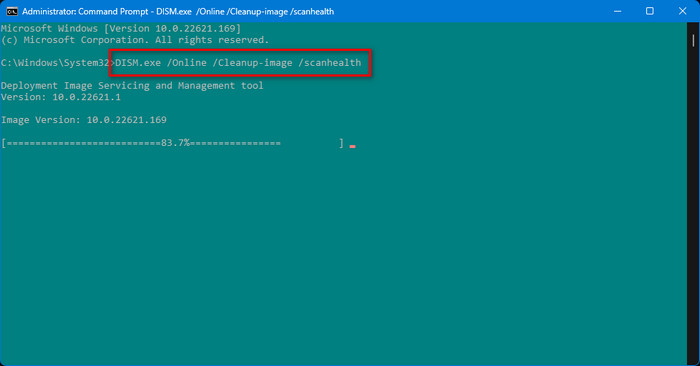
- DISM.exe /Online /Cleanup-image /scanhealth
- Wait until the process is done.
7. Uninstall Recent Updates
If the error occurs after the newest feature update on your PC, then try to uninstall the recent update to resolve the error issue.
Here are the steps to uninstall the recent updates on Windows 11:
- Open the Windows Search panel by pressing Windows+S on your keyboard.
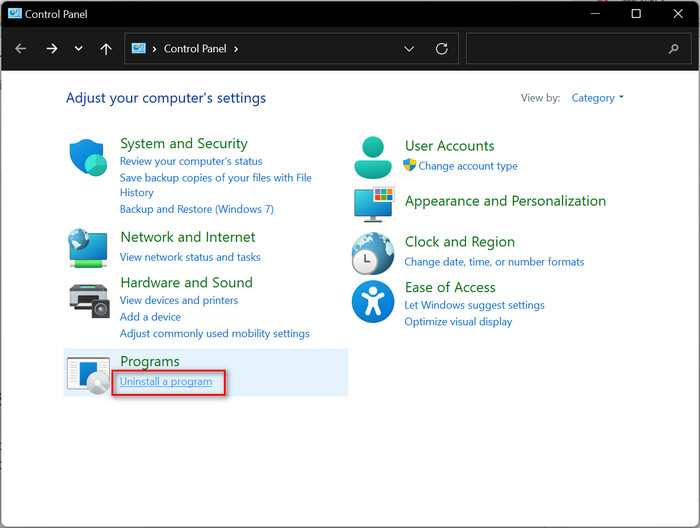
- Type control panel and hit the Enter key to open the Control Panel.
- Click on the Uninstall a program under the Programs section.
- Click on the View installed updates.
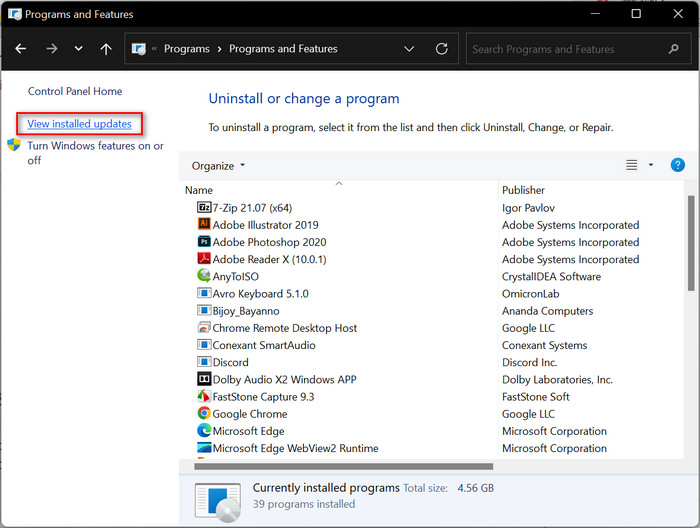
- Find the most recent Feature update, then select and delete the update.
8. Cloud Reset PC
You must reset Windows to fix the issue if none of the other solutions work to cure the error. By doing a Windows reset, you may get rid of all of your damaged data and generate fresh system files.
Here are the steps to cloud reset your Windows 11:
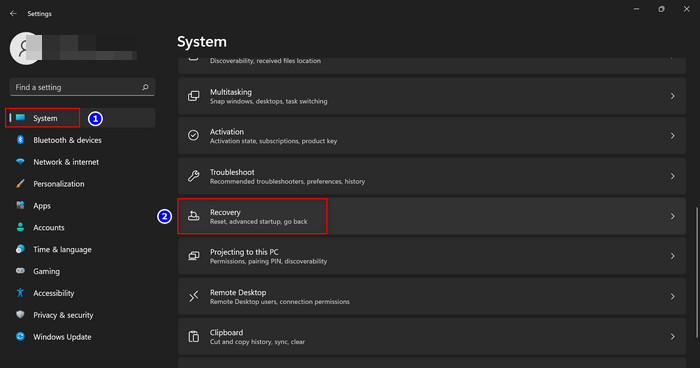
- Open the Windows System Settings app and navigate the System > Recovery.
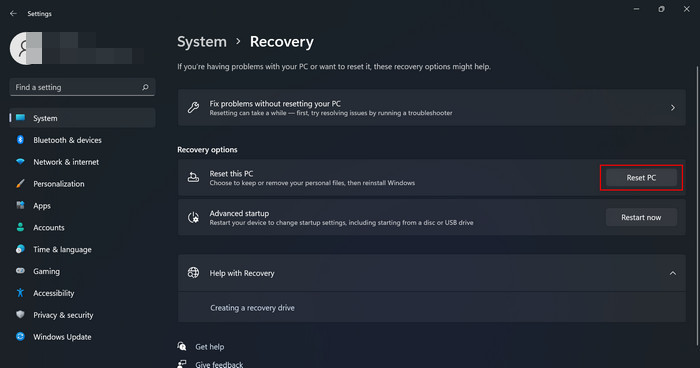
- Click on the Reset PC next to the Reset this PC under the Recovery options section.
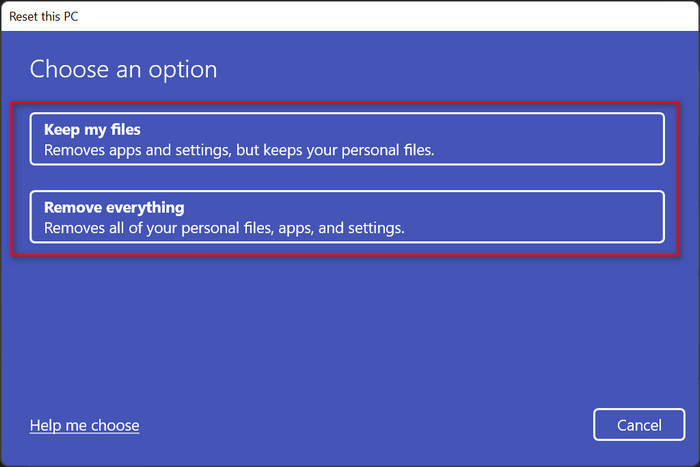
- Choose to Keep my files or Remove everything as one of the reset options based on your preference.
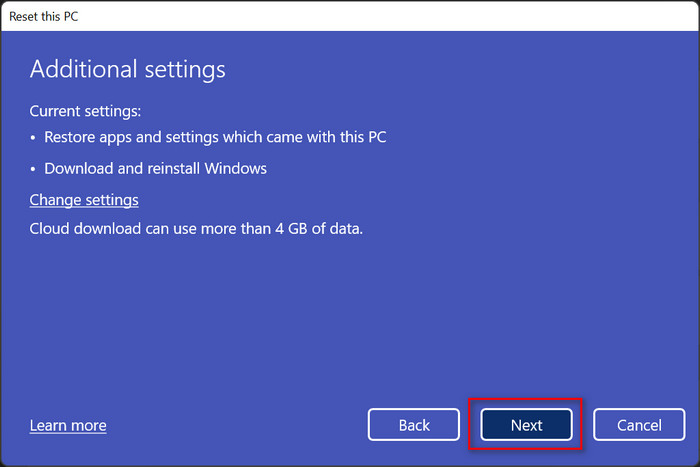
- Choose Cloud download to reinstall windows.
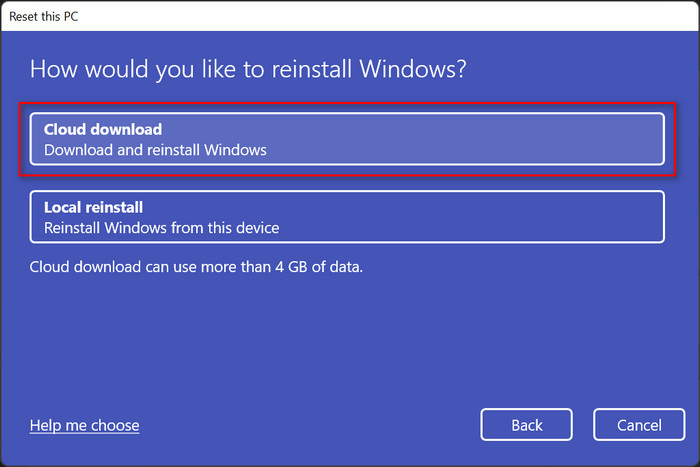
- Click on Next to start the resetting process.
- To complete the reset procedure, wait a while. Your issue is fixed when you have finished resetting Windows.
Related guide: Windows 11 Not Showing Up In Windows Update.
How to Enable and Disable the File History on Windows 11
Enabling and disabling the File History is an easier process on Windows 11. Following some simple steps on Windows 11, you can easily enable and disable the File History.
Here are the steps to enable and disable the File History on Windows 11:
- Open the Windows Search panel by pressing Windows+S on your keyboard.
- Type control panel and hit the Enter key to open the Control Panel.
- Select System and Security.
- Select File History.
- Click on the Turn On button to enable the File History.
- Click on the Turn Off button to disable the File History.
Final Thoughts
Windows 11’s File History functionality has bugs, there is not enough disk space, or the system drive is not working correctly, which results in the error File History element not being found. One of the main reasons for the issue is corrupted system files.
Applying some tested techniques, such as increasing your storage drive, resetting the File History, repairing your drive, uninstalling recent updates, or resetting your PC, helps you to fix your error problem.
Apply one by one until you get the right one to resolve your problem. Which method helps you to solve your problem? Please let me know in the comment section below.