Nothing is perfect in this world. The same applies to Windows 11, the latest version of Windows. As Windows 11 is relatively new, it has some errors that will eventually be fixed with future updates.
Many users have reported the Installation Failed Error 800f0830 that usually happens during an update installation. Now, you can ask why this error happens.
Why does the Installation Failed Error 800f0830 occur?
If you dislike facing an error like this, I give you a virtual high five as we are on the same page. Sadly, problem-solving is a part of the PC master race.
If you are searching for a fix, look no further as I have written the best and simplest methods that you can follow to fix the installation error 800f0830 on Windows 11. I have double-tested these fixes, so they are legit.
Read the full post for more details.
Fix Installation Failed Error 800f0830 on Windows 11
You can find many methods that you can follow to fix the installation error 800f0830 error on Windows 11 but not all of them are working or simple to follow. I have made sure to provide you with the most straightforward and latest methods that work in 2022.
Please go through them and you can get rid of this annoying error.
Here are the methods to fix Installation Failed Error 800f0830 on Windows 11:
1. Check Minimum System Requirements
If your system does not fulfill the minimum system requirements to run Windows 11, the 800f0830 installation error will pop up.
The minimum system requirements to run Windows 11 are pretty low, meaning you do not need a powerful PC to run Windows 11. In my honest opinion, a potato PC can also run Windows 11.
If your PC does not have enough horsepower to run Windows 11, I would suggest you upgrade your system as it is most probably very outdated by now.
Check out the easiest way to Fix When Windows 11 Won’t Install.
Here are the minimum System requirements for Windows:
| Processor | 1 gigahertz (GHz) or faster with 2 or more cores on a compatible 64-bit processor or System on a Chip (SoC) |
|---|---|
| RAM | 4 gigabyte (GB) |
| Storage | 64 GB or larger storage device Note: See below under |
| System firmware | UEFI, Secure Boot capable. |
| TPM | Trusted Platform Module (TPM) version 2.0. |
| Graphics card | Compatible with DirectX 12 or later with WDDM 2.0 driver. |
| Display | High definition (720p) display that is greater than 9” diagonally, 8 bits per color channel. |
If your PC meets the minimum system requirements to run Windows 11, please follow the other methods given in this post.
2. Switch to TPM 2.0

Intel processors before the 8th generation does not support TPM (Trusted platform module) because the motherboards that support these processors do not have support for TPM 2.0.
You can still check for exceptions by searching for them on your internet browser like Chrome.
Check whether your motherboard supports TPM 2.0 and turn it on.
To turn on TPM 2.0, you need to go to the BIOS settings to turn it on. As each motherboard manufacturers have different BIOS firmware and different ways of entering the BIOS menu, you need to check how you can access the BIOS menu for your specific motherboard.
You will find countless tutorials on Youtube for your motherboard, so you can access the BIOS menu easily by following them.
Ensure to enter the correct manufacturer name and model number for your motherboard when you are searching for the steps on how to access the BIOS menu.
For example, my motherboard is the Gigabyte h110m DSV 2.0, so I would search for something like “How to access Bios menu Gigabyte h110m dsv 20” and follow the tutorials.
If you have enabled TPM 2.0 but the installation error 800f0830 is not fixed on your Windows 11 system, please follow the other methods given in this post.
Read more on how to Fix Windows 11 Install Error 0x800f0922.
3. Enable Secure Boot
Just like the previous method, you also need to enable secure boot for many functionalities to work properly on Windows 11. You need to access the BIOS menu of your motherboard and turn on the Secure boot option.
For Windows 11, it is mandatory to enable TPM 2.0 and Secure boot to play some popular games like Valorant. So, you should keep it on regardless of whether there is an error or not.
You can find it in the Bios menu somewhere around the TPM option mentioned in the previous method. As different manufacturers have different BIOS firmware, entering the BIOS differs from manufacturer to manufacturer.
Entering the BIOS menu of a Gigabyte motherboard will be different from an ASUS motherboard, so you need to search for the procedure for your motherboard manufacturer and model.
Fo me, I need to search for how to enter the BIOS menu for the Gigabyte H110 M DSV 2.0 motherboard, where Gigabyte is the name of the manufacturer followed by the model number.
After enabling Secure boot, make sure to check whether the installation error 800f0830 still occurs on your Windows 11 system or not.
If the error did not get fixed after turning on TPM 2.0 and secure boot, please follow the other procedures given in this post.
4. Install Windows 11 Offline
If you are facing this error when you are trying to install Windows 11 on your system, this could happen to be a security violation glitch.
You need to be offline for this problem to be fixed. You can install Windows in several ways on your system. In this case, you need to install Windows 11 by booting from an external storage device with the installation media.
You have to select the option of creating installation media when downloading the Windows 11 files from the official website.
After creating the installation from a bootable USB or external storage device, you need to go to the BIOS menu and boot from the USB or external storage device.
Boot from the USB and follow the on-screen prompts to install Windows 11 from the USB or whatever external storage device you are using.
Also, check our guide if your PC won’t go into Sleep mode in Windows 11.
5. Disable Third-Party Antivirus
Third-party antiviruses like Avast and Kaspersky tend to interfere with apps during updates and installation. Disabling them will save you from a lot of headaches when you are downloading or installing something from a trusted source.
There are many third-party antiviruses out there; you need to check how to disable them from sources online.
All third-party antiviruses can be deactivated by following the steps below as they are pretty similar to each other.
As I use Avast, I have given the steps on how you can disable it and these steps will be similar to steps you would follow to disable other third-party antiviruses as well. The steps are similar, so please go through them.
Here are the steps to disable third-party antiviruses to fix the Installation Failed Error 800f0830 on Windows 11:
- Click on the up arrow at the bottom right of your screen.

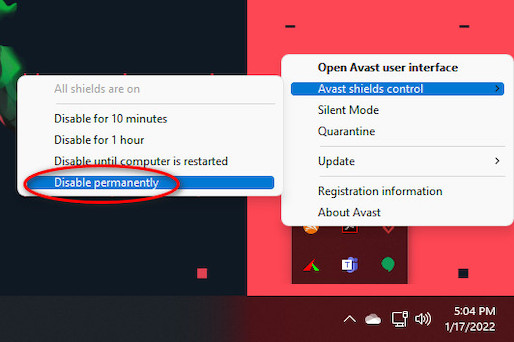
- Right-click on Avast and navigate to Avast shields control. You will see multiple options pop up.
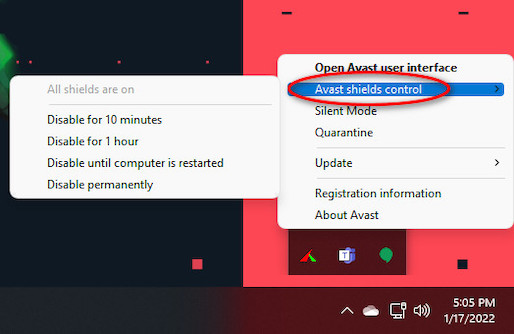
- Click on Disable permanently.
- Check whether the error still pops up or not.
You may also like to read: Stop Apps Running in Background Windows 11.
Conclusion
I hope you were able to fix this error. Windows 11 is great despite it having some flaws but it is pretty new, so these things are expected.
I expect problems like these to get fixed in the future.
I hope you never face an error like this in the future. I wish you luck in whatever you do in the future. Take care and stay safe!