Microsoft built the ActiveX framework on sharing functionalities across all its programs. It enhances accessibility and user experience.
Facing ActiveX Component Can’t Create Object error with no idea what’s going on? You must turn on ActiveX on your machine to solve it.
In this write-up, I will walk you through all the processes to allow ActiveX on your computer.
Let’s begin, shall we?
Turn On ActiveX in Windows 10
Multiple methods are available to activate ActiveX in Windows 10. Internet Explorer, Registry editor and Windows Services give you the upper hand to enable this feature. You can attempt any method at your convenience.
Here are the ways to turn on ActiveX in Windows 10:
Activate from Internet Options/Internet Explorer
The easiest way to activate ActiveX in Windows 10 is through internet options. You can also access it through the Internet Explorer browser.
Here are the steps to allow ActiveX in Windows 10:
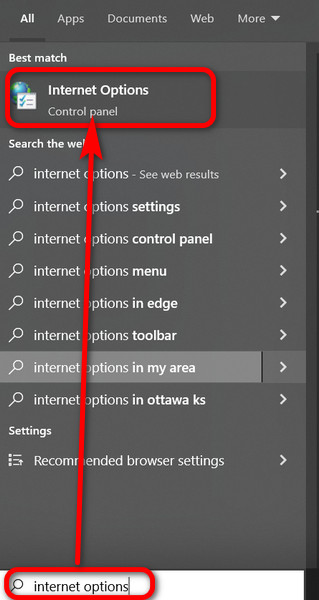
- Launch the Internet Explorer browser and click on the gear icon at the top right corner to access Internet options.
- Type internet options in the Windows search box and access the first search result for a direct approach.
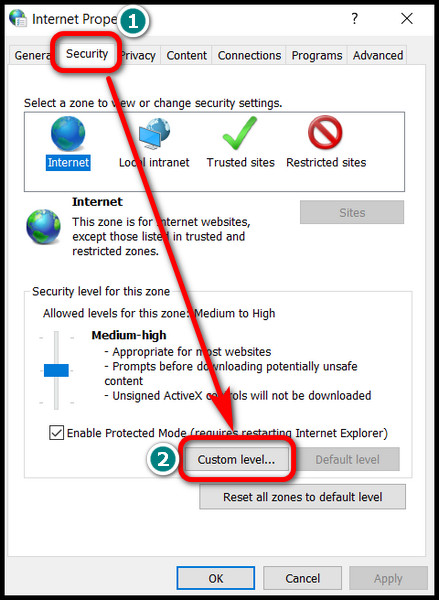
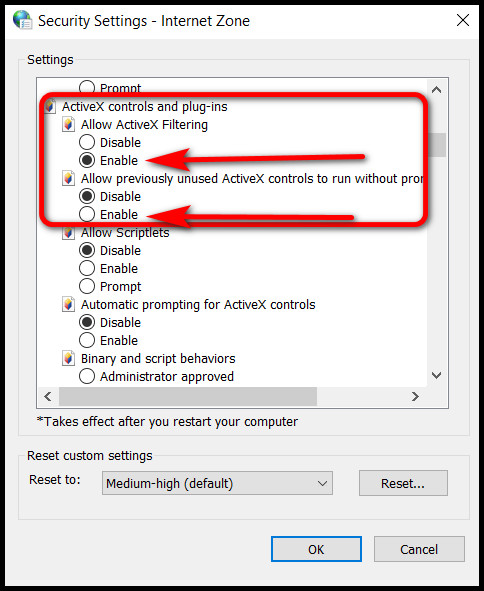
- Switch to the Security tab of the new dialog box.
- Click on the Custom level button from the bottom half.
- Scroll down and choose Enable for Run ActiveX controls and plug-ins, Run antimalware software on ActiveX controls, Script ActiveX controls marked safe for scripting and Download signed ActiveX controls.
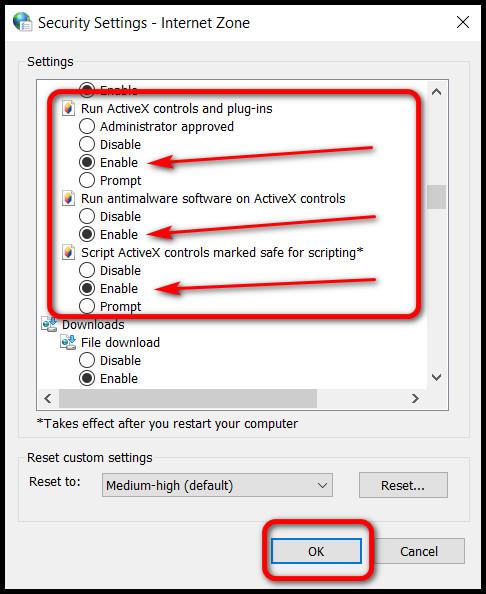
- Press OK and restart your machine.
On the next boot, changes will take effect. ActiveX is now active for your OS.
Related guide about best places to buy Windows 10 key.
Enable ActiveX from Windows Services
Another easy and quick method to turn on ActiveX on your computer is from the Windows services.
Here is how you can enable ActiveX from Windows services:
- Press Win + R to open Windows Run and type services.msc.
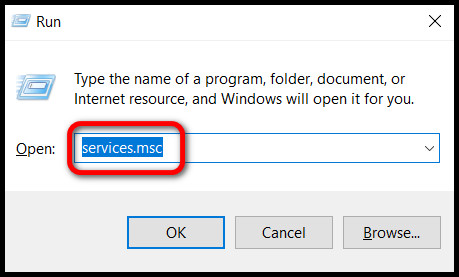
- Hit Enter and the services console will appear.
- Right-click on the first service labeled as ActiveX Installer.
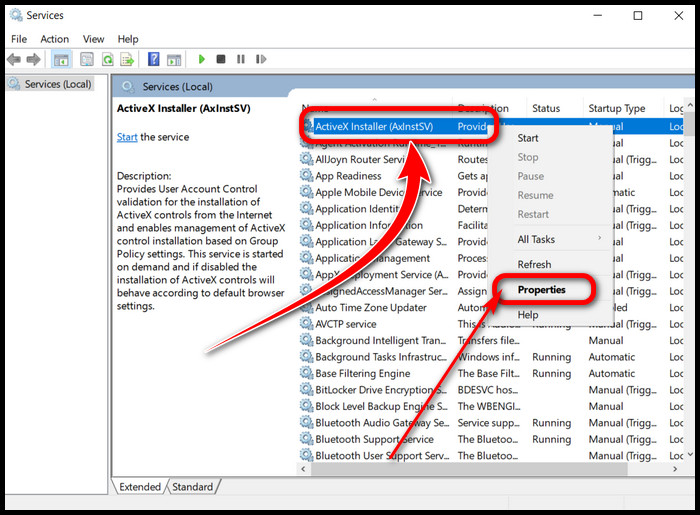
- Choose Properties.
- Select Automatic from the Startup type box.
- Press the Start button under the Service status.
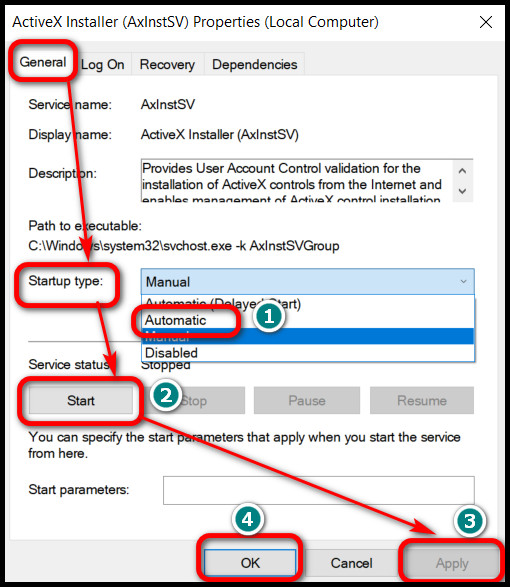
- Click Apply and then OK.
You’ll see the Service status is now changed from Stopped to Running. Restart your PC, and ActiveX is enabled.
Check out our expert-recommended on how to adjust page file in Windows 10?
Enable ActiveX in Windows 10 Registry
Thinking about how to enable ActiveX in Windows 10 registry? I’ve got you covered. Out of all the methods available, it’s the most complicated and confusing one. I recommend this method for advanced users.
Note: If you are a novice and don’t know what you are doing, you better avoid this approach. Any wrong tweaking in the registry may break your OS.
Here are the steps to turn on ActiveX in Windows 10 registry:
- Launch Windows Run and type regedit.
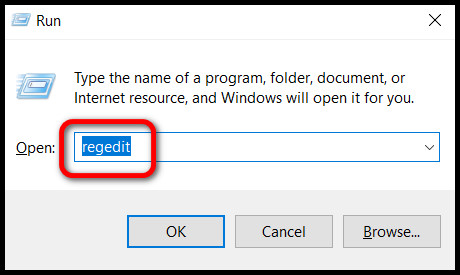
- Press Enter and the registry window will appear.
- Copy and paste Computer\HKEY_LOCAL_MACHINE\SOFTWARE\Microsoft\Windows\CurrentVersion\Internet Settings\Zones in the address bar and then hit Enter.
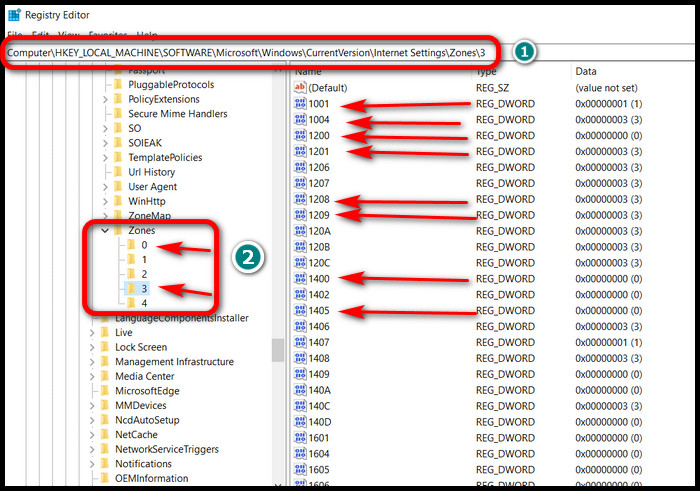
- Select folders 0 and 3 under Zones.
- Right-click on 1001,1004,1200,1201,1208,1209,1400 and 1405 values and choose modify.

- Set the DWORD value to 1 for each one of them.

- Click OK and Restart your computer.
Congratulations! You have successfully enabled ActiveX control on your machine.
Follow our guide to know, how to change file attributes in Windows 10/11?
Turn On ActiveX Controls in Chrome
Although ActiveX is running on your machine, it may require you to turn it on separately in the browsers. But why?
See, Microsoft introduced this technology in the first place. So, all their native applications, such as Internet Explorer, Edge etc., are good to go. However, for non-Microsoft browsers like chrome, you need to enable ActiveX within the application.
Here’s how you can enable ActiveX control in Chrome:
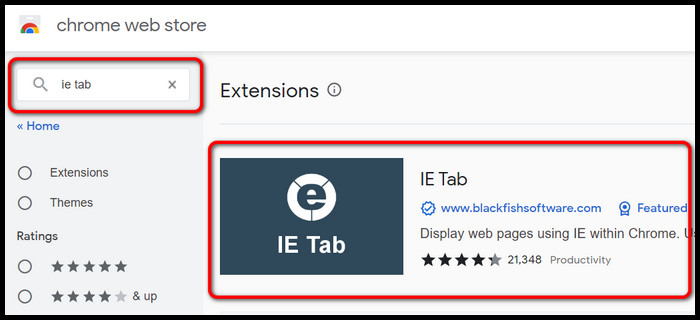
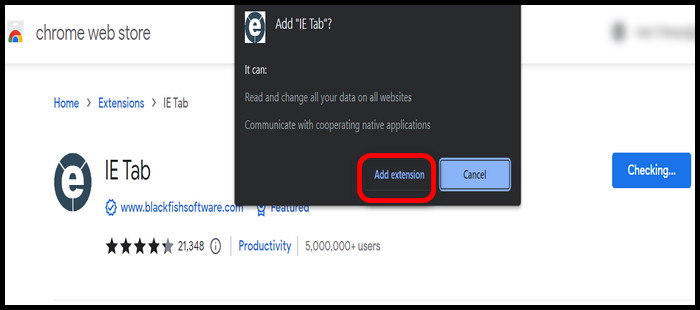
- Lauch Chrome and go to the chrome web store.
- Search for IE Tab extension and click Add to Chrome.
- Choose Add Extension.
- Sign in with your Gmail account if required.
- Select your preferred Internet Explorer version. I recommend the latest one.
- Click on the extension icon from the top right corner.
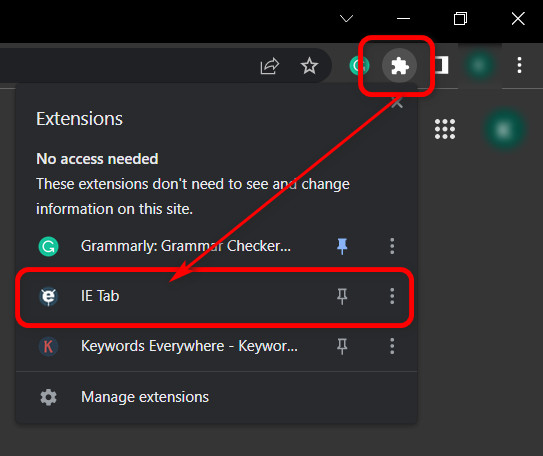
- Open IE Tab from the extension list.
ActiveX is now open, and you can start surfing.
Related contents you should read about how to fix Windows 10/11 update error 0x80d02002.
Ending Remarks
ActiveX may seem like an unknown feature, but it’s crucial in several programs and applications. Currently, it is enabled in Windows by default. However, If you need to activate it manually, this article is all you need.
Comment down below and let me know your thoughts. Have a nice day!