The Diagnostic Policy Service is responsible for detecting and resolving network-related issues that may impair your system’s functionality.
However, the Diagnostic Policy Service itself is not always harmless as it can show an excessive appetite for your CPU resources. Hence reducing the smoothness of your computer’s performance and ultimately, affecting your productivity.
Therefore, in this article, I’ll provide a set of highly effective solutions to overcome the Diagnostic Policy Service High CPU Usage and restore your computer to its former glory.
Let’s begin!
What is Diagnostic Policy Service?
Diagnostic Policy Service can identify and troubleshoot the problems in Windows 10/11 system components. It is a very important service policy from the Service Host. The process will automatically start when the computer boots up and it keeps running in the background.
The Diagnostic Policy Service is an essential, versatile, and sophisticated troubleshooting service designed to detect and resolve issues that may arise in the Windows operating system.
This Service operates quietly in the background, carefully and thoroughly scanning and analyzing the operating system’s software and hardware components.
It is an integral and necessary component of the Windows operating system. In its absence, the OS would be unable to diagnose, detect, and repair problems that may occur within the system.
How to Know the Diagnostic Policy Service CPU Usage?
When the Diagnostic Policy (DPS) Service starts a process, it should use about 10 to 15 MB of memory, and you should see 0% CPU usage on the Task Manager. But sometimes, it can utilize more resources depending on its operation.
If DPS is consuming too much CPU, memory, or disk space, you need to fix it.
Here’s how to know the Diagnostic Policy Service CPU usage:
- Press the Ctrl + Shift + Esc keys together to open the Task Manager.
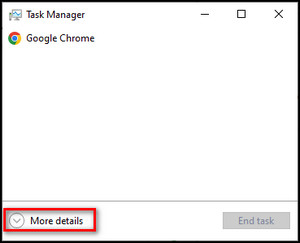
- Click More Details in case all the running tasks are hidden.
- Look for Service Host: Diagnostic Policy Service in the Processes tab.
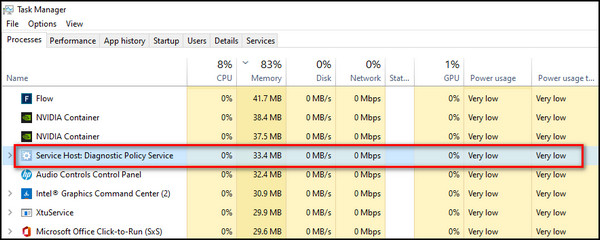
You’ll be able to see how many resources the DPS is using. If it’s utilizing a lot of CPU, memory, or disk space, you need to go through the steps provided in the following section to fix it.
Sometimes the svchost process can give you high CPU utilization. If you are facing the same issue, check out our dedicated article to solve this exact issue.
How to Fix Diagnostic Policy Service Consuming High CPU
The Diagnostic Policy Service starts automatically when the PC boots up and keeps running in the background. Sometimes, it acts abnormally and consumes high CPU/Disk/RAM. To fix this issue, delete the SRUDB.dat file, change the power plan, run SFC & DISM, and disable the service.
Below I’ve described the methods that’ll solve any high power usage issues by the Diagnostic Policy Service.
Here are the methods to fix Diagnostic Policy Service consuming high CPU:
1. Stop Diagnostic Policy Service
When you disable the Diagnostic Policy Service, though your system cannot detect and troubleshoot network-related issues, it can still work normally.
Here’s how to end Diagnostic Policy Service:
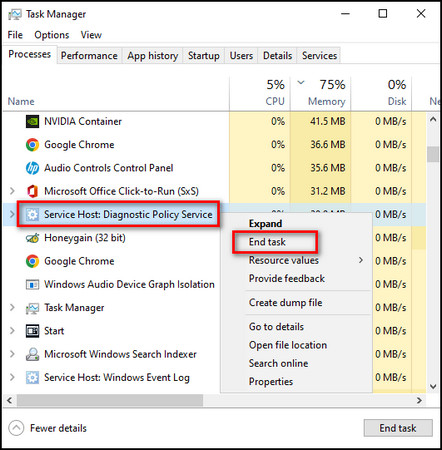
- Right-click on the taskbar and choose Task Manager. Or press Ctrl + Shift + Esc.
- Right-click on Service Host: Diagnostic Policy Service and select End task.
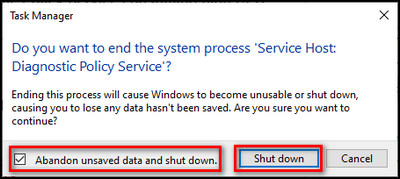
- Check Abandon unsaved data and shut down and click on Shut down button.
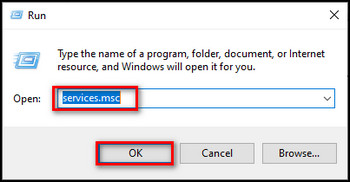
- Right-click on the Windows icon and choose Run. Or press Win + R.
- Type services.msc in the text field and click OK to open Services.
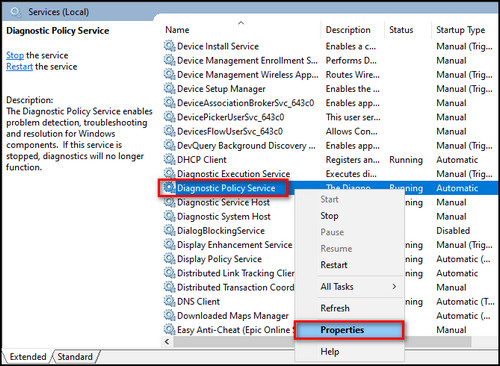
- Scroll down to Diagnostic Policy Service, right-click on it, and select Properties.
- Click on the Stop button and set the Startup type as Manual in the General tab.
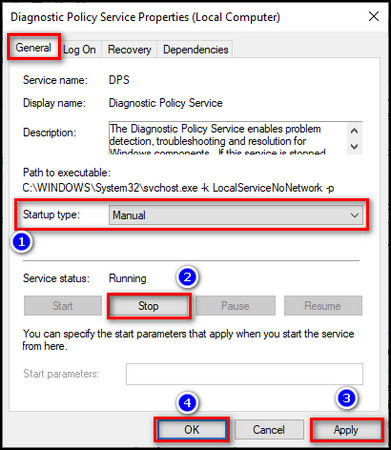
- Click on Apply and then OK.
2. Remove the SRUDB.dat File
The file is an Extensible Storage Engine database. It records network data usage and deleting this file can free up resources used by the Diagnostic Policy Service.
Follow this method to delete the SRUDB.dat file:
- Press Win + R to open the Run program.
- Type in %WinDir%\System\sru, and click OK.
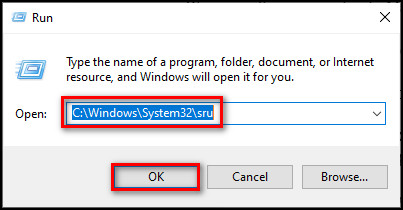
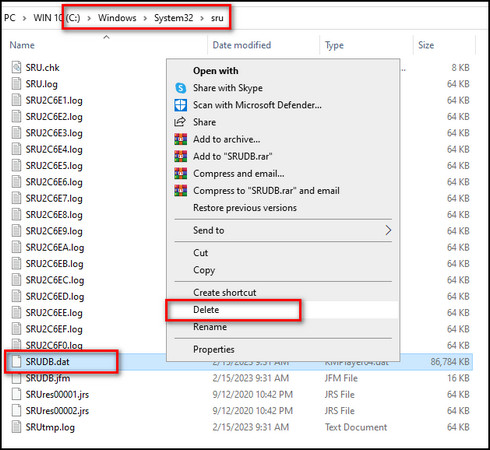
- Right-click on dat and select Delete.
When updating Windows, you can see the Modules Installer using all the CPU. To bring it to normal levels, check out our separate article where we troubleshoot this issue.
3. Modify the Power Plan
Changing the power plan to Maximum Performance will unburden the processor from the DPS.
This is the process to change the power plan of your device:
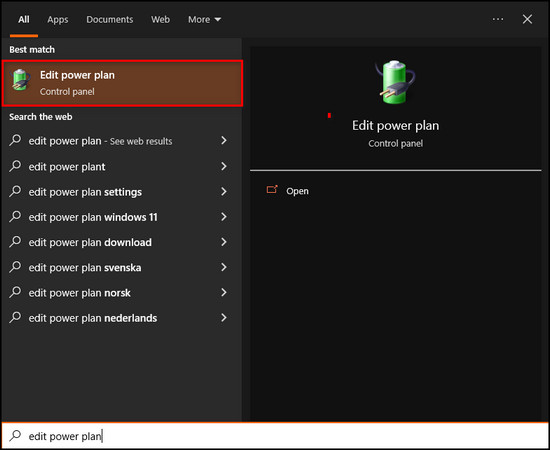
- Click on the Search icon on the taskbar.
- Search for Edit power plan and open it.
- Select Change advanced power settings.
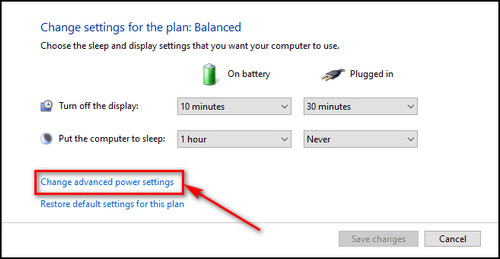
- Expand Wireless Adapter Settings and Power Saving Mode from the Power Options window.
- Set Maximum Performance for On battery and Plugged in.
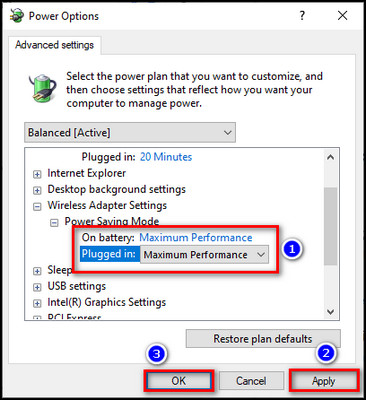
- Click on Apply, then OK.
The same steps helped us to fix power throttling on CPUs. If you face the same issue do check out the article.
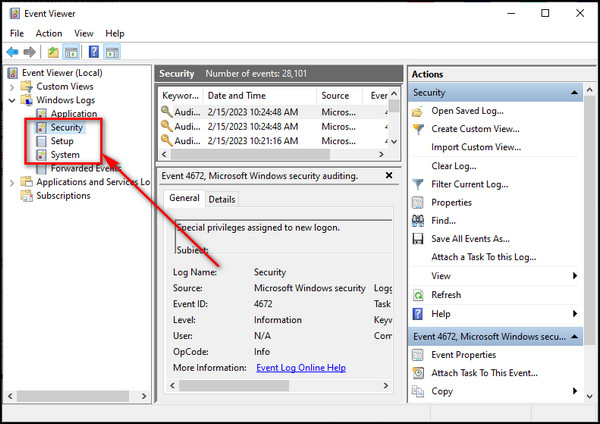
4. Clear Event Viewer Log
The Event Viewer log can use too much processing power and should be cleared.
Here are the steps to clear the Event Viewer log:
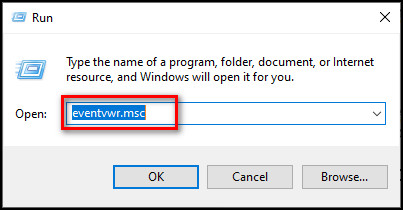
- Press Win + R on the keyboard to open the Run dialog box.
- Type eventvwr.msc in the text field and press Enter to open the Event Viewer.
- Expand Windows Logs and select Application from the left panel.
- Click on Save All Events As from the right panel.
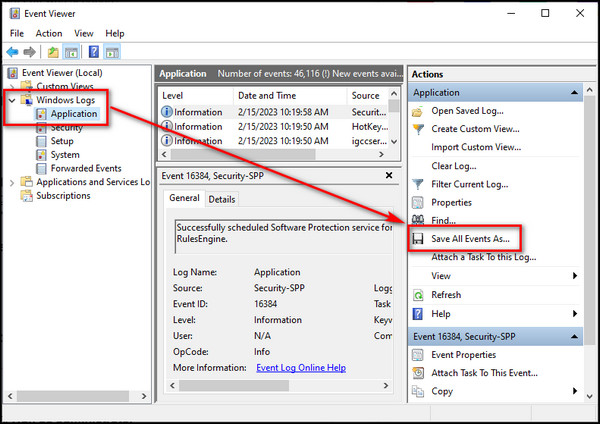
- Set a file extension and directory to save the event log.
- Select Clear Log, then Clear.
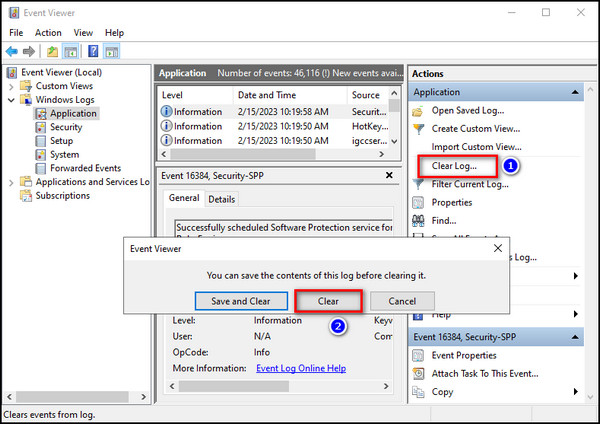
- Repeat the steps described above for Security, Setup, and System under Windows Logs, and restart your computer.
5. Run SFC and DISM
Both SFC and DISM are powerful tools that can help to diagnose and repair problems with a Windows system. If there’s a problem with the Diagnostic Policy Service, they can fix it.
Here’s how to run SFC and DISM on Windows:
- Click on the Search icon on the taskbar.
- Search for Command Prompt and select Run as administrator.
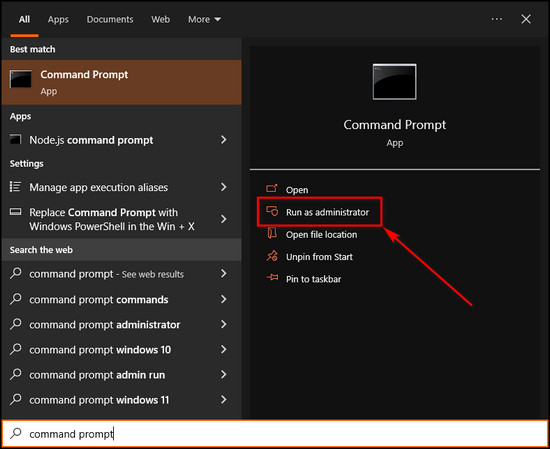
- Type in sfc /scannow and press Enter. Wait for the process to finish.

- Write DISM /Online /Cleanup-Image /RestoreHealth and press Enter.

Now restart your computer and check whether Service Host is using too much processing power.
Sometimes you can get the source file not found error when running the DISM tool. Read our separate article to know the fixes for this issue.
6. Update or Roll Back Your Windows Version
The DPS utilizing high CPU power can be due to a bug specific to the Windows version you are currently running. So, change the version and see if it solves the issue.
Here’s the process to update or roll back Windows:
Update Windows
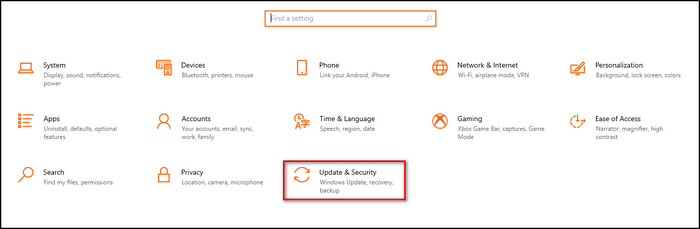
- Click on the Windows icon and choose Settings.

- Select Update & Security.
- Click on the Check for Updates button.
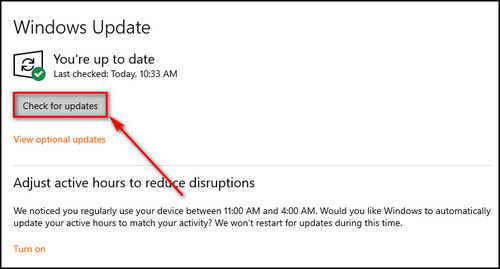
If an update is available, it’ll start to download. Then restart the computer to finish the installation process.
In case no update is available, uninstall the most recent update.
Roll Back Windows
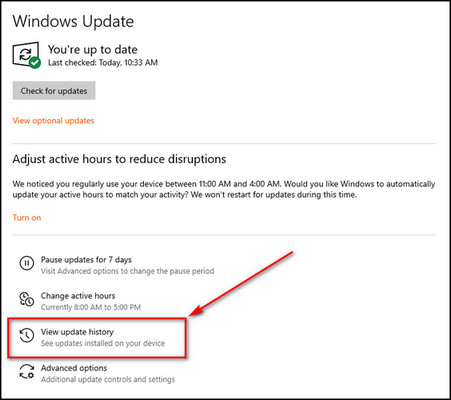
- Select View update history from Windows Update.
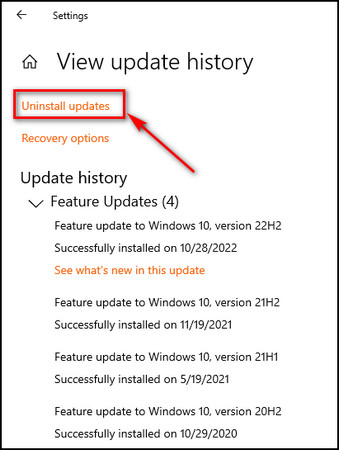
- Click on Uninstall updates.
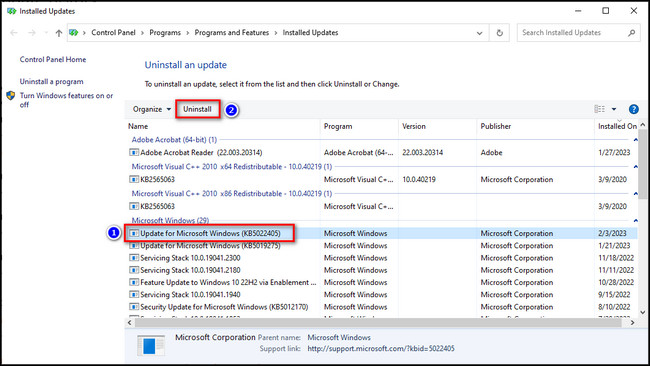
- Choose the latest version of Microsoft Windows and click on the Uninstall button.
Now restart your PC and check if the problem is solved.
If you fail to update Windows 11, check out our separate article where we troubleshoot the update issues.
7. Run System Maintenance Troubleshooter
The System Maintenance Troubleshooter identifies and fixes maintenance problems that can affect the performance and stability of the computer. It is part of the Troubleshooting feature on Windows.
These are the steps to run the System Maintenance troubleshooter:
- Right-click on the Start icon and choose Run.

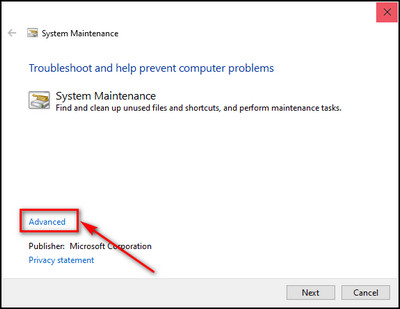
- Write msdt.exe -id MaintenanceDiagnostic in the text field and press Enter to open System Maintenance.

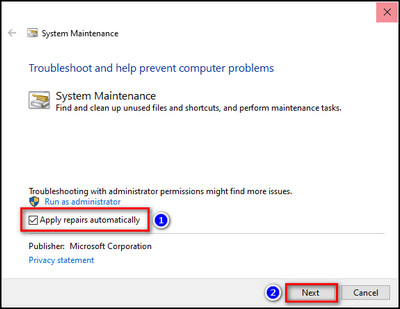
- Click on Advanced.
- Check Apply repairs automatically and click on the Next button.
- Choose Try troubleshooting as an administrator.
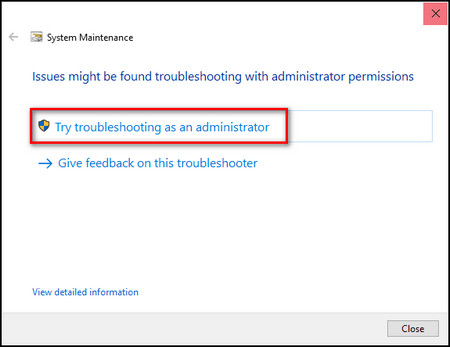
Now the troubleshooter will solve the problem or give you the reason for this issue when the process completes.
What Makes Diagnostic Policy Service Use High CPU Resources?
The Diagnostic Policy Service, in the process of attempting to tackle problems, may consume a substantial amount of CPU resources. This is not much of a concern, provided that it does not consistently consume too much CPU and memory resources.
However, in the case that the process does indeed take up an excessive amount of CPU usage, then you might consider various causes that may be responsible.
One of them can be corrupted system files in the computer system. Also, failing to keep your Windows operating system up-to-date is another potential reason that should not be overlooked.
Another factor to consider is that the SRUDB.dat file, located within the computer, maybe the cause of the problem. The issue can somehow be related to the Windows Update itself, which can make the situation much worse.
FAQs
Can I disable the Diagnostic Policy Service?
Yes. to disable Diagnostic Policy Service, press Win + R on the keyboard, type services.msc in the text field, and click OK. Right-click on Diagnostic Policy Service, and select Properties. Click on the Stop button and set the Startup type as Manual. Apply the changes.
What is Diagnostic Policy Service Windows?
Service Host: Diagnostic Policy Service can identify and troubleshoot the problems in Windows 10/11 system components. The process will automatically start when the computer boots up and keeps running in the background.
Is it safe to disable the Diagnostic Policy Service?
It is not safe to disable the Diagnostic Policy Service. Because disabling it can stop your computer from detecting and troubleshooting network problems, which cause issues with network connectivity or performance.
Is Diagnostic Policy Service necessary?
The Diagnostic Policy Service is not necessary for the normal use of a computer. But, if you are facing network connectivity issues, the DPS can be very helpful in detecting and resolving the problem.
Final Thoughts
Experiencing high CPU usage caused by the Diagnostic Policy Service can be frustrating as it can slow down your computer.
However, by following the solutions discussed in this article, you can easily fix the issue and improve your computer’s performance. Also, remember to regularly update your Windows operating system and run virus scans to prevent similar issues from happening again.
Leave a comment below if you have further questions, and we’ll get back to you.