Outlook is a must-have app for most users since it handles your contacts, calendar and, of course, your emails. Keeping track of all your emails can be time-consuming.
But thanks to Outlook’s Move to folder option, this long process can be completely automated. And all you have to do is apply some rules. In this article, I will explain how you can use the Rules feature to create an automated process that moves your emails to your desired folder in Outlook. Let’s begin!
Check out the easiest way on how to find old emails in Outlook.
How to Automatically Move Emails to a Specific Folder in Outlook
To move emails automatically to your desired folder, you need to utilize the Rules feature in Outlook. You have to create a new rule that takes emails from a specific sender and puts them into the folder of your choice without further instructions.
Follow the steps below to create a rule that moves emails automatically to a folder you’ve specified in Outlook.
Here are the steps to automatically move emails to a specific folder in Outlook:
On Windows
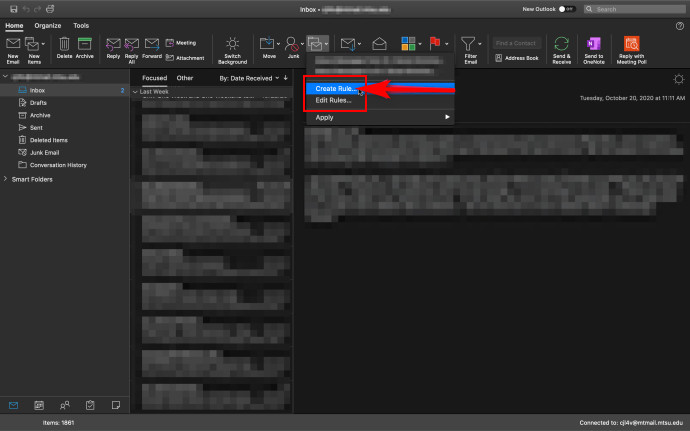
- Launch the Outlook app on your computer.
- Open an email from a specific sender whose messages you want to move automatically.
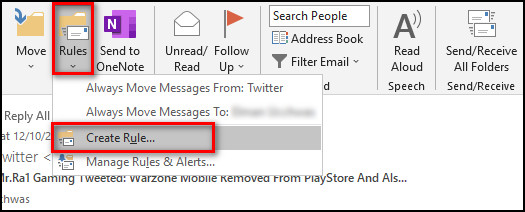
- Select Rules from the Move section and click on Create Rule.
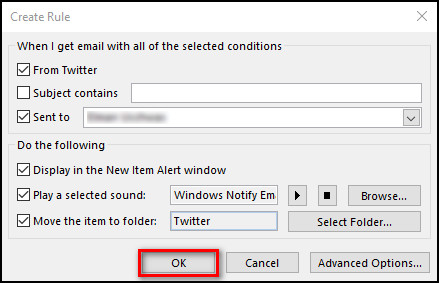
- Check the box for From sender.
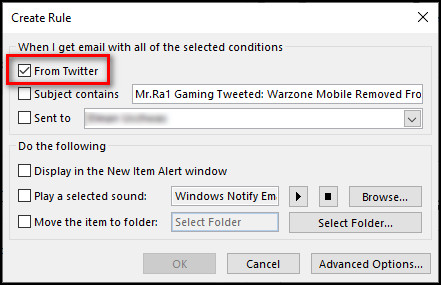
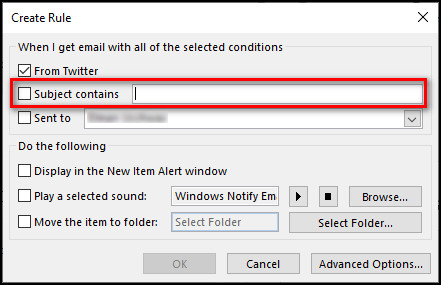
- Keep the Subject contains option unchecked, so all the items from that user go straight into the folder of your choice.
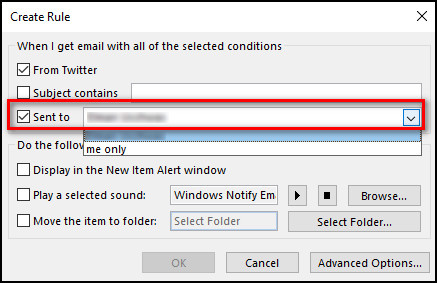
- Choose your account for the Sent to field.
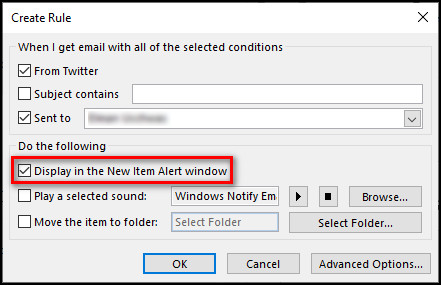
- Check Display in the New Item Alert window if you wish to get notified when you receive messages from the sender.
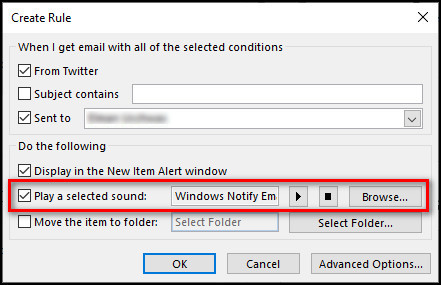
- Put a checkmark on Play a selected sound or click the Browse button and pick a notification sound if you want.
- Check the Move the item to folder option.
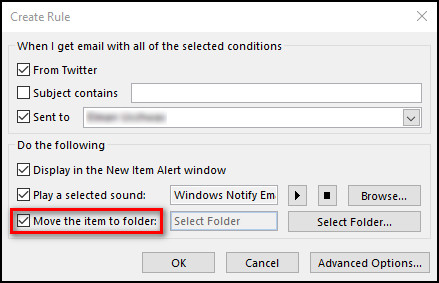
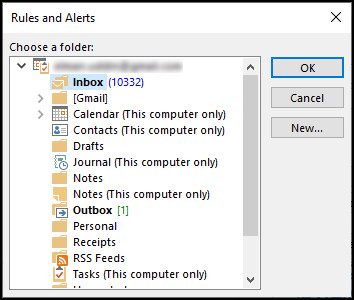
- Choose the folder to which you want to transfer the emails and click OK or select New to create a new folder.
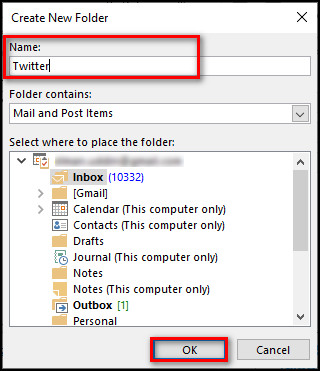
- Provide a suitable folder name for the folder and click OK.
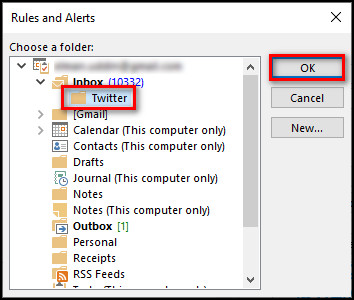
- Select the folder you’ve just created and press OK.
- Click on the OK button in the Create Rule dialog box.
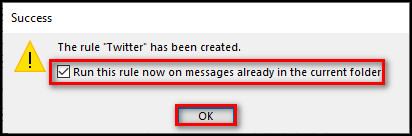
- Check the Run this rule now option and click OK.
Follow our guide on how to automatically forward emails in Outlook.
On Mac
- Open Outlook on your macOS device.
- Go to the Home tab.
- Select Rules > Create Rule.
- Provide a Rule name.
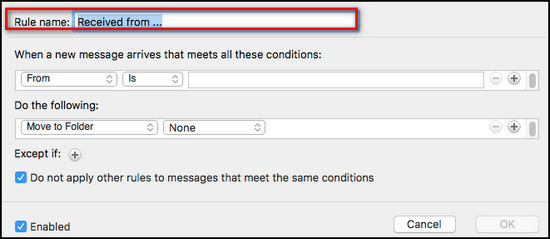
- Type the email address of the sender whose messages you want to move.
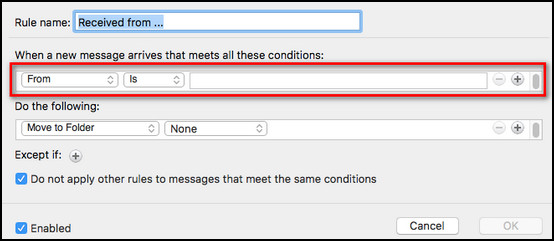
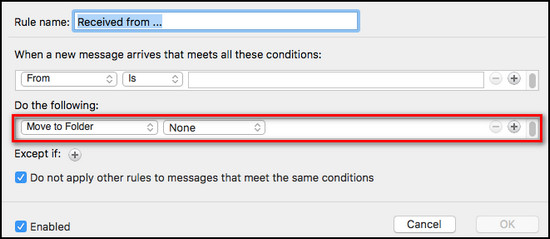
- Select Move to Folder and specify the folder to which you want to move the emails automatically.
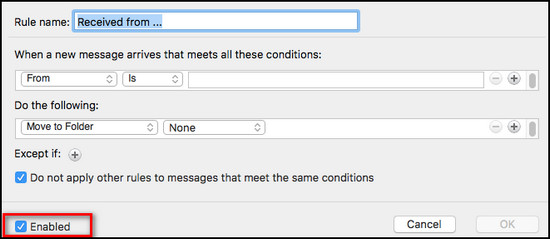
- Check the Enabled option and click OK.
Also, check out our separate post to Outlook not marking emails as replied.
On Web
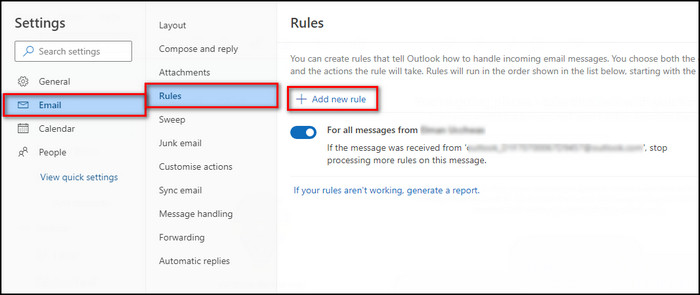
- Go to outlook.live.com and sign in to your Microsoft account.
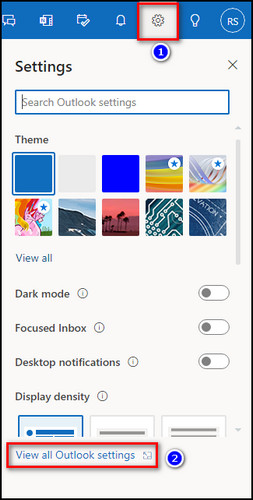
- Click on the Gear icon at the upper right corner and select View all Outlook settings.
- Proceed to the Rules tab and click on Add new rule.
- Give the rule a proper name.
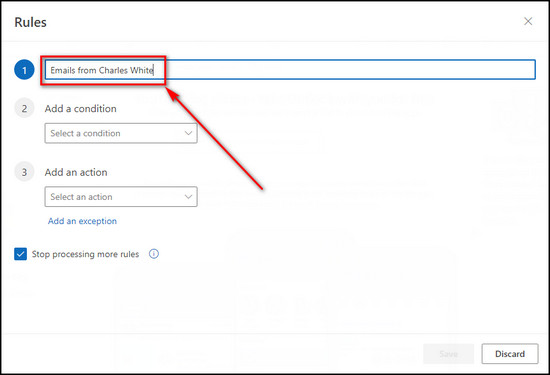
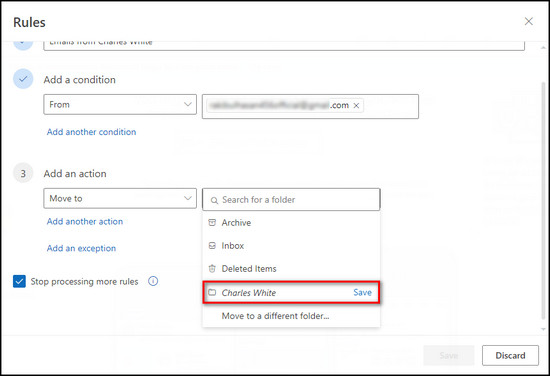
- Choose From for the Add a condition field and provide the user’s email address whose messages you want to move.

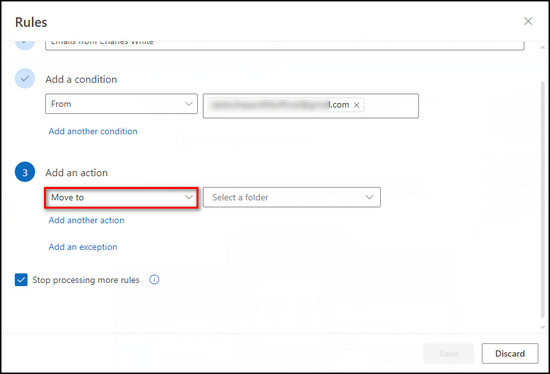
- Select Move to for the Add an action field.
- Choose the folder where you want to transfer the emails or select Create new folder.
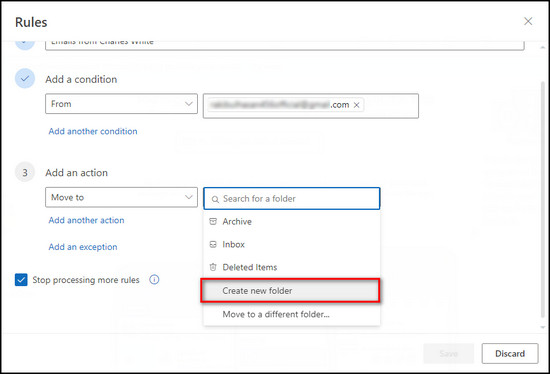
- Type in a suitable folder name and click Save.
- Check the Run rule now box and click on the Save button.
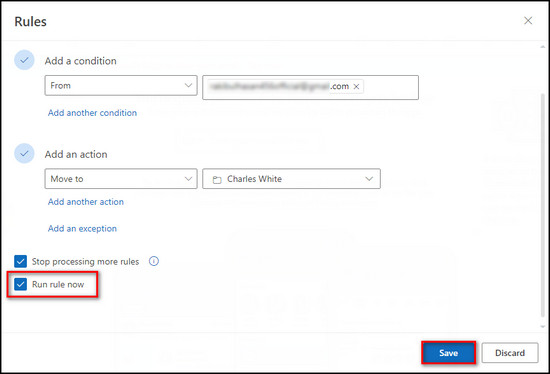
Now the rule will take effect immediately, and all the emails from the sender you’ve chosen will automatically travel to your specified destination folder.
Check out the easiest way to how to recall an email in Outlook.
FAQs
How do I automatically move emails to a folder by date in Outlook?
Follow the steps below to move emails to a folder by date in Outlook automatically:
- Open Outlook.
- Right-click on the folder you want to move emails from.
- Select Properties.
- Move to the AutoArchive tab.
- Select Archive this folder using these settings.
- Specify how old the emails should be to be transferred to your desired folder.
- Choose to move the emails into the Archive or click on Browse and select a folder on your computer.
- Click Apply.
Can Outlook automatically sort emails into folders?
Yes, Outlook can automatically sort emails into folders using the Rules feature.
How do I automatically organize emails into folders?
Follow the instructions below to automatically organize emails into folders:
- Launch Outlook.
- Right-click on an email you want to organize.
- Select Rules > Always Move Messages From.
- Choose the folder where you want to move the email or click New to create a new folder.
- Provide a suitable folder name.
- Click OK.
Final Thoughts
The Rules option allows you to create automated processes for the Outlook app, such as automatically moving emails to a specific folder. But to use this feature, you need to know exactly how to create a new rule that does what you intend.
However, if you follow all the steps described in this article, you’ll be able to move emails automatically to any folder you want.
Leave a comment below if you face any issues moving emails to a specific folder, and I’ll walk you through the solution.