SSDs are the best upgrades a PC can get. Without spending a fortune, you can inject snappiness into your computer.
But this does not mean you need to open up your computer to install the SSD. You can install any operating system on an external drive too.
This guide states how to set up and install Windows or mac to your USB SSD. So, tag along, and let’s get started.
How to Boot Windows From an External SSD
Things that you need:
An External SSD, A Type-C to Type-A adapter (if your computer does not have USB C), a Windows ISO file and a will to dabble with the command prompt.
Microsoft used to provide a dedicated tool to install its OS on external drives. This is known as Windows to Go. But it stopped supporting it starting from Version 2004, which was released in mid-2020.
But we can configure the SSD as a boot drive using the command prompt. So let’s look at how you can do it.
Follow the steps to boot Windows into external SSD using the command prompt:
1. Format the External SSD
First, insert the SSD into the USB port. Use a Type C port if it is available. For most computers, choose the fastest port that is available. USB 3.0 ports are marked blue for locating easily.
Now, format the SSD from the Files Explorer. We will choose NTFS as the file format.
Here are the steps to format your USB SSD:
- Connect the external SSD to your computer.
- Right-click on the drive and select Format.
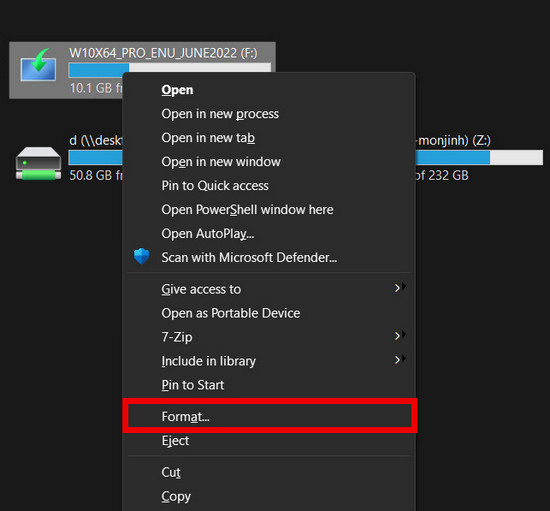
- Select File system as NTFS.
- Tick on Quick Format.
- Press Start.

When the format is successful, move on to the next step. Note the drive letter of the SSD, which we will need later on.
Check our exclusive tutorial on how to use an internal SSD for external storage.
2. Copy the Windows ISO into the SSD
Now we need to copy the files from the windows installation into the SSD. First mount the ISO to access the file as a drive. Then copy the Windows setup file by using CMD. Just replace your ISO and USB SSD location in the command prompt command.
Follow the steps to mount ISO on your computer:
- Right-click on the ISO file and navigate to Open with > File Explorer.
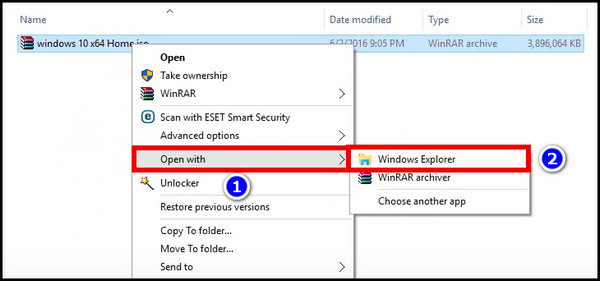
- Note the location of this drive.
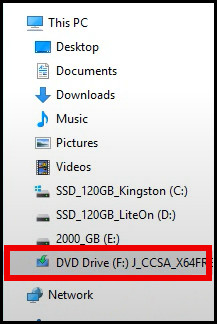
Next, open CMD and copy the files into the USB SSD.
These are the steps to copy the Windows ISO to a USB SSD:
- Press the Windows key + R.
- Write cmd and press OK.
- Type cd .. and press enter.
- Next, type xcopy e:\*.* d: /e/h/f replacing e with the ISO drive letter and d with the SSD drive letter.
- Press enter and wait till the process completes.

When the files are copied, it’s time to make the SSD bootable.
Follow the steps to make the SSD bootable:
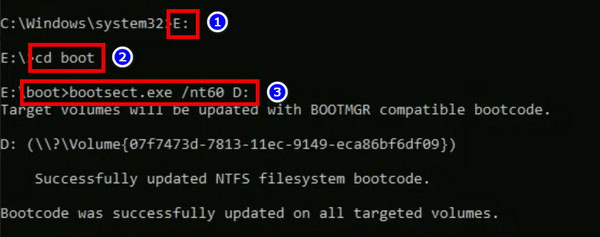
- Open CMD from the Start Menu.
- Enter the iso file location, E: and press the enter key.
- Type cd boot and press the enter key.
- Next, type bootbootsect /nt60 d: where e contains the Windows ISO and d is the USB SSD drive.
Now the SSD is configured with the Windows installation files.
Also, check out our expert’s recommended fastest PCIE 4.0 SSDs.
3. Set the SSD to boot from the BIOS and install Windows
Your BIOS is set to load the boot drive, which contains Windows. Now that we intend to use the SSD as the primary drive, you need to point this to the BIOS.
To do that, you must connect the SSD using a USB port. Then enter the BIOS by pressing the key set by the manufacturer. This is usually the DEL key.
Inside the BIOS, navigate to Boot Priority and set the USB SSD to the top of the list. Save the changes by pressing the F10 key, and the computer will restart.
Next, follow the on-screen instructions and complete the Windows installation. During this time, the computer will restart many times. When the process completes, you will land right on the desktop.
You have successfully made a portable Windows setup on the external disk drive. Now you can plug it into any computer, and upon booting, all your files and apps will be present. In short, your work will travel with you.
Did you know you can also use the external drive for backup? Read our excellent piece on how to backup and restore your files in Windows 11.
How to Boot macOS From an External SSD
You can also boot a macOS installation from an external SSD. This is particularly useful for older macs which are harder to upgrade. Just make sure you are using a USB 3.0 port to connect the SSD to enjoy its faster speeds.
Here are the steps to boot macOS from an external SSD:
1. Erase and Format the SSD
First, remove any existing files and erase the SSD. Use Disk Utility from Settings to do this.
These are the steps to erase a drive using Disk Utility:
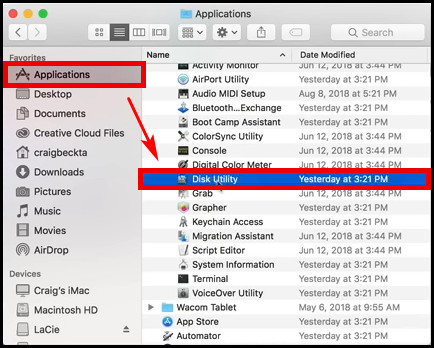
- Click Finder and go to Applications.
- Find Disk Utility under Utilities.
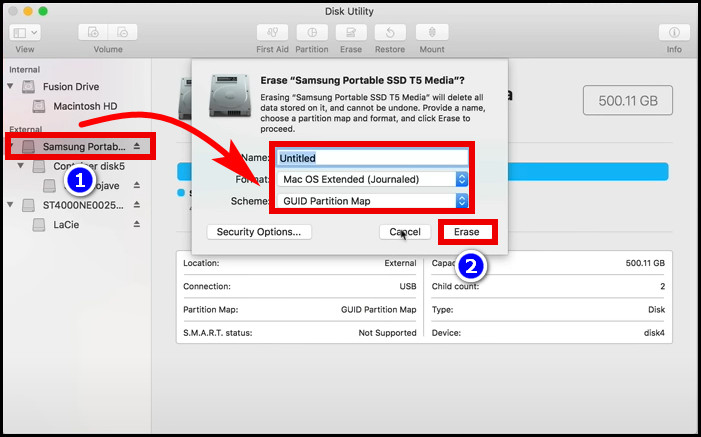
- Click on the SSD from the list of drives.
- Enter the name, select Mac OS (Extended Journaled) from Format and click on the Erase button.
Now all the files are erased from the USB drive.
Read more on how to use old SSD on a new computer.
2. Install the Latest macOS from the App Store
The app store provides the latest OS for your mac. Just search using the name of the latest software, which will open a new window that will guide you through this process.
Remember to select the USB SSD as the disk drive, or everything in your primary drive will be permanently erased.
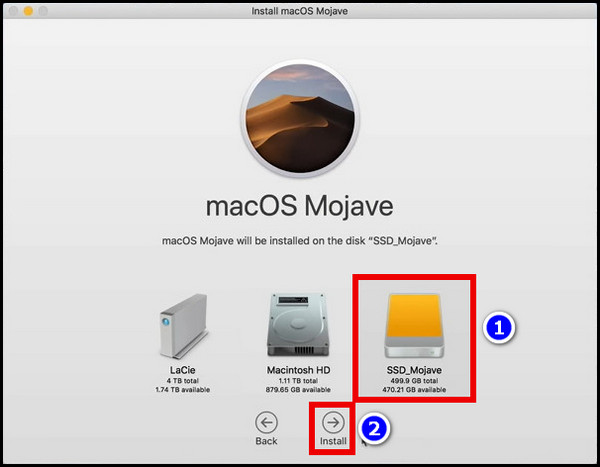
Follow the steps to install macOS on an external SSD:
- Open the App store and search for the macOS update (for example, Monterey).
- From the update page, click Open.
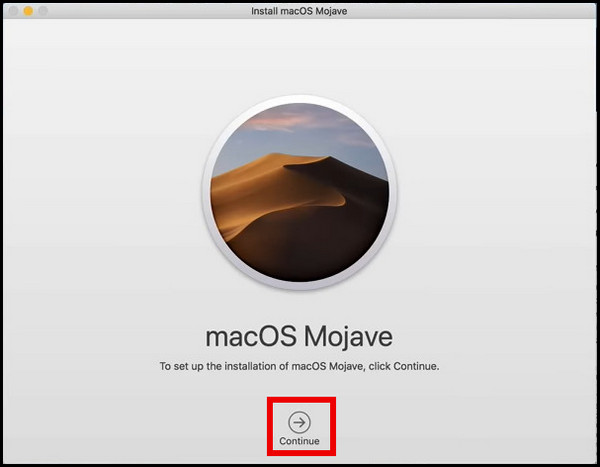
- Select Continue from the Install Mac OS window.
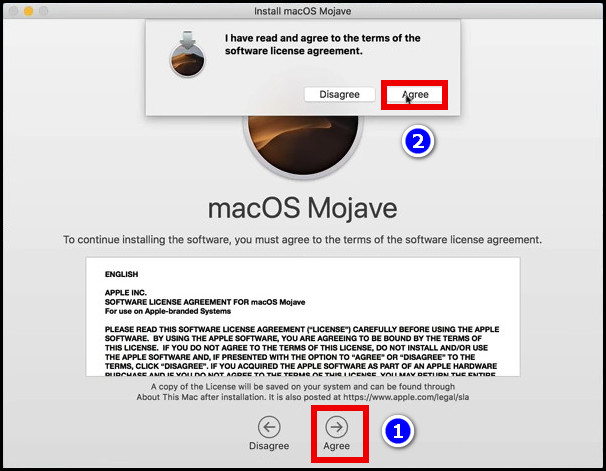
- Press the Agree button to accept the software terms and conditions.
- Press on Show All Disks and select the SSD that you erased earlier.
- Click on the Install button.
Your mac will reboot and start installing its software. A progress bar will show you how long it takes until the process completes.
3. Set the SSD as the Startup Disk
Now make sure the mac boots up from the SSD instead of the internal disk. Change this from the Startup Disk settings inside System Preference.
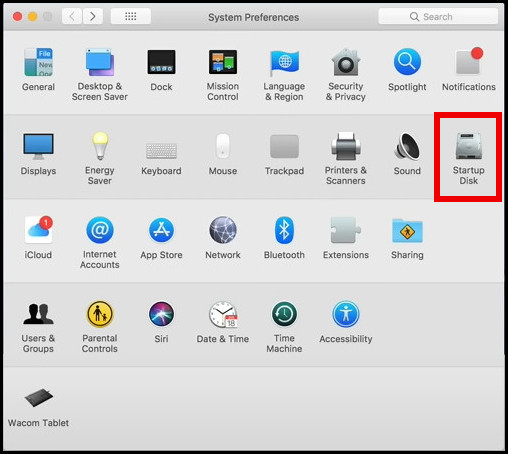
These are the steps to set the SSD as the start-up disk on macOS:
- Click the apple icon and select System Preferences.
- Open Startup Disk.
- Select the SSD from the list and click on Restart.
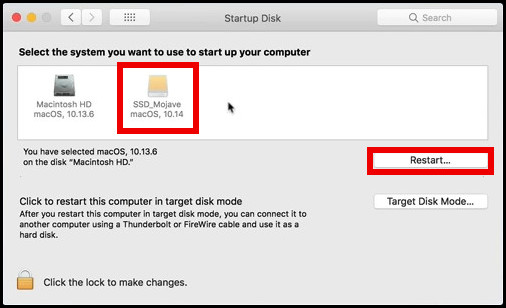
Now the mac will load from the external drive every time you power it on.
On older macs, you will definitely appreciate the overall speed boost. Doing any tasks will feel smoother the next time you use your computer.
Final Words
If opening up your mac or Windows computer gives you anxiety, setting up the OS on an external drive is the perfect solution for you. You get the benefits of both worlds ‒ speed and convenience as well.
So, how well did this project go? Do not forget to let us know in the comments.
Goodbyes for now.