Do you know when virtual reality is in the most interesting mode? The world of virtual reality (VR) turns more exciting when you are able to take screenshots and share them with your peers. On this note, Oculus Quest 2, a headset product developed by Meta is arguably the most convenient tool to enjoy VR games and other apps also.
Taking and sharing screenshots- you will find it as a child’s play here. Plus, you can record the screen without being out of the game you are in. You need not even navigate to the system menu. So, what exactly is the process of taking screenshots on Oculus Quest 2? Do you not want to know?

If yes, then don’t worry. As a tech enthusiast, I will be right there with a couple of easygoing steps. So, without wasting time, let’s dive into the game.
Please, do not skip any section as I hope my thorough discussion will vanish all your doubts.
How Do I Take a Screenshot on Oculus Quest 2
If you get a high score in a game on Oculus Quest 2, it is obvious that you will intend to share your score with your buddies. At this point, the importance of taking screenshots is at its peak.
Of course, there are other scenarios when you will need to take snapshots as well. Focusing on the matter, I accrued multiple ways with which you can take screen records whenever you need.
Here are the ways to take screenshots on Oculus Quest 2:
Using Oculus Touch Controller
Compared to the ways of capturing a screen, using the Oculus touch controller is reported to be the simplest of all. Though here you will not find any dedicated screenshot button here on Oculus, still, I will tell you how you can do this otherwise. You just need to know which key you should press to have a snap.
Here are steps to take screenshots using Oculus Touch Controller:
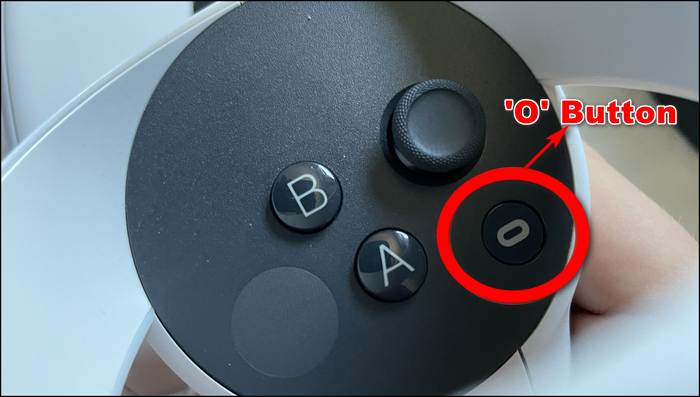
- Press and hold the Oculus button on the right controller. The oculus button is marked with an O.
- Press any of the triggers from the two to take a snapshot.
If you can perform the steps successfully, within a fraction of seconds you will hear a camera shutter sound. Moreover, Oculus will give you a notification to let you know that a screenshot has been captured and stored.
Check out our separate post on can PS5 use keyboard and mouse.
Using On-Screen Controls
By any chance, if you fail in capturing snaps with the touch controllers, no need to worry. You have ways remaining on your hand. You can take snapshots by the screen control as well. And, most importantly this way is, according to some users, even more straightforward than the previous one.
Here are the steps to take screenshots using on-screen controls:
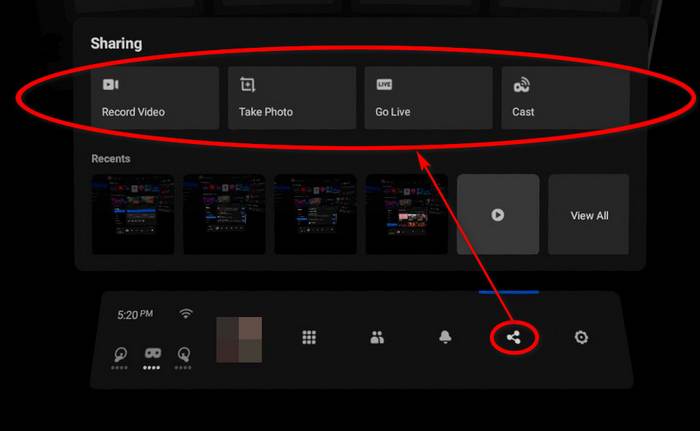
- Press the Oculus button on your right controller. Then, the Oculus menu will show up.
- Select the option Take Photo to take a screenshot. It will redirect you to the app or game you were in and then capture the screen within a few seconds.
- Select Record Video if you want to record your activity for a period of time.
That’s it. Here you will have other options like returning to your application, closing the app, casting your video or screen to a local Chromecast device, or reporting any issue.
This step also helps in fixing discord Krisp not working issue.
How to See Captured Screenshots on Quest 2
Quite often we check the images that we captured just before to check if it has been captured accurately and perfectly. So, no need to mention the importance of finding a way out to view all taken screenshots. I have two methods for you.
Using Sharing tab
This would be your best fit if you want to have a quick look at what you just captured i.e. recent content. From the updated Oculus toolbar, click on the icon of an outgoing arrow towards the right. You will get a pop-up with all your recently captured images under the section Recent. Click on any particular image to scale it up for a better view.
Using Files app
If you want to look for an earlier image or content, then probably using the Files application would be the most suited for you. From the home screen, go to the Apps menu to find Files. Click on the Media from the left panel appeared. Then you will see all the files including screenshots and videos you captured to date.
Check out our latest fix for Windows Audio Device Graph Isolation High CPU.
Parallel to taking screenshots for one’s own, it is a matter of sharing with others. Sharing becomes mandatory when the case is related to games and you scored a high.
As Oculus is owned by Facebook, you can use it as a platform to share your shots. But, the question is, how will you do it? Pretty simple like other processes I stated before.
Here are the steps on how to share screenshots of Oculus quest 2 with others:
- Tap to the Oculus button to open the Oculus menu.
- Click on the Sharing icon, i.e., the icon with an arrow directing to the right.
- Select the items you want to share from the thumbnails or click on View all to find the previous content.
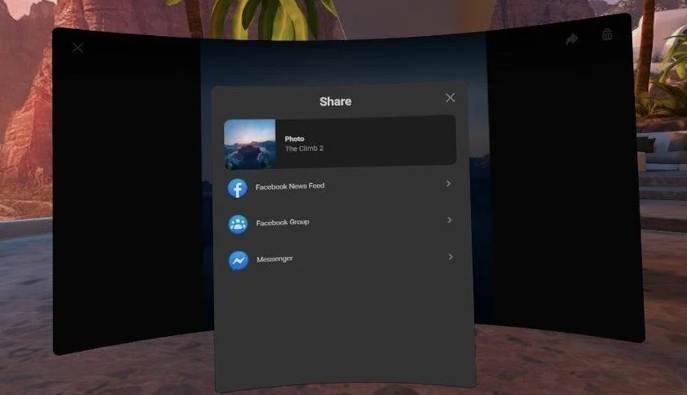
- Click on the Sharing icon at the top-right of the screenshot you opened in order to get the sharing options.
- Choose one option from the three- Facebook News Feed, Facebook Group, and Messenger.
If you are done with the steps, you have successfully shared your content with your friends on social media. Just be aware of one thing, there will be no confirmation notification after your share. So, check carefully if you anyhow misclicked.
Check our exclusive tutorial on fastest DNS servers for PlayStation 5.
How to Transfer Screenshots from Oculus to PC
It is worth mentioning, transferring taken screenshots from Oculus to PC is a lenient task. So, let’s direct get into the process.
Here are the steps to transfer snapshots from Oculus to computer:
- Connect your Oculus Quest 2 headset to your computer with the help of an Oculus link cable.
- Select Allow to permit accessing data from other devices. You will get a pop-up as soon as you will connect your Quest 2 to the computer.
- Navigate to My Computer on your Windows. Here, you will find a new drive Quest.
- Double-click on the Quest drive.
- Enter the Internal shared storage folder and then, Oculus folder.
- Go to Screenshots from the appeared four folders. All the snapshots you have taken on your VR headset will be in this folder.
- Copy all the images from the folder and paste them into a convenient folder to store them safely. You can use the shortcut of Ctrl+A to select all, Ctrl+C to copy, and Ctrl+V to paste.
- Go to the Video shots folder if you want the video files to transfer and do the same things as mentioned in the previous step.
If you can do up to this, you have successfully accessed and stored your screenshots and other files on your computer.
Wrapping Up
If you are a VR enthusiast, Oculus Quest 2 can be considered one of the most breathtaking devices for you. What not can you do with Quest 2? Mostly, as per my experience, users play games via it to feel the graphics and animation in real-time.
And, they frequently take screenshots of their score or capture videos of their activity and share those with their partners. That is why, screenshots play a crucial role here. Many requested me to get down the techniques of taking snapshots for them. At last, I got the time to make it. And, I am hopeful that this article will grossly help you to avoid the issues you did feel.
Did the article help you? Please, let me know. And, feel free to share it with others.
Happy Gaming!