VLC is like the Swiss Army Knife of media players for its variety of features and reliability. Not only it plays almost any media file, but it also has a very high-quality recording feature.
You can easily record your screen to make a quick guide or gameplay walkthrough without installing any separate software if you have VLC. And the process is quite simple.
How to Record Your Computer Screen with Audio Using VLC Player
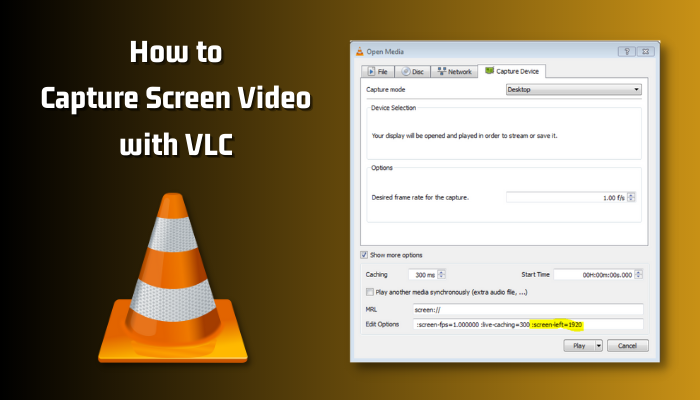
On Windows, capturing video with VLC is a relatively simple process. Go to Media > Open Capture Device on VLC player, select Desktop, input the recording frame rate, and select Convert to record your screen.
However, the recording process is quite different on macOS. This section will show you the detailed screen capture walkthrough for both Mac and Windows OS.
On Windows
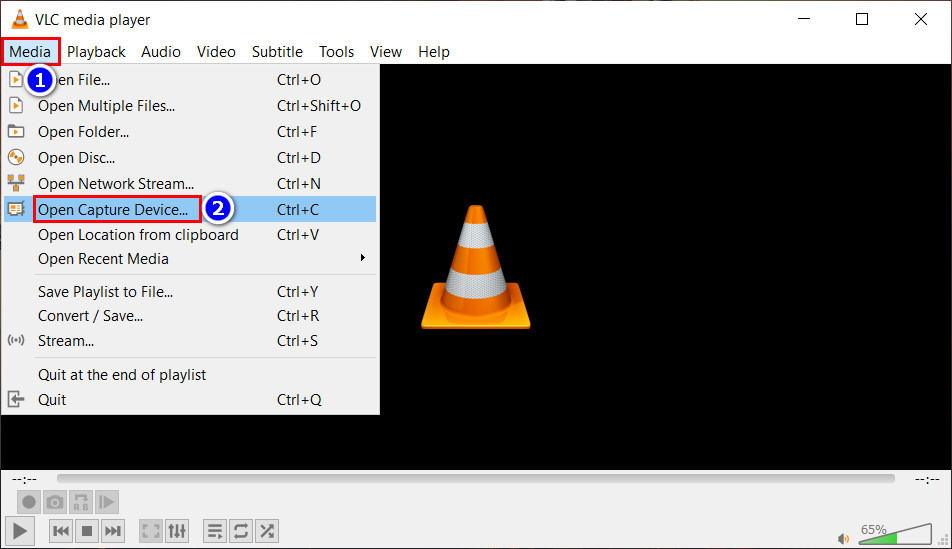
- Open the VLC media player and go to the Media tab.
- Select the Open Capture Device option.
- Choose Desktop as the Capture mode and input the chosen recording framerate.
- Click the Show More option checkbox, then the Play another media synchronously checkbox.
- Type wasapi:// in the Extra media textbox to record mic audio.
- Click on the down arrow next to the Play button and select Convert.

- Choose a Video profile in the Profile section and tap the Browse option.
- Go to the storage folder where you want to save the file, insert the file name, and click Save.
- Press Start to begin recording.
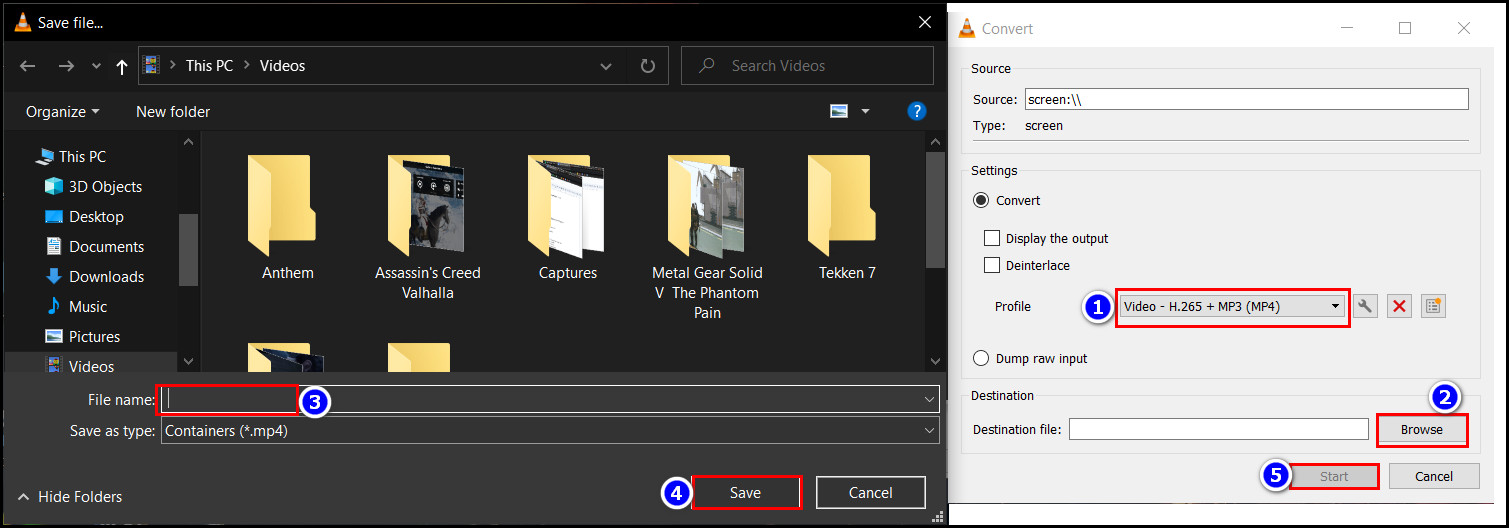
- Click the Stop Playback button to stop the screen recording.
After completing the steps, you can access the video files from the saved location you’ve selected previously.
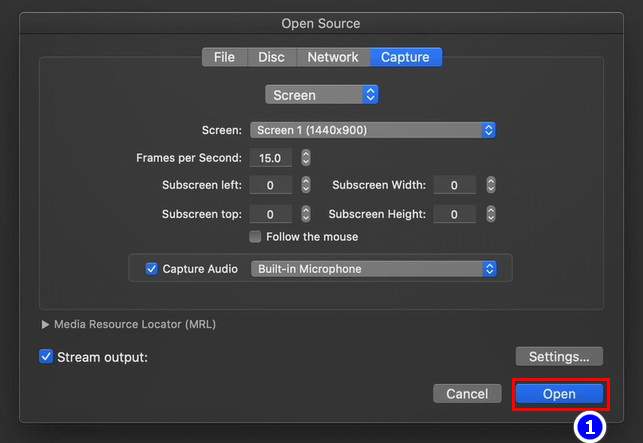
On Mac
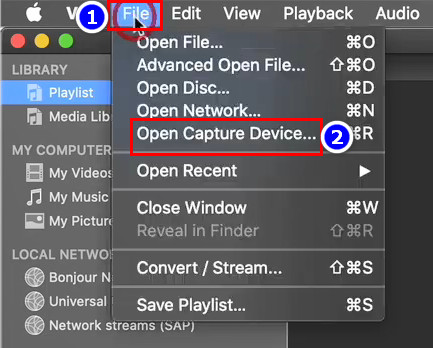
- Open the VLC player and select the File ribbon.
- Click on the Open Capture Device… option.
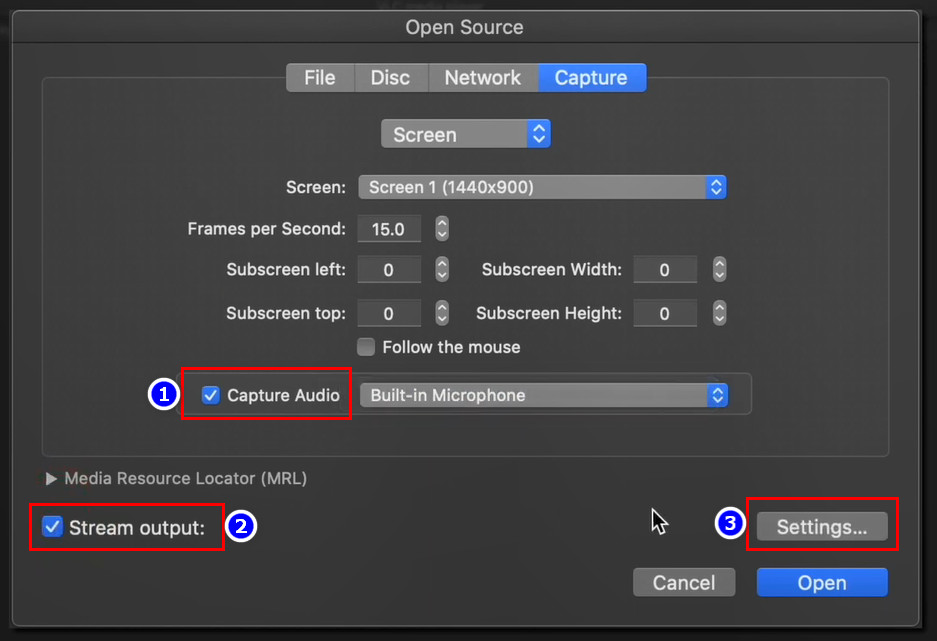
- Go to the Capture menu and select the Screen option in the video source menu.
- Mark the Capture audio checkbox to record audio.
- Click the Stream output box and select Settings.
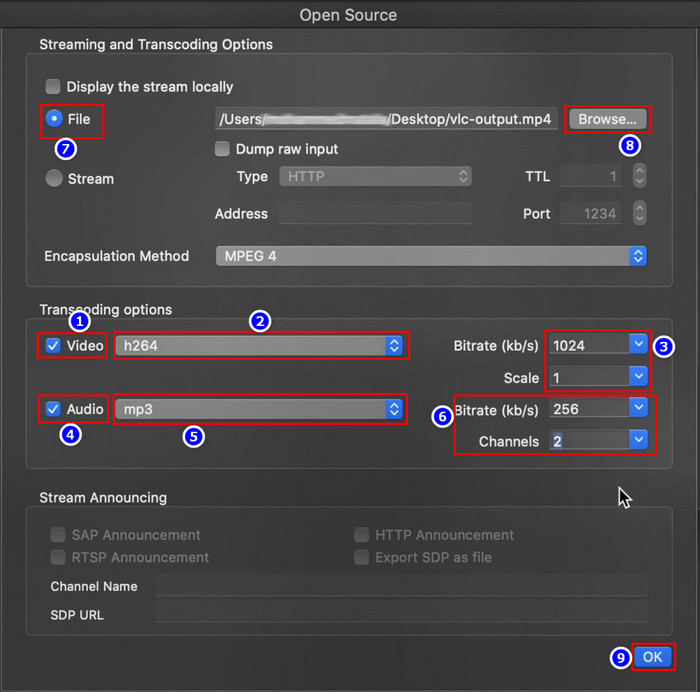
- Choose MPEG4 in the Encapsulation Method section.
- Mark the File option and click the Browse button.
- Rename and relocate your video files as your choice and hit the Save button.
- Mark the Video box in the Transcoding option, select h264, and choose your desired bitrate.
- Click the Audio checkbox, select mp3, and choose 256 in the bitrate box.
- Choose 2 in the Channels option for stereo audio output and hit the Ok option.
- Hit the Open option to start recording.
- Press the Stop button from the down-left corner to stop recording and click Keep existing files.

After completing the steps, you can access the video from the saved directory.
Use Command Scripts
If you don’t like moving back and forth between settings to record your desktop, the command script is a good alternative. But those scripts won’t work unless you install the VLC player on your desktop.
After that, just open the command line (Windows)/ terminal (Mac) and paste the following script:
For Windows
- Press the Windows icon and type CMD.
- Click the Command Prompt form in the search result.
- Copy-paste the following command and press Enter :
For Mac
- Tap the Launchpad icon and type Terminal in the search box.
- Click the option from the search field.
- Paste the following command line and press the Return key:
Understanding the Command Line
- “C:\Program Files\VideoLAN\VLC\vlc.exe” or /Applications/VLC.app/Contents/MacOS/VLC is the VLC.exe program location. It is different from PC to PC. You can find the file location in the target section of the VLC shortcut properties.
- screen:// is the screen recording command.
- :screen-fps=30 means 30 fps for video capturing (you can change the framerate if you wish).
- screen-caching=100 is the buffering time before encoding.
- vcodec=h264,vb=800,scale=1,acodec=mpga indicates the H.264-encoded MP4 file, with a video bitrate of 800 kbps.
- ab=128,channels=2 means the stereo audio output with 128 bits.
- dst=screen_capture.mp4 is the file name. (you can edit the name if you like).
How to Capture Video Using VLC Media Player
Not only the VLC player can record the screen, but it can also capture a portion of any video or live stream. This feature especially helps when you need to extract a specific segment from a video to include it in a project, like a news report, or to enhance your presentation.
Follow the steps to capture a full or a portion from any video or live stream:
- Open the VLC player.
- Go to the View ribbon and select the Advanced Controls option.

- For an offline video: Play the Video file from your hard drive/DVD dive in the VLC player.
- For online stream: Press CTRL+N, paste the video URL and click Play to online stream the video.
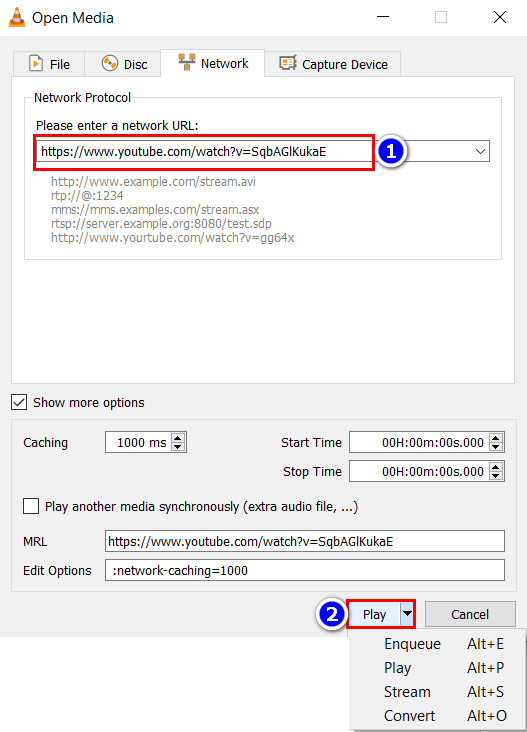
- Click the Record button (red dot) to start recording.

- Tap the Record icon again to stop the video recording and save the file.
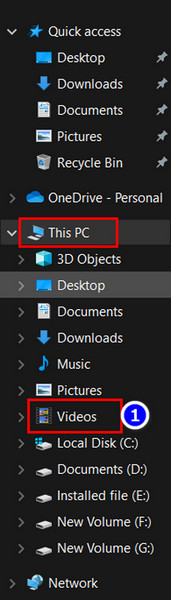
- Go to the Videos folder to see the recordings.
You will see the file in MP4 media format in the Videos folder. You can also use this method to record a full live stream or a DVD video.
How to Record Your Webcam Footage With VLC Media Player
Besides recording videos and screen captures, VLC’s video recorder can also capture footage from your webcam. This trait is particularly useful for including your reactions in gaming streams or recording yourself for an online presentation or webinar.
To record the Webcam footage with VLC:
- Open the VLC player on your PC.
- Go to the View ribbon and select the Advanced Controls option.
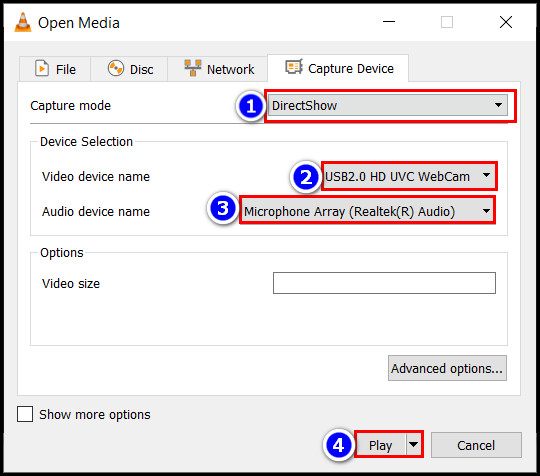
- Navigate to the Media tab and select the Open Capture Device option.

- Choose DirectShow in the Capture mode dropdown menu.
- Select your webcam in the Video Device Name and your mic in the Audio Device Name.
- Tap the Play button to see the webcam footage.
- Click the Record button (red dot) to start recording.

- Tap the Record icon again to stop the video recording and save the file.
- Go to your Videos folder to see the saved file.

Besides these, you can also download YouTube videos using the VLC media player.
FAQs
What is the record button in VLC?
The record button of the VLC media player is under the playback menu. But you can access it from the playback window if you enable the Advanced Controls toolbar.
Where does VLC save recordings?
VLC player usually saves the recording files in the Videos folder by default. But for screen recordings, the apps keep the media in your chosen location.
Can VLC screen record with audio?
Yes, the VLC player can record your screen with audio, but you must enable it from the Play another media synchronously checkbox.
Conclusion
In short, VLC’s built-in recording feature is a valuable tool for creating high-quality recordings, and the steps are quite straightforward. Whether you’re looking to create tutorials, share gameplay footage, or simply record your desktop for future reference, VLC is an excellent option.
After reading this post, I’m sure you can record any video using the VLC media player. Comment if you face any problems during screen recording.
And for everything else, stick with 10Scopes.