To troubleshoot your PC components at a fundamental hardware level, there is no greater alternative than a simple breadboard. At a first glance, you may get confused about how to work with a breadboard.
Using a breadboard for your PC seems like checking whether your computer parts are functioning or not. To get the proper result, you need an in-depth guide for breadboarding a PC.
In this article, I will demonstrate a step-by-step guide for how to use a breadboard. Let’s dive into it.
How to Breadboard a Computer Like a Specialist
A breadboard is a thin plastic board used to test circuits without the hassle of soldering.
If you have to use a breadboard for your desktop, it means either you need to figure out whether all of your PC components are good or you want to check your recently bought PC parts before installing those in the case.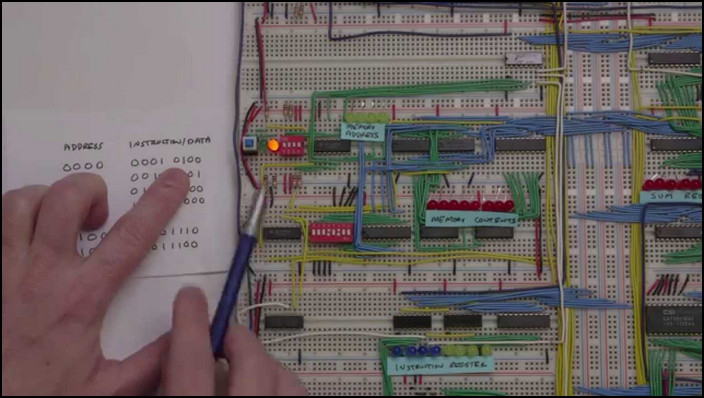
Breadboarding is often used by tech specialists to check if all the parts are functional or not. But it doesn’t mean a non-tech guy can’t use a breadboard. The process is similar for both troubleshooting and new gadget checking.
As this is a very basic barebone technique to check your components, you need only four main PC items at the beginning phase. The parts include your motherboard, a CPU with a ram stick & power supply aka PSU.
Check out our separate post on how to best $2200 RTX 3080 gaming PC.
Here are the steps on how you can breadboard a PC:
1. Get Familiar With Your Motherboard’s Specific Beep Sound
There are a couple of manufacturers of motherboards that offer different features to their customers. Most Motherboards have debug lights for CPU, GPU, RAM. They also make beep sounds according to the PC component’s status.
As we need the beep sounds to distinguish specific problems, we need to collect all the meanings of beep sounds for a specific manufacturer mobo. Usually, mainboard companies upload all their mobo-specific information on their website.
We should collect the meaning of every beep code from either motherboard’s website. Or we can get information from the manual that comes with the box of the motherboard.
For the breadboard, we will not use any external loudspeaker. So we have to use a 4-pin speaker to get the beep sounds from the mobo, in case the motherboard doesn’t have an integral speaker.
2. Use Anti-static Gloves
Dealing with computer parts needs some serious electricity caution. Most PC parts tend to damage prone to static charge.
This is why it is always advisable to ground yourself before working with electric components. As breadboarding is used on an open surface, this leads to exposing computer components. As a result, the risk of getting shocks increases if there are not enough precautions.
So how can you save yourself from THOR’s thunder unleash?
The most convenient way is to use anti-static gloves. Though it helps to reduce electrical emissions, a better alternative is to use an antistatic wrist strap attached to a metallic part.
That being said, always try to avoid working on the carpet floor, as carpets are a paradise for dust which works like a catalyst for static charge.
You also should ignore using an antistatic bag as according to MSI, an antistatic bag contains conductive material outside the area of the bag to protect the inner components. Instead, they suggest using the antistatic mat.
Check out our latest post about best $700 gaming PC build.
3. Prepare the PC Parts for Troubleshooting
After taking proper precautions, now you can gather the parts you want to test on a solderless breadboard.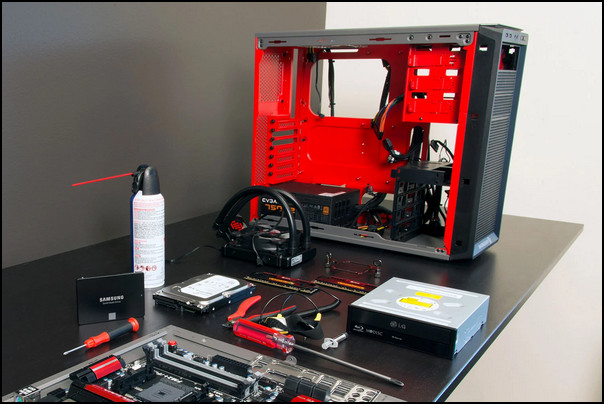
You need your newly acquired motherboard, CPU, RAM & PSU to test the parts. So that you can know whether these are dead on arrival or works like a charm.
However, if you want to troubleshoot your existing PC, you have to detach all peripherals & make sure the power is switched off. Subsequently, put off your motherboard from the case. Then place it back on the cardboard. Don’t forget to unclamp all the RAM sticks.
4. Connect the Hardware to Diagnose
Now, to begin the troubleshooting process, you have to set up the main parts one by one. Without a CPU, the pc won’t boot, so you need to install the processor first. After that, you can attach one RAM module & in the end, set up a graphics card if you owned any.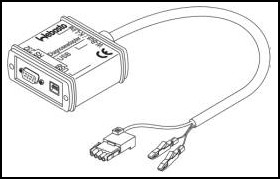
Here are the details of connecting the PC parts:
Mount Your CPU
Verify the CPU socket is compatible with the CPU, otherwise, the processor will not fit & work. Before putting the processor in the socket, look for any visible physical damage to the socket or any bent pins.
Every CPU has an indicator on the corner to properly seat on the socket. If that indicator matches, it will easily drop into the socket. After that, ensure the CPU’s clip which attaches the processor to the socket is properly tightened.
Now, for the requirement of running CPU, you need a CPU cooler with a fan connected to ATX connectors. Be sure to put a pea-sized thermal paste on the processor before attaching the CPU cooler. The cooler’s heatsink will automatically spread the paste, so no need to manually spread the paste.
Now it’s time to check if the CPU is ok. Turn on the PSU after attaching the cables. If everything is ok, the cooler’s fan will start rotating.
There’s nothing to be confused when your PC beeps a single time, indicating no RAM is installed. As we will attach RAM after this process, this beep sound is completely fine.
Also, check out the easiest way to fix PC won’t go to sleep mode in Windows 11.
Install RAM Stick
Now it’s time to examine the RAM stick. Before installing the RAM module, turn off the power & plug-out PSU cables. 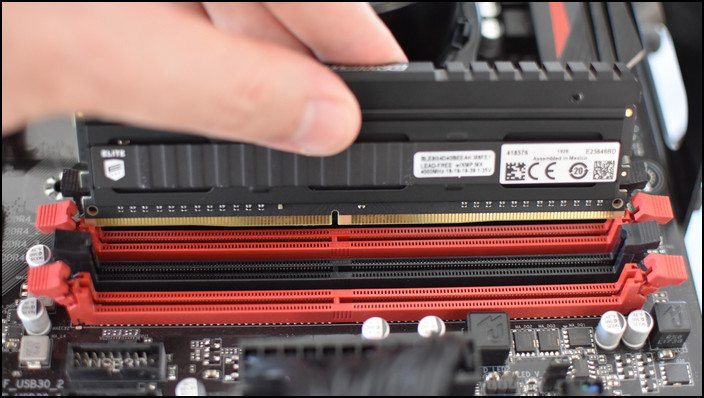 Installing Memory is fairly easy, as the slot is one-directional & will accept the RAM only that way.
Like the CPU section, inspect the RAM slot to check out any physical damage or dust to rule out a faulty slot.
After aligning the RAM stick, loosen the clips of the memory slot & insert the RAM. If properly placed, the clip will lock the RAM. You will hear a clicking sound when it clips the stick.
Now power on the system & check for any beep sounds that indicate faulty RAM.
If the RAM is ok, there will be no beep code for damaged RAM. If there are extra memory slots & modules, you can check those in the same way mentioned above.
Now, you may not hear any beep codes related to defective RAM, but you may get beep codes for the absence of GPU. The latter part will cover this topic.
Seat Your Graphics Processor Unit
Installing GPU is pretty straightforward. If the GPU is new, there will be a plastic cover protecting the display output slots. You should remove those in order to connect cables to a monitor.
Then find the nearest PCI-e X 16 slot to the CPU & put the GPU into it. The reason for the closest slot to the CPU is, it will use the CPU lane which is better in terms of performance instead of the chipset lane.
Like the memory slots, there is a clip for the GPU to lock it to the slot. After putting the GPU in the slots, ensure the clip is attached properly. If the GPU requires extra power connectors from the PSU, plug those cables.
Now power on the system & check everything is running smoothly.
Check out our separate post on top 5 best water cooling radiator for water cooled PC.
How to Startup System Into BIOS
On a breadboard, only a few major pieces of hardware are attached. Due to the lack of any SATA devices or storage devices, we will not have any operating system installed.
For this reason, we will boot into BIOS to check further things if needed.
To do this, we need to connect the keyboard & monitor at this stage. Generally, each manufacturer has a unique hotkey to enter in BIOS.
You can find this hotkey on the motherboard’s website. After powering on & entering BIOS, you can check furthermore.
What are Some Cautions During Breadboarding a PC?
A breadboard is used to troubleshoot PC hardware. However, you should maintain some caution, so that your experiment with the breadboard works flawlessly.
Here are some significant items you have to be careful of during breadboarding:
- Compatible Sockets & Cables: This is a common mistake for a novice user to not fasten cables, which leads them to look for solutions everywhere. You need to make sure the cables are properly attached to the connectors. Seating PC parts to the proper sockets is another thing beginners often ignore in the first place.
- Proper Use of Thermal Paste: Using a proper amount of thermal paste is very crucial. A large volume of paste can overflow, which can damage motherboard parts. Again, a small portion of the paste is also bad, as it will not cover the chip fully. This will lead to the chip running hot & reduce its lifespan.
- Ensure the Proper Placement of Motherboard Standoffs: If the motherboard standoffs are not properly seated, it can touch the case’s metal part. This can result in electric shorts
- Correctly Connected Hardware: Your CPU, RAM & GPU should be seated properly. Or else it will prevent the system to boot. You have to check whether your RAM’s DDR version is compatible with your motherboard’s RAM slots. If you have more than one memory stick, using dual-channel will increase system performance.
Final Thought
Your dream PC can arrive as DOA or a tech geek can advise you to troubleshoot your computer parts by using a breadboard.
In this article, I explained a stepwise guide about how to use a breadboard to find out faulty hardware. If you still find any difficulty, don’t forget to comment.