Finally, you’re glad & excited that you have updated the OS to Windows 11! But after using a while something seems not okay, specifically, the drag & drop feature isn’t working at all.
Is it a bug or glitch in the newly updated OS? Or how to make it work again?
Well, if you’re desperate to know the exact cause and how to fix it, this article will pave the way for you. So, without further ado, let’s begin!
Why is Drag and Drop Not Working on Windows 11?
The drag-and-drop feature is not working on your Windows 11 PC because Microsoft deliberately disabled that feature in Windows 11. After launching the Windows 11 21H2, the Sun Valley edition, Windows 11 users could not drag & drop files on any open apps on the Taskbar.
Later, it was brought back with the Windows 11 22h2 update.
After upgrading to Windows 11 from Windows 10, many users reported that they faced the drag-and-drop feature not functioning on their Windows 11 computers.
All Windows users have been familiar with the drag-and-drop feature for a long time, as it is like a basic Windows operation. The feature helps drag a file onto an app in the Windows Taskbar menu to open it easily and quickly.
Sometimes due to stability issues in Windows 11, features like this might fail consequently. Also, malware can block this new OS’s drag & drop features.
Apart from this issue, users also reported that widgets were not working in Windows 11, and you can fix it too just like you can fix the drag & drop issue.
How to Fix Drag and Drop Not Working in Windows 11?
To use the disabled drag & drop feature in Win 11, you can use the Alt + Tab key to select the opened apps and drop the files to the required app. Plus, utilize Windows 11’s snap layout feature to transfer content between folders or apps. You can also use the Win 11 split-screen feature.
You already know that once Microsoft officially disabled the drag-and-drop operation permanently from Windows 11. But later in Win 11 22H2, they enabled that feature again. So, if you have an older Windows 11 version, you can’t drag-and-drop like before.
You must install the latest Windows 11 at least 22H2 to resolve the drag-and-drop issues on your PC. However, if you’re still having this issue, keep reading.
Here are the methods to fix the drag and drop not working on Windows 11:
1. Use the Alt + Tab shortcut
When you press Alt + Tab key it will show all the opened apps in the Taskbar. After pressing Alt + Tab, hold the Alt key and press & release the Tab key to open the desired app.
However, if you are unfamiliar with this drag-and-drop technique, follow the below steps to use the shortcut key when drag & drop is out of order in Windows 11.
Here are the steps to use the drag-and-drop feature via the Alt+Tab shortcut:
- Open the drive location or application where you want to drop the file or folder.
- Go to the location where your file or folder is located.

- Select the file or folder that you want to drag and drop.
- Click & hold the left mouse button and drag the file or folder slightly.
- Press Alt + Tab keys while holding the mouse button on your keyboard to view all the open app windows.
All available apps will be listed as individual tiles in this section. The presently open or most recently opened window will be listed first, followed by the previous window, and so on.
- Hold the Alt key and press the Tab key to browse the open windows.
- Select your desired tab and release the Alt key to open the program or location.
- Release the left click when the destination window appears to dropfiles and folders.

This is how you can alternatively use the drag & drop in Windows 11 in case the usual one is out of order. Besides this annoying problem, you might also face the volume mixer not working in Windows 11 while playing music or watching movies but there are fixes for it too.
2. Restart Explorer
Sometimes Windows Explorer gets malfunctioned and then the drag & drop might not work. So you can restart the Explorer to fix this issue.
- Press Ctrl + Shift + Esc to open Task Manager.
- Go to the Processes tab and look for Windows Explorer.
- Select it and click on the Restart task button.
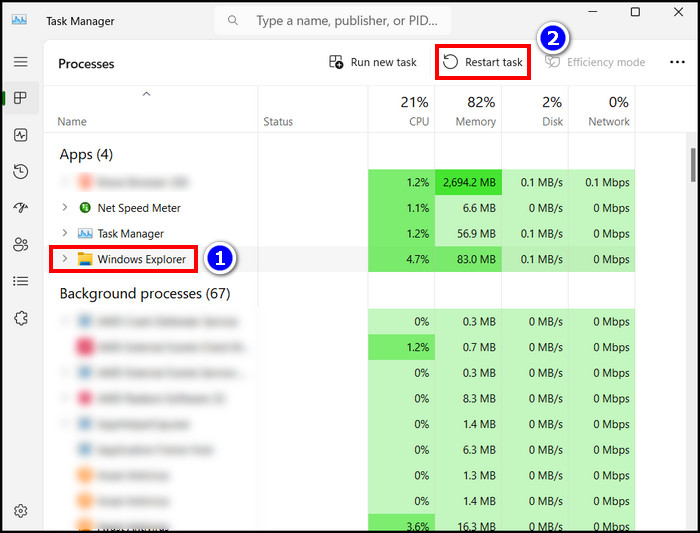
After that, the desktop icons along with the taskbar will get vanish for a moment. But don’t worry they will return immediately. Now, exit from the Task Manager and check whether the drag & drop is functioning okay.
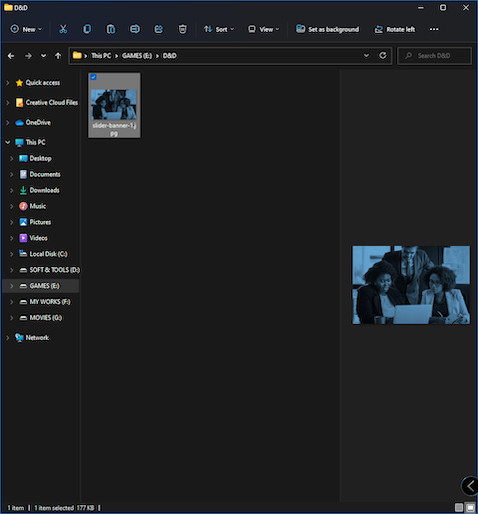
3. Utilize Windows 11 Split-Screen Feature
Another effective method to drag and drop files or folders is to open two Windows on the split-screen mode. In Windows 11, the split-screen feature is very convenient and helpful.
Follow these steps to open two windows in split-screen to drag and drop:
- Open the drive location or application to drag and drop the file or folder.
- Go to the place where your file or folder is located.
- Hover your mouse cursor over the current window maximize button, and you can see the split-screen option is visible.

- Using the first option to make the current window fill half the screen.
- Choose the window to move the file or folder in the other half. All of the additional open apps are listed in the other half.
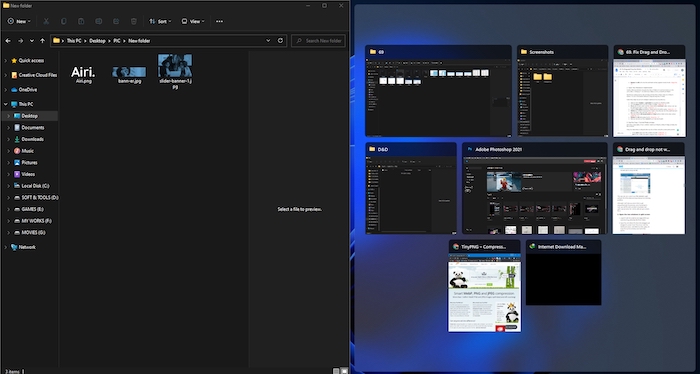
- Click and hold the left mouse button and drag the file or folder to the other window.
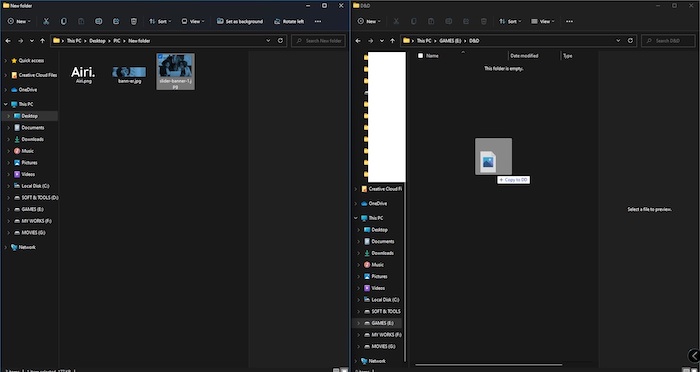
- Release the left click to drop the file.
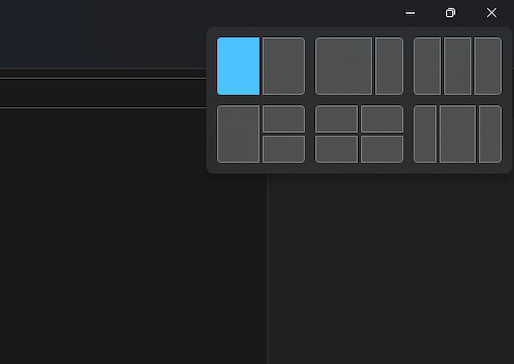
Pro Tip: This split screen feature works the same as the Windows 11 Snap Layout feature. To enable it when you’re in the exact folder or app press Windows +Z and the Snap Layout will appear in the top right corner. You can choose between two, three, or four-window modes.
4. Edit the Registry
As editing or modifying the Windows Registry Editor can make root-level changes to the system, it might be the resolution to your problem.
Follow these steps to enable drag and drop by editing the Registry:
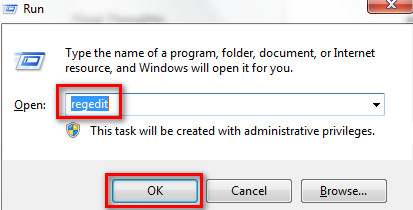
- Press Win + R keys on your keyboard to open the Run window.
- Type regedit in the Run dialogue box.
- Press the Enter key on your keyboard or click the OK button to open the Registry Editor.
- Click the address bar and remove the existing address.
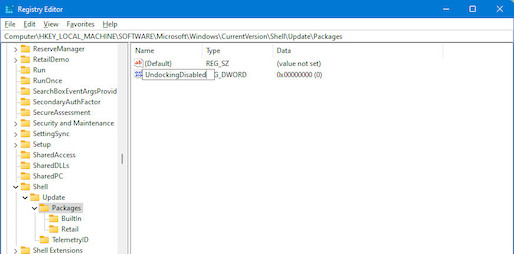
- Enter the following path into the address bar to navigate the path:
HKEY_LOCAL_MACHINE\SOFTWARE\Microsoft\Windows\CurrentVersion\Shell\Update\Packages
- Right-click on the right-side screen space, choose New >DWORD (32-bit) Value.
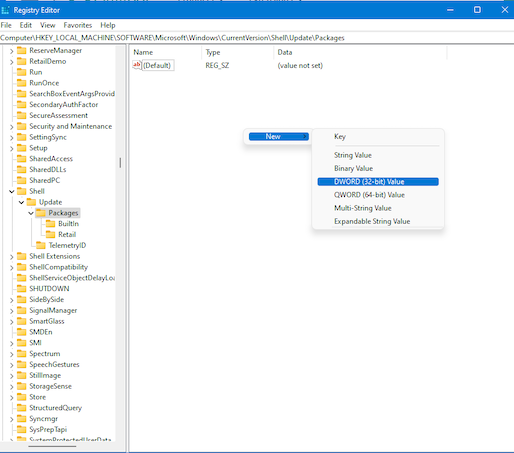
- Enter the name of the value as UndockingDisabled.
- Right-click on it and select the Modify.
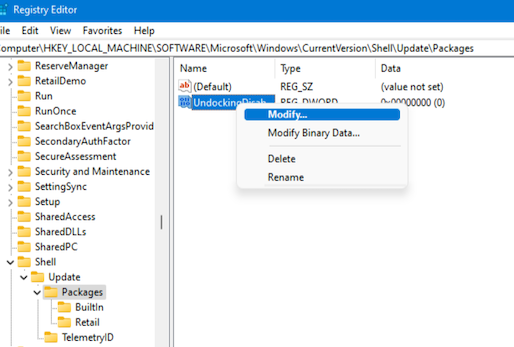
- Enter the value one (1) into the Value data field.
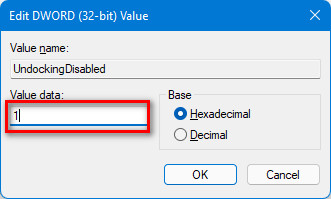
- Click on the OK button to apply the changes.
- After saving the changes, close the Registry Editor and restart your computer.
Check if you can drag and drop items after following these steps.
NOTE: This approach has a significant drawback. After making registry changes, you won’t access the Start, Search, or Cortana menus from the taskbar.
5. Run the SFC and DISM Scan
Corrupt system files sometimes block the usual operation of the Windows system. If there is a malfunctioned system file in Windows 11 you won’t be able to drag and drop files into the folders or application into the opened app on the Taskbar.
To fix this you can run the System File Checker (SFC) and Deployment Image Servicing and Management (DISM) scans to check corrupted system files in Win 11. Running the SFC will find corrupted files through a scan and replace those with the working files.
And DISM scan works the same and it gets the replacement working files directly from Microsoft.
Here are the procedures to run SFC & DISM scan with Powershell to fix the drag & drop issue in Win 11:
- Press Win key + R to launch Run.
- Type powershell and press Ctrl + Shift + Enter to launch it as an administrator.
- Enter the following commands and hit Enter.
sfc / scannow 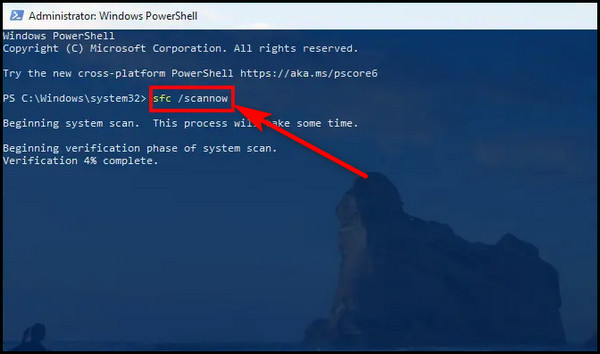
- Run the DISM scan after the SFC scan is completed successfully.
- Type the following command and hit Enter.
DISM /Online /Cleanup-Image /RestoreHealth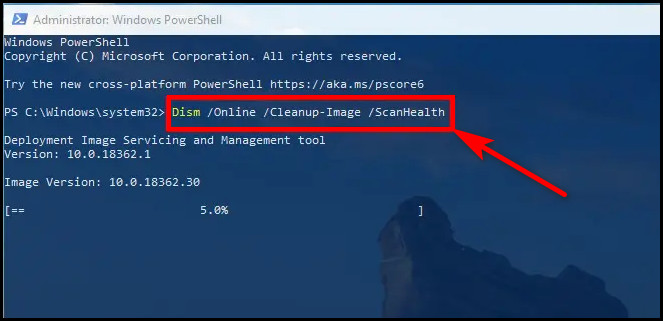
Please keep patience while the scanning is going on because it will take some time. After the DISM scanning process is completed 100%, try to drag & drop the files or folder into the opened apps in the Taskbar. I bet it will work flawlessly as it was before.
6. Use the Copy/Cut and Paste process
Using the cut and paste process is another easiest and most effective method to drag and drop your files or folders. Here’s how you can do that:
- Go to the place where your file or folder is located.
- Select the file or folder you want to drag and drop.
- Right-click on the file or folder and select the Copy or Cut icon.
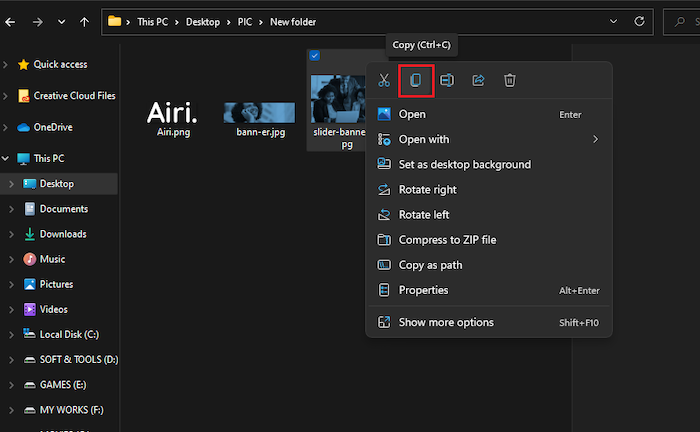
- Open the application where you want to drop the file or folder.

- Right-click on the text or file input area and choose the Paste option.
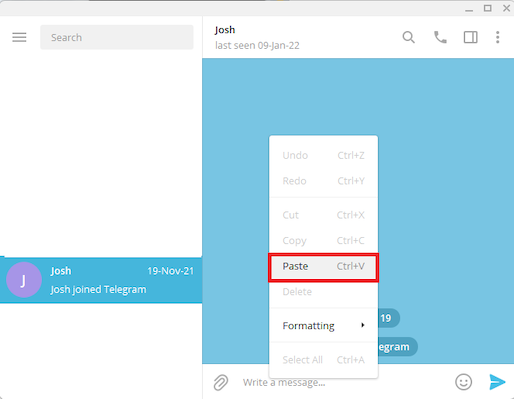
Now you can see your file is dropped to your desired location. If not, well, move to the next one.
Final Thoughts
Though the problem is fixed by now, some users still faces it. The methods in this post are highly effective to solve the problem. So, apply them precisely, and comment below which method worked for you. Peace!

Thanks this is really helpful!
I cant belive they removed it!
Thanks. The 1st Solution works well for me.
First and second method works well for me. Thanks
Why did they remove this feature?
Microsoft periodically updates its operating systems for new changes and features.
OMG thank you so much! The registry edit worked like a charm. Literally the best feature.
With the version 22H2 update on 09/21/2022 Microsoft finally fixed it
Thanks a lot, the 1st option Alt+tab is working fine and easy to use and adopt.
Many thanks.