File sharing in Windows is a lot easier than in other operating systems. You don’t need to use any storage device to transfer your files. Using a systematic approach is enough for network sharing/file sharing.
But due to some technical errors, Windows file sharing can get complicated sometimes. And when that happens, other users can’t access the vital file/folder you shared/made visible.
To avoid such scenarios, there are easy solutions that you can apply. This article is about finding out why Windows file sharing is not working and how to resolve the issue.
Continue reading till the end.
Follow our guide on how to Change File Attributes in Windows 10/11
Why is File Sharing not Working Windows 11/10
Incorrect file sharing settings are the most valid reason why you can’t share files on Windows 11 PC. Additionally, if you haven’t created a Windows credential or your file sharing connection isn’t compatible, you won’t be able to do network sharing in Windows 11.
However, disabling the SMB 1.0 (file sharing protocol) can also be a reason behind sharing issues.
When these problems prevent you from network sharing, you might get these messages on Windows 11:
- Can’t access shared folders from File Explorer in Windows 10/11.
- You do not have permission to access \\<IPAddress or Hostname>.
- You can’t access this shared folder because your organization’s security policies block unauthenticated guest access.

Also, sometimes you may get an Error code: 0x80004005. Unspecified error.
If any of those error messages appear on screen, you can try the following solutions that I’ve added later. I can assure you after implementing those, your file sharing issue will be resolved.
How to Fix File Sharing over Windows Network not Working
Allow Windows file sharing through Windows firewall settings. After that, check whether the required service for file sharing is turned on or not. Then restart your computer. Disable password-protected sharing and turn on the SMB 1.0 sharing protocol.
I’ll explain every solution in detail; just bare with me through the process.
Here are the solutions to Windows file/network sharing not working:
I know it’s a bit silly to talk about this method at first. But hey, we’re not machines. We can mistakenly overlook the sharing status of the file/folder. So, it’s best to verify the file’s sharing status.
Here are the steps to check whether you’ve shared a file or not:
- Right-click on the folder you want to share and select properties.
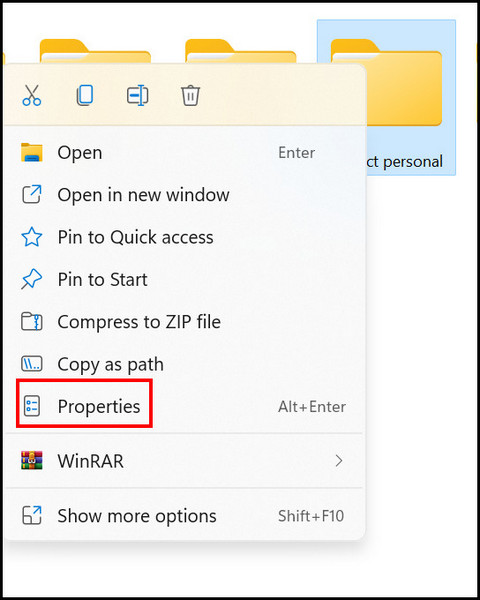
- Go to the sharing tab when a new popup window appears.
- Locate the network file and folder sharing option on the top, and verify the shared status.
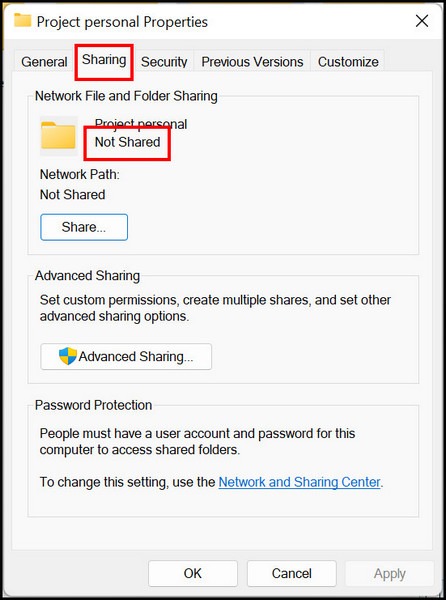
If the folder indicates as shared, but even after that, you can’t access files from a different computer, try the following solutions.
Check out the easiest way to Fix Error 0x80004005: Unexpected Zip File Error on Windows
2. Turn on Network Discovery to Enable File Sharing
Network discovery is by default enabled in Windows 11. But, due to some system errors, Windows tend to turn off the feature. Hence you get the message Can’t access shared folders from File Explorer in Windows.
You need to re-enable file sharing to turn on printer sharing and network discovery.
Here are the steps to enable network sharing in Windows 11:
- Locate Control Panel from Windows 11 search menu.
- Navigate to Network and internet > Network and sharing center.
- Click on Change Advanced sharing settings from the left pane.
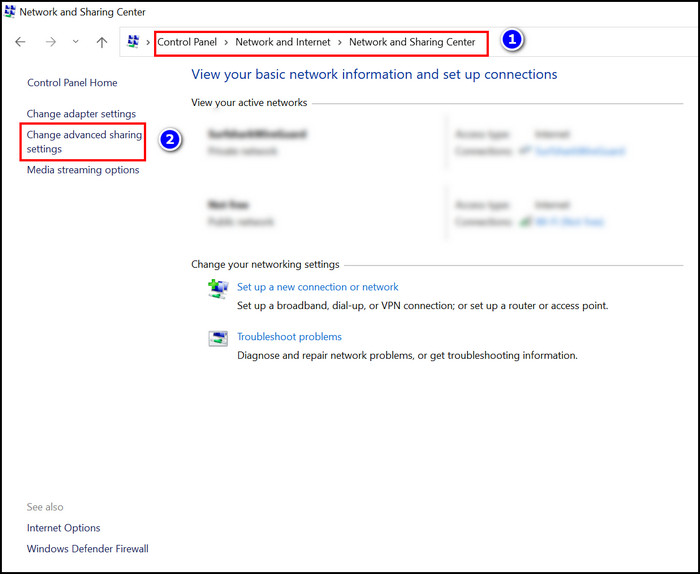
- Tick the boxes that say Turn on network discovery and turn on file and printer sharing.
- Select save changes from the bottom to finish the process.
Restart your computer once you finish the procedure. File sharing won’t be an issue after this solution.
3. Tweak Windows services to Make your Computer Visible for Sharing Files
When you can’t access the shared folder in Windows, the reason behind that might be ― Windows sharing services are turned off.
You can easily modify the services to enable file sharing/ network sharing. That will make your file/folder visible for sharing.
Here are the steps to run the sharing services in Windows 11/10:
- Click on the Windows 10/11 start menu, type Services, and press Enter.
- Locate these services on the services menu;
- Function Discovery Provider Host.
- Function Discovery Resource Publication.
- SSDP Discovery.
- UPnP Device Host.

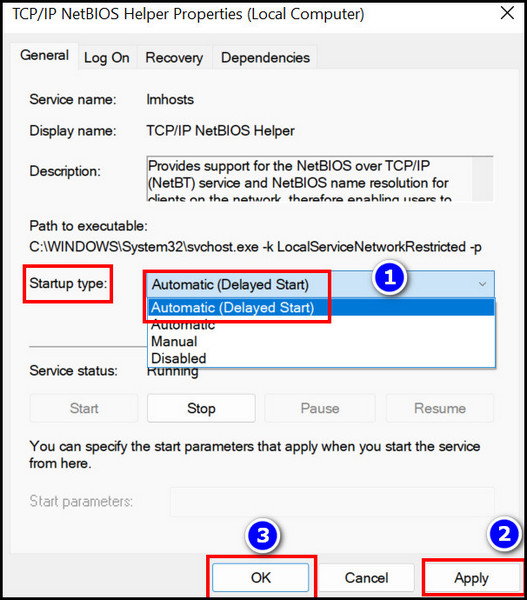
- Double-click on each of the services and change the startup type to Automatic.
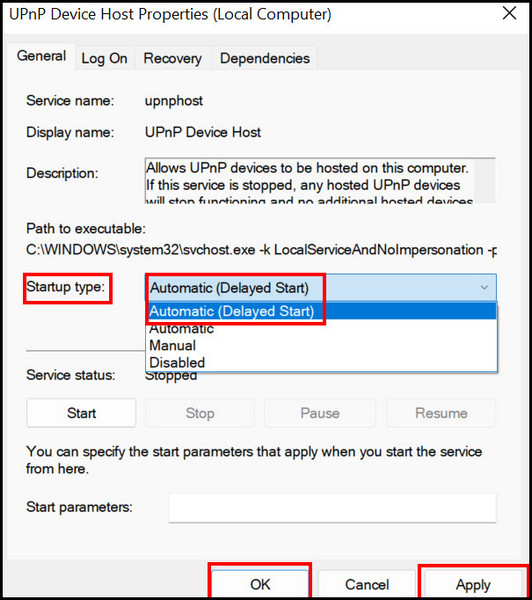
- Restart your computer after changing each of the services.
You’ll notice that file sharing is working perfectly on your computer.
Here’s a complete guide on how to Enable or Disable File History on Windows 11
4. Make Sure you Created a Windows Credential
Windows credential is a must if you’re sharing files via the Windows network. You can’t access a folder on remote servers without knowing the IP address, username, and password. That prevents intruders from accessing important files.
Here are the steps to add a Windows credential:
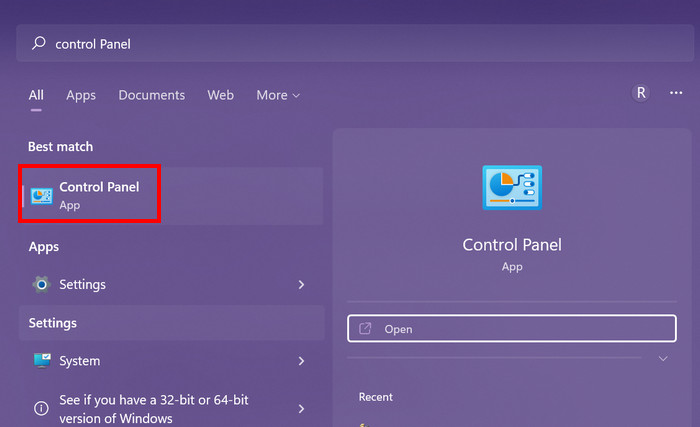
- Open Control Panel from the Windows search menu.
- Navigate to User Accounts > Credential Manager > Windows Credential.
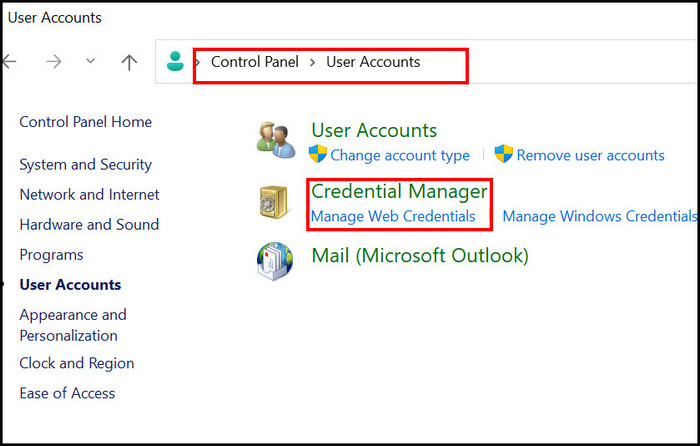
- Click on Add a Windows credential from the bottom.
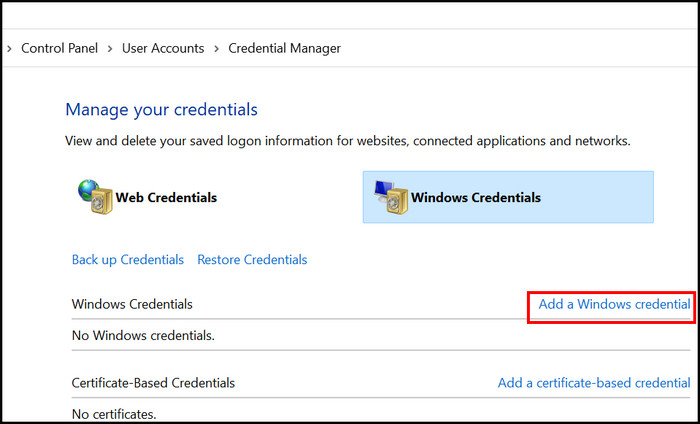
- Provide the IP address of the computer that shared files. Also, input your username and password.
After that, click ok to save the changes. Try the following methods if this solution can’t help you with the file sharing issue.
5. Enable Full Control for Sharing Files
When sharing to everyone feature is not enabled, the receiver won’t be able to access the files/folder you shared. An error message can also show up— You do not have permission to access \\<IPAddress or Hostname>.
To eliminate the issue, make sure you turn on file sharing permission for everyone.
Here’s the procedure to share permission with Everyone for the folder you want to share:
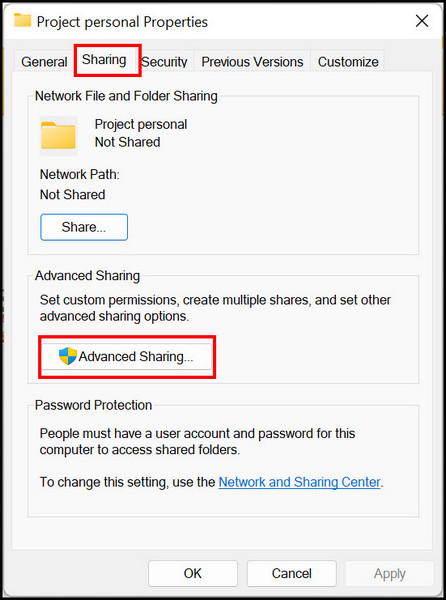
- Right-click on the folder you want to share and select properties.
- Move to the Sharing tab and click on the Advanced sharing option.
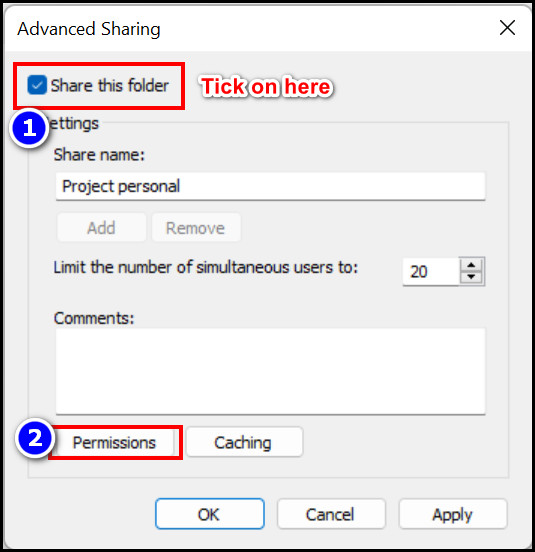
- Tick on Share this folder, then select permission. A new window named Permissions for program files will appear on your screen.
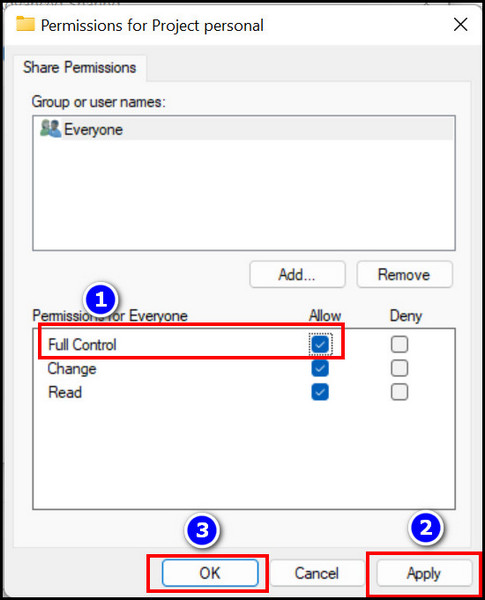
- Check on boxes Full Control. Make sure all three boxes are ticked on.
- Click on Apply > Ok to save the changes.
After applying these steps on your computer, the file sharing problem with Windows 11 will be resolved.
Check out the easiest way to switch domain controller on Windows.
6. Turn on SMB 1.0 Support Feature
Though Microsoft declared that SMB 1.0 is no longer needed for file sharing, disabling the feature can deter file sharing. Hence you get the error message; Windows can’t access shared folders from File Explorer in Windows 10/11.
Turn it on if the SMB feature is still available on your PC.
Here are the steps to turn on SMB 1.0 to fix Windows 11/10 file sharing:
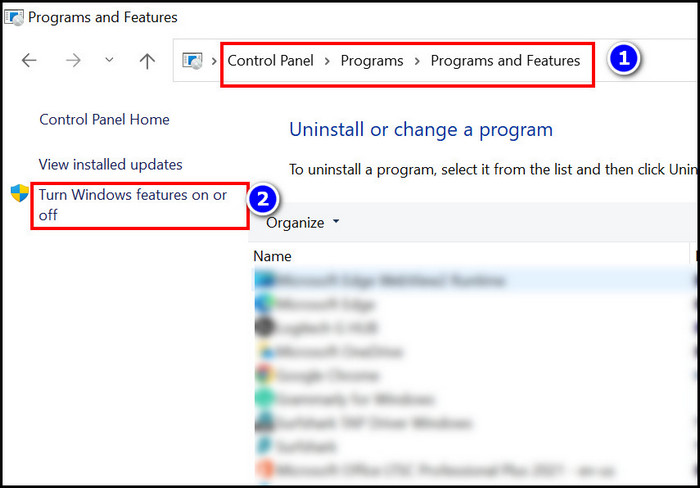
- Search Control Panel in the Windows search menu and press Enter.
- Navigate to Programs > Programs and features.
- Click on Turn Windows features on or off from the left menu.
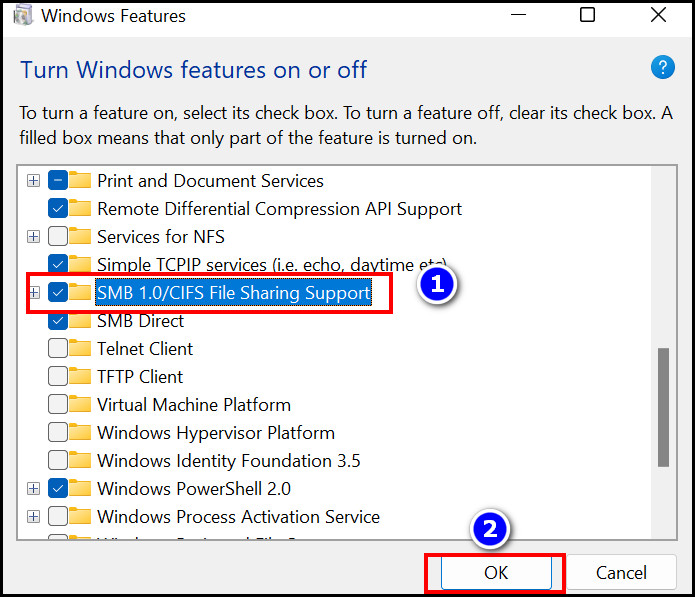
- Scroll down when the new window appears to locate SMB 1.0/CIFS File Sharing Support.
- Tick on that feature and click Ok.
Restart your computer after implementing this method. File sharing on Windows is not going to be an issue after this.
7. Change File Sharing Connection
Usually, windows use 128-bit encryption for protecting shared files. But, not every device support 128-bit encryption. And when your device doesn’t allow this encryption, accessing shared files becomes difficult.
So, switch the encryption process to 40- or 60-bit encryption.
Here’s the process to change the file sharing connection on Windows 10/11:
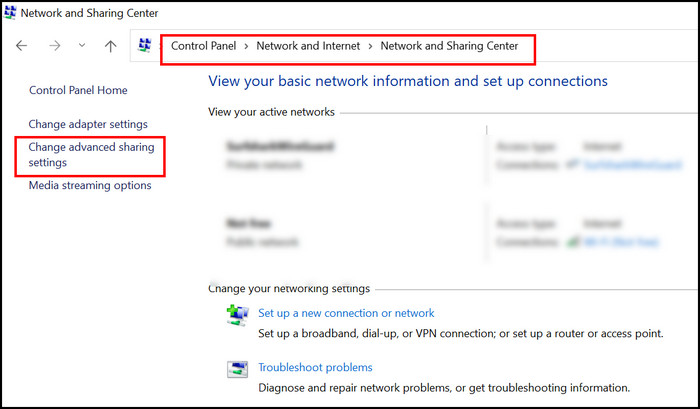
- Open Control Panel on your computer.
- Navigate to Network and security > Network and security center.
- Click on the Change advanced sharing settings from the menu bar.
- Expand the All network section.
- Locate File sharing connections.
- Tick on the 40- or 56- bit encryption menu if you’re using 128-bit encryption and vice-versa.
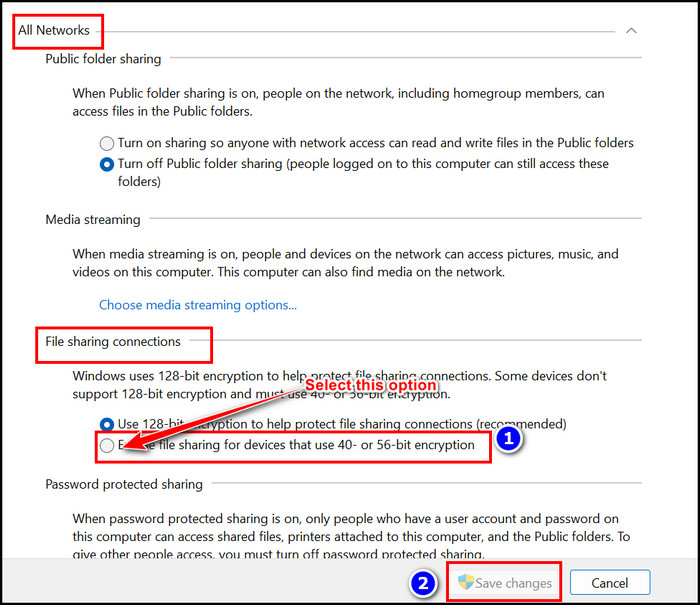
After choosing an encryption system, click on save changes and then restart the computer. That will resolve your issues with Windows sharing files.
8. Make Sure TCP/IP NetBios is Enabled
If you get this error message while sharing files, You do not have permission to access \\<IPAddress or Hostname>, enabling NetBios can help solve the error.
Here are the steps to enable TCP/IP in Windows 11/10:
- Go to the Windows search menu.
- Type Services and hit Enter.
- Double-click TCP/IP NetBIOS Helper on that menu.
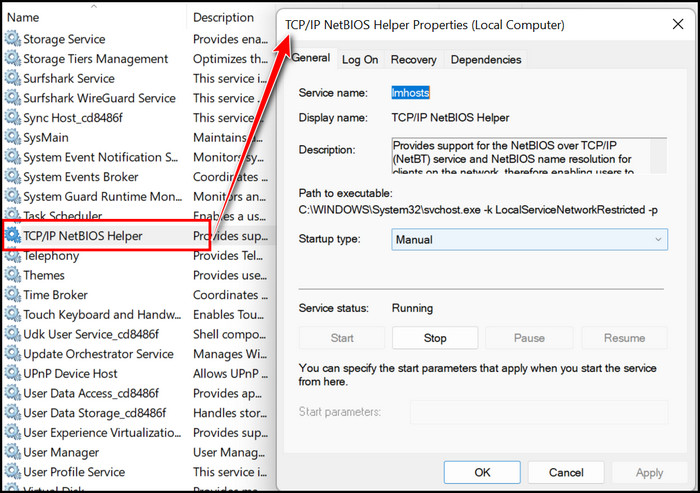
- Set the Startup type property as Automatic.
- Open the control panel and move to Network and Internet > Network and Sharing Center.
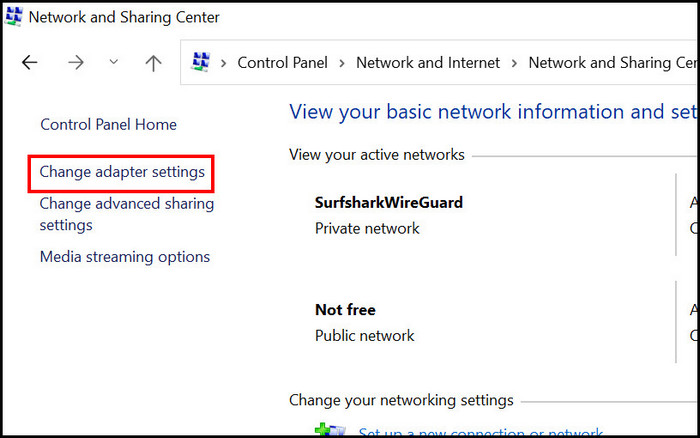
- Click on Change adapter settings from the left menu.
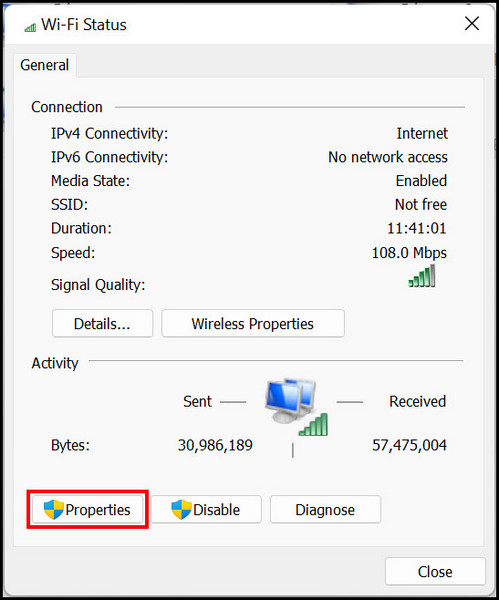
- Double-click on the internet source you’re connected to.
- Select Properties from the bottom.
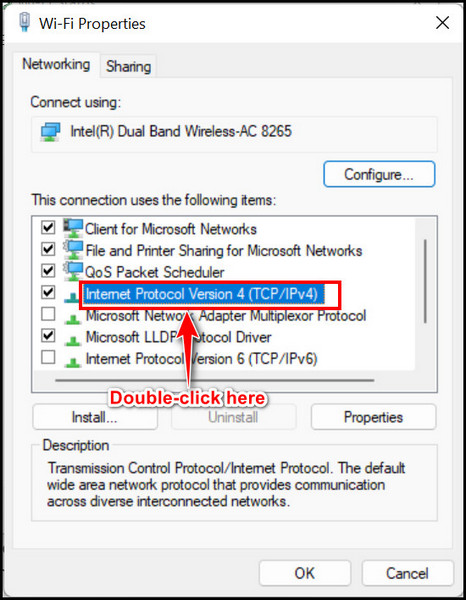
- Double-click on Internet Protocol Version 4 (TCP/IPv4). A new window will pop up.
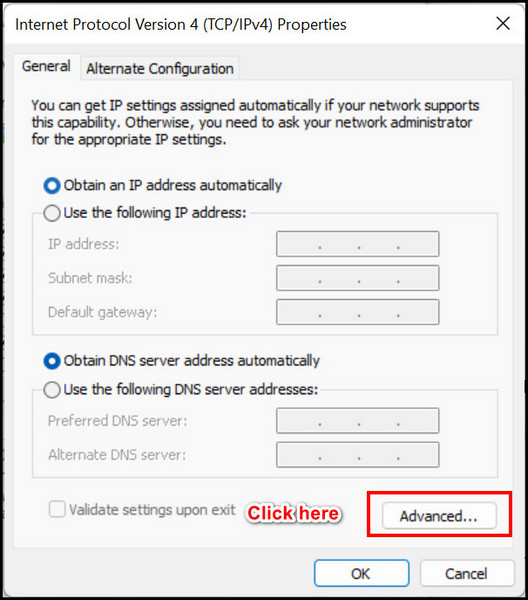
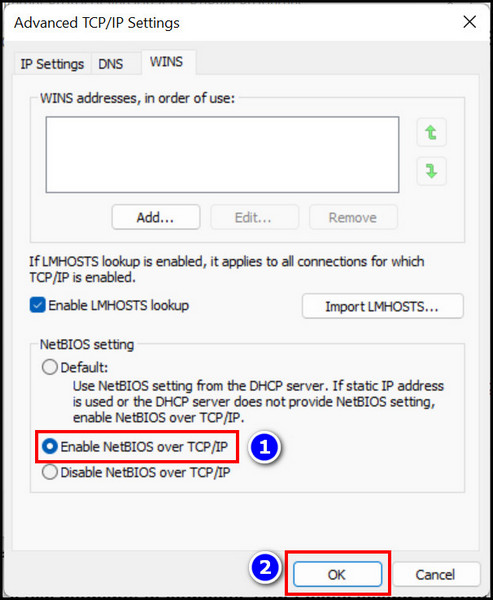
- Select Advanced TCP/IP settings from the bottom and move to the WINS tab when the following dialogue box appears.
- Tap on the option Enable NetBios over TCP/IP > Click Ok to save the changes.
Note: This process will take a few moments to complete. Don’t panic seeing the long list of actions. After applying these steps, You will surely be able to share files in Windows 10/11.
Make sure you follow the procedure as I explained here. These steps can get 100% effective when you can’t share files in Windows for the wrong TCP/IP setting. Also, you can disable IPv6, but I think that won’t be necessary after this solution.
Also, check our exclusive tutorial on how to Flush ARP cache on Windows 11.
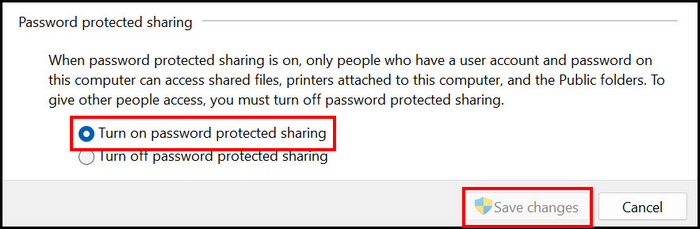
9. Disable Password Protected Sharing
When password-protected sharing is enabled, you need a username and password to access the files/folders. That’s not possible to share the folders with multiple users. You must turn off password protection to avoid such scenarios.
Thankfully, you can disable the password-protected file sharing manually.
Here’s the procedure to turn off password-protected file sharing in Windows 11/10:
- Click on Control Panel from the Windows 10/11 start menu.
- Navigate to Network and Security > Network and Sharing Center.
- Click on Change advanced sharing settings from the left pane.
- Expand the All Networks submenu and scroll down to the Password Protected sharing option at the bottom.
- Check on the box Turn Off Password Protected Sharing.
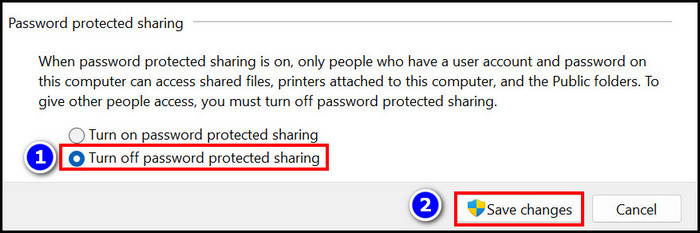
- Click on save changes and restart your computer.
Try to share the necessary files/folders now. I’m pretty sure file sharing won’t be an issue after using this proven method.
You should try these solutions when you can’t share files/folders between Windows computers for technical reasons. But, do you know the proper way of file sharing in Windows? Check out the following section to know how to share files.
Sharing files without using a device may seem complicated, but trust me! You don’t need gadgets to share files from Windows. And if you’re moving files remotely, those hard drives/pen drives gets quite useless.
Using a Windows network service for file sharing can be really amazing. Just follow the steps I’ve included here, and network sharing won’t be as complicated as before.
Here are the steps to share files/share network on Windows 10/11:
- Open File Explorer on your computer and navigate to the folder you want to share.
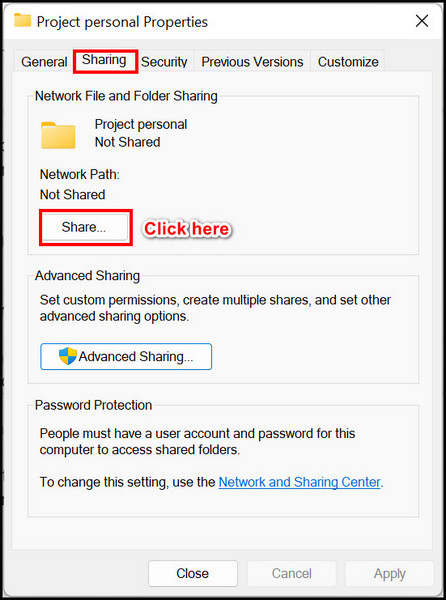
- Right-click on the desired folder and select properties.
- Move to the sharing tab and click on the share button.
- Select the person to share the folder using the drop-down menu – for example, select Everyone.
- Select add after you choose a user from the dropdown menu.
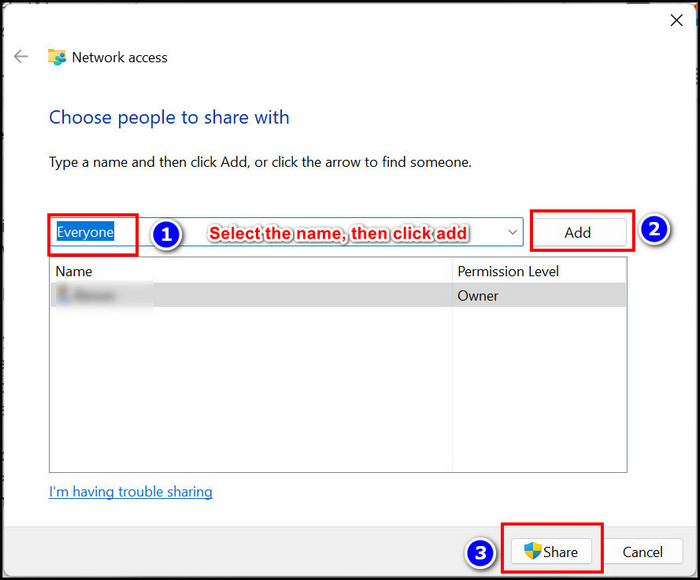
- Click the Share button > Select the No, make the network that I am connected to a private network option (if applicable).
- Copy the folder’s network path and send it to someone you want to share files/folders with.
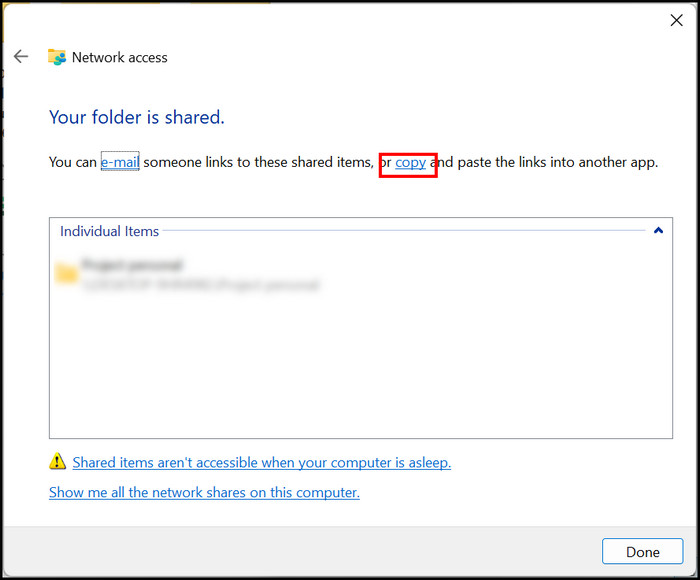
After that, the other users will be able to access your computer (the folder you shared). You can use other methods to share files, but to me, this is the best way for beginners.
If you have further queries regarding file sharing issues over Windows, check out the FAQ section below.
Frequently Asked Questions
Why is file sharing not working?
The outdated version of Windows is the main reason behind file sharing isn’t working. Apart from that, if the shared link for a folder gets expired or when the file owner changes the folder location manually, file sharing won’t work properly on Windows 11/10.
Can’t connect to Windows File share?
Open registry editor in Windows 11 > Navigate to HKEY_LOCAL_MACHINE\SOFTWARE\Policies\Microsoft\Windows\LanmanWorkstation > Create a new DOWRD 32-bit value named AllowInsecureGuestAuth > set the value data as 1 > save data.
How do I enable file sharing in Windows 10?
Control Panel > Network and Internet > Network and sharing center > Change advanced network settings> Turn on sharing so anyone with network access can read and write files in the Public folders > 128-bit encryption.
Conclusion
If you’ve read this article from top to bottom, then I’m pretty sure what you need to do when Windows file sharing is not working. However, I’d love to clear out the meaningful solutions even though you know all of them.
First, turn on the computer’s network discovery, then create a new Windows credential and modify Windows services to share files properly. Also, enable the TCP/IP for a more convenient outcome.
Don’t forget to mention the solution that resolved your issue. Remember, you can save a lot of people’s time just by commenting on the ideal solution for you.


I would like to include what I found after pulling my hair out for a week trying to figure out my issue, which I only figured out after taking a couple deep breaths and collecting my thoughts over a stiff bourbon, LoL. I suggest, especially if 1 format (say videos) is accessible, while the others are not, they try this. Go to WMP – File – Manage Libraries and notate library location exactly. Go to that EXACT library location and make sure it is set up per your instructions to share. What I found upon a closer inspection was it’s easy to set the wrong media location address to your network as there are multiples listed in the folder/drive list pane on the left of the explorer window. For whatever reason the WMP won’t connect the dots and will not share unless the correct library location is shared.