Microsoft Word offers many features for the benefit of its users. With those amazing options, you can make your word document more eye catchy and compact.
Suppose you want to say something interesting to your recipient but don’t want to express it in words, then creating a drawing can help you. With this drawing feature in MS Word, you can give a visual representation to your viewer.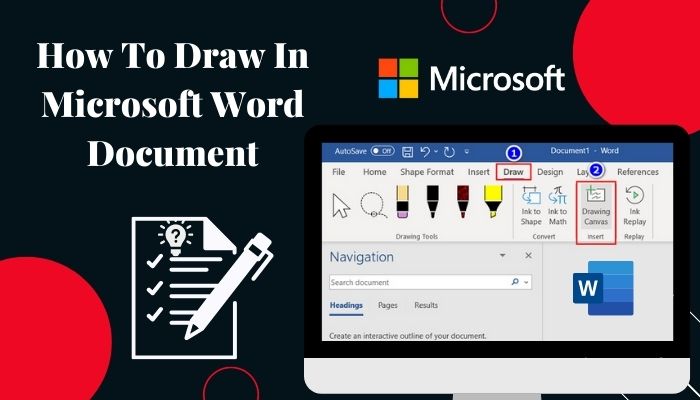
But many of you don’t know how to add a drawing to your MS Word. Don’t be troubled in this article; I will show the way of adding a drawing in Word. Also, there are some guidance pictures for your aid.
Don’t miss out on anything from this article if you want to increase your MS Word skill.
Let’s start!
Is there a Draw Tool in MS Word?
Yes, there is a Draw tool function in MS Word, and you can use this feature to add freehand drawings to your Word document. Attaching a visual art is possible due to this drawing option. Your MS Word skill will definitely improve if you know how to use this feature.
Sometimes the graphical representation of an idea can be more detailed and easy to understand for users. Developers of Microsoft also know that hence they implement the Draw option in their product.
You can see different types of pens and functions when you hover through the Draw section on MS Word. Select the Pen with which you want to draw and start drawing; it’s as simple as that. But for some users, there is no Draw section on their Microsoft Word.
If you want to know how to activate this Draw option on your MS Word, read through this article.
Also, check out our separate post on how to Why is my Word Screen Black with White Text.
How to Draw on MS Word with the Draw Function
There is an inbuilt Draw Function in Microsoft Word. This option helps to add a unique drawing to the Word document. However, for some users, this feature doesn’t appear. If that’s the case with you, activate the Draw option and use them afterward.
Here are the steps to draw on MS Word with the draw function:
1. Activate the Draw Function on MS Word
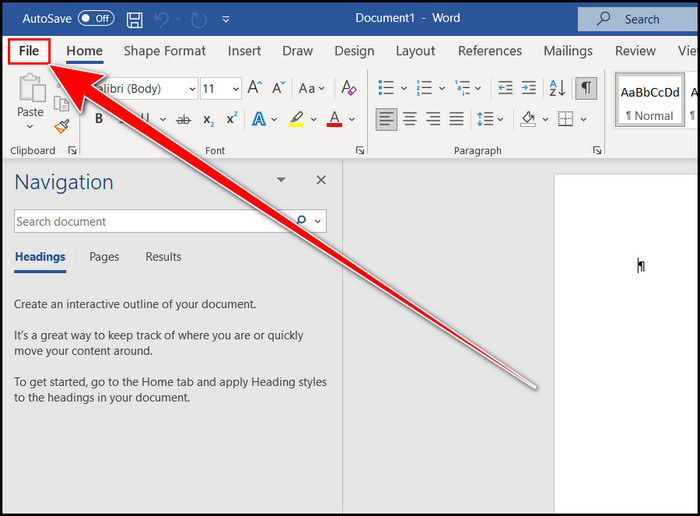
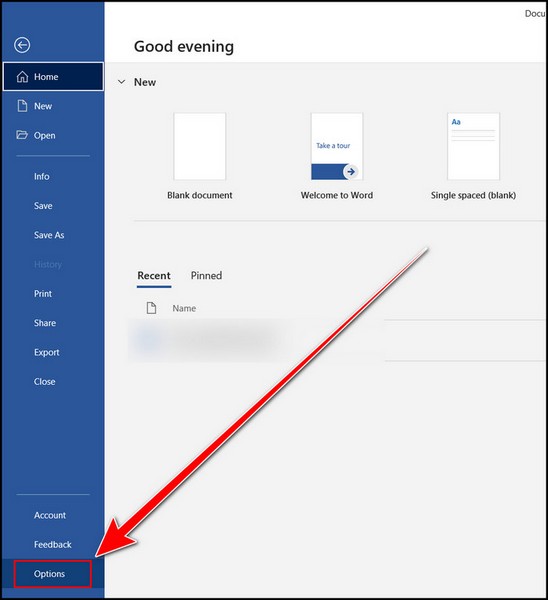
If you don’t have any Draw section on your MS Word, click on the File section and open the Word option. Choose the Customize Ribbon and enable the Draw section.
Here are the steps to activate the Draw function on Microsoft Word:
- Launch the MS Word program.
- Click on the File section.
- Select the Options section.
- Move to the Customize Ribbon option.
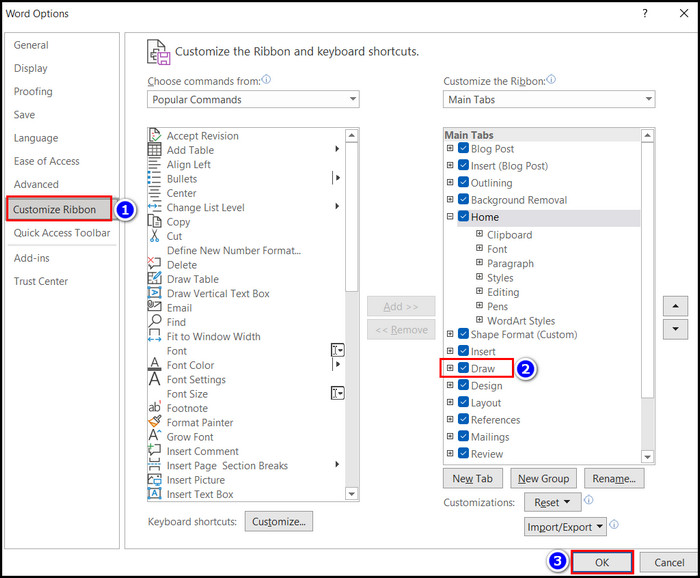
- Enable the Draw checkbox under the Main Tabs box.
- Press the OK button.
Immediately you will notice the Draw section is added to the MS Word top-down menu.
Here’s a complete guide on how to Find and Replace Text in Microsoft Word.
2. Use the Draw Function to Add Drawing to Your MS Word Document
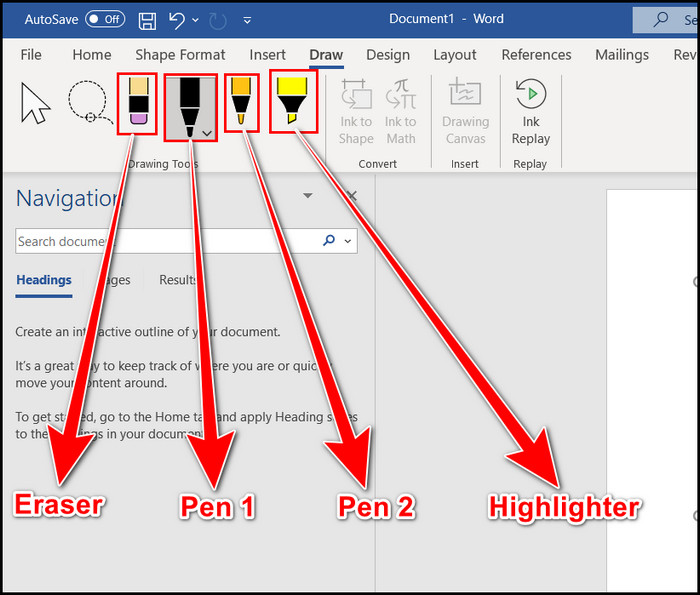
There are different pen sections in Draw mode on MS Word. You can select a pencil, highlighter, and many more options from there to illustrate your drawing.
Here are the steps to use the Draw function on MS Word:
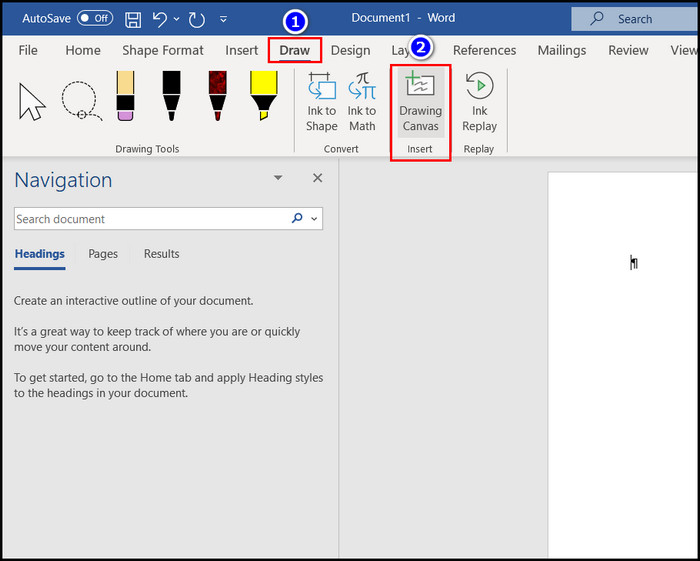
- Select the Draw section from Microsoft Word.
- Choose the Drawing Canvas option to select your desired area of art.
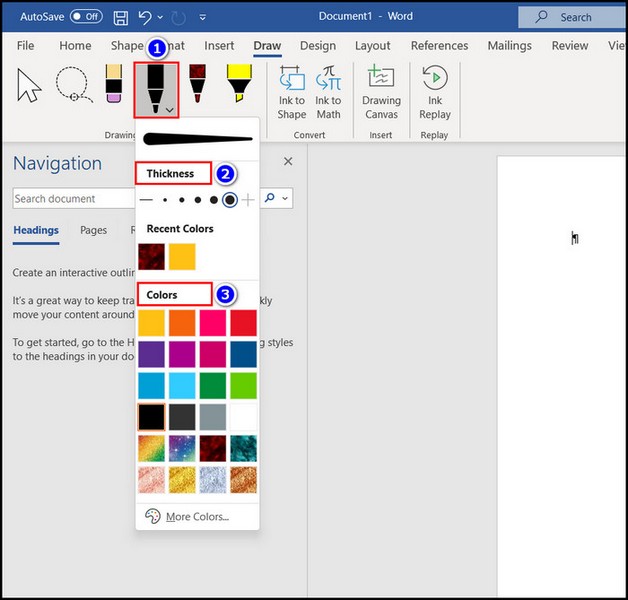
- Select your Drawing Pen and Expand it to determine its Colors and Thickness.
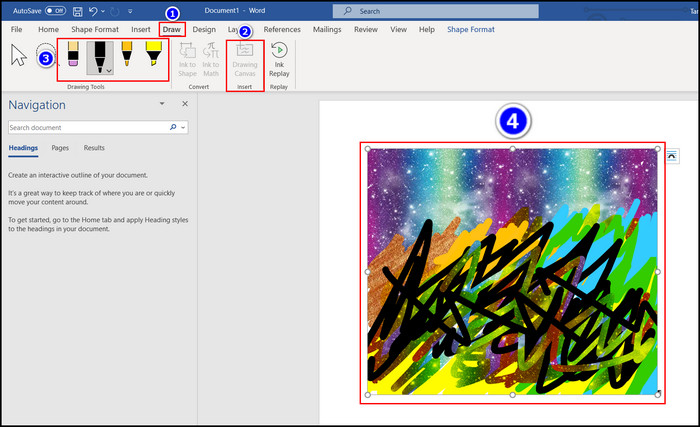
- Draw your particular picture.
- Use the Eraser if you want to remove some portion of the art.
- Select and Expand the Highlighter, choose its Thickness and Color, then use it to highlight some areas.
- Finish your Drawing.
Now you know how to activate the Draw feature and use it to illustrate your desired drawing. If you want to know other easy ways, follow through the next portion of this article.
Check out our separate post on how to Double Space in Microsoft Word.
How to Draw in Microsoft Word Using the Insert Shape Tool
With the help of the Insert section on MS Word, you can quickly draw your specific pictures without falling into a hassle. The Insert feature includes several options such as Shapes, Icons, 3D models, SmartArt, etc. You can use them to draw beautiful pictures in Microsoft Word.
Here are the steps to use the Insert option on MS Word:
- Open the MS Word application.
- Select the Insert option.
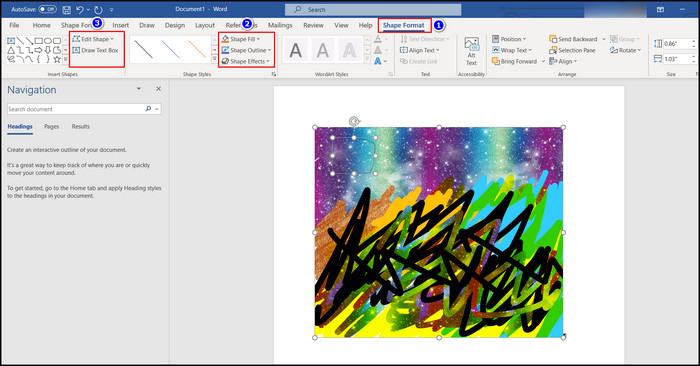
- Expand the Shapes option and select the Freeform: Scribble or Freeform: Shape to draw freehand art.

- Select your desired Basic Shapes and Flowchart from this Shapes section to improve your art.
- Modify the Shape Format after finishing your shape drawing. You can use the Shape Fill, Shape Outline, and Shape Effect options.
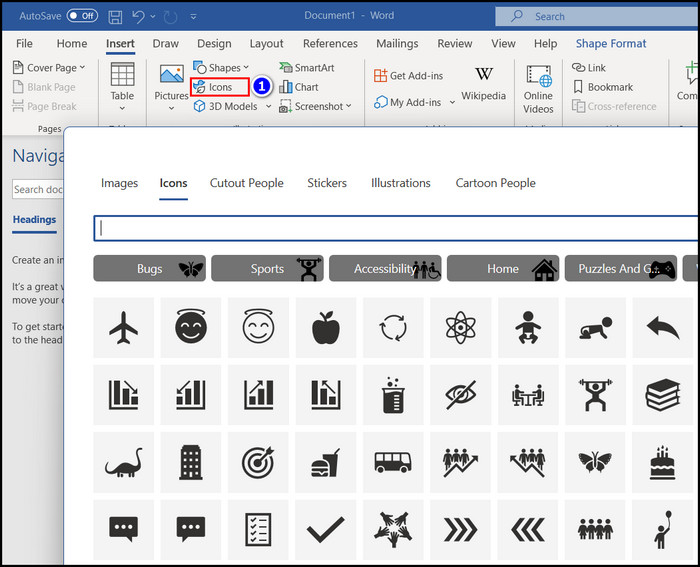
- Choose the Icons Section to include an icon on your drawing.
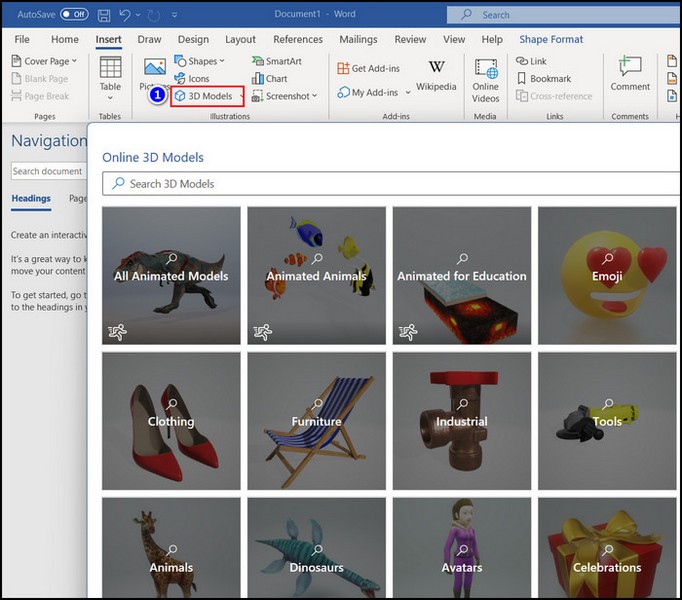
- Click on the 3D Models option to spice up your drawing.
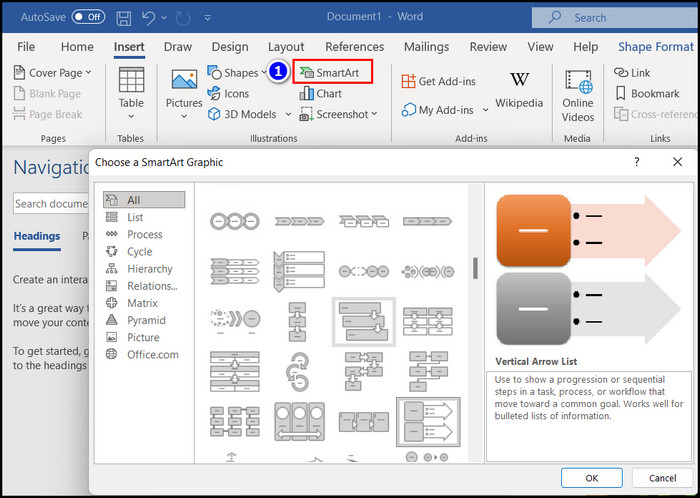
- Select the SmartArt option to include a fresh and smart design on your art.
- Blend all these art components and produce a magnificent drawing on your MS Word.
After combining all the necessary items from the Insert section, you can create a marvelous piece of drawing. If you use different MS Word versions, read the next heading.
Read more on why Microsoft Word Read Aloud Stopped Working.
How to Draw on Different Versions of MS Office
You can use the Draw feature of Microsoft Office on different versions. How to apply the Draw feature on MS Office 16,13 and 07 is given below.
1. Draw on MS Office 16 and 13
Microsoft Office 16 and 13 are comparatively new; as a result, some features resemble the latest versions of Office.
Here are the steps to Draw on MS Office 13 and 16:
- Launch the MS Word program.
- Move to the Word Ribbon and select the Review tab.
- Choose the Start Inking option.
- Click on the Pens, then select your Pen from the menu.
- Select the Color and Thickness of your pen and start drawing.
- Finish the drawing when you feel like it’s done.
You can make your desired art with the help of this method.
2. Add Drawing on Microsoft Office 2007
The drawing feature is available on MS Office 2007. Click on the Insert section and choose the Shapes option to draw on your Word document.
Here are the steps to add drawing on Microsoft Office 2007:
- Open the MS Word app.
- Move to the Insert section.
- Click on the Shapes option under the Illustrations menu.
- Select your required shapes and drag them into the document.
- Change the Shapes Formats if necessary.
- Choose the Scribble or Freeform: Shape under the Shapes Lines section.
- Include the Canvas and 3D effects when you feel like it.
- Combine all the essential functions from the Insert feature and finish your art.
With the help of these steps, you can create your very own unique art.
Check out our separate post on how to Fix Export to PDF Error in Word.
How to Add Drawing on a Mac with MS 365 or MS Office 2019
MS Office 365 and Microsoft Office 2019 are available on Mac. So, if you want to draw on a Word document with a Mac, follow the steps below.
Here are the steps to add drawing on a Mac with MS 365 or MS Office 19:
- Open the specific MS Word File or create a New Blank Document.
- Select the Draw section.
- Choose your Pen from various Pens options and select its Color and Thickness.
- Click on the Draw with Trackpad option if you want to draw on the trackpad instead of the Mouse Cursor.
- Use the Eraser to remove unwanted drawing parts.
- Apply the Highlighter where it is necessary.
- Finish the drawing.
As you can see from the method, it is pretty easy to draw on a Mac using MS Word.
FAQs
How do I freehand Draw in Word?
To apply the freehand draw mode in MS Word, you must follow the Insert > Shapes > Freeform: Shape options.
Why can’t I Draw in Microsoft Word?
When your Draw option is not activated, then you can’t draw in MS Word. To apply Draw on Word, follow the File > Options > Customize Ribbon options and enable the Draw checkbox.
Is there a pen in Microsoft Word?
Yes, a Pen option is available in the Draw section of Microsoft Office.
Afterthought
Drawing in a Microsoft Word document is a straightforward process. Also, this visual representation can enhance your MS Word proficiency.
There are two straight-cut ways to draw on MS Word. The first one is applying the Insert Shape option, and the second one is the Draw Pen section. If you read my article thoroughly, you already knew that, and now is the time for you to apply the Draw feature to your Word file.
As usual, it’s time to say goodbye. If you have any questions regarding this article, let us know in the comment.