You bought a new pair of case fans so that you can control your fan speed for more noise-free computing, and then you went on to replace the old fans with the new ones, but hey, you cannot just plug it in.
Frustrating right? I know.
But where does the PWM cable go?

I went through the same hassle and came up with a complete guide So that you don’t have to look anywhere else for the solution you need.
So put on your reading glasses to get the solution you are here for.
What Is PWM and How Does It Work?
So, you might be wondering what PWM stands for?
PWM stands for Pulse Width Modulation.
This technology came into the tech industry in 2003, but awareness of this spectacular innovation stands at 0.
Which is fair for the consumers but for people who are making Motherboards? NO.
You might be asking yourself, hey, why is this guy getting angry at the suppliers for no good reason?
As I explained earlier, you need four-pin Headers on your Motherboard to install PWM Fans on your pc. But there is still a good number of companies out there making motherboards with just three-pin headers. Outrageous! To say the least.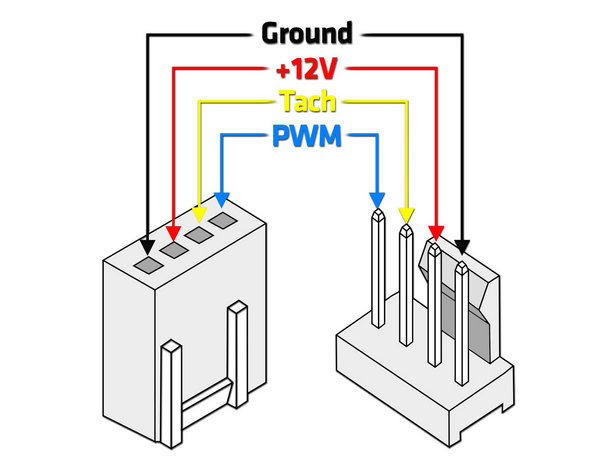
But why is this tech so important, you may ask?
Well, it revolutionized modern-day computing with close to zero noise.
PWM fans come with an integrated circuit so that you can control the fan speed.
It works like a switch. More like an on-off button while controlling the Fan or the Pump. In correspondence with the motor, you can give the fan Zero power to Full power.
One thing to keep in mind: PWM fans always run on 12 voltages constantly, which is why you shouldn’t use more than one PWM fan or, at best, two with the Y-splitter.
You can use PWM fans on your CPU, Casing, or even GPU units.
PWM Water Cooling pumps are also available in the market, but keep in mind it is very power-hungry.
So before installing the fans, you need to identify the fan type.
Also, check out some classy and aesthetically pleasing RGB CPU Air coolers.
How to Identify Different Fan Types
There are currently three types of fans. One is literally obsolete but still in the market.
- Two Pin Headers: Comes with two-pin connectors, just one plus and a Minus connection. That’s about it.
- Three Pin Headers: yeah, guessed it right, comes with a three-pin. Two Plus and Minus Pins for the connection and another one to see what speed your Fan is running on.
- Four Pin Headers: Comes with Four pins and is known as PWM fan cable.
Keep that in mind some of the three-pin connectors actually look like they are four-pin connectors, but if you look closely, you will only see three of the wires are getting connected to your Motherboard. So, if you are picking up PWM fans, make sure to check it before buying.
Now how to connect PWM fans to your Motherboard.
Also, if you got some free time, read my take on some of the best motherboards for Ryzen 9 5900x.
Where do PWM cables go?
The PWM cable goes directly into the Motherboard.
Most of the users cannot install PWM cables just because they are putting them in the wrong Header.
PWM cable comes with a 4-pin header, where most of the case fans are basically installed on three-pin headers.
So, how’s this any different than regular fans?
First of all, you cannot control the fan speed with ordinary fans. I mean, regular fans would always run at maximum speed out there; that way, you can never make your pc client.
You may ask:
Can I use a PWM fan without PWM?
PWM fans can be connected in Three-pin headers if you don’t have four-pin headers. But if you do so the PWM fans will always run at maximum speed. Meaning there is no way you can control them or turn them off completely. They will work like normal case fans.
Also, one of the most significant flaws of regular fans is that it dies if the voltage goes down anything lower than 5v.
But with PWM Fans, Fan speed can go down to 300-600 RPM. That means your pc at the particular time is running on Zero noise. You can turn off some fans completely. Consider building your Rig with the best Ryzen 5 5600x motherboards.
How to Install PWM Fans into The Motherboard
Most new Motherboards except a few come with a Four pin Header.
So, for people who own new-gen Motherboards, it is relatively an easy process for you guys.
Usually, every MOBO comes with at least two fan headers. But you have like MOBO’s like B450m you will have like Four pin headers.
Now look for these pin headers around your Motherboard:
- SYS_FAN (System Fan)
- CHA_FAN (Chassis Fan)
- PWR_FAN (Power Fan)
- EXT_FAN (Extension Fan)
If you are facing difficulties locating them, search at the bottom left of your Motherboard. You will quickly get one Header.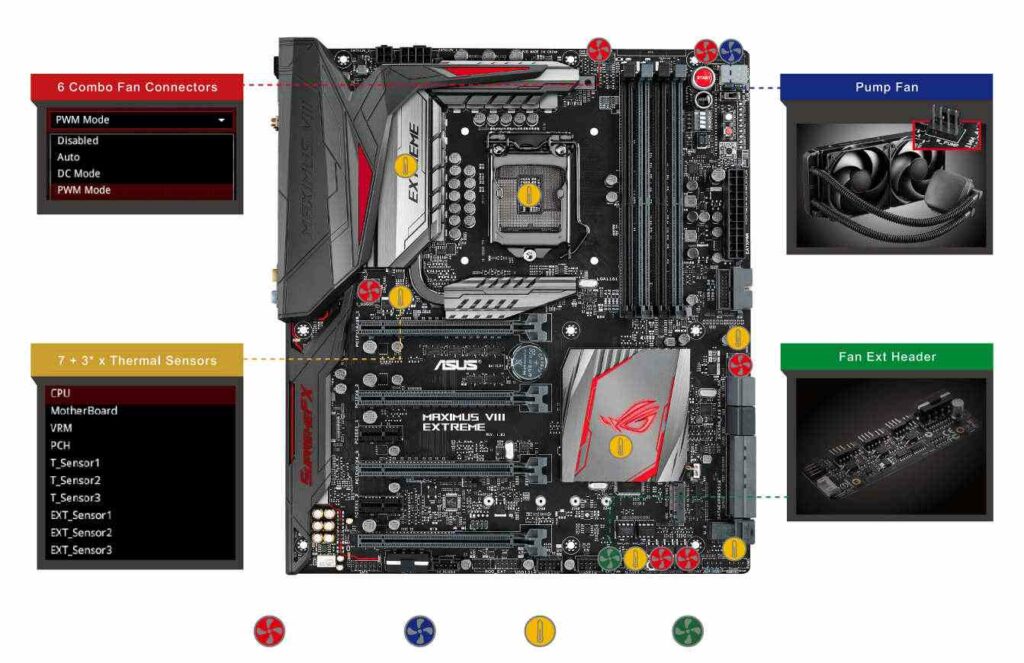
After finding the Header, it’s time to plugging it in
- Every connector will have two tabs like a bump (at the beginning of the port and at the end of it) line it up above the Motherboard.
- Gently push the connector down the Header until it’s fully connected to the MOBO.
There you go; you are done plugging it up.
Try to plug the Fan to the closest fan header to have clean cable management.
But if you don’t have the Four-pin Headers?
Well, you guys are in luck. Don’t crucify yourself right away for picking up the wrong Fan.
Turns out you still can connect the four-pin connectors to your three-pin headers, but if you do so, keep that in mind you cannot control the fan power or speed.
If you really want to control it, you can pick up Y-Splitters, but there might be a concern for your Motherboard. So not recommended.
You are done setting the fans, but how do you use it?
You may also like to read: Do Modular PSUs come with cables
How to Control PWM Fans Via BIOS
Well back in the days, we had to do everything on our Desktop, Right? Those days are gone. Bios have upgraded so much now that you can actually do anything there.
So, let’s get into controlling the fans.
- Go to your System Utility Screen by pressing F2 at the Bootup screen. (Usually, the key is F2, F1, or Delete).
- After getting to BIOS, click Fan Info.
- There you will see two FAN settings named CPU FAN and SYSTEM FAN.
- Click on settings and turn on smart fan mode.
- Then set your fan speed on the exact level you want.
I personally keep my Fan speed at 70%, while the temperature is 50 Degrees Celsius, and if it’s on 60 Degrees, I put my fans on 85%, but if the temperature goes up to 70 degrees, I put my fans on 100% speed.
Also, Turn on the CPU Fan Fail And Warning Control. That way, you will get a warning just in case if any of your Fans die.
Final Thoughts
We all dream of a PC to run on Zero possible noise. With PWM cables, we can make our dream a reality.
I hope with this guideline, you will be able to connect your PWM cable to your Motherboard.
But if you still have any queries, you can always reach us.