You are using VPN to secure your network for your working or gaming purposes, but after upgrading Windows 11, you encounter your VPN is not working on your Windows 11 computer.
If this is the case, there is nothing to worry about. You are in the right place, then.
As a tech specialist and enthusiast, I will research and test the Windows 11 VPN not working problem. This article will show you some practical ways to fix your VPN not working issue on your Windows 11 system computer.
If you are looking for some of the best practical and effective techniques to fix your VPN problem on your Windows 11 system computer, here is the best-proven guide for you.
Keep reading and precisely follow the instructions.
So, let’s get started to know the effective methods to fix your VPN problem.
What is the Reason for VPN Not Working on Windows 11
There are many significant reasons why the VPN is not working on Windows 11 computers. This section will discuss the possible explanation for the VPN not working issue.
Here is the possible reason for the VPN not working on Windows 11 computers:
One of the leading causes of this problem is third-party applications such as Antivirus. Some third-party applications interfere with the VPN client, which creates the VPN connecting issue. For this reason, the VPN is not working on your Windows 11 PC.
Another culprit is the Windows Firewall. Windows Firewall blocks the VPN client. Sometimes, the Windows Firewall unnecessarily blocks the VPN client network that creates the connecting not working issue to your VPN.
Problematic network adapter drivers are another reason to create the VPN not working issue on Windows 11 computers. The troubling network drivers make the VPN not working problem in your system.
You’ve seen the possible causes of the VPN not working issue on your Windows 11 computer so far, and in the next part, I’ll show you several tested and proven solutions to solve the problem.
So, let’s jump into the main topic to know the solutions to solve the VPN not working problem.
Also read, Show Folder Size in Windows 11.
How to Fix VPN Not Working on Windows 11
Many Windows users reported that they are experiencing the VPN is not working on their Windows 11 PC after upgrading to Windows 11. Also, the users ensure that this problem only happens in the new latest Windows 11 OS.
There are some practical ways you can solve the VPN not working problem. This section will show you several tested and proven solutions to solve the VPN not working issue on Windows 11 computers.
Let’s dive right in to see what solution you have to solve the VPN not working issue.
Here are the steps to fix the VPN not working on Windows 11:
1. Reinstall WAN Miniport Network Adaptars
If the VPN is not working on your Windows 11 computer, you should try reinstalling your WAN Miniport network adapters driver to fix the problem.
To connect with the hardware on your system, Windows uses several drivers. WAN Miniports are drivers that can connect to many sorts of networks.
Follow the steps below to uninstall the sound driver on your Windows 11 computer:
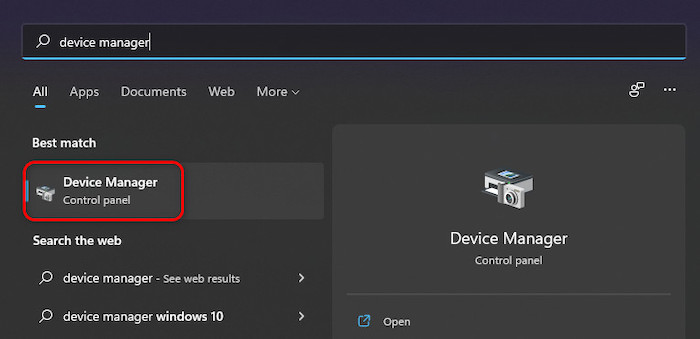
- Press Windows Key + X on your keyboard and select Device Manager from the list. Or,
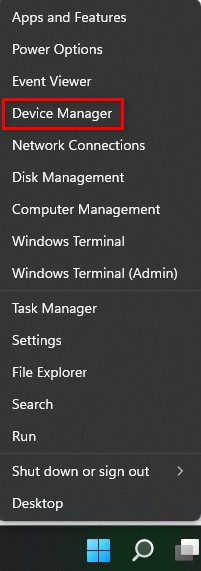
- Type Device Manager on the Windows search bar and press Enter key to open the Device Manager.
- Select the Network adaptors option and click on it to expand to see the drivers list.
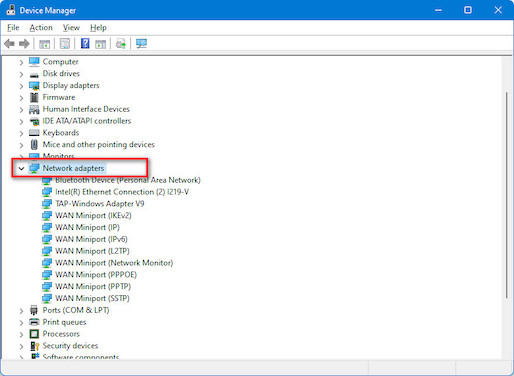
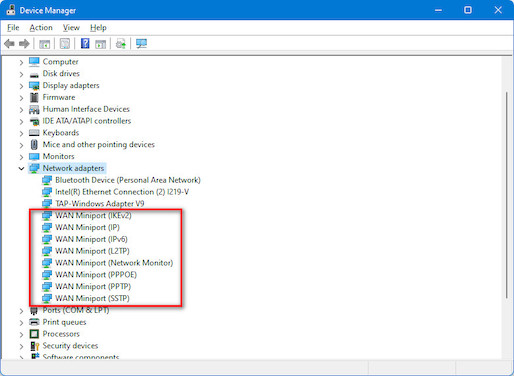
- Select WAN Miniport drivers only by one to uninstall the drivers.
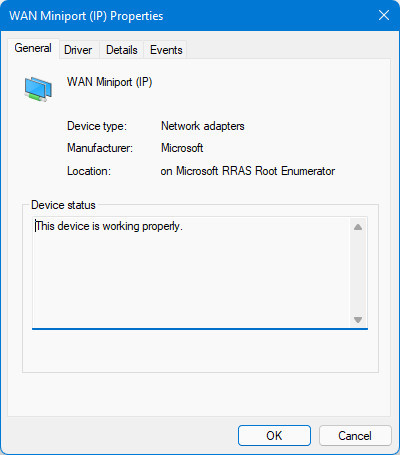
- Hit the Enter key to open the driver Properties window.
- Click on the Driver tab to open the driver details and options.
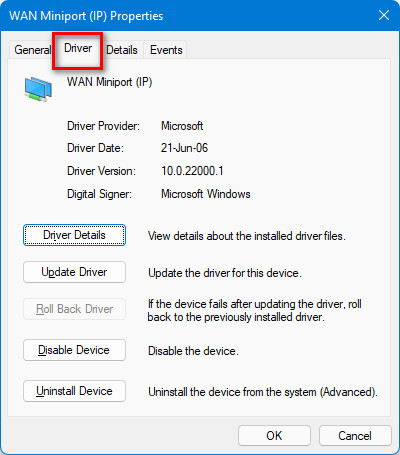
- Click on the Uninstall Device
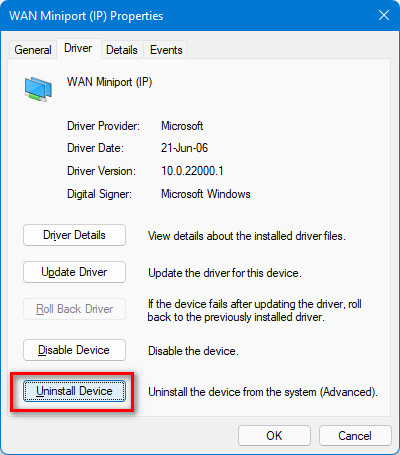
- Wait some time to finish uninstalling your sound driver.
- Restart your computer to automatically reinstall the network adapter driver and see whether your problem is solved.
Check our latest post on how PC won’t go to sleep mode in Windows 11.
2. Flush the Domain Number Server (DNS)
Another effective way to solve your VPN not working or connecting issue is to flush the DNS. Executing some commands on your command prompt may fix your problem.
Follow these steps to flush the DNS to solve your VPN not working issue:
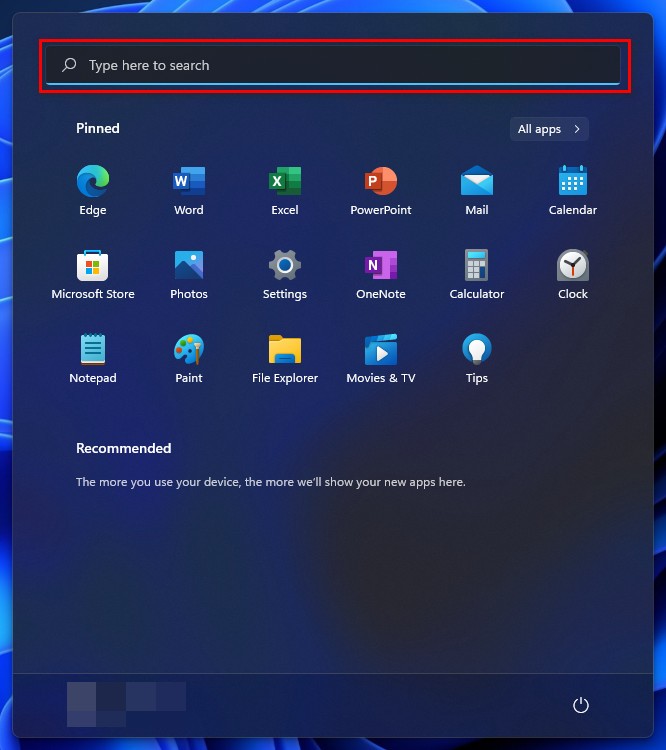
- Press the Win + S key on your keyboard to open the Windows Search panel.
- Type cmd and click on Run as administrator to open the Command Prompt with admin privileges.

- Enter the following commands one by one to flush the DNS:
- ipconfig /release
- ipconfig /flushdns
- ipconfig /renew
- netsh int ip reset
- netsh winsock reset
- Close the window after executing all the commands.
- Restart your computer and see whether your problem is solved.
3. Disable Internet Protocol version 6 (IPv6)
If you are using Internet Protocol Version 6 (IPv6), you can try to disable it to fix the VPN is not working issue on your Windows 11 computer.
Follow the steps below to disable the Internet Protocol Version 6 (IPv6):
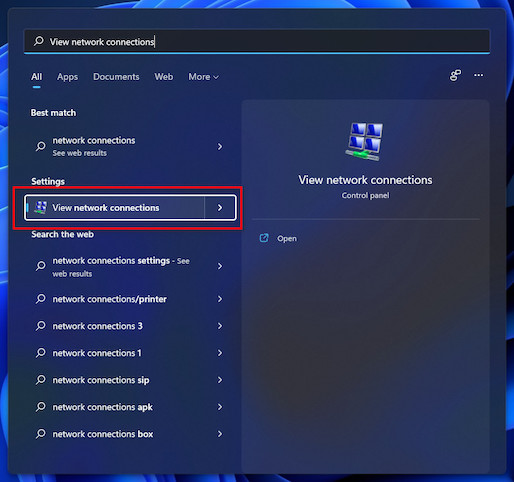
- Press the Win + S key on your keyboard to open the Windows Search panel.
- Type network connections and click on the search result: View network connections to see the Network Connections.
- Right-click on your VPN network adapter and select Properties.
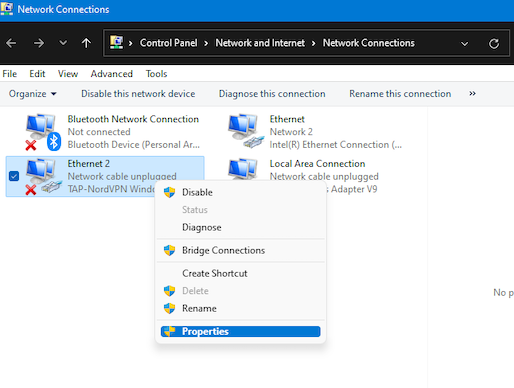
- Select the Networking tab window.
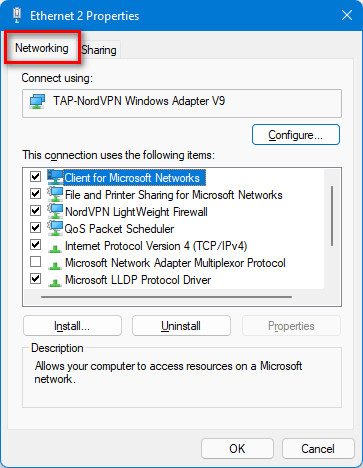
- Uncheck the Internet Protocol Version 6 (TCP/IPv6).
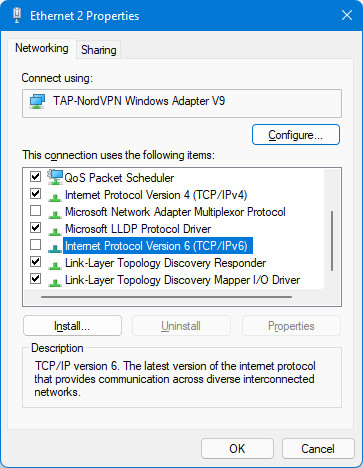
- Click on the OK button to apply the changes.

4. Allow VPN through Windows Firewall
The Windows Firewall unnecessarily blocks the VPN client network that creates the connecting or not working issue to your VPN.
To fix the VPN not working issue on your Windows 11 PC, allow the VPN through the Windows Firewall.
Follow these steps to allow the VPN through the Windows Firewall:
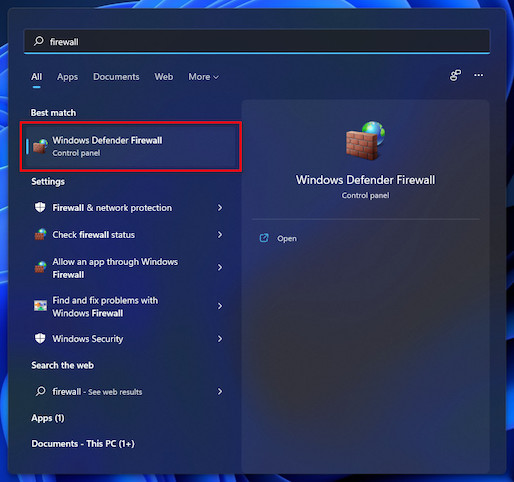
- Press the Win + S key on your keyboard to open the Windows Search panel.
- Type firewall and click on the search result: Windows Defender Firewall to see the firewall settings.
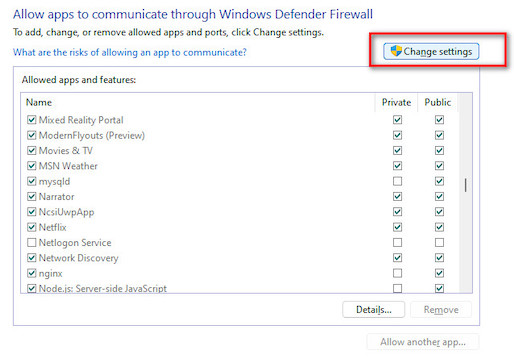
- Click on the Allow an app or feature through the Windows Defender Firewall
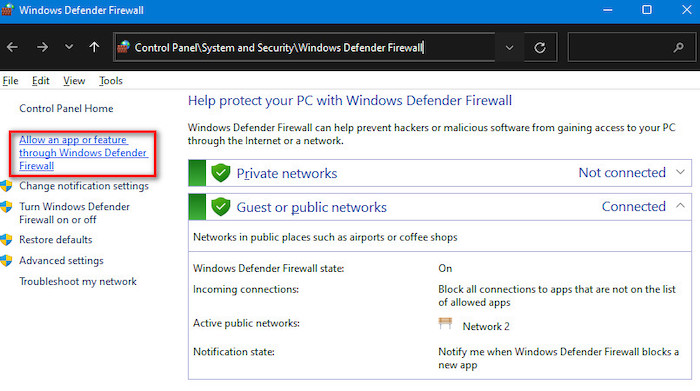
- Click on the Change settings
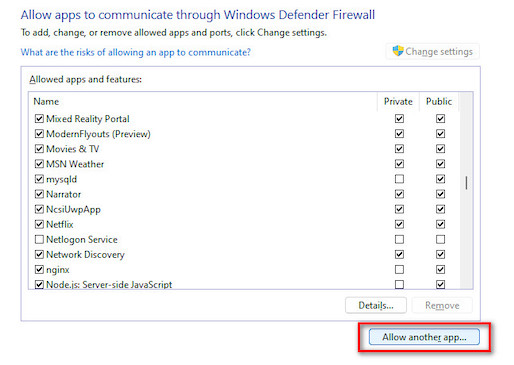
- Click on the Allow another app to add your VPN application manually.
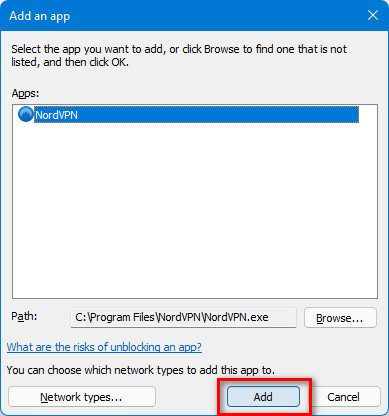
- Click on the Browse button and select your VPN app .exe file.

- Click on the Add button to add your VPN application.
- Check the Private and Public
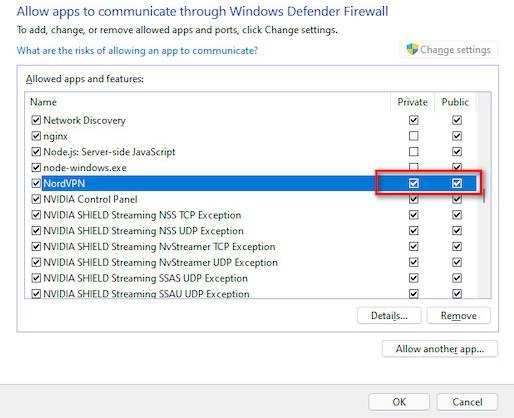
- Click on the OK button to apply the changes.
You may also like to read: Stop Apps Running in Background Windows 11.
5. Update Your Windows OS
Another effective way to solve your VPN not working problem on your Windows 11 PC is to keep your Windows system up to date.
The latest Windows updates help fix many technical problems because updating the newest version fixes bugs or issues on your system.
Follow the steps below to check and install your latest version of Windows on your Windows 11 system:
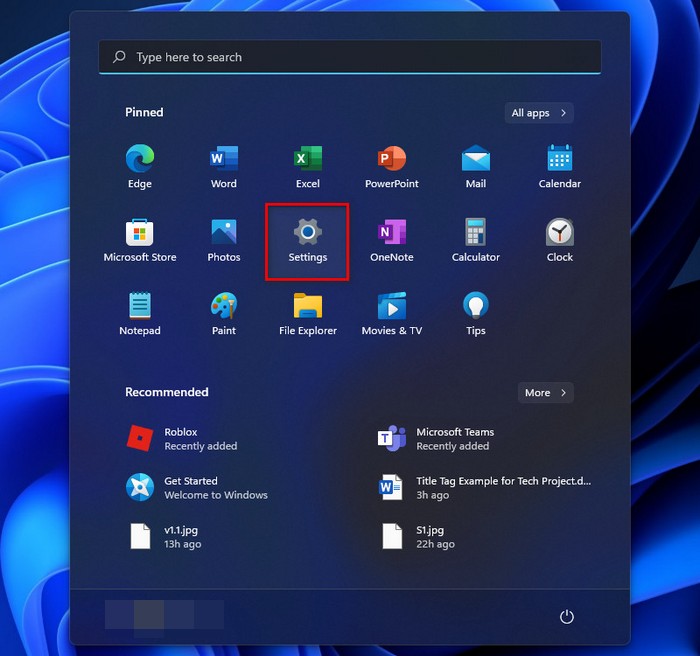
- Press Windows key + I on your keyboard to open the Windows Settings shortcut. Or,
- Click on the Windows icon on your left-side corner taskbar, and then click on the Settings under the Pinned apps to open Windows Settings.
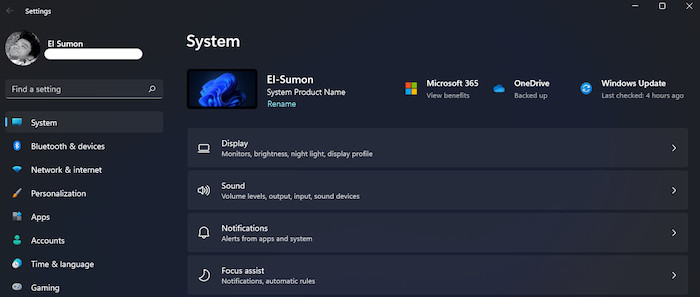
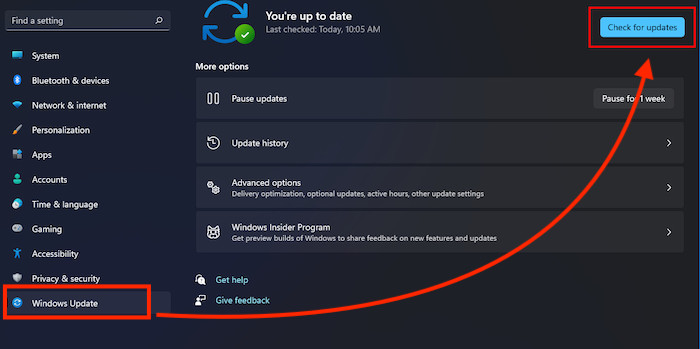
- Select the Windows Updates tab on the left side menu panel.
- Click on the Check for Updates button to check for available updates.
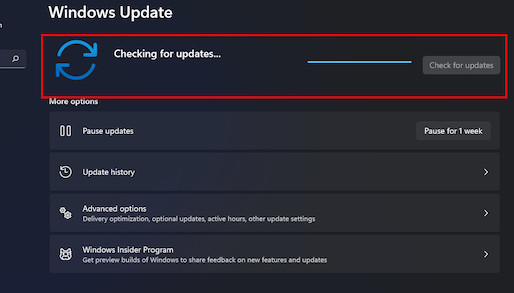
- The system will start to check updates and download any new updates automatically that are available for your PC.
- Begin the installation process; click the Install Updates option once the updates are ready.
- Wait until the update is installed fully on your computer.
- After completing the Windows update, check whether the problem is solved.
6. Reinstall the VPN Software
The corrupted or faulty VPN client software itself may cause the VPN not to work. To solve the issue, you need to uninstall and then reinstall the VPN software on your PC.
Follow these steps to fix the error by uninstalling and reinstalling the apps:
- Press Windows Key + I on your keyboard to open the Windows System Settings App.
- Click on the Windows icon on your left-side corner taskbar, and then click on the Settings under the Pinned apps to open Windows Settings.
- Select the Apps tab option from the left side settings menu panel.
- Click on the Apps & features option at the top of the right side screen.

- Scroll down and find your VPN software.
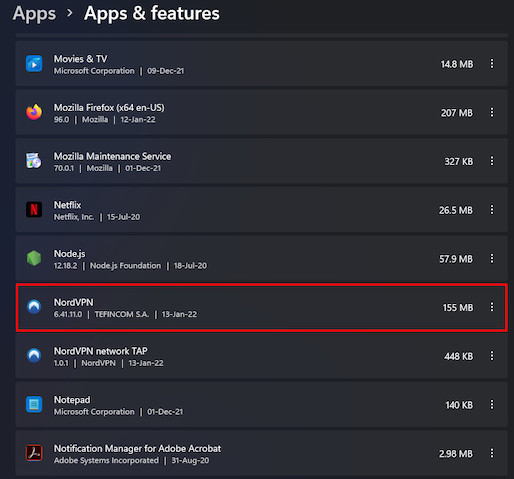
- Click on the three-dot menu and select the Uninstall button.

- Click on the Uninstall button to confirm to delete or remove the app.
Check out our separate post: Switch Domain Controller On Windows.
Final Thoughts
After updating to Windows 11, many Windows users have claimed that their VPN no longer works on their computers. Users also confirm that this issue occurs exclusively in the most recent version of Windows 11.
There are various reasons why the VPN on Windows 11 machines isn’t working. In this post, I’ll go over the reasons why your VPN isn’t working.
There are several practical solutions to the VPN not working issue, and I also demonstrate several tested and proven solutions for the VPN not working problem on Windows 11 machines.
I hope you found this post to be informative. If you found your solution, please let me know which method works for you.
You may also look at other posts if you’re interested in learning more about similar topics.