High power usage is a big concern & when it comes to PCs, it can give a heavy toll on your electricity bill by consuming lots of watts.
That’s why Microsoft designed the Windows default power plan, to save some energy by lowering CPU power consumption. But as a gamer or power user, it’s an annoying condition because of the throttle.
As I’m a hardcore gamer by myself, in this article, I will guide how to utilize the max CPU power on Win 10. Let’s dive in.
Why Does the CPU Not Run on Max Power by Default?
Microsoft developed Windows for all types of users & designed its power plans too. In the modern era, people are conscious about energy use. Keeping in mind that, Microsoft set the default power plan to Balanced. This results in conservative power consumption during idle.
Another reason the CPU doesn’t use max power can be due to power throttling or thermal throttling. For this reason, the processor will reduce the frequency to stay below its power limits or critical temps.
So, how to tell if a CPU is using power saving?
You can use Windows Task manager’s Power Throttling column to check if any app is power throttled or not. You can also use Resource Monitor to check the CPU frequency.
Here are the steps to check if the CPU is power throttling via Task Manager:
- Open Task Manager with Ctrl+Shift+Esc.
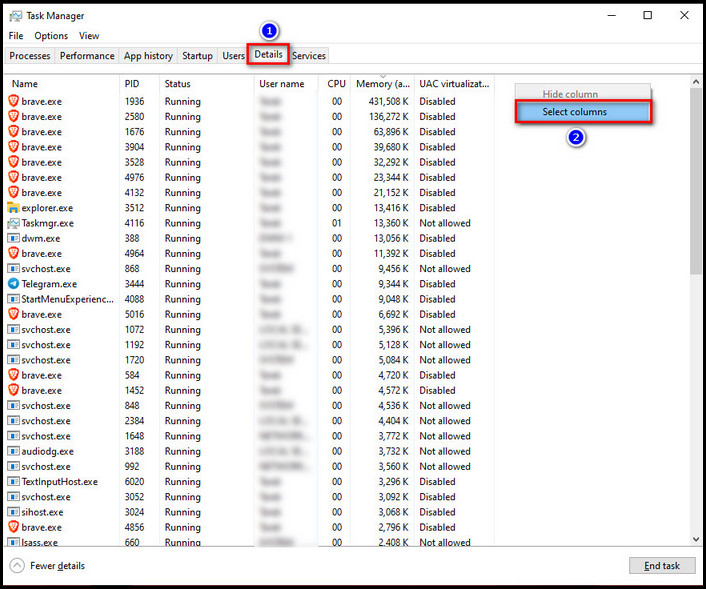
- Click on the Details tab.
- Right-click on the Name row & choose Select columns.
- Scroll down & find Power throttling.
- Check the box & click OK.
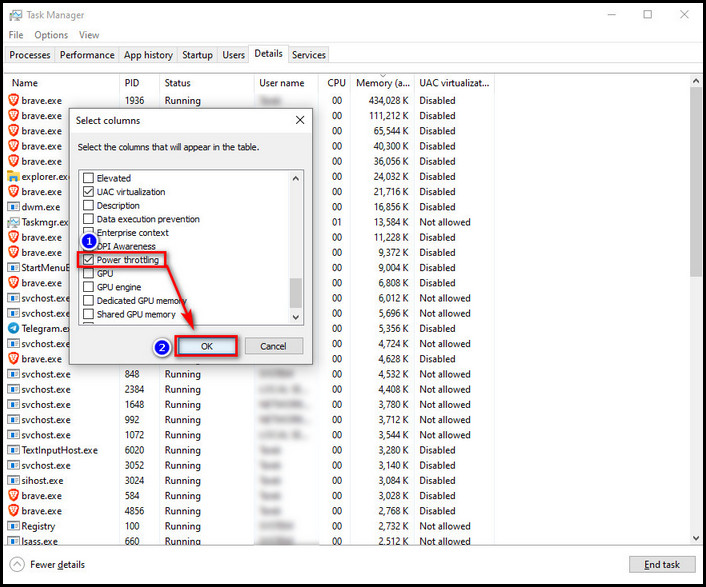
From the newly added Power throttling column, you can see the power throttle status.
Checking CPU frequency with Resource Monitor is also simple. Press Win+R & in the box, type resmon & hit OK.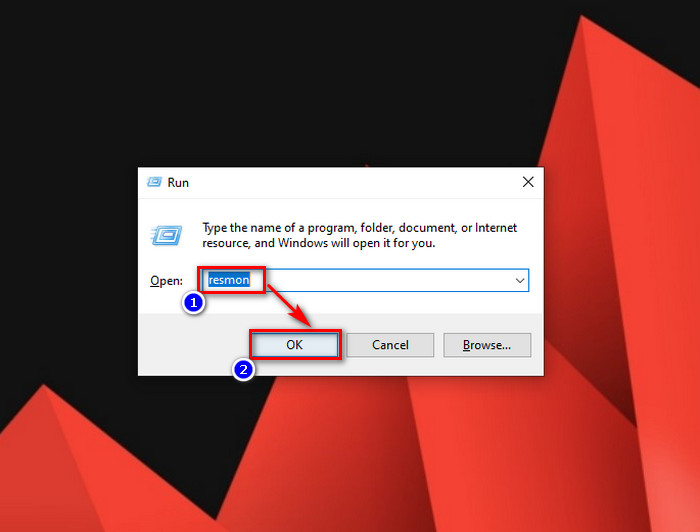
In the Resource Monitor, in the CPU section, you will find Maximum Frequency. If the percentage is not constant at 100%, then the chip is not at max power.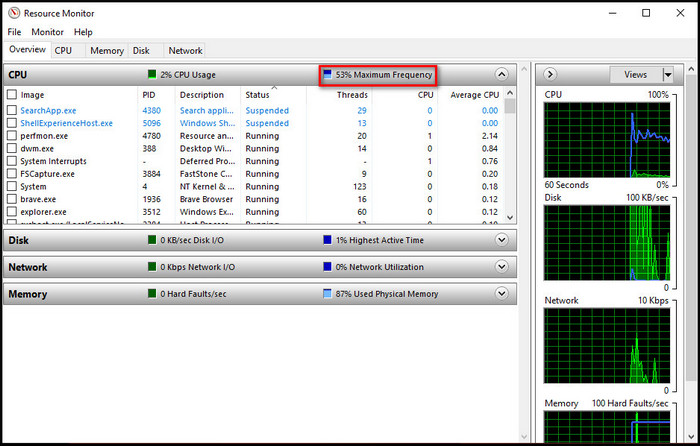
How to Activate Max CPU Power in Windows 10
For competitive gaming, every frame matters. Besides that, maxing CPU power can reduce stutters, freezes, or frame time spikes, as this prevents CPU frequency fluctuations. But mind that, using max processor power constantly will increase the temp & power consumption.
But as a power user, one doesn’t care about this & they want to squeeze out the best performance for gaming. For this purpose, you want to use maximum processor power in win 10.
Here are the ways to use maximum CPU power in Windows 10:
1. Configure Windows Power Plan
As already mentioned, Windows set the Balanced power plan as default. We have to reconfigure some settings, so that the CPU stays in P-state. During P-state, the CPU stays active & scales its voltage to increase frequency.
To properly configure the Windows power plan, we will use an external software named PowerSettingsExplorer. The software can be downloaded from guru3d forum.
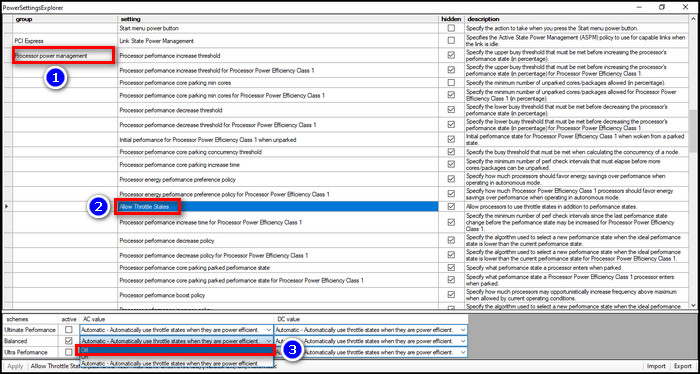
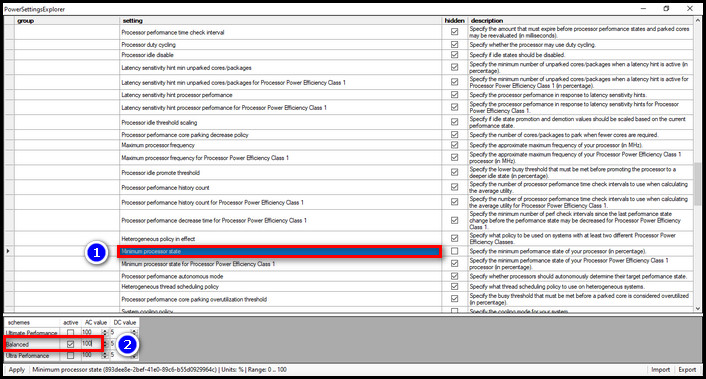
After downloading the software, open it. Scroll down & find Processor power management under the group column. We will change some values from the setting column. You have to click on the settings name & you will find the AC value on the bottom left side.
There is a tick box under the active section. That power plan is currently active & you need to change the AC value of that power plan.
Here are the settings you need to configure for max CPU power on Windows:
- Allow Throttle States: Set the value to off. (Default: Automatic-Automatically use throttle states when they are power efficient)
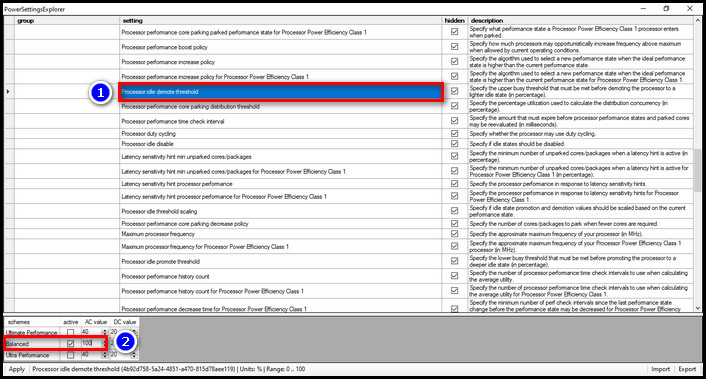
- Processor idle demote threshold: Set the value to 100 (Default: 40)
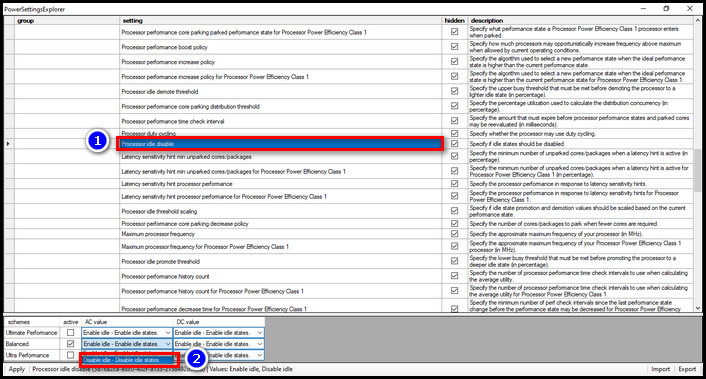
- Processor idle disable: If you are using hyper-threading, leave this as default, which is Enable idle. If not, set the value to Disable idle-Disable idle states. Remember that this will increase power consumption and cause overheating if not having enough cooling system.
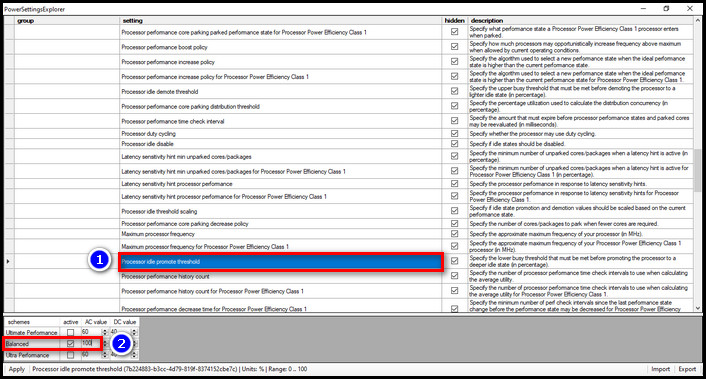
- Processor idle promote threshold: Set the value to 100 (Default: 60)
- Minimum processor state: Set the value to 100 (Default: 5)
- System cooling policy: Set the value to Active-Increase fan speed before slowing the processor.

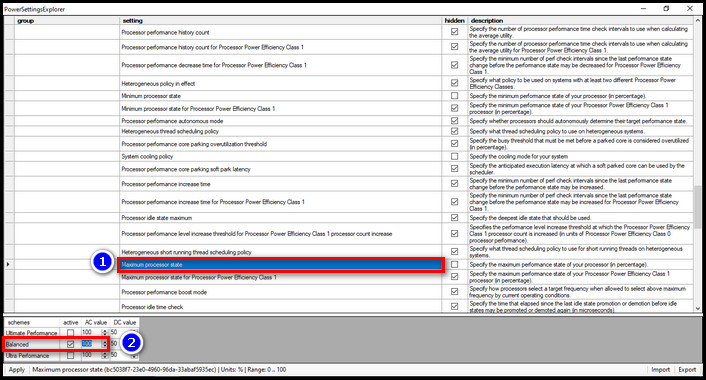
- Maximum processor state: Set the value to 100. (Default: 100)
For laptops, you have to change the DC value too while using the battery. Otherwise, changing the AC value will do the job.
2. Disable Power Throttle
Windows 10 has the option to disable power throttle through its Group Policy Editor.
Here are the steps to disable Power throttling with Group Policy Editor:
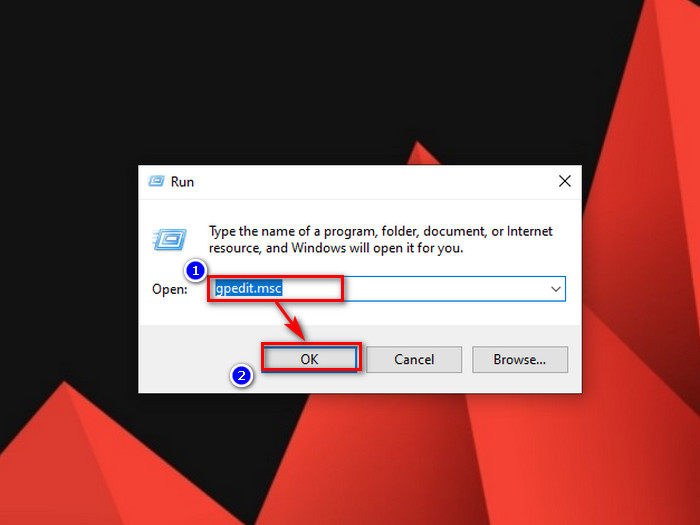
- Press Win+R to open run.
- Type gpedit.msc in the box & hit OK.
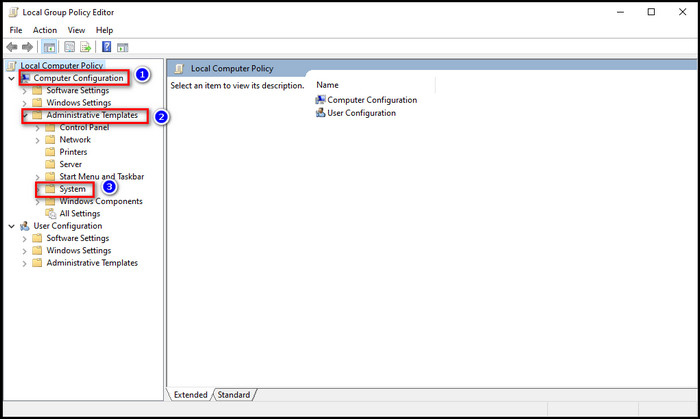
- Dropdown Computer Configuration & then Administrative Templates.
- Expand System Folder.
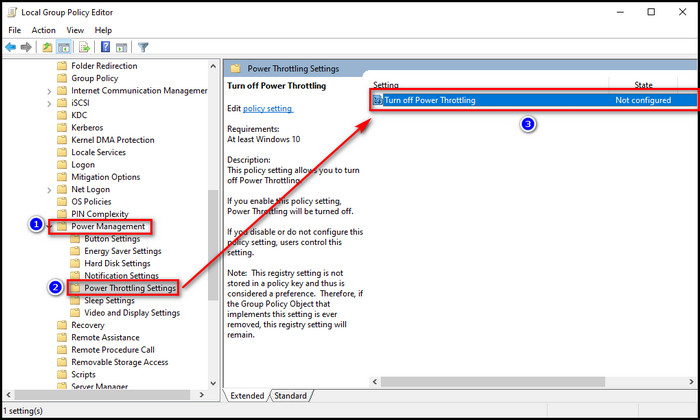
- Find Power Management, double-click on it & then find Power Throttling Settings.
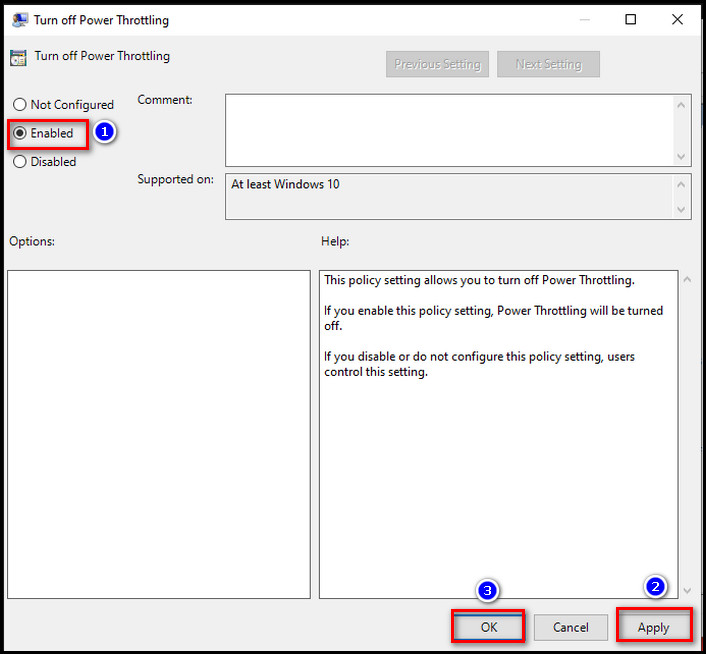
- Double-click to Turn off Power Throttling from the right section.
- Choose Enabled, then Apply & OK.
Reboot the PC to take effect on the settings.
That’s not all. Also, check our comprehensive guide on power limit throttling in a separate article.
3. Turn Off the Battery Saver
This option is exclusively for laptop users. As a laptop is portable & uses a battery when there is no electricity, this device has the option to conserve battery for long-term use.
If you are connected to a wall outlet, you can disable the battery saver. However, if you try to turn off the battery saver option while using the battery, remember that your battery support will be much shortened for high power consumption.
Here are the steps to turn off the battery saver:
- Click on the Battery icon from the bottom-right taskbar.
- Move the slider to the right (Best performance).
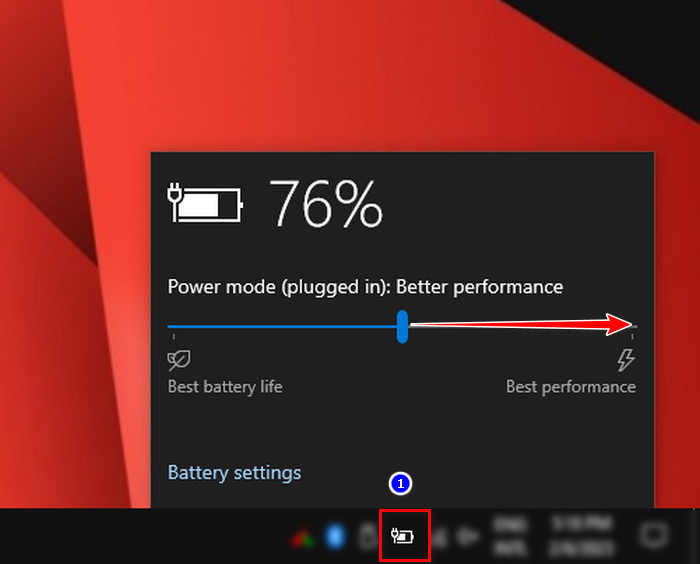
This will ensure max performance for your laptop even on battery, but with a cost of high battery consumption if on battery usage. Now, continue reading to confirm the validation of the steps.
If you are looking to save energy, check our separate guide to adjust the energy consumption of your computer.
How to Verify The Applied Methods Are Working
After following the methods of using max processor power, we need to validate that the steps are working. One of my friend’s younger siblings re-enabled the battery-saver option without my friend’s consent. Later, my friend found out about that when he was lagging in games.
So it is a good idea, to ensure the CPU is working at max for a power user. Usually, I use HWiNFO64 to monitor the processor’s frequency & temps.
Here are the steps to follow for verifying the max CPU clock:
- Download the installer version of the app & install it.
- Run the app with Sensors-only.
- Find the 1st CPU section & expand the core clocks.
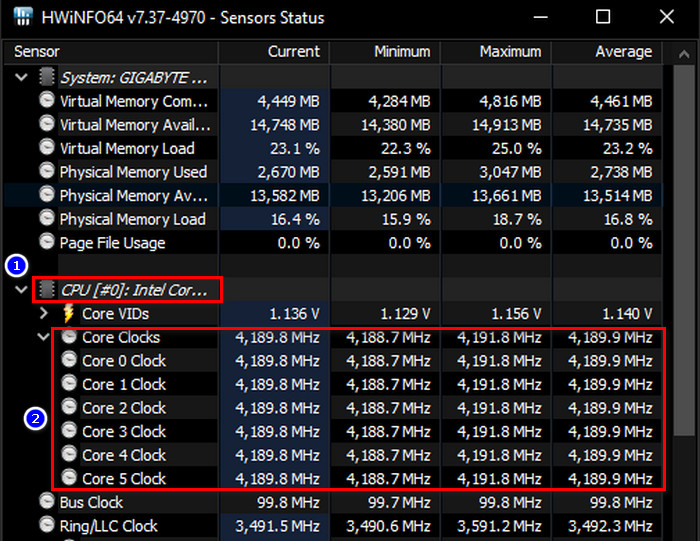
There you will see that your CPU is running at max non-turbo speed. To check the idle states disabled, you have to expand Core Effective Clocks & there you will observe that all cores are running at full non-turbo frequency when the idle states option is disabled.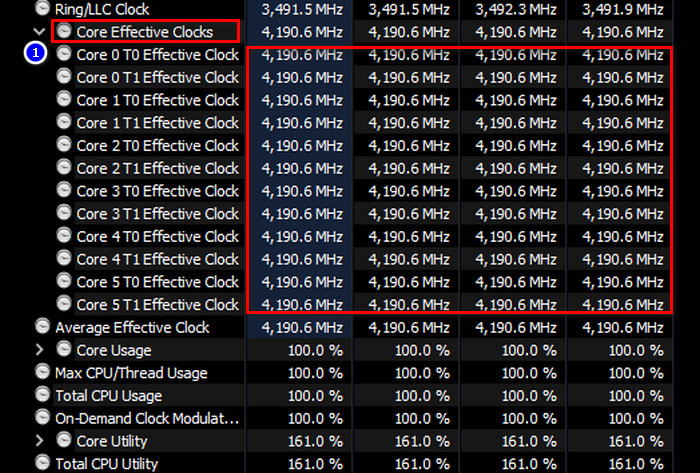
Now as you verified your CPU is running at max power, it can start to throttle down or can’t sustain at that high clock cycle. To know the reason, read along.
What Causes CPU Max Power Unstable?
You can set the high-performance plan with a 100% minimum processor state, yet the processor may not be able to stay at max frequency. But why?
Here are some reasons the CPU can get thermal throttled & don’t stay at max power:
- Inadequate CPU Cooler: If the cooling system doesn’t meet the TDP (Thermal Design Power), it will be unable to scatter away the heat from the CPU quickly. This results in overheating & for the safety mechanism, the chip will reduce the frequency.
So picking a proper cooler for your system is crucial, if you want to use max power 24/7.
- Dried-Up Thermal Paste: The processor can also throttle with a beefy cooler. But why? The reason is, the heat can’t pass to the cooler if the heatsink is not properly seated or the thermal paste gets dried. This results in increasing CPU temp.
Cleaning the thermal paste on yearly basis & properly seating the heatsink is necessary to avoid such circumstances.
- Poor Air Flow: Another reason for the increase in CPU temp is the lack of proper ventilation. If the casing lacks fresh intake airflow, the hot air can circulate inside the casing & increase every component’s temp.
This is why ensuring proper airflow is also vital.
FAQs
What is TDP?
Every CPU & GPU has a TDP (Thermal Design Power) value. This value indicates how much heat the component can dissipate. It is used to choose a cooler so that the cooling system can dissipate the heat quickly enough.
What is hyper-threading?
Intel’s hyper-threading is a process, where the CPU divides its one physical core into two threads. This extra thread is also known as the virtual core.
What is C-state?
CPU goes into C-states when it is idling. There are different C-states like C6, C2 to conserve energy.
Final Thought
To achieve the max CPU power to avoid stutter or frame drops, gamers need to set a high-performance power plan & reconfigure some settings. For laptop users, it is required to set the best performance from the battery settings.
A side effect of max CPU power is overheating. So ensuring a proper cooling system & airflow is also necessary for this process.
In this article, I guided how you can use maximum processor capacity in Windows 10. Don’t forget to give feedback.