Do you want to trim a video on your Windows 11 system computer without having to use a third-party video tool?
If this is the case, there is nothing to worry about. You have come to the right place.
If you are looking for a step-by-step guide to trim a video fast, here are some of the best-proven solutions for you.
As a tech and video editor specialist, I will find the best possible solutions to trim a video. This article will show you some practical ways to cut a video without third-party software on your Windows 11 computer.
So, how do I trim video on Windows 11?
Keep reading the whole post and follow the instructions.
Let’s get started and see what solutions you have to trim a video.
Does Windows 11 have a Video Editor?
Yes, Windows 11 have a built-in video editor. If you want simple and basic video editing features such as trim, merge, split, or rotate, then the Windows 11 Vidoe Editor is for you. You can also change the video speed, draw or create a slow-motion video using the Video Editor tool.
There are have many third-party video editing tools you can find online. Some are free, and others are paid, and you can use them for basic or professional video editing tasks.
The Vidoe Editor app is free to use, and it is a part of the Photos app. Generally, it is a primary video editing tool for quickly doing simple video editing tasks without installing and using advanced video editing tools.
But, you may not need to use these third-party programs if you want to trim a video also fast other essential tasks in Windows 11 because the Windows OS has a simple video editor.
The following section will show you some practical ways to trim a video using the Windows built-in video editing tool.
You may also like to read: Stop Apps Running in Background Windows 11.
How to Trim Video in Windows 11
Windows 11 includes a full-featured video editor that can handle all your basic video editing needs. You can trim or merge videos, change the video speed, apply filters, and more using the Windows 11 Video Editor.
This section will demonstrate the different ways to trim a video in Windows 11.
So, let’s dive right in and see what technique you have for trimming a video effortlessly.
Here are the steps to trim a video in your Windows 11 system computer:
1. Use Video Editor App
Video Editor is a Windows 11 built-in essential video editing tool that is free to use for Windows users, and it is a part of the Photos app.
You can trim videos, merge one or more videos to create one, change the video speed, apply filters, apply 3d effects, create a slow-motion video, and more using the Windows 11 Video Editor.
To trim a video by using the Windows 11 Video Editor, follow the steps below:
- Press Win + S on your keyboard or click on the Search icon on the left-side taskbar to open the Windows Search panel.
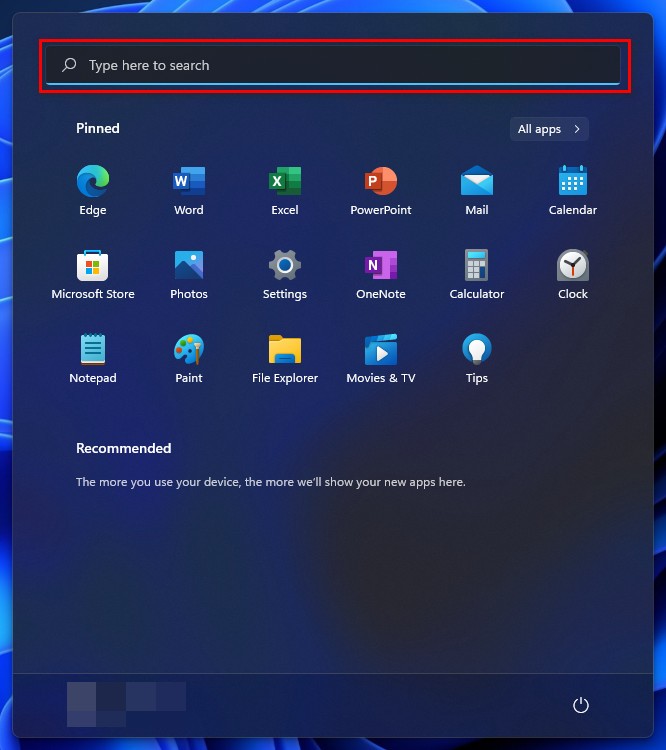
- Type video editor on the search bar to find the Video Editor apps.
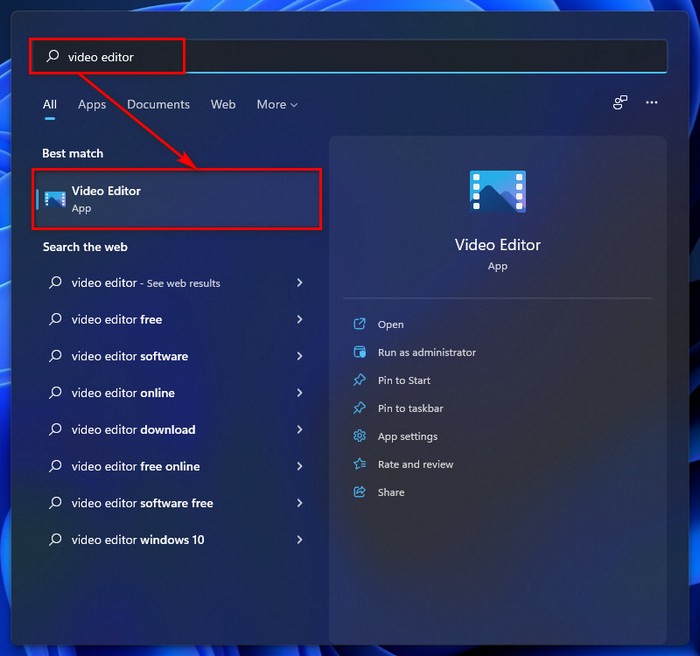
- Click on the search result or press the Enter button on your keyboard to open the Video Editor apps.
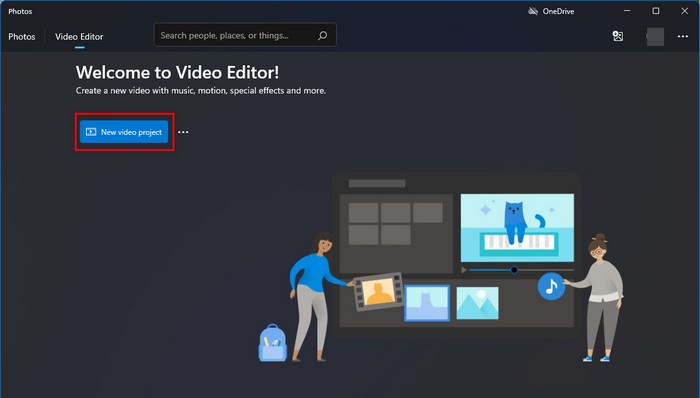
- Click on the New video project button to create a new video project.
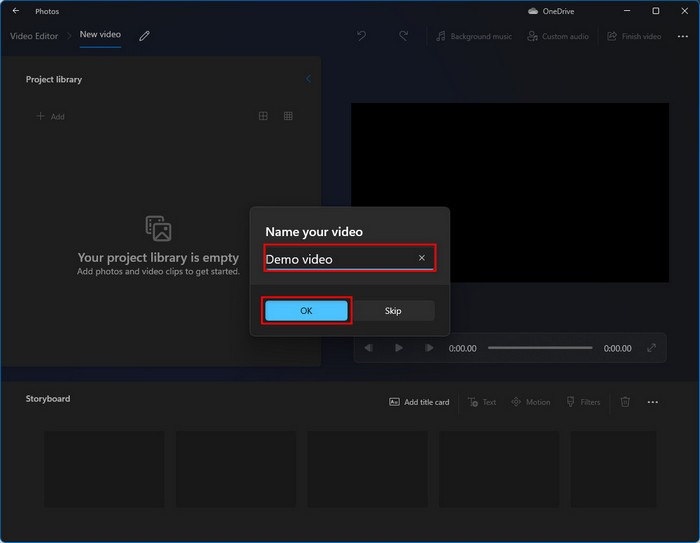
- Enter a name for your project and click on the Ok button. Or, you can skip by clicking the Skip button.
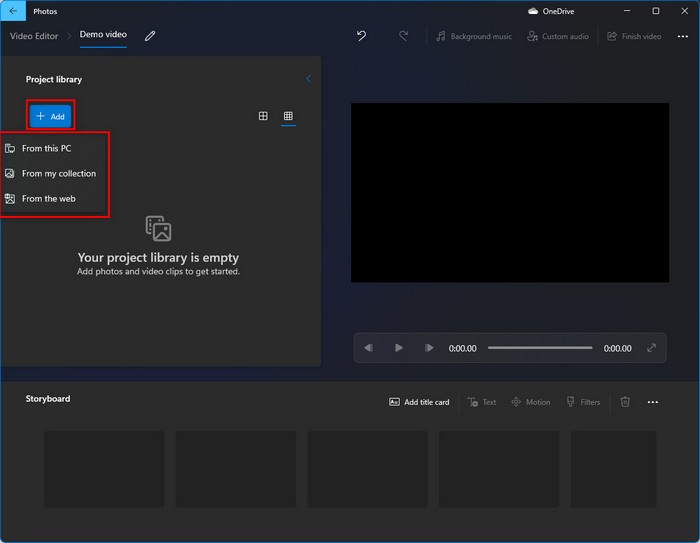
- Click on the Add button under the Project library to open your video clips from your PC, my collection, or the web. Or, drag and drop any video files on the project library from your PC.
- Right-click on the Project library video and select Place in the storyboard. Or, click on the video files and drag and drop the files on the storyboard.

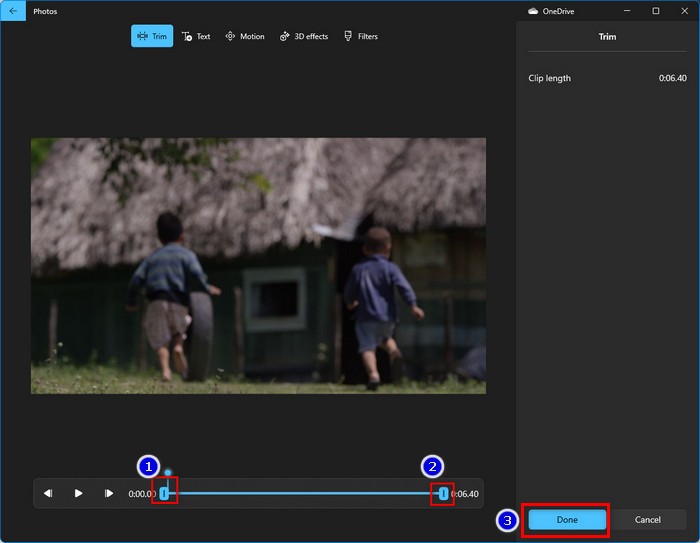
- Click on the Trim button to start the video trimming.
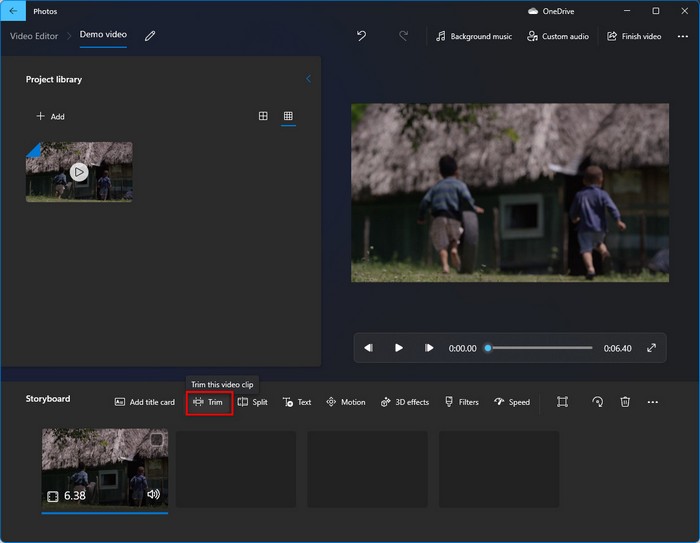
- Drag the start and end sliders in the trimmer window to cut the video. Trimming will result in the blue area of the video.
- Click on the Done button to finish the trim.
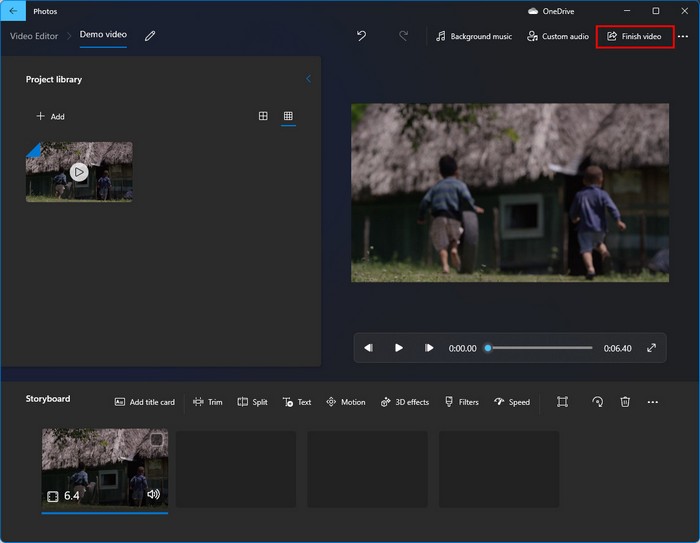
- Click on the Finish video button to save your trimmed video.
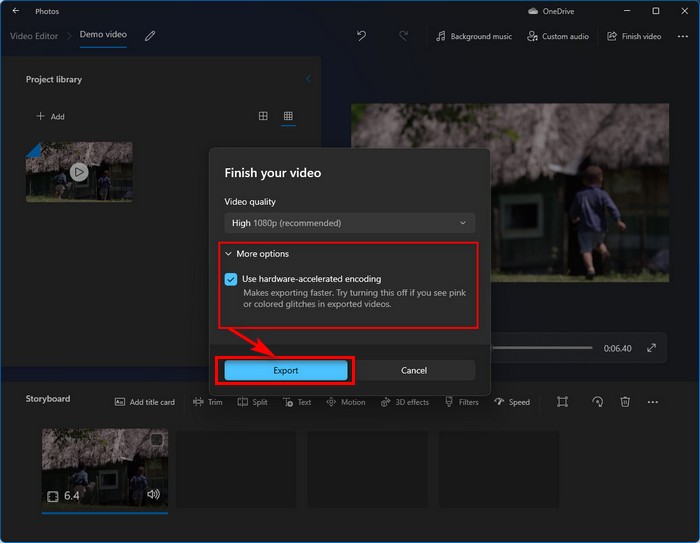
- Choose a Video quality you want to export your video.
- Click on the More options and check the Use hardware-accelerated encoding option to make exporting faster.
- Click on the Export button to start exporting your video.
- Wait until the video exporting is completed.
Check our exclusive tutorial on How to Fix Blue Screen on Windows 11.
2. Use Movies & TV App
Another effective way to trim videos on Windows 11 system computer is using the Movies & TV app.
The Movies & TV app also have the video trim feature, and you can easily cut your videos using the Movies & TV app.
Follow these steps to trim videos on Windows 11 using the Movies & TV app:
- Select a video and right-click on and navigate to Open with > Movies & TV.
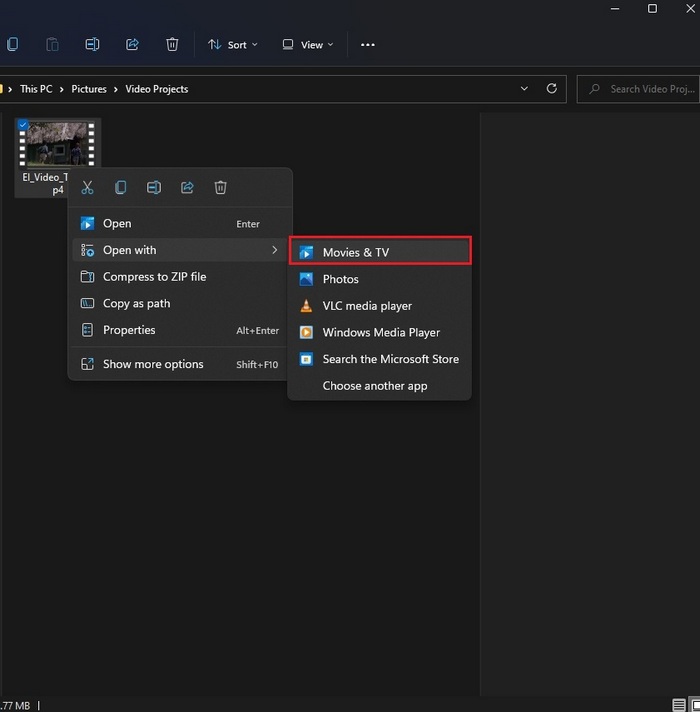
- Click on Movies & TV to open the file with the Movies & TV app.
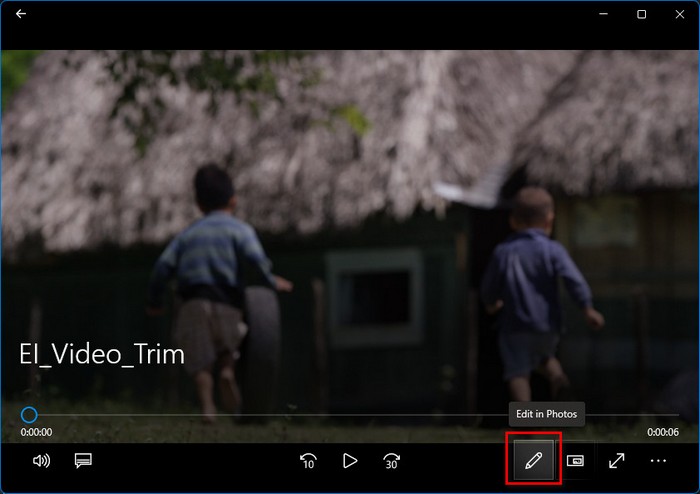
- Click on the Edit in Photos button.
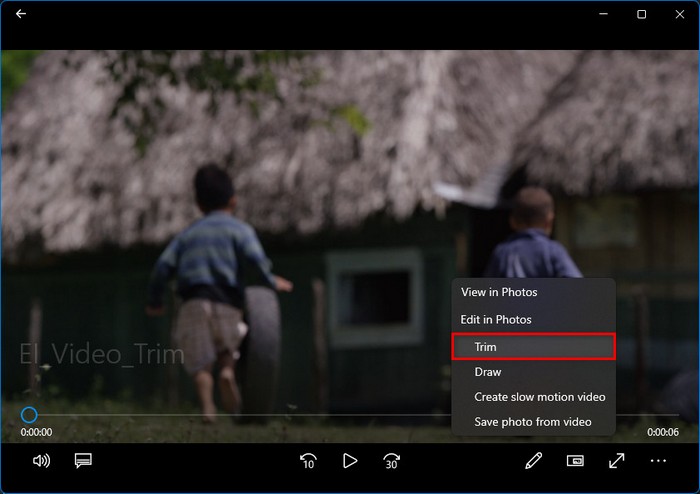
- Select the Trim option to open the video trim window.
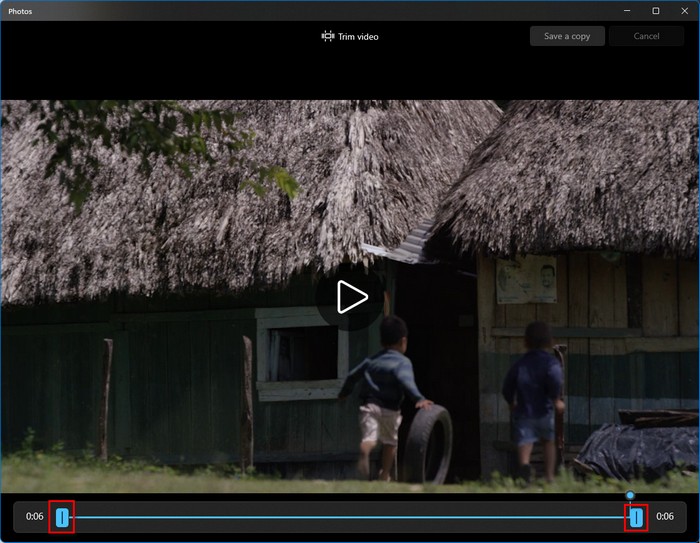
- Drag the start and end sliders in the trimmer window to cut the video. Trimming will result in the blue area of the video.
- Press Ctrl + S on your keyboard and click the Save a Copy button to save the trim.

- Wait a few times to finish the saving.
Also, check out how to disable SuperFetch on Windows 11.
3. Use Photos App
The last simple way to trim videos on Windows 11 system computer is using the Photos app. This method is one of the easiest and quickest ways to cut your videos.
Follow the steps below to trim videos on Windows 11 using the Photos app:
- Select a video, right-click on it, and navigate Open with > Photos.
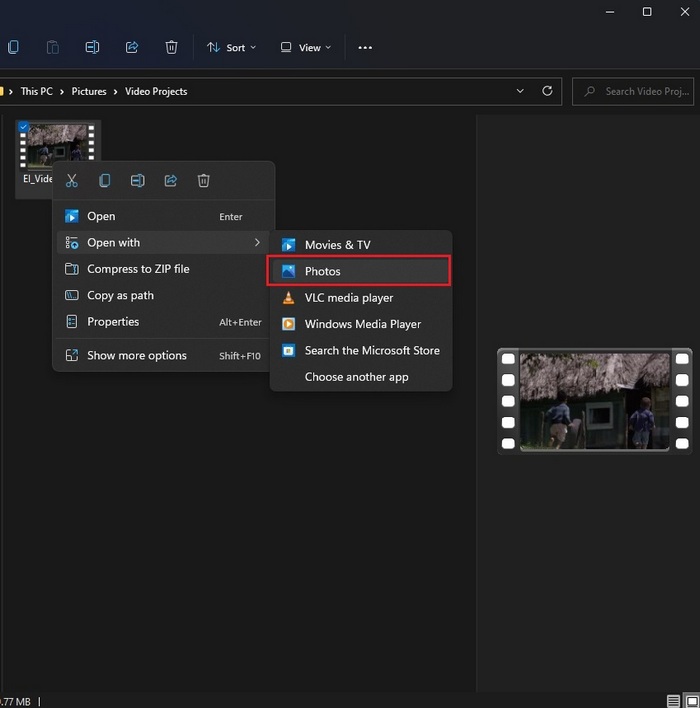
- Click on the Photos to open the file with the Windows Photos app.
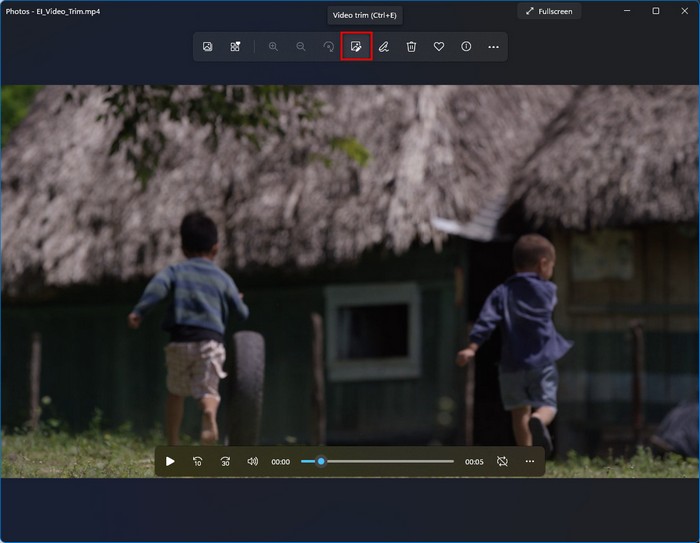
- Click on the Video Trim button at the middle of the top menu, or press the Ctrl + E on your keyboard to open the video trim window.
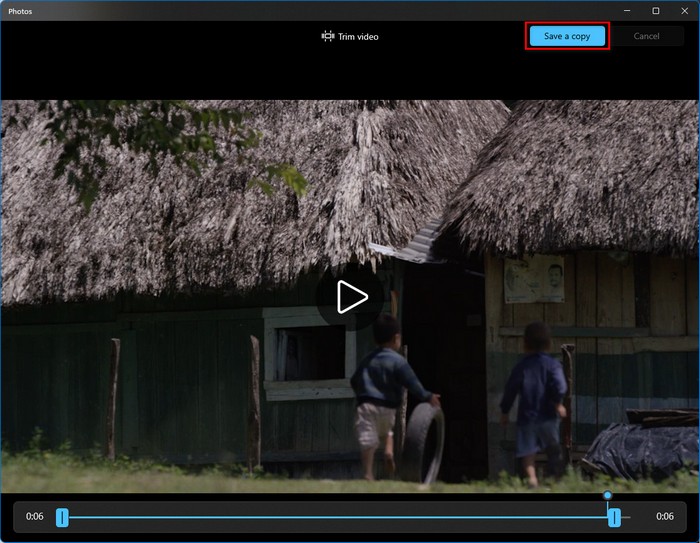
- Drag the start and end sliders in the trimmer window to cut the video. Trimming will result in the blue area of the video.

- Press Ctrl + S on your keyboard, or click the Save a Copy button to save the trim.
- Wait a few times to finish the saving.
Final Thoughts
To quickly trim a video on your Windows 11 system computer to share your social media or use it for other professional work without using a third-party video tool, you can use Windows Photos or Video Editor tool.
In this post, I describe the Windows built-in Video Editor software and the uses of the Video Editor tool.
I also describe three practical and effective methods to trim videos using the Video Editor, Movies & TV, or Photos tool.
I hope you found this post to be informative. If you found this post helpful, please let me know which method works for you.
You may also look at other posts if you’re interested in learning more about similar topics.