A controller is your console’s input device. When it stops working, the PS4 is of no use to you. It is like a car that has its steering wheel scrapped.
Most of the time, you would think about getting a new controller when your existing one stops charging. But before going through that route, why not troubleshoot the existing one and save yourself some money?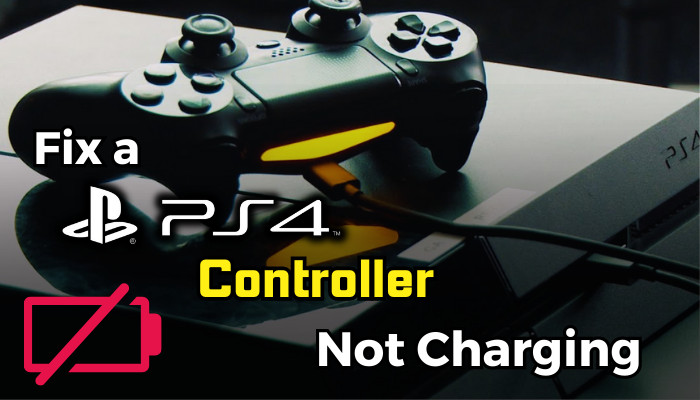
So, let’s look at the possible ways you can fix your PS4 controller so that it starts to charge again.
Why Is Your PS4 Controller Not Charging?
A PS4 controller stops charging when its charging port is damaged. Dirt and grime can settle inside the port, causing the charging cable to not make proper contact. A bad cable can also cause this. If the battery inside the PS4 controller is worn out, then the controller will not charge.
With prolonged use, a battery will drop its rated capacity. That means a controller’s battery will degrade over time. So if your controller’s battery dies after a while, then maybe a battery replacement is what you need.
Also, a bad charging cable will not charge a controller. If the cable has multiple twists, that can prevent the controller from charging. That’s when you will see no lights from its LEDs.
How To Fix A PS4 Controller That Is Not Charging
To fix a PS4 controller that does not charge, first, make sure your PS4 is turned on or in rest mode. Next, clean the charging port and use a cable that is working. If these do not work, then reset the controller and try re-connecting the DS4 with the PS4 again.
Before attempting these fixes, ensure your PS4 is updated and running the latest firmware. To know more about PS4’s latest firmware, go check Sony’s support page.
With that out of the way, let’s get to the fixes right away.
These methods will fix your PS4 controller when it is not charging:
1. Ensure PS4 is in Rest Mode During Charging
Your DualShock 4 controllers only charge when the PS4 is powered on. If that’s not the case, the USB ports will not get any power which in turn will not charge the controller.
So, either connect the controller to the PS4 when it is turned on or when in rest mode. Rest mode also allows the DualShock 4 to charge. But you need to enable a setting that will power the USB ports during that time.
Here’s how to do it:
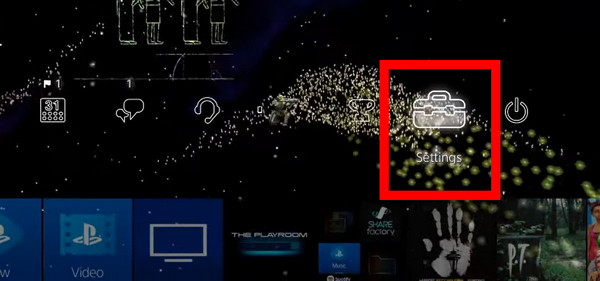
- Open PS4’s Settings menu.
- Go to Power Save Settings.
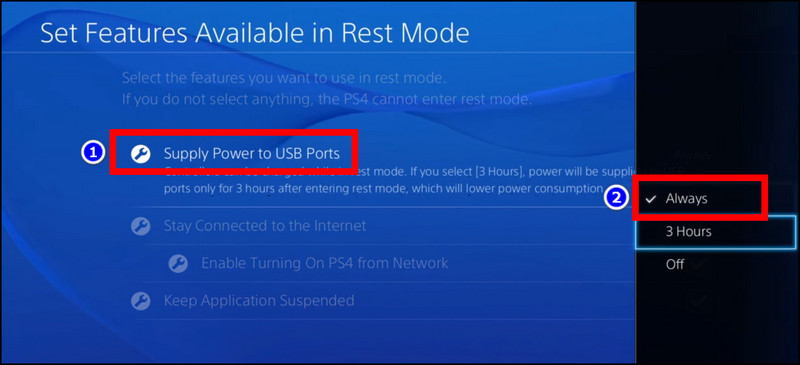
- Open Supply Power to USB Ports.
- Set this to Always. You can also choose 3 Hours to save more power draw from the PS4.
Now, it is time to put the PS4 in Rest Mode.
To do this, press the power button on the PS4 until you hear a beep. After this, the PS4 turns off, and its LED settles into an orange color. This indicates that the PS4 is in rest mode. Now try to connect the controller to any USB port. See if the controller glows amber, meaning it is charging.
2. Clean the Charging Port
If you keep the controller next to the PS4 like most people, dust can enter the charging port. Then even if you use a good working cable, the controller will fail to charge.
So, clean the controller periodically to avoid the build-up of dust inside the charging port. You can use a can of compressed air and blow out the dirt particles. Or you can swab a Q-tip in rubbing alcohol and clean the insides of the port.
Try reconnecting the controller to a different device and see if you can get it to charge. Plugging into a USB port of your PC should start charging. If that does not work out for you, then you need to change the charging port. This is detailed in the battery replacement section.
3. Use a Different Cable
Connect the DualShock 4 with a different cable. Find old micro USB cables, and that should have no problem charging the controller. Also, connect it to a different device other than PS4.
If you have a power bank, that should work too. To eliminate possible cable damage, use the same cable and see if it charges other devices.
Once you figure out the cable is not the issue, try resetting the controller to eliminate any software issues preventing the controller from turning on.
4. Reset the Controller
Now it is time to turn back time and reset the PS4 controller. Well, we won’t be messing much other than the controller’s software.
DualShock 4 controller comes with a reset button. Once you push it, existing pairing information is deleted. That means you will need to pair it to your PS4 again. This mostly fixes the issue when a controller is charging but not connecting.
Follow the steps to reset your DualShock 4 controller:
- Turn off your PS4 completely. Pressing the power button for 10s will do this. You will hear two beeps which will confirm this.
- Push the button underneath the controller using a sim ejector tool or a similar metal. This is present near the L2 button. Hold the button for 5s until you release it.
- Now connect the DualShock 4 controller using a USB cable to your PS4.
- Power on the PS4.
- Press the PS button and follow the on-screen instructions to pair it up with the PS4.
At this point, you need to see if you see an amber color flashing on the controller. This will mean the controller is charging. If you just see a blue light, that means it’s connected but not charging. This indicates the charging port is okay, but the battery will not charge.
If the controller works okay when connected but won’t hold a charge, you probably need a battery replacement.
5. Change the Controllers Batteries
All batteries lose their capacity over time. That is also true for the PS4 controller. But if you have a fairly new unit and it is unable to retain its charge, return it for a replacement if it still has a warranty. Otherwise, buying a replacement battery is the only thing you can do.
Before showing you how to change the battery, let’s see how the charging port can be changed. Then we will replace the battery. That itself is pretty easy if you do not mind removing some screws.
Follow the steps to change the charging port and battery on the DualShock 4 Controller:
- Remove the four screws at the bottom of the DualShock 4 controller.
- Pull the controller grip upwards until you see it disconnecting from the bottom part. Use a gentle force, and it should separate from the base.
- Carefully remove the ribbon cable connecting the charging port to the controller mainboard. This should remove the back part from the controller.
- Remove a translucent shroud over the charging circuit. Pulling it will cause it to come off.
- Unscrew the charging port circuit from the case.
- Place the replacement charging port in the same place and screw it in securely.
- Place the plastic shroud in the same place as earlier.
- Now bring the entire back plate over to the rest of the controller and route the ribbon cable into its slot. Ensure that it stays fit snugly.
Before we reassemble the entire unit, we will change the battery.
- Disconnect the battery from the controller mainboard. It is held using a small power connector. Pulling it up should disconnect it.
- Remove the battery and insert a new battery into the same place.
- Connect the power cable to the motherboard.
Now you have the place the back part of the controller back into place. Apply some pressure near the sides of the triggers. This should join the two parts of the controllers firmly. Remember to place the screws right in securely.
And you have successfully replaced the DualShock 4’s battery.
Now it is time for the moment of truth. Plug in the controller to the PS4. You should surely see the amber light now. That means the controller is finally charging, and all the effort you put in until now was totally worth it.
Frequently Asked Questions
How do I know if my PlayStation 4 controller is charging?
When the PlayStation 4 is successfully charging, it flashes an amber color. It maintains this solid color as long as it charges. When the charging finishes, the controller will not display any color.
Why isn’t my PS4 controller not turning on or charging?
When it runs out of battery, the PS4 controller will not turn on. If it refuses to charge, then either the cable is faulty, or the battery needs a replacement.
Can I charge a PS4 controller with a phone charger?
A PS4 controller will probably charge with a phone charger, but it is not recommended. Because the phone’s charger uses a different voltage than what Sony normally uses, which can damage the controller’s battery over time.
What’s Next
So, by now, you should get the DualShock 4 controller working. If not, maybe you need a new controller. If you are willing to save some bucks, go get a pre-owned unit from Gamestop.
Even if the battery no longer works, you can go the wired route and use it with an old USB cable. You will just lose the wired functionality that way.
As always, comment below for any queries that you have. And that’s our cue to say goodbye.