Increasing the system RAM speed is an effective & cost-free way to squeeze every bit of performance out of your PC & boost the overall workflow.
But what is the safest way to change or increase the RAM frequency without any hassle? That’s where my years of PC expertise come in. Read on as I have shortlisted the most straightforward way to optimize & increase the system memory speed without risking any hardware damage. So let’s get started.
How to Increase RAM Speed on Your PC
To change or increase RAM speed, enter the BIOS of your Windows PC and enable XMP profiles. Otherwise, RAM modules would run at the stock frequency by default. You can also try overclocking the memory modules by manually tweaking the operating voltage & CAS latency.
Alternatively, you can optimize the RAM usage by closing any unnecessary background apps or services and disabling any anti-virus software you have on your PC. It will increase the overall memory performance of your device.
Below I have briefly discussed the 5 most precise and tested ways to optimize and increase the system RAM speed in Windows computers.
Here are the methods to boost your computer’s RAM speed:
1. Enable XMP
The most definitive way to increase DRAM speed is to enable the XMP(extreme memory profile) from the BIOS menu.
A high-performance RAM module usually runs on the stock frequency by default. In order to get the highest memory performance, you need to change the RAM speed from the BIOS memory profiles.
The name of the options in BIOS can vary depending on the motherboard models. So it’s difficult to describe the exact path for XMP settings. But you should get a general idea about the location of this option after going through the steps below.
Here’s how to enable XMP profiles in BIOS:
- Completely shut down your computer.
- Press the power button. After the splash screen appears, mash/press down the BIOS key(depending on your motherboard model, it’s usually a function key, Esc or Delete) to enter the BIOS menu.
Note: You’ll see the necessary instruction and BIOS key on the initial splash screen during boot. Press the BIOS key accordingly. If the computer boots to Windows, it means you didn’t hit the correct key fast enough. Reboot the device and immediately start pressing the BIOS key until you enter the BIOS menu.
- Navigate to X.M.P or DIMM profiles. If you don’t see such an option, go to OC > DRAM Settings or similarly named settings. Here are some examples:
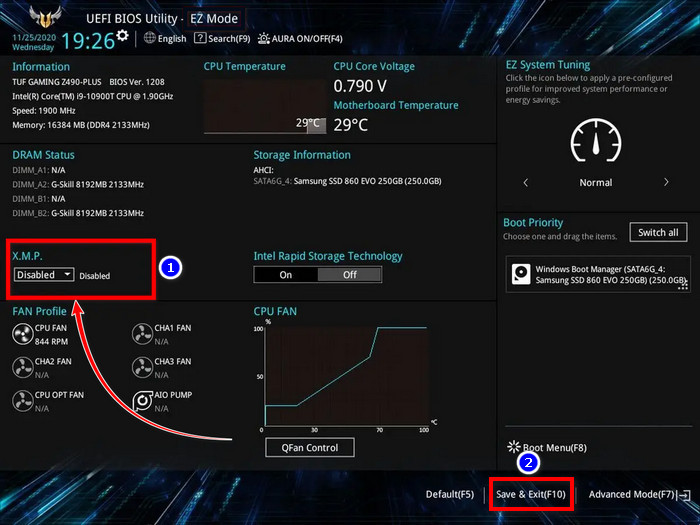
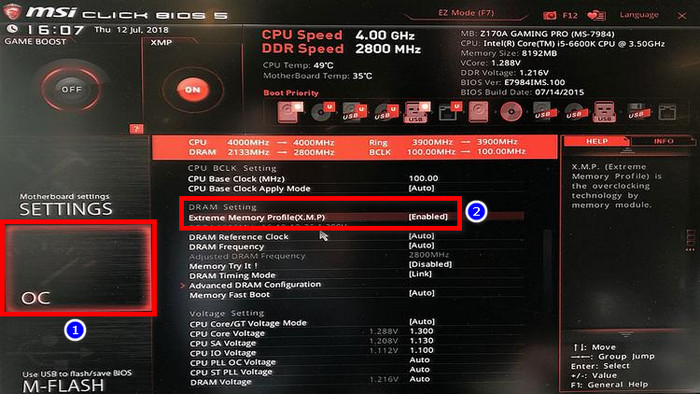
- Click on the drop-down menu for Extreme Memory Profile or X.M.P and select Enable.
- Click on Save & Exit or press F10 to quit the BIOS menu.
Now, your computer will reboot. Press Ctrl+Shift+Esc & go to the Performance tab. Then click on Memory. You’ll be able to see the current RAM frequency in the Speed section. In case the entry hasn’t changed, you may have forgotten to save the changes before exiting the BIOS.
If the entry has changed, try running some memory-intensive tasks/programs and check for any stability issues. In case you experience any BSoD(blue screen of death) or random restarts/shutdowns, consider disabling the XMP option from the BIOS by following the same steps.
Furthermore, if you see more than one XMP profile in the BIOS settings, choose the fastest and see if your PC runs without any issues. If you experience BSoD or any kind of problem, step down to the slower one and try again.
Check out our expert’s reviewed best DDR4 RAMs and DDR5 RAMs.
2. Check RAM Usage
Keeping an eye on the system’s memory usage can often be beneficial since certain 3rd party apps or services can take up huge chunks of available memory and ultimately reduce the overall memory performance.
Here’s how to check RAM usage in Windows:
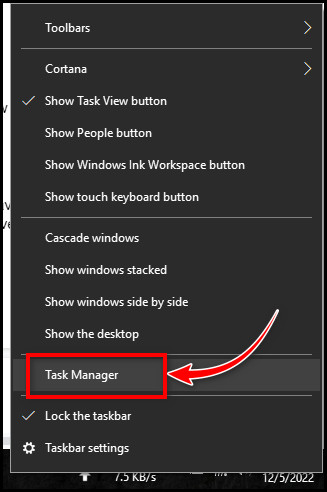
- Right-click on the taskbar and select Task Manager.
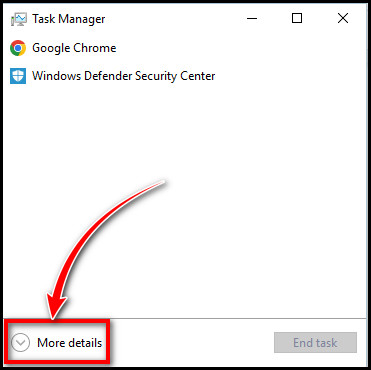
- Click on More details to expand to full view. Skip this step if you’re already in full-view mode.
- Click on the Memory header. All processes will get sorted from most to least memory usage.
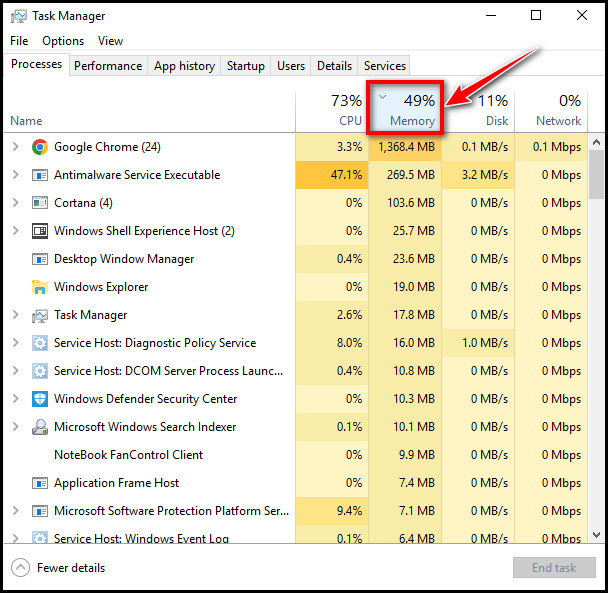
Now you can see which apps or services use the most RAM. Keep in mind that resource-heavy apps generally need more RAM. So, it’s not an issue when you’re running a resource-intensive program and notice a high system memory usage by it.
If you’re currently not running any demanding apps, but still noticing high RAM usage, then you have a problem. Move on to the next method to know what to do in such cases.
3. Close Unnecessary Background Processes
As I have mentioned earlier, certain apps or services can run in the background and take up a lot of available system RAM.
This can cause performance issues when you’re trying to play heavy games or do resource-intensive workloads such as video editing, which require a hefty chunk of free system memory.
Fortunately, closing any unnecessary programs/services can free up available memory and increase your PC’s system-memory-related performance.
Simply go to the Task Manager and choose the background running apps/services. Now click End task. Keep in mind some system apps/services require running in the background to function properly. So be cautious about which program/service you choose to close.
4. Scan for Malware
If your device gets affected by malware, you may notice unusually high memory usage even when your PC is idle. This can significantly reduce your computer’s performance and cause further memory leaks.
Thankfully, Windows now comes with a built-in malware scanner that can scan your PC for viruses, spyware and other malicious softwares. It will also take necessary actions to remove those malware from your device.
Here are the steps to scan your PC for malware:
- Press Windows Key+S and type windows defender security center.
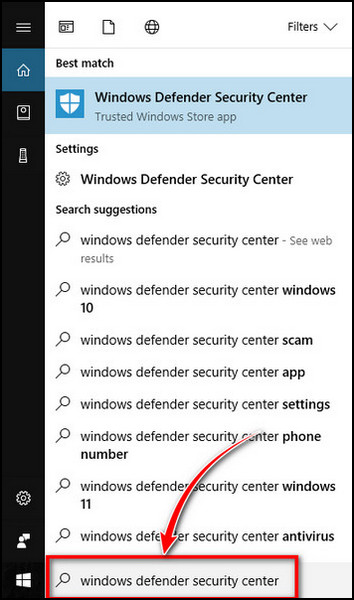
- Hit the Enter button.
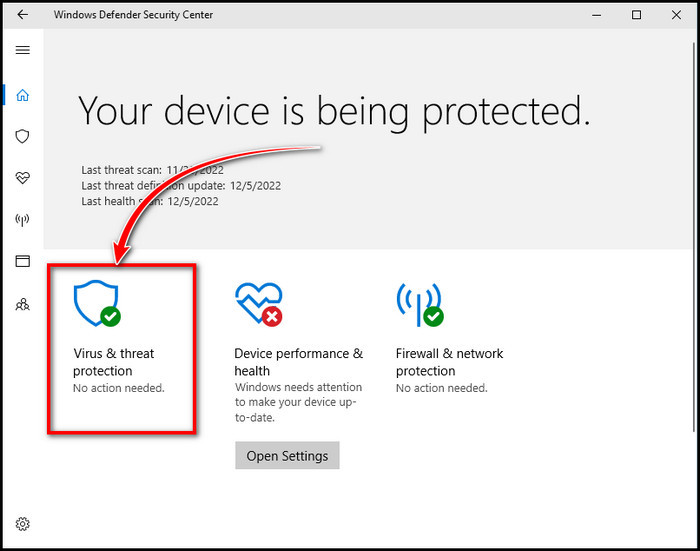
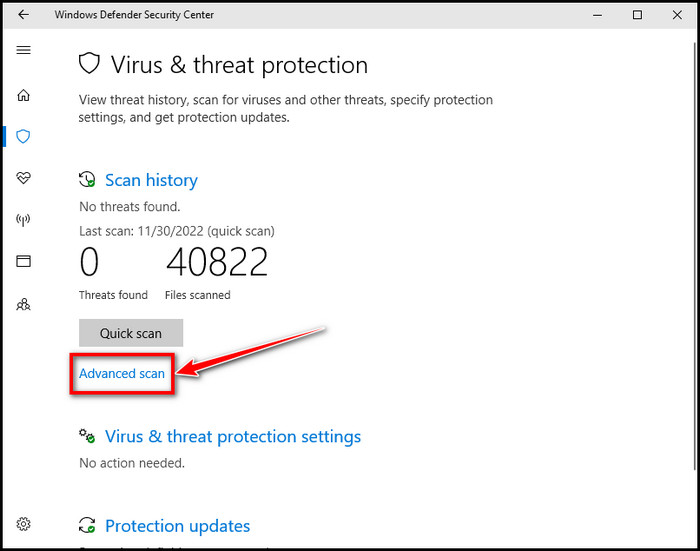
- Click on Virus & threat protection > Advanced scan.
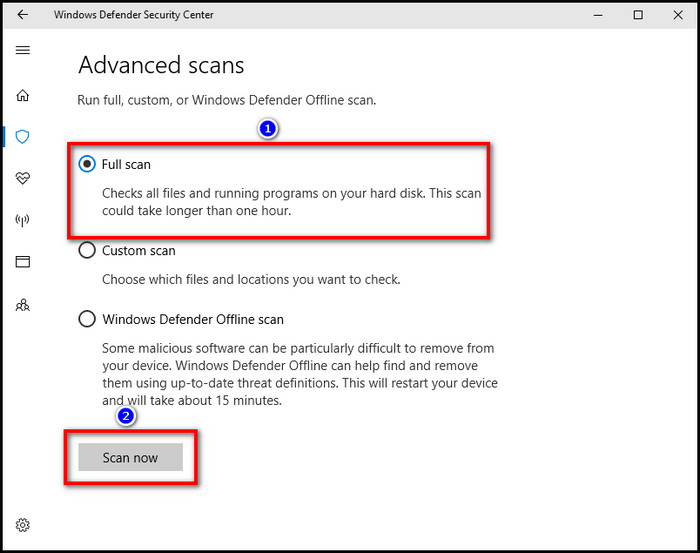
- Choose the Full scan option & click Scan now.
These paths can change depending on the Windows version installed on your PC. But you should get a general idea about the steps to scan for malware from this guide.
You can also use a 3rd party anti-virus program, but those can often start hogging available system memory for themselves. This brings us to our next and final topic….
Also, check out our separate post on will motherboard turn on without RAM.
5. Disable Anti-Virus
Anti-virus programs are useful to protect your computer against any spyware or malware. Unfortunately, these programs can often use a lot of RAM while running in the background.
This can ultimately reduce the available system memory for other apps & cause performance issues for resource-intensive tasks such as gaming or photo/video editing.
If you’re experiencing such issues, try disabling or uninstalling any anti-virus software you have on your computer.
Last but not least, consider buying more RAM or upgrading to a faster memory kit. Though this will cost you some money, adding more/faster RAM will deliver much-improved performance and allow you to run many apps at once. There’s no way around it.
Check out other posts, far a better understanding of which RAM slots to use and which RAM channels to use.
Frequently Asked Questions
Can I increase RAM MHz?
Yes. Using XMP profiles, you can increase your computer’s RAM speed by overclocking from the BIOS.
Why is my RAM not running at full speed?
Your computer’s RAM won’t run at full speed if the CPU doesn’t support the frequencies of the XMP profiles. The same goes for motherboards. Additionally, you have to enable XMP from the BIOS. Otherwise, the RAM modules will only run at the stock frequency.
How do I fix low RAM speed?
You can fix low RAM speed by enabling the XMP in your computer’s BIOS. You can also tweak the latency timer accordingly & get a much faster speed than stock settings.
Final Note
Increasing the DRAM frequency from the BIOS might seem a little risky for a PC hardware novice. But worry not; simply follow this guide & you’ll be able to get the most out of your RAM purchase without any issues.
That’s it for today. If you have further questions about this topic, feel free to share them in the comment section below.
Have a great day!