At the heart of training deep learning models is the graphics card. These models require enormous computational power to train & optimize, and GPUs have emerged as the preferred hardware to take on the task.
In this article, I’ll explain what kind of GPU is good for deep learning and what software you need to install to prepare the graphics card to train ML models for both Windows and Linux operating systems.
Let’s begin!
What Type of GPU is Required for Deep Learning?
At the centre of the machine learning model is the graphics card. GPUs are extremely fast at executing deep learning models. Unlike CPUs, which have only a few complex cores capable of doing complex tasks, the GPUs have hundreds, if not thousands, of cores. And though they are simple in nature, these are more than capable of running neural networks.
The most reliable video cards for deep learning are from Nvidia. That’s because Nvidia graphics cards have CUDA SDK which is a software library to interface with the GPU.
When picking out a graphics card, to get the most value out of your money, you need to buy one which has Tensor Cores. These cores are specialized processing units that are designed to do matrix maths.
When you have a GPU with Tensor cores, you can utilize mixed precision training. It allows bigger batch sizes and faster training of bigger models in machine learning.
All Nvidia RTX models and all the products that have come after that have Tensor cores.
Another thing to keep in mind when selecting your machine-learning GPU is its memory. If you only want to train models for embedded devices which are smaller models, a graphics card with less memory, like 4 GB will be sufficient.
But for bigger models like in the NLP domain, you’ll need as much GPU memory as possible. So, you can simulate bigger batch sizes with much faster speed on larger models.
Also, for a multi-GPU setup, be sure to use blower-style graphics cards. You can stack this type of GPU a lot closer to each other compared to the usual cards because blower-style video cards blow out the hot air through the back panel of the PC case.
Now that you know what kind of graphics card you need, let’s see what other computer components and software are required for deep learning.
What are the Minimum Hardware & Software Requirements for Machine Learning?
You don’t need a high-end, state-of-the-art $1000 system for deep learning. In fact for beginners, a moderately cheap computer with an RTX series graphics card will be enough.
Once you see my computer configuration, you’ll get a good idea about what specs your PC needs to have to start machine learning.
My deep learning PC configuration:
- Graphics card: Nvidia Geforce GTX 1650 OC 4 GB.
- RAM: 2 x 4GB sticks.
- Hard drive: SSHD 1 TB 7200 RPM 64 MB Cache.
- Processor: AMD Ryzen 3 Series 4 Core 3.1 GHz.
- Power Supply: Corsair 450 W.
- Motherboard: MSI A320M.
- PC case: DIYPC Solo-T2-BK with 2 fans pre-installed.
For the software side, you’ll need an operating system with a C language compiler to learn deep learning. It converts C code into Machine language, so your computer can run it.
If you are a Mac or Linux user, you’ll already have the compiler on your device called Clang & GCC, respectively. On Windows, you’ll need to download it through Visual Studio.
But despite being a powerful language, C is not designed for the parallel processing you need for machine learning. That is where the CUDA toolkit comes into play.
CUDA is a GPU-specific tool. It is a collection of programming models, compilation tools and architecture. The C code optimized through the CUDA toolkit provides the best results for deep neural networks.
And Nvidia has created different CUDA libraries for different tasks. For example, cuDNN for neural network training, TensorRT for inference, and Visionworks for computer vision.
Then comes the Python framework, which includes more libraries like TensorFlow and Keras, designed to simplify neural networks even further.
How to Use Nvidia GPU for Deep Learning with Ubuntu
To use an Nvidia GPU for deep learning on Ubuntu, install the Nvidia driver, CUDA toolkit, and cuDNN library, set up environment variables, and install deep learning frameworks such as TensorFlow, PyTorch, or Keras. These frameworks will automatically use the GPU if it is available.
Here are the steps to set up GPU powered machine for deep learning with Ubuntu:
1. Install Ubuntu
- Open your browser, go to the download page of Ubuntu, and click on Download.
- Go to etcher.io and Download Etcher.
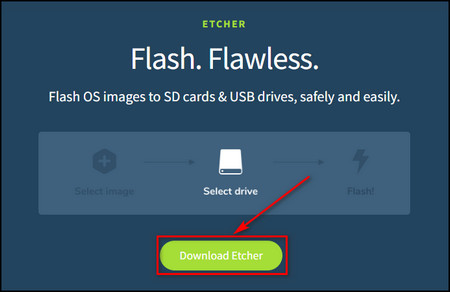
- Start the recently downloaded Etcher program.
- Select Flash from file.

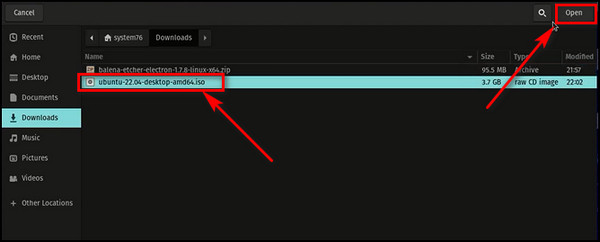
- Choose the .iso file of Ubuntu you’ve just downloaded and click Open.
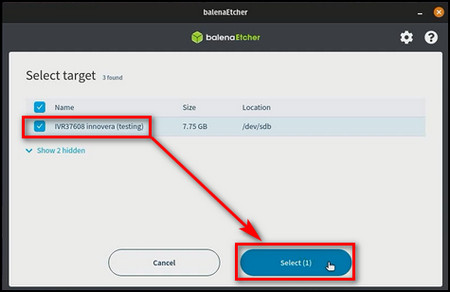
- Insert your flash drive into the computer, select it when it pops up in the Select target window, and click Select. Don’t forget to back up the data in the flash drive because this process will wipe everything from it.
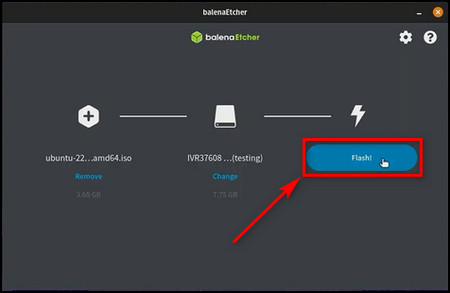
- Click on the Flash button.
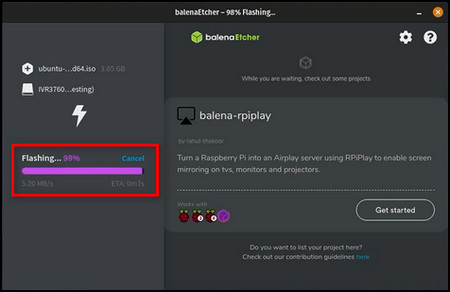
- Wait for the flashing process to complete.
- Shut down your computer and insert the flash drive with bootable Ubuntu.
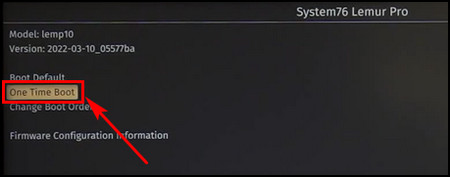
- Turn on the PC and go to the boot menu or the BIOS mode.
- Select the One Time Boot option.
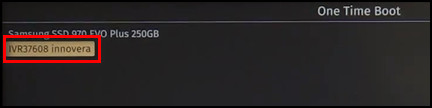
- Choose your flash drive and press Enter.
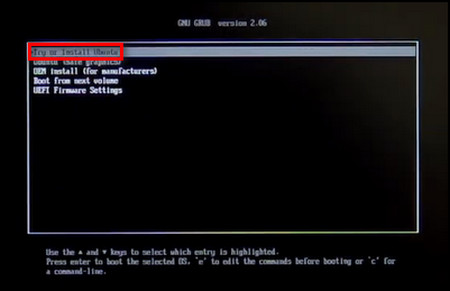
- Select Try or Install Ubuntu and press Enter again.
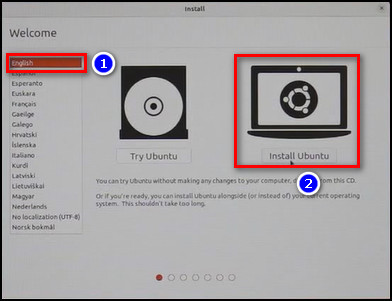
- Pick English as your language and choose Install Ubuntu on the Welcome page.
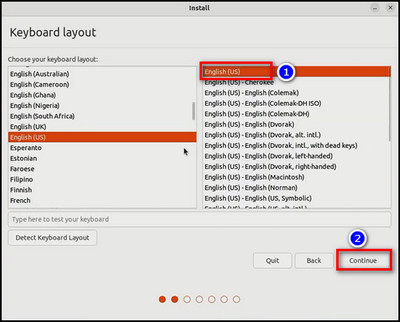
- Select your keyboard layout and click on Continue.
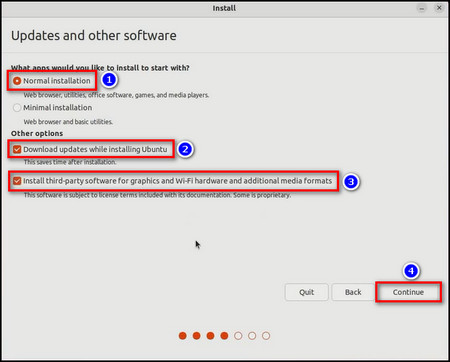
- Choose Normal installation, Download updates while installing Ubuntu & Install third-party software, and click the Continue button.
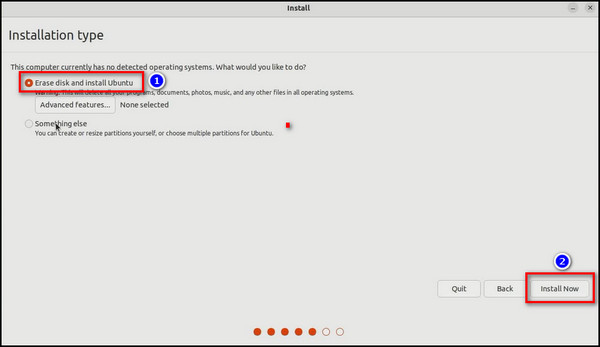
- Select Install Now and click on Continue again.
- Click your location on the map and click Continue.
- Provide your information, select Continue, and the Ubuntu installation process will start.
- Click on the Restart Now button.

When Linux starts to boot up, it’ll ask you to remove the flash drive so it doesn’t accidentally install Ubuntu again. Then press Enter. Once the system starts, you’ll find Ubuntu has been successfully installed.
2. Install the Nvidia Driver and Verify
To install the Nvidia driver on Ubuntu:
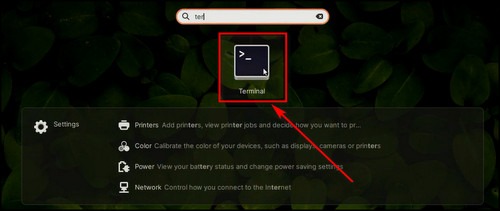
- Click on the App Launcher in the bottom left corner, search for Terminal, and open it.
- Run the following command to update the system and repositories:
sudo apt update && sudo apt upgrade -y
- Enter the common below to get the list of supported drivers for your graphics card:
sudo ubuntu-drivers devices- Copy the recommended version of the Nvidia driver.
- Insert the recommended driver version in the following command line as such:
sudo apt install nvidia-driver-460 -y- Enter the command sudo reboot when the installation process is completed.
Now your computer will restart to apply the changes.
To verify the Nvidia driver:
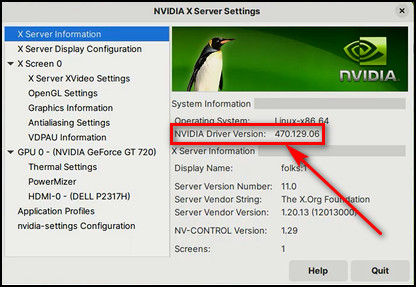
- Search for Nvidia X Server Settings and open it.
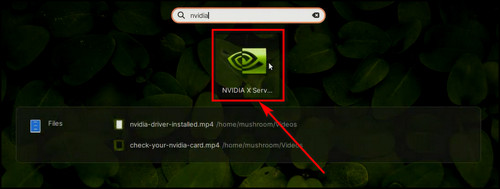
- Check the Nvidia Driver Version.
- Open Terminal and run the command below to check which GPU is being used:
prime-select query- Enter the following line to swap to Nvidia in case Inter is being utilized:
sudo prime-select nvidia- Restart the system after you switch the graphics driver.
3. Download & Install CUDA Toolkit
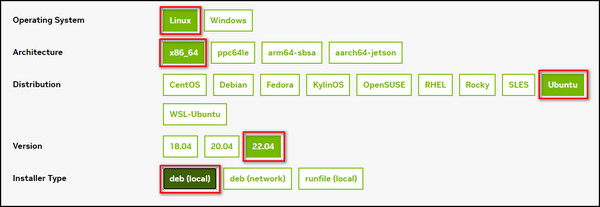
- Open your browser and go to the Nvidia Developer CUDA Download page.
- Select your device & OS information, and you’ll get the source code to install CUDA.
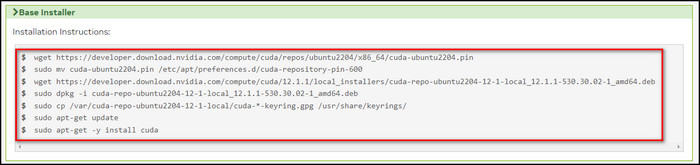
- Open the Terminal and run the command lines in the Base Installer table sequentially. After each terminal command, press Enter and wait for the command to fully execute.
4. Download & Install cuDNN
- Open Terminal and run the following command to install the zlib package:
sudo apt-get install zlib1g- Open your browser and the Nvidia Developer cuDNN Download page.
- Agree to the cuDNN terms and download the latest cuDNN version.

- Go to the folder containing the downloaded cuDNN file and open the Terminal there.
- Execute the following shell commands in the Terminal and press Enter after each command:
sudo dpkg -i cudnn-local-repo-${OS}-8.x.x.x_1.0-1_amd64.deb
sudo cp /var/cudnn-local-repo-*/cudnn-local-*-keyring.gpg /usr/share/keyrings/
sudo apt-get update
sudo apt-get install libcudnn8=8.x.x.x-1+cudaX.Y
sudo apt-get install libcudnn8-dev=8.x.x.x-1+cudaX.Y
sudo apt-get install libcudnn8-samples=8.x.x.x-1+cudaX.Y
5. Install Python, OpenCV, TensorFlow & Keras Using the Anaconda Platform
- Open your browser and go to the Anaconda Installers page.
- Select and download the latest Anaconda Installer file under Linux.
- Open the Downloads folder and copy the name of the installer file.
- Press Ctrl + Alt + T to open Terminal.
- Type bash ~/Downloads/ and paste the name of the Anaconda setup file you’ve just copied. Then Press Enter. In my case, the command line was:
bash ~/Downloads/Anaconda3-2021.05-Linux-x86_64.sh- Read the license agreement, type yes, and press Enter.
- Confirm the installation location, and press Enter again.
- Enter yes into the Terminal for the last time to finally initialize Anaconda.
- Run the following shell command to install Python 3.9:
conda create --name env39 python=3.9- Execute the commands provided below to install TensorFlow, OpenCV & Keras, respectively.
conda install -c anaconda tensorflow-gpu
conda install -c conda-forge opencv
conda install -c anaconda keras
6. Check GPU Utilization
To verify whether your graphics card is all set to begin deep learning, open the Python IDE and execute the following code:
from tensorflow.python.client import device_libdef
get_available_gpus():
local_device_protos = device_lib.list_local_devices()
return [x.name for x in local_device_protos if                                                                                         x.device_type==‘GPU’]
listGPU = get_available_gpus()
If you get back a response giving you the GPU name and its size, it means the graphics card is ready for machine learning.
How to Download & Install Nvidia GPU using TensorFlow for Training Deep Neural Networks on Windows
To train deep neural networks using TensorFlow on Windows, you need to install Nvidia GPU, download and install the CUDA Toolkit, and cuDNN from the Nvidia website. Then install TensorFlow using pip and verify the installation by running a Python code.
Once installed, you can use TensorFlow for machine learning on Windows using the power of Nvidia GPU.
Follow the instructions below to use TensorFlow for Deep learning using Nvidia GPU on Windows:
1. Install Visual Studio
- Open your browser and go to the Visual Studio Community page.
- Click on the Download button.

- Run the downloaded installer file.
- Don’t choose any additional workloads. Just install the Visual Studio core editor.
2. Install the NVIDIA Driver
- Go to the official Nvidia Download Drivers page.
- Select your Nvidia product and click on the Search button.
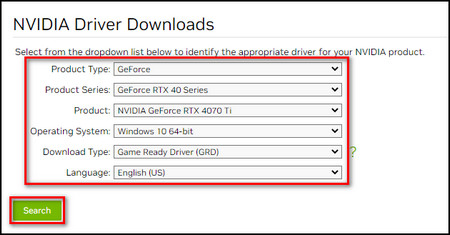
- Click Download, and the most recent Nvidia graphics driver file will be saved.
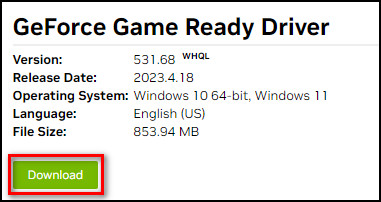
- Install the recently downloaded setup file.
3. Download and Install the CUDA toolkit
- Open the TensorFlow installer page and scroll down to the GPU section.
- Check which CUDA toolkit version you need.
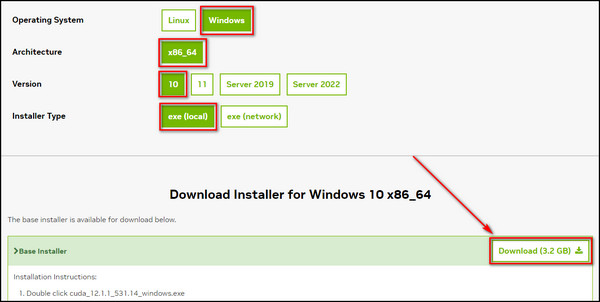
- Go to the CUDA Toolkit Archive page and choose the CUDA Toolkit version you’ve validated.
- Select your OS architecture & version, choose exe (local) as the Installer Type, and download the Base Installer for CUDA.
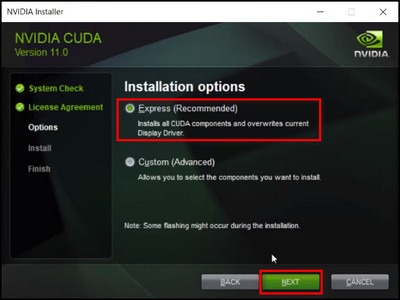
- Right-click on the downloaded CUDA installer file and choose Run as administrator.
- Select Agree and Continue, choose Express, and go through the installation process.
4. Download cuDNN
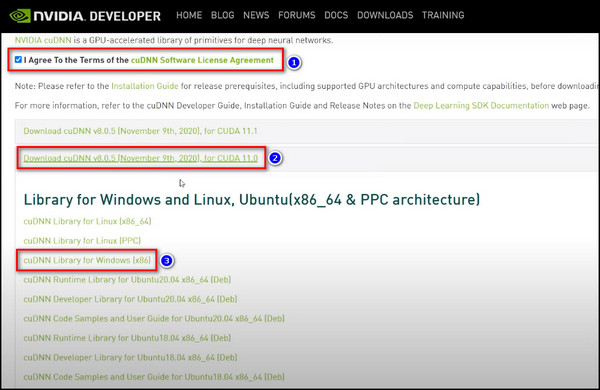
- Open the Nvidia Developer cuDNN page.
- Sign up or log in to your Nvidia account.
- Accept the cuDNN Software License Agreement terms.
- Choose the cuDNN version that supports the CUDA version you’ve installed in the previous section, and select cuDNN Library for Windows.
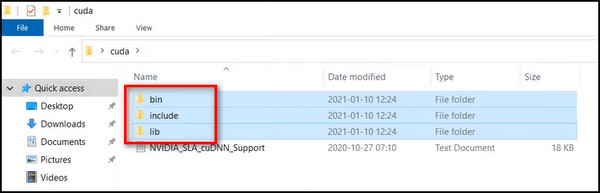
- Extract the downloaded cuDNN Zip file and you’ll see a folder labeled CUDA.
- Open CUDA and copy the bin, include & lib folders.
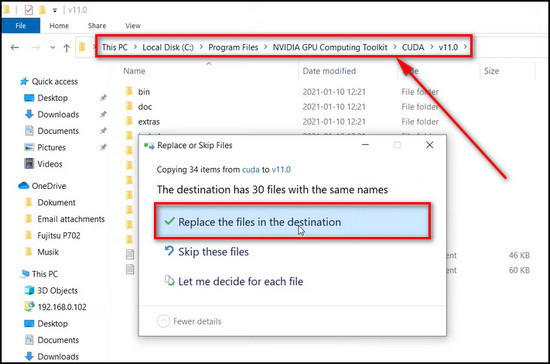
- Go to C: > Program Files > Nvidia GPU Computing Toolkit > CUDA > 11.0. Then paste and replace the copied folders.
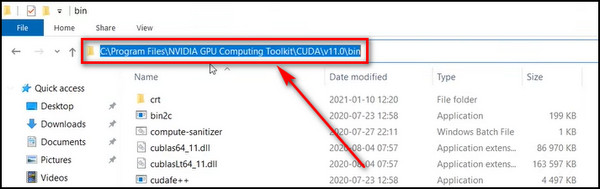
5. Create an Environment Variable
- Open the C: > Program Files > Nvidia GPU Computing Toolkit > CUDA > 11.0 > bin folder.
- Copy the path to the bin folder.
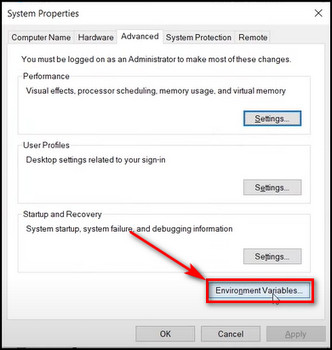
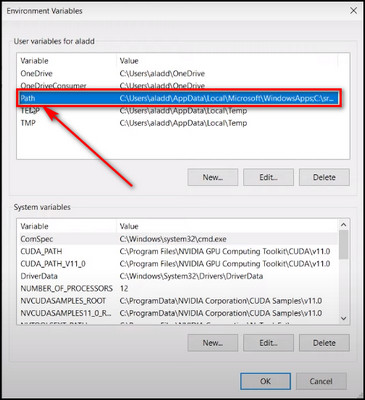
- Search for Environment Variables and open it.
- Double-click on Path.
- Click on New, and paste the location to the CUDA bin folder.
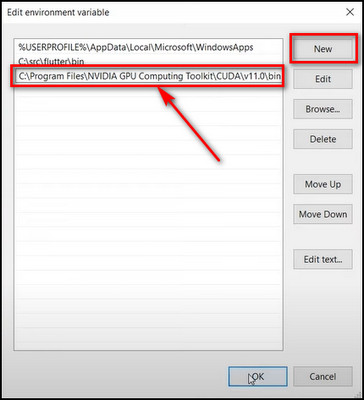
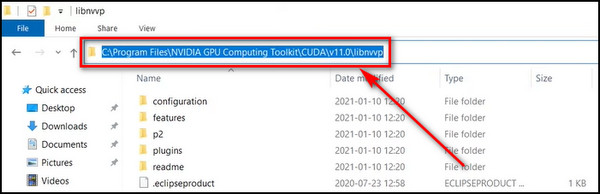
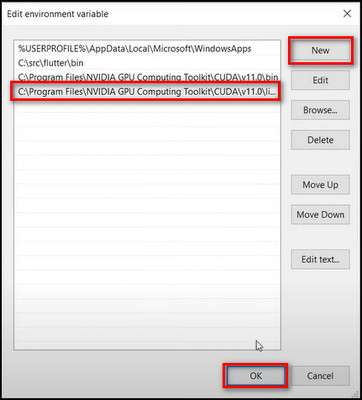
- Copy the directory to the libnvvp folder.
- Select New on the Edit environment variable window again, paste the path to the libnvvp folder, and click OK.
6. Install TensorFlow using Anaconda
- Go to the Anaconda Distribution page and click Download.
- Install the Anaconda setup file as an administrator. The installation process is straightforward.
- Open Anaconda as administrator and execute the following command line to create a conda environment:
conda create --name tf_2.4 python==3.8- Run the command below to activate the environment you’ve just created:
Conda activate tf2.4- Execute the shell command below to install TensorFlow:
Pip install tensorflowHow to Use GPU for Machine Learning on Windows with Jupyter Notebook
To use a GPU for machine learning on Windows with Jupyter Notebook, install the CUDA Toolkit and cuDNN library, create a new Anaconda environment, and install required packages like TensorFlow or Keras. Then launch Jupyter Notebook, and write your deep learning code in a new notebook.
The code should automatically use the GPU for training, resulting in significantly faster training times compared to running the same code on a CPU.
Below I’ve provided the steps to use GPU for ML on Windows with Jupyter Notebook:
- Go to the Anaconda Distribution page and click Download.
- Install the Anaconda setup file as an administrator.
- Search for Anaconda Navigator and open it.
- Go to the Environments tab from the left menu.
- Click on Create to make a new virtual environment for your Python project. It is a self-contained custom directory for the Python IDE.
- Provide a name for the environment, select Python 3.6 and click the Create button.
- Search for tensorflow and sort the result by Not installed.
- Choose keras, tensorflow & tensorflow-gpu, and click on Apply.
- Click on the Apply button again on the Install Packages dialog box and all the packages and sub-packages that will be installed.
- Install JupyterLab and then launch it.
- Run the text script provided below to check whether Python has detected the GPU:
import tensorflow as tf
from tensorflow import keras
print("Num GPUs Available: ", len(tf.config.experimental.list_physical_devices('GPU')))
tf.test.is_built_with_cuda()
print(tf.version.VERSION)
import sys
sys.version
Now if you see the output Num GPUs Available: 1, your graphics card is all set for deep learning.
What Operating System to Use for Deep Learning?
You can use different operating systems, including Windows, macOS, and different Linux distributions for machine learning. But Linux would be my preferred choice of OS for deep learning tasks, and here’s why:
Open Source
For being open-source, you have access to the Linux source code. So you can customize the system for deep learning tasks as you like, enhancing performance and productivity.
Flexibility
Linux provides more flexibility and customization options compared to other OS. You can install and configure various deep learning frameworks and libraries, which are essential for building and training neural networks.
Performance
Linux is known for its excellent performance and consistency, which are essential for machine learning. Linux’s low overhead and efficient memory management allow neural network models to process large amounts of data quickly.
Community Support
The Linux community is vast, and there are many resources available online for deep learning developers, including forums, tutorials, and code repositories. So you can easily seek help and improve your skills.
Considering all these facilities, I’d recommend the Linux operating system for deep learning.
Final Thoughts
Remember, choosing the correct hardware, and installing the required software are essential steps to achieve the best possible results in your Deep Learning projects.
Through the steps provided in this article, you can be sure that your GPU is completely ready to take on the most challenging Deep Learning tasks.
Leave a comment below if you have further questions, and we’ll get back to you.