Screen Record is one of the most asked and desired features for Chromebook users. While you could do it through apps, a paid subscription is required to take full advantage.
Thankfully, google updated the Chrome OS, and from version 89, you can use built-in apps to capture the screen.
Without further delay, let’s look at how easy and quick it is to screen record on Chromebook.
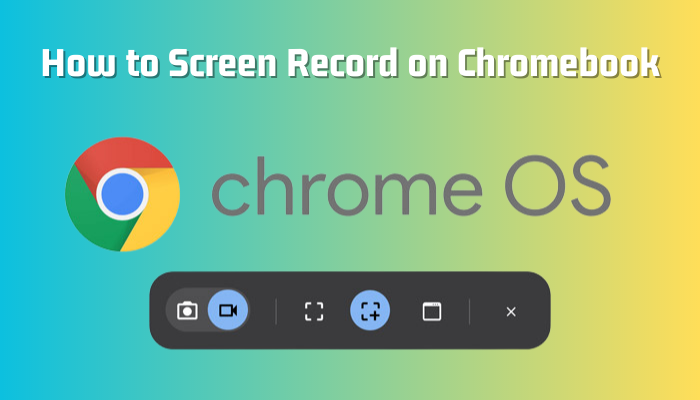
Screen Record on Chromebook
Two built-in apps in Chromebook let you record screens from the get-go 一 Screen Capture & Screencast. The first one is a generic tool with limited features, but the latter comes with additional features such as drawing on the screen, transcribing voice to text, and collaborating & share with your classmates, which makes it a brilliant tool for schoolwork.
Follow the methods below to screen record on Chromebook:
1. Use Chrome OS Screen Capture Tool
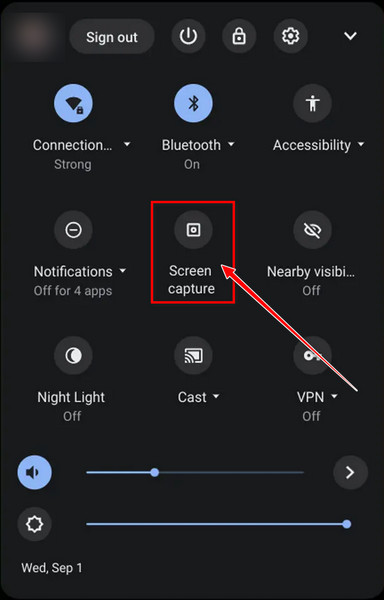
- Click in the bottom right corner of the screen to access the quick menu.
- Select Screen Capture. However, if you don’t see this option, click on the little up arrow to expand the menu.
- Choose from the 3 capturing methods such as full screen, partial area, or window capture. You can take screenshots from here as well.

- Click on the gear icon to allow recording audio from the mic and footage from the face cam, or choose file saving location on the Chromebook.
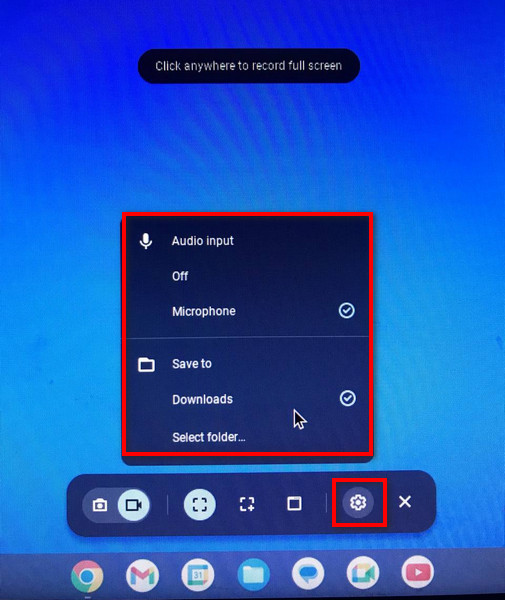
- Press the Record button on the screen once you have set everything according to your preference.
From here, you can also take a screenshot of your Chromebook screen.
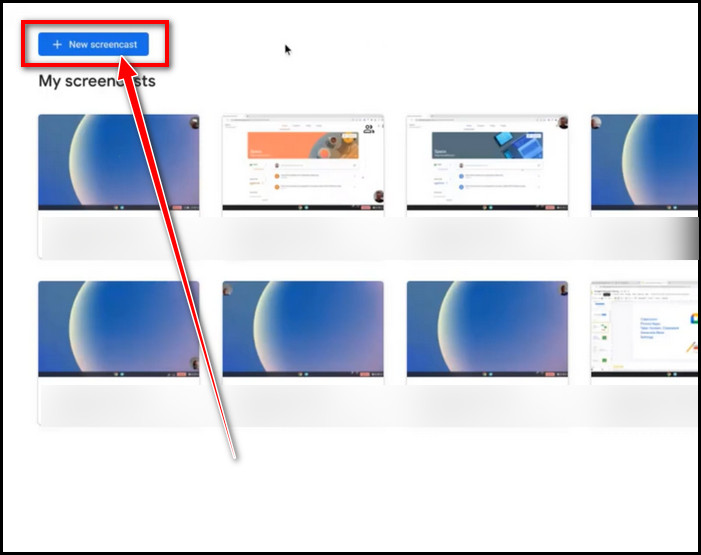
2. Use the Screencast App on ChromeOS
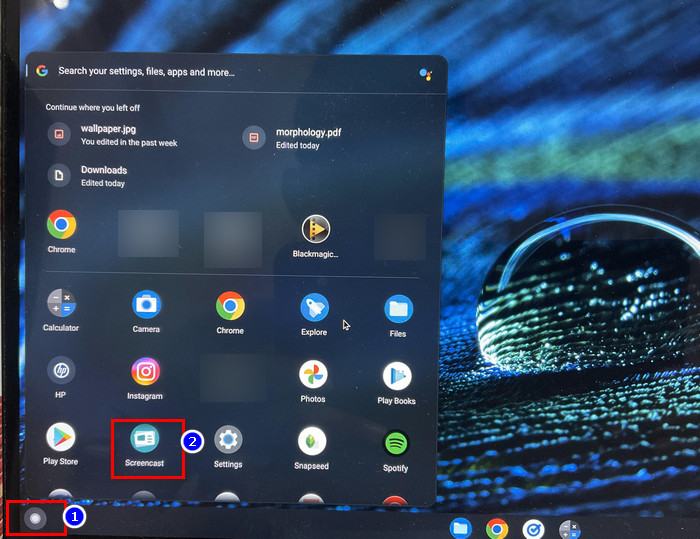
- Click the circle button in the bottom left corner to open the app drawer.
- Find Screencast and click once on it.
- Press the New Screencast button at the top left. An overlay will appear with a toolbar at the bottom.
- Hit the gear icon and choose your Audio or Camera settings.

- Pick a screen captures mode such as Full, Specific screen area, or a Window capture.
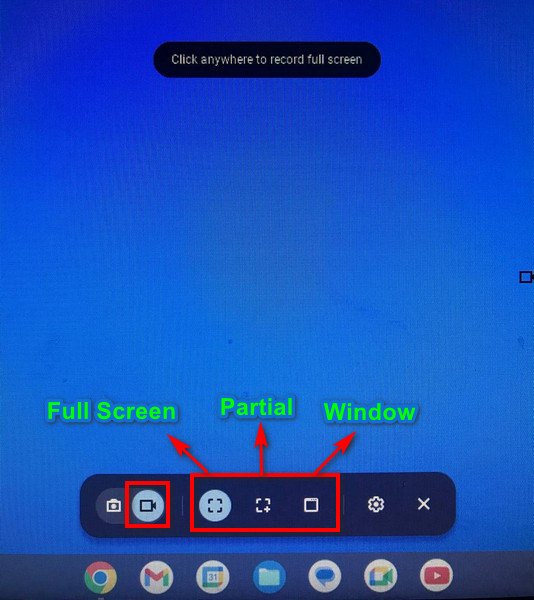
- Click anywhere on the screen or the Record button to start screen record on your Chromebook.
A timer with a 3-second countdown will appear before the actual recording starts. After you are done recording, click on the red Stop button on the taskbar.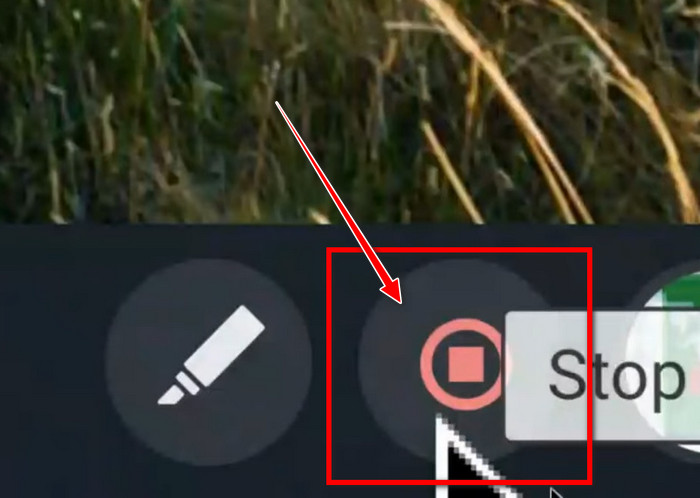 A notification will pop up in the bottom right corner with a Screen Recording Taken message. Click on Show in folder to open the recorded file.
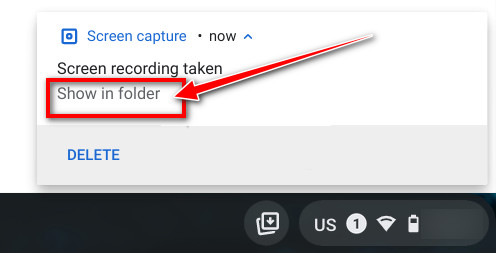
Also, check out how to right-click on a Chromebook.
How to Screen Record on Chromebook With Audio and Facecam
Screen Capture and Screencast are built-in apps on the Chrome OS to record a screen or capture a screenshot. It can do so along with the audio coming from the microphone. But these tools are a complete letdown when it comes to recording a screen with internal audio such as click sounds, video playback, audio from the games, etc.
So, I present you Screen Recorder, a free Chrome extension to record the device audio as well as the audio from the mic. The UI and the actual screen recording procedure are just a walk in the park. Not to mention this add-on is also capable of recording footage from the front camera.
Following is the process to screen record on Chromebook with audio:
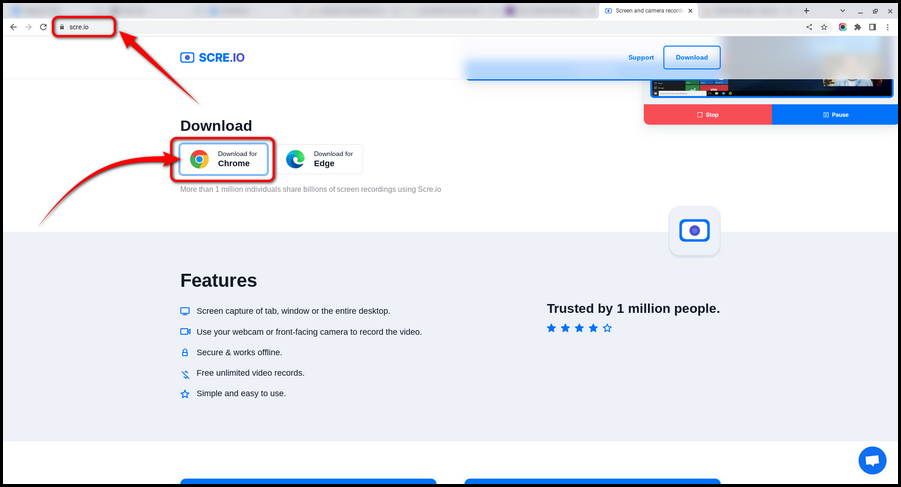
- Open Chrome on your Chromebook laptop.
- Go to SCRE.IO website and click on Download for Chrome button. The Chrome web store will open in a new tab.
- Click on Add to Chrome button to install the extension. Choose Add extension from the pop-up.
- Select the extension icon and pin Screen Recorder on the toolbar.
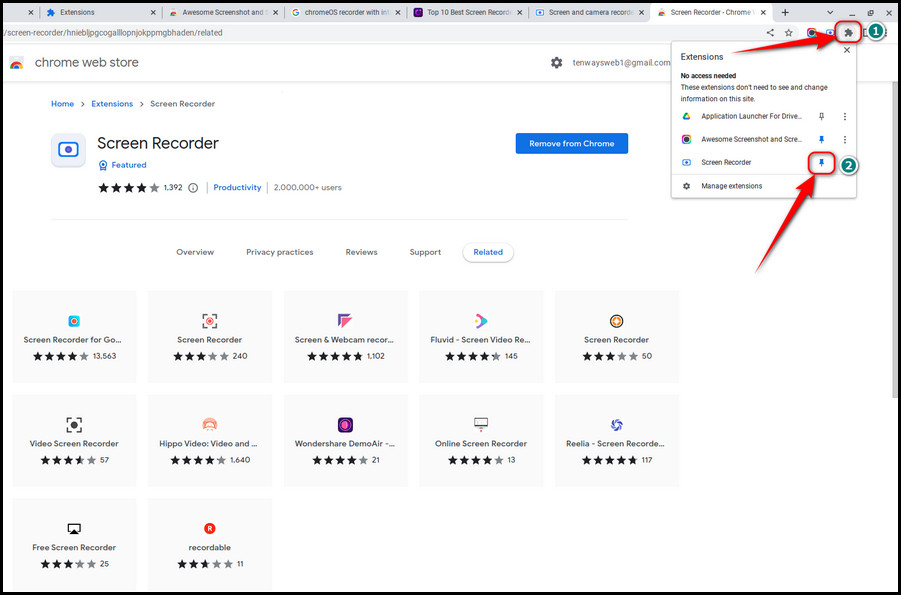
- Launch the add-on with a click on the toolbar.
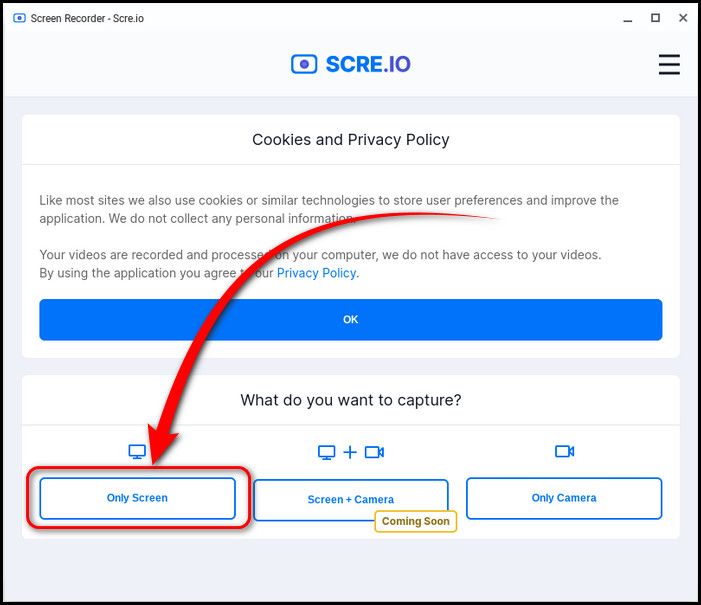
- Choose Only Screen from the opening window. A new set of options for audio will appear just below.
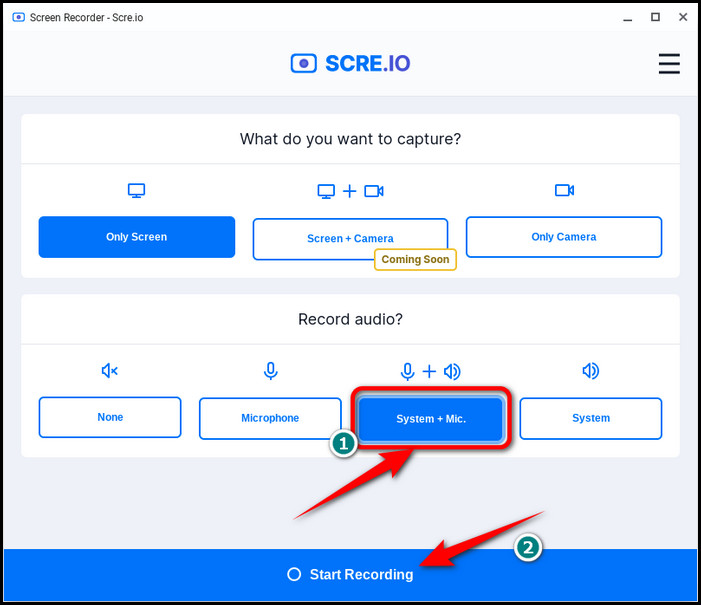
- Pick System + Mic and hit the Start Recording button below.
- Select how you want to record your screen Entire Screen, Window, or Chrome Tab. Also, check the Share system audio box in the bottom left corner.
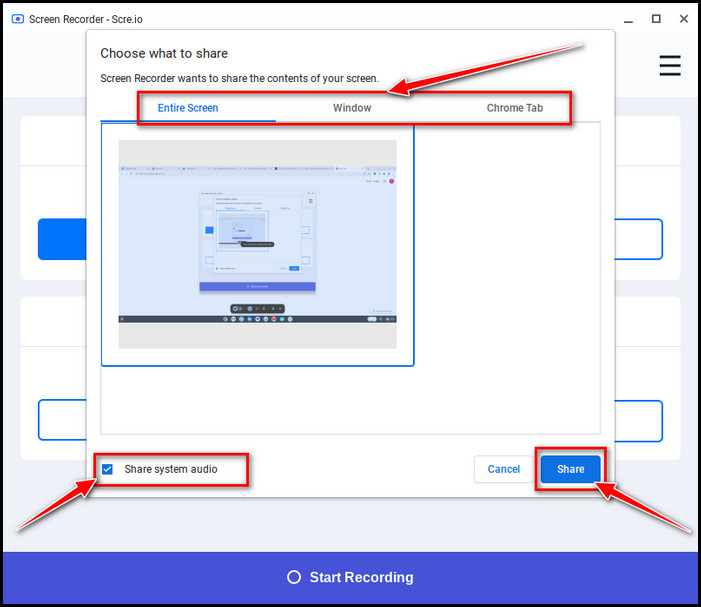
- Click on the Share button in the bottom right to start recording your Chromebook screen with audio. Now, the screen recording will commence capturing your actions on screen.
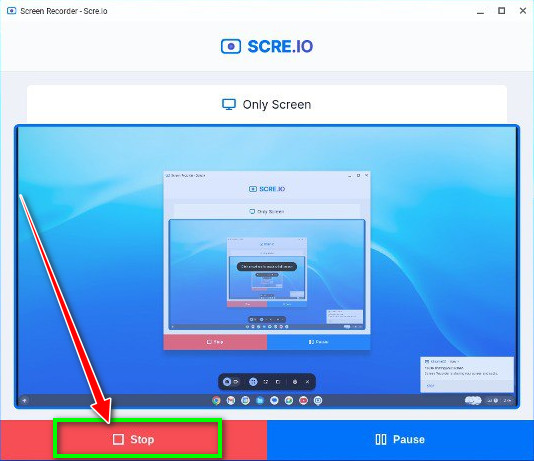
- Click on the red Stop button to end the recording.
Now, press the Save button to download the captured video to your Chromebook storage. You’ll notice a notification Download complete in the bottom right corner. Click on the SHOW IN FOLDER button to instantly access the screen record. 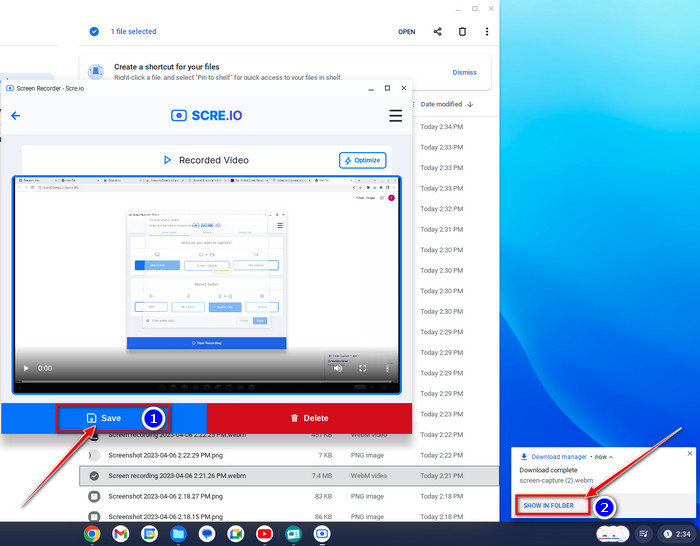
You may also like to read about how to rotate the screen on Chromebook.
Locate Your Screen Recordings on Chromebook
The recorded screen footage is saved to the Downloads directory on your Chromebook. But this destination can be changed while you start recording the screen from the settings. I’ve shown it in the recording walkthrough section above.
Once the screen recording is complete, follow these steps to locate the file on your Chromebook:
- Press the circle icon in the bottom left corner to access the app launcher.
- Click on the Files app.
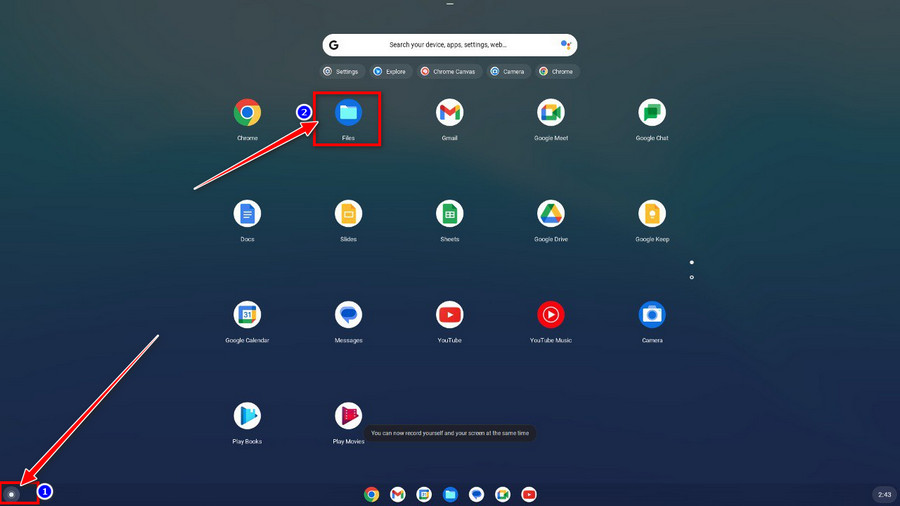
- Go to Downloads next, and you’ll find all your captured screen recordings with the .webm file extension.
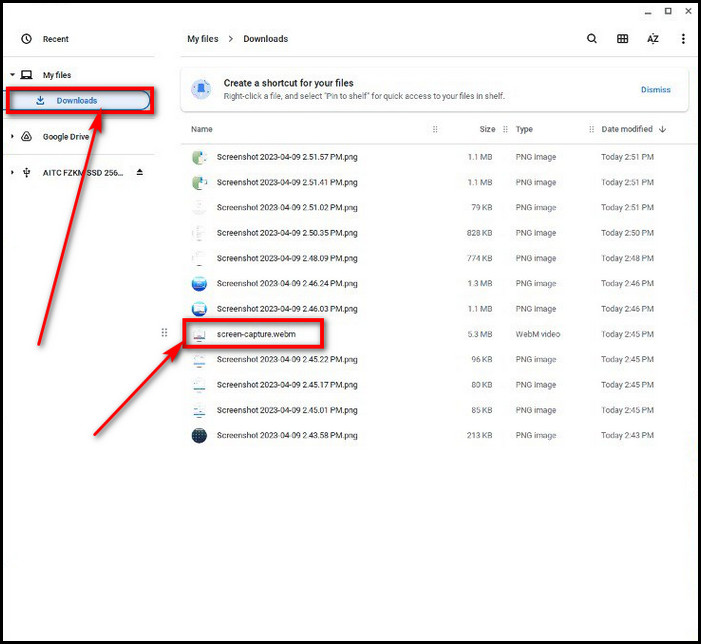
Interestingly, these files are not saved locally but rather on your Google Drive. So, you can share the files with anyone via the file link.
Additionally, read our in-depth guide on how to turn off the touch screen of a Chromebook.
FAQs
Does Chromebook Have Screen Recorder?
Yes, Chromebook has two built-in screen recorders, Screen Capture & Screencast. You can either launch the apps from Settings, App Drawer, or with a keyboard shortcut.
Can I Screen Record on Chromebook With the Face Cam?
Yes, you can screen record on Chromebook with the face cam via the integrated apps or third-party ones. It’s a great solution for the intended pre-recorded classes.
Ending Remarks
Screen recording can make so many things easier than spending time explaining. And the Chromebook now has the necessary tools to achieve that. Hope you find this article the perfect solution you’ve been looking for, whether recording screen with internal audio or a front camera.
Got more questions? Don’t forget to leave a comment below.