A CPU cooler is the most important component of your PC. Without installing it, your PC may not even turn on. This is due to BIOS protocols that protect the CPU from heat build-up. So correctly installing the CPU cooler is very crucial.
In this guide, I will show you how you can easily install the different types of CPU coolers that are available. The process is detailed step-by-step so that you will not have any difficulty doing this on your own.
So get your screwdriver ready, and let’s get started.
What Do You Need to Install a CPU Cooler?
Most CPU coolers include mounting brackets, backplates, and the necessary screws inside the box. As for the stock coolers, they use the stock backplate bundled by the motherboard manufacturer to hold the cooler with the motherboard.
Simply put, you need thermal paste, a Philps head screwdriver, and a lot of patience to install a CPU cooler. The thing about patience is that some coolers are finicky to work with, and they have tiny screws to put in place, which can get annoying sometimes.
Other than that, just make sure the cooler is positioned correctly and attached securely to the backplate. The better the contact made between the CPU and the cooler, the better cooling you will get.
In this guide, we will assume that you have already installed the CPU and applied the thermal paste. Do not use too much thermal paste, as it can fall over the motherboard’s PCB, which can be difficult to clean later on.
How to Install a Stock CPU Cooler
AMD and Intel’s stock coolers are relatively easy to install. With Intel CPUs, the stock cooler does not require any backplate. This is due to a plastic retainer that holds the cooler in place. As for AMD, you need to place the backplate at the back of the motherboard before installing the cooler.
Let’s now look at how you can install them both.
For Intel Processors
These steps will install an Intel cooler into your motherboard:
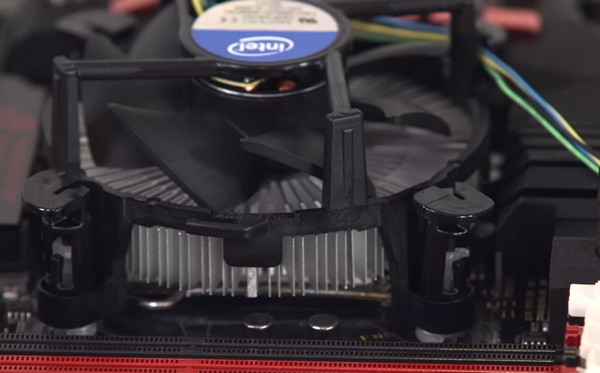
- Turn the four push pins in a clockwise direction on the Intel stock cooler.
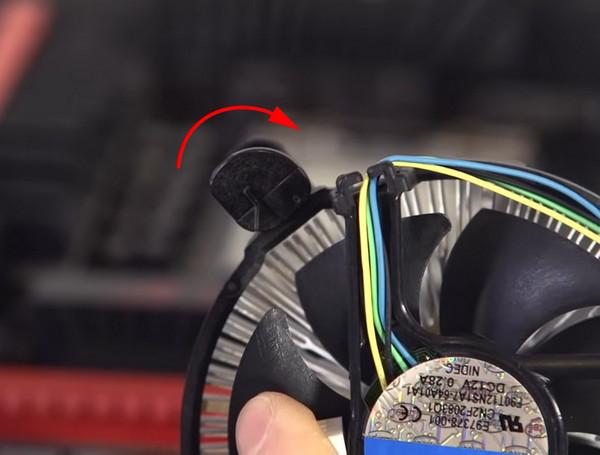
- Align the cooler against the mounting holes placed around the CPU slot. Ensure that the power cable is close to its connector on the motherboard. You can turn the cooler if the cable is smaller and then install it.
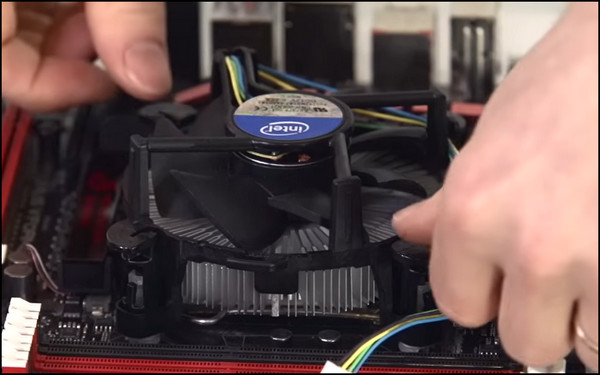
- Once you feel the cooler is perfectly placed, push the pins inside. Press the opposite pins at the same time to ensure a good fit.
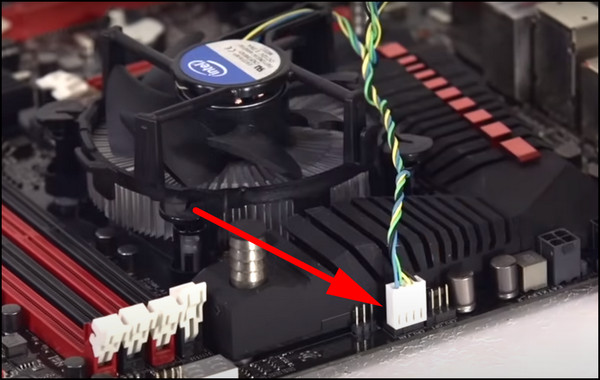
- Finally, connect the power connector to the motherboard.
For AMD Processors
There are three stock coolers for the current generation of AMD CPUs. The Wraith Prism uses clips to attach itself to the CPU, while the Wraith Spire and Stealth implement screws to hold them.
I have shown how to install them both below.
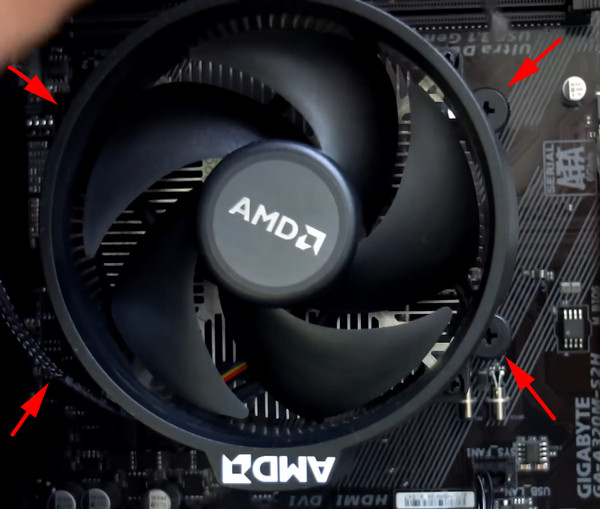
Follow these steps to install an AMD Wraith Spire or Stealth stock cooler:
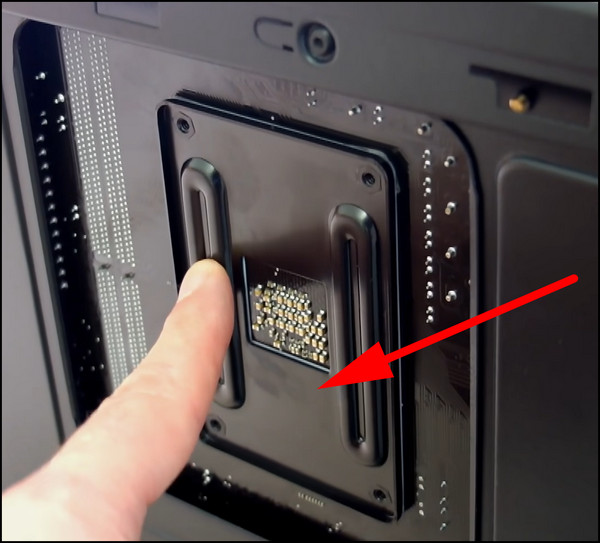
- Align the backplate correctly on the back of the motherboard. Make sure the motherboard cut-outs are in line.
- Place the AMD cooler on top and ensure the screws are aligned correctly. Make sure the power cables are not too tight and have some slack.
- Screw in the cooler to the motherboard. You may have to use some force as the screws are spring-loaded.
- Connect the cooler’s power cable to the motherboard connector.

The Wraith Prism comes with a retention clip. This has a different installing mechanism compared to the spring-loaded screws.
These are the steps to install the AMD Wraith Prism stock cooler:
- Make sure the backplate is installed properly.
- Place the plastic mounting brackets over the cutouts in the motherboard and screw them in.
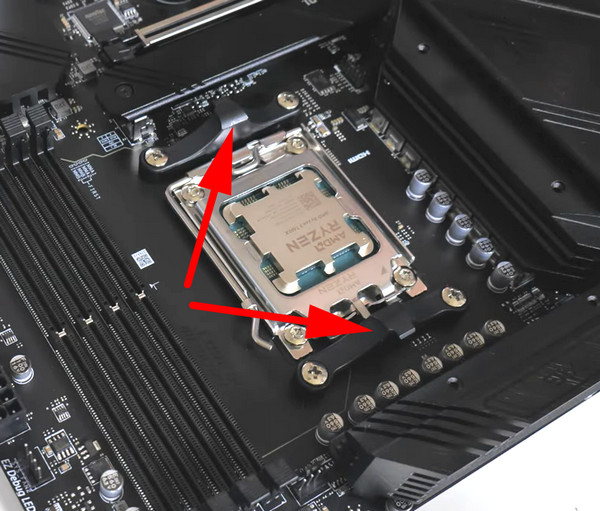
- Now, there are two metal arms that hook into a cutout of the mounting bracket. Attach both arms to the brackets. Use a little pressure to push the cooler down if the metal arm does not reach near the plastic bracket.

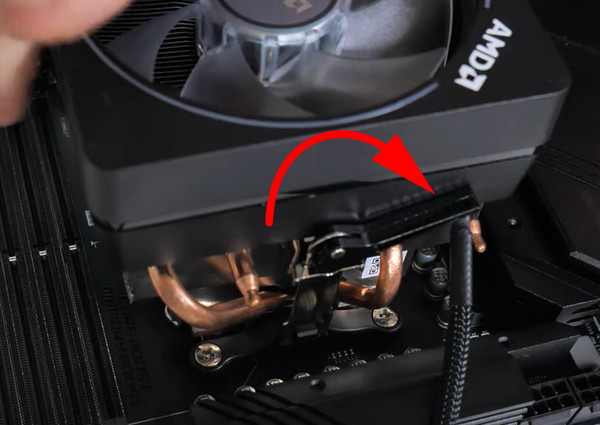
- Lock the cooler in place by moving the lever clockwise. When it clips right in, you will hear a sound.
- Attach the CPU cooler’s power cable to the 4-pin CPU fan connector.
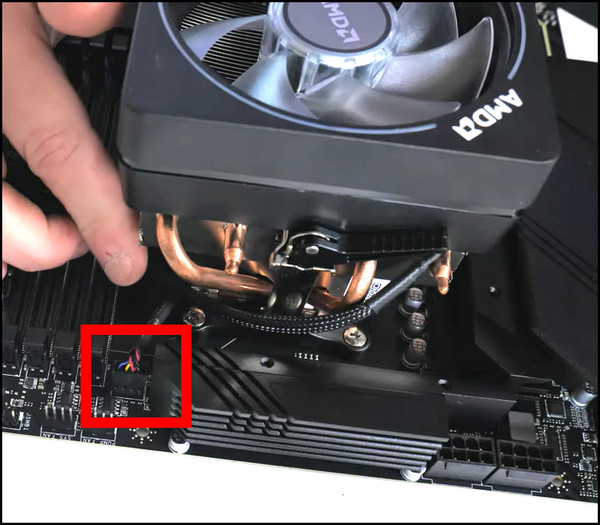
If the cooler comes with RGB support, connect the provided cable to the RGB connector on the motherboard.
When you are done, turn on the PC now and see if you can boot to the BIOS. This will indicate you have installed the CPU cooler successfully.
How to Install a Custom CPU Cooler
A custom CPU cooler has an extra component to add before installing it. It is the mounting bracket. The bracket sits on the opposite side of the backplate and is attached to the CPU socket. You do not need to purchase it separately, as it is already included in the box.
As these coolers are often large, you must see if they fit inside your PC case. Also, note if your cooler provides enough clearance with the memory module before purchasing it.
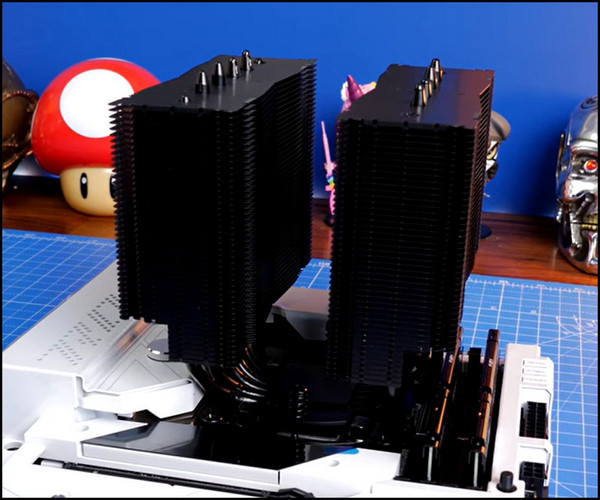
To demonstrate this, I have used a Noctua D15 cooler and installed it on an AM4-based system.
Follow the steps to install a custom CPU cooler on your system:
- Align the backplate on the back of the motherboard and place it on a flat surface. The motherboard’s cardboard box is a good pick for this.
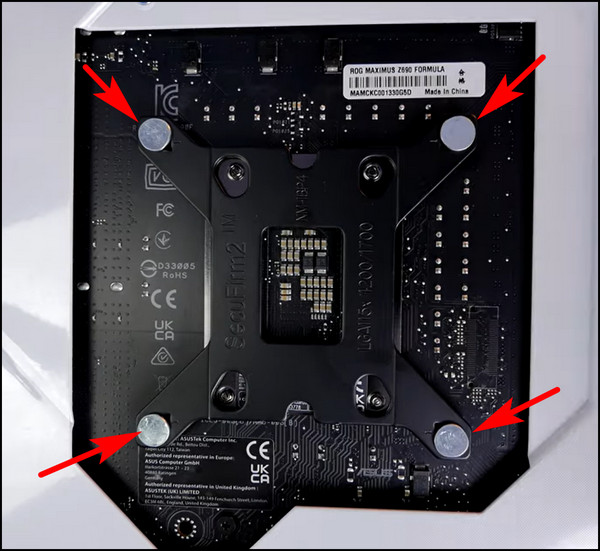
- Place the washer on top of the mounting holes in the motherboard.
- Now place the mounting brackets over the washer. Attach it firmly by placing screws over it. Apply equal pressure to both mounting screws alternately. This will ensure a secure fit. Repeat the same procedure for the other mounting bracket.
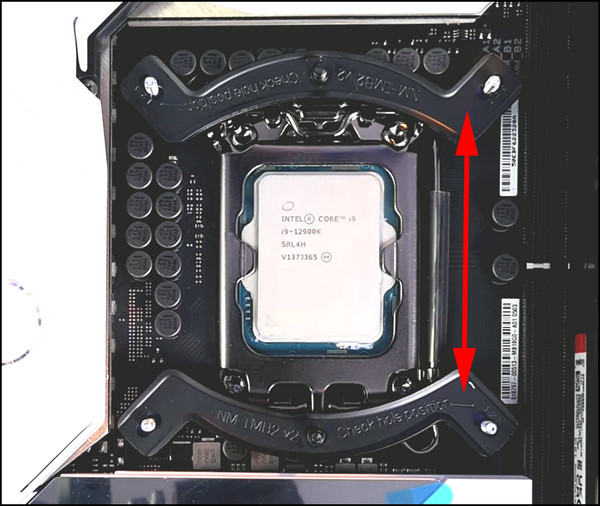
- Now bring over the heatsink and place it over the mounting bracket. There are two screws, one in each bracket, which you need to secure all the way in. Similar to the above, apply equal pressure on both.
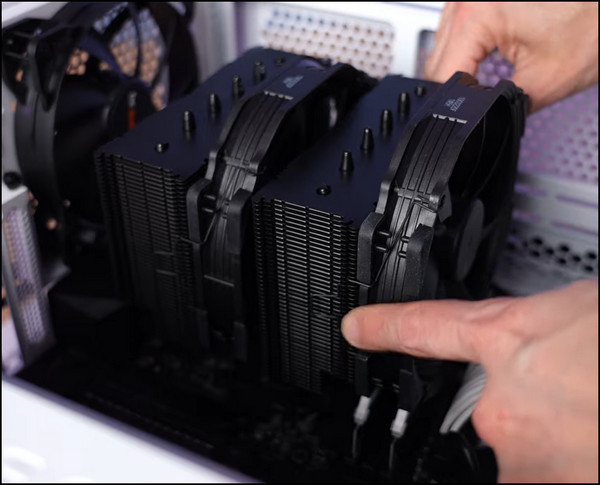
- Now attach the fans. There is a clip that holds it against the heatsink. You need to pull the clip and attach it securely. There may be more than one fan if your cooler supports it. Install it in the same way as before. On the D15, the second fan needs to be placed a little higher to make the clearance for the memory modules.
- Connect the CPU fan power cables to the motherboard’s CPU power connector. This is often labeled as CPU FAN. If you have multiple fans attached, you need to use a splitter that connects both fans and plugs into a single power connector.
One thing to note is that not every cooler will be the same. The mounting brackets and backplates are all different. But the procedure to install them is often the same. If you are confused about what goes where do check out the manual before installing.
Finally, turn on the PC and see if the BIOS shows up. You can see the current CPU temperatures monitored right from here.
How to Install an AIO CPU Cooler
AIO coolers take more time to install. Because you get more parts which need assembling. Spare some time to plan how you would want the air to flow through the case. You can set the radiator at the top and pull the cold air in or attach it vertically.
Okay, so let’s go through what you get with an AIO cooler:
- Radiator
- Radiator fans
- Backplates and mounting brackets
- A cold plate
- Covers for the cold plate (optional)
- Accessories (screws and brackets)
So, let’s start with how you can install them into your case.
Step 1: Install the Fans and attach the Radiator
Always install the fans with the pipes from the radiator below the cooling fins. The radiator fans have a separate pack of washers and screws for them. Attach a washer to one of the screws and screw it into the radiator. Do the same for all the fans on the radiator.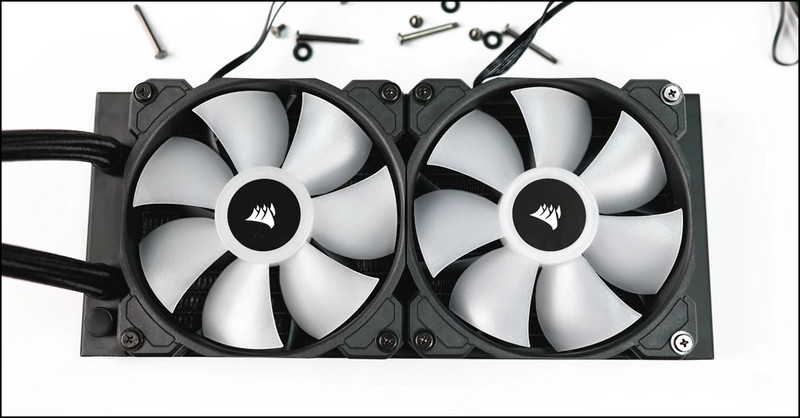
Once the fans are attached, it is time to install the radiator. Use the small screws with the washers installed and securely connect the radiator to your case. Depending on which setup you choose, this should either go into the front or the top of your case.
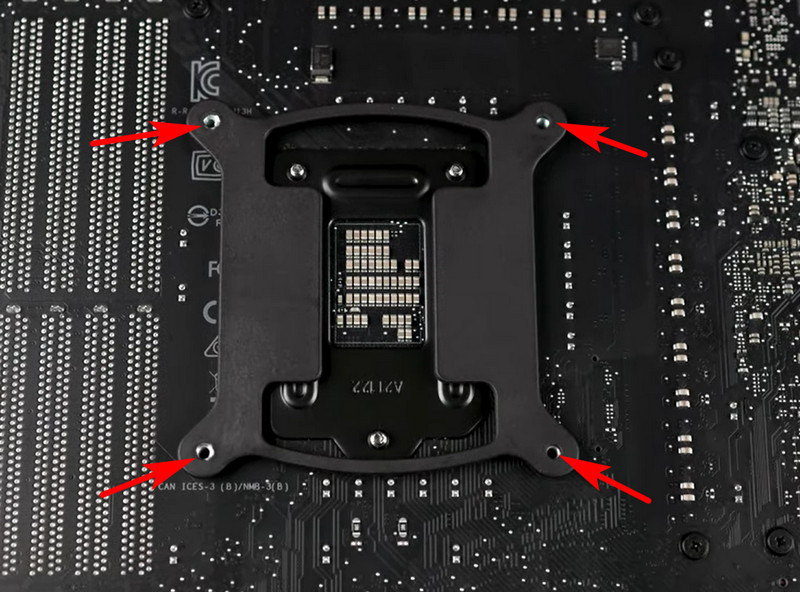
Step 2: Install the Backplate and Cold Plate
You will get two backplates, one for Intel and the other for AMD CPUs. To install it, remove the tape covering the adhesive and line it with the holes on the motherboard. Give it a gentle push, and it should stick there. There are separate stand-offs for holding the backplate in position. Screw them in, as they will be needed for the cold plate later on.
 Remove the plastic cover from the cold plate and align it with the backplate screws that you just installed. Now use thumb screws to attach them into place.
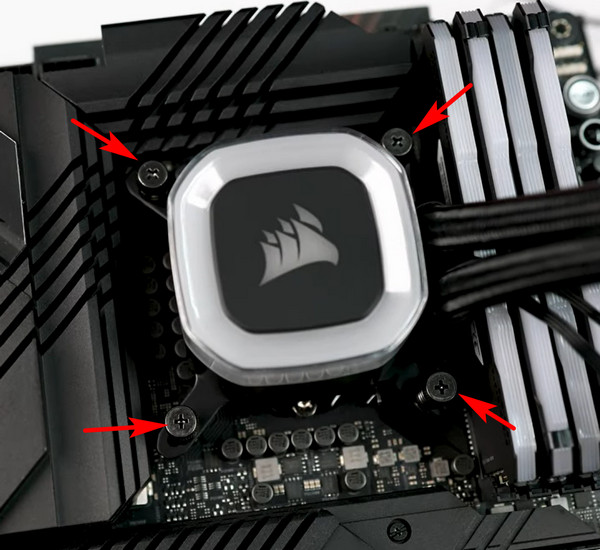
Some AIO units allow you to change the cold plate cover. The Corsair H150i that we used here comes with a spare one. You can change that if you want.
Step 3: Attach the power and ARGB cables
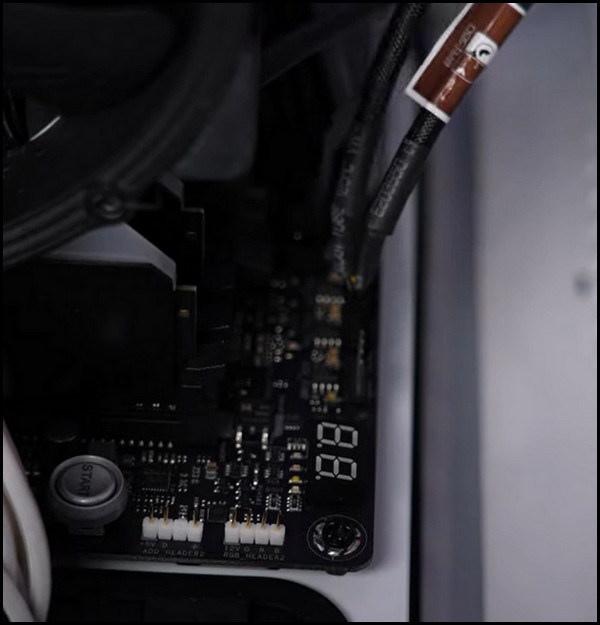
Some AIO coolers come with a hub connecting all the fan cables from the radiators into one place. The Corsair H150i has one. If you have something like that, all the power and ARGB cables will connect to it. Then you have to connect the hub to the motherboard’s USB header and a SATA power connector.
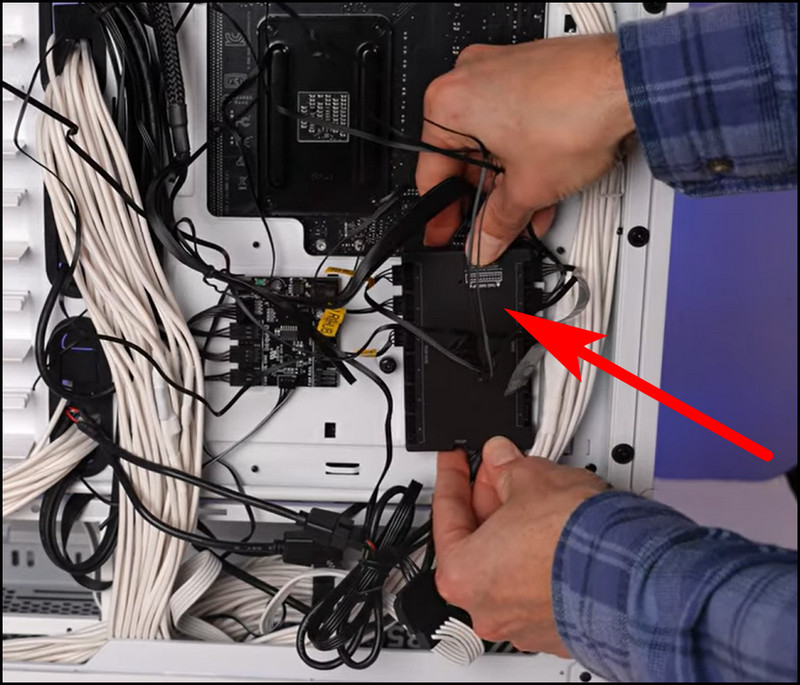
We still have one thing left, and that is the pump connector from the AIO. It will connect to the CPU FAN header.
If you do not have a hub, simply connect the radiator fans to the SYS FAN and their ARGB cables to the respective headers on your motherboard. Once again, do not forget to connect the power cable from the AIO pump to the CPU FAN header, or you will simply get an error from the BIOS. 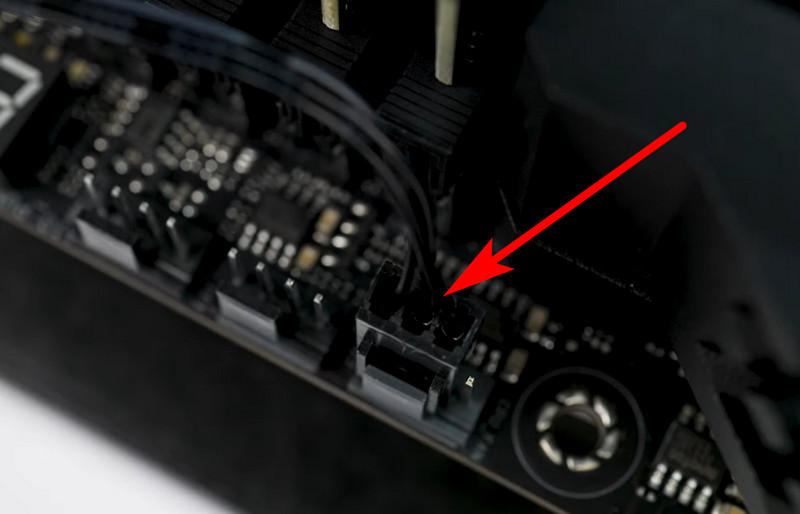
Finally, boot up your PC. You should see the BIOS recognizing your components, and that shows that everything went on smoothly.
How to Remove a CPU Cooler
Removing a CPU cooler is actually easier than installing it in the first place, especially if you consider the number of screws you need to handle when assembling an AIO unit. In most cases, you have to remove the screws and pull the cooler from its place.
But before doing this, ensure that the PC is running for a few minutes. This will ensure the thermal paste is warmed, which makes it easier to remove the CPU cooler for the processor’s heat spreader.
Remove Intel Stock Cooler
Intel coolers come with a push pin that can be rotated. You have to rotate all of them counterclockwise from the installed position first. This will unlock them for removal. Now just pull the cooler upwards with a gentle force. If the cooler feels stiff, you can wiggle the cooler a bit and pull the individual pins one at a time. That will release the cooler.
Remove AMD Stock Cooler
There are two styles of AMD coolers: clip-on and screw-in. Proceed to the one that is present on your system.
Wraith Spire and Stealth
Using a Phillips head screwdriver, remove all four screws attached to the cooler. The screws will not come out as they are held by a spring. When you are done, just pull the cooler up, and it should come out of the place easily.
Wraith Prism
First, you need to unlock the lever on the cooler. In the locked state, it is placed on the right side. Apply some force and move it to the left.
Now you have to remove the metal arms which are attached to the plastic brackets. Push the cooler down and pull the arms outwards to release it. Repeat this with both sides of the CPU cooler. This should free the cooler, and you can easily remove it.
Remove Custom CPU Cooler
With Retention Clips
If the CPU cooler is held in place using clips, all you have to do is release the clips. To do this, apply some pressure on the heatsink and pull out the clip by pressing it downwards. Repeat the same steps on the other side. Once the clips are free, take them out using a wiggle motion. Do not pull it using a strong force. The cooler should come off easily.
With Mounting Screws
These types of coolers are much easier to remove because there are no clips to worry about. However, if you have two or more fans attached, then you need to remove the connections from the fan headers individually.
First, remove the clips that are holding the fans in place. Pull these back, and they will come out of the heatsink ridges. Now pull the pins outwards when you are removing the fans. Next, you need to remove the fan headers attached to the motherboard. If you are using a fan splitter, just remove the single cable from the motherboard that joins the individual fans.
To remove the heatsink, unscrew it from the mounting plates attached to the motherboard. Use the same screwdriver provided with the cooler. This helps you to reach the small spaces easily. Once you remove the screws, the heatsink should come off very easily with a gentle push.
AIO CPU Cooler
When you are removing an AIO cooler, you should approach this as a two-step process. Firstly, disconnect the respective power cables for the fans and AIO pump. And then, remove the radiator and cold plate.
The first part is the most difficult because of all the small cables that you need to detach from the motherboard. Start by locating all the fans attached to the radiator and trace their cables going to the motherboard.
For a non-RGB fan, you will have a single cable that goes into the CPU-FAN header, while for RGB fans, another cable will go to the ARGB header. Also, do not forget to unplug the AIO pump’s power cable, which goes to the AIO-PUMP header. Once you unplug everything, it is time to take out the radiator.
To remove the cold plate, unscrew it from the mounting bracket. Using a gentle twisting motion, wiggle the cold plate until it comes off. Do not yank it, as the CPU pins can get damaged. Next, remove the screws holding the radiator to your case. Pull it out carefully, as the fans are still attached to it. Once outside, put the radiator in a safe place.
So, that’s how you remove a CPU cooler without damaging the processor or other components. Hope you find the article very helpful.
Frequently Asked Question
Do I need to put water in my CPU cooler?
If you are using a custom open-loop water cooler, then you can add water and coolants to it. But other than that, CPU coolers do not require any water to be added to them.
How many coolers does a PC need?
A PC normally needs a single cooler for its processor. You can, however, add as many case fans as you want, depending on how many are supported by your case.
What is the best place to put a CPU cooler?
It all depends on how your case is optimized for airflow. Always put it in a position where the fans can draw cool air into the radiator. This can be at the top or the front of the case.
Final Words
This article aims to make the CPU fan installation and removal process a breeze. Some units have a complicated procedure for sure, but they do follow the same procedure as the others. Also, if you get stuck, remember to consult with your CPU cooler manual.
That’s everything to cover for today. Hope this article helps you out.