Installing a new graphics card on a system is always exciting yet intimidating, especially with the growing size of the cards in each generation.
As absurd as it sounds, sometimes it feels like installing a motherboard on the GPU!
Jokes apart, it’s rather an effortless procedure if you maneuver the right approach.
But how? Well, this is what I’m about to bring to light in this write-up.
Things to Check Before Connecting GPU to the Motherboard
When I say effortless, do you think of grabbing the GPU and slapping it on the motherboard right away?
Just hold on a bit! We’ll get there.
But before we do, it’s important to consider a couple of physical compatibility factors. Not to mention, whether your chosen GPU is going to be bottle-necked by the CPU.
Assuming that you’ve selected a GPU to make an upgrade, the following points are what you need to look out for before plugging in the GPU.
GPU & the Case Dimension
You see, if your GPU is too large in contrast to the space inside the case, you have a dire situation there; it’s physically impossible to install the graphics card. GPU length is the one that creates this issue.
If you apply too much force, it will only make things worse. Heck, you may even end up physically damaging your card or the motherboard in the process.
Now, two things you can do — Mod the case or buy a new one. Modification, however, needs skill and patience. But you can easily buy a new case.
So before you try to connect the graphics card to the main board, check the dimension carefully.
Power Supply and Cables
You know, a dedicated GPU requires supplementary power from the PSU to run in good order. But that also implies you need to have a power supply capable of feeding that much power to the GPU when being on load.
And how do you know that? Well, you’ll find the power supply requirements information on the GPU box or on the manufacturer’s website.
Check if you have a PSU that matches the minimum power requirement of the GPU. But I always recommend getting something extra for safe measures. Also, get a rated power supply; at least a bronze one.
For example, an RTX 3060 requires a 550W PSU. I would go for 650W considering other components such as the CPU, fans, coolers, etc.
Now that everything is flush, you’re all set to mount the GPU on the motherboard.
Install GPU on the Motherboard
With easy and simple steps, you can complete the graphics card mounting process in 5 minutes tops.
Follow the steps below sequentially:
Step 1: Remove Expansion Slot Brackets from the Case
First thing first, take off the expansion slot cover from the back of the chassis. Typically, the PCIe slot is aligned with the second expansion cover. 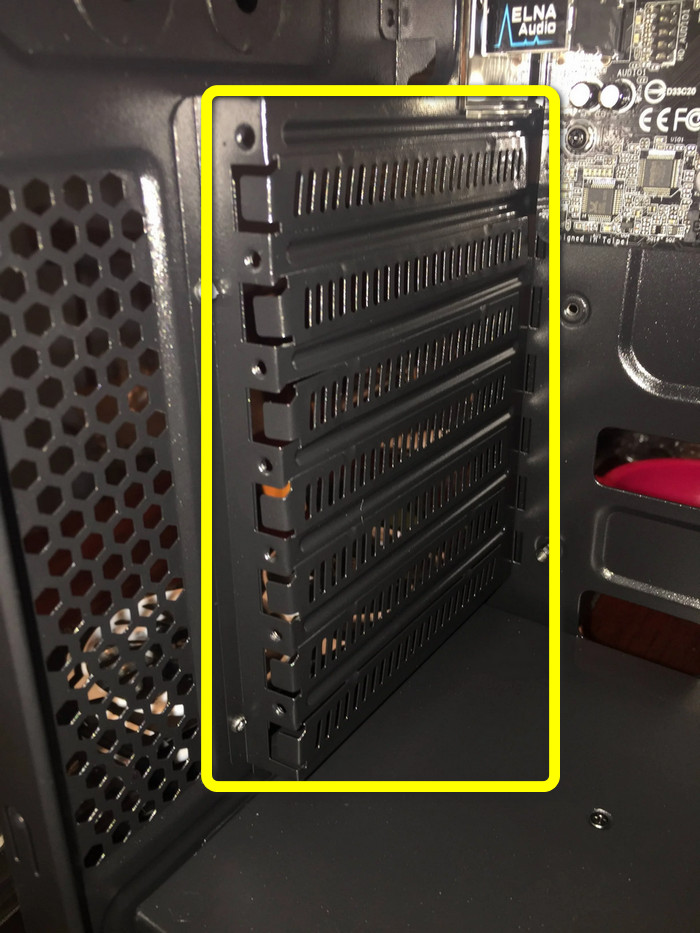
Unscrew or break it off from the case, depending on the removal process. It will vary depending on the case manufacturer.
You may have to take out two or more brackets as per your GPU dimension. A beefy card such as the RTX 4090 takes up to 4 slots.
Step 2: Locate the PCIe x16 Slot on Motherboard
Find the PCIe x16 slot on the motherboard. On ATX boards you’ll find 2 PCIe x16 slots, and mATX has 1.
Here things get a little tricky — always install the GPU on the PCIe slot, which is the closest to the processor. Because it is directly bound to the CPU, having access to full bandwidth.
As a result, your GPU will take advantage of the maximum allocated bandwidth, yielding the best performance.
Keep a keen eye, and just under the CPU socket, you’ll see an x16 or GPU slot on the motherboard. 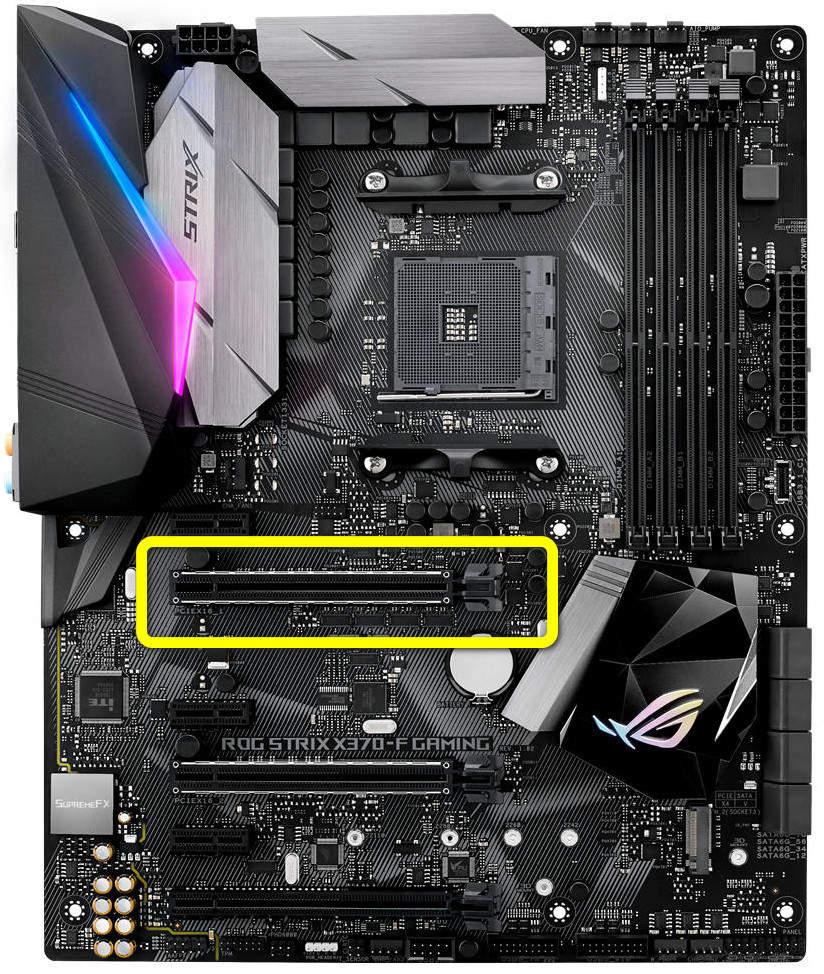
Step 3: Sit the GPU on PCIe x16
Once you located the slot you’re about to mount the GPU, here comes the most satisfying yet terrifying part.
Align the GPU and PCIe x16 slot’s notch. Make sure you don’t get blocked by the expansion cut-outs on the chassis. Also, if there’s a latch on the PCIe slot, press it to unlock the slot. 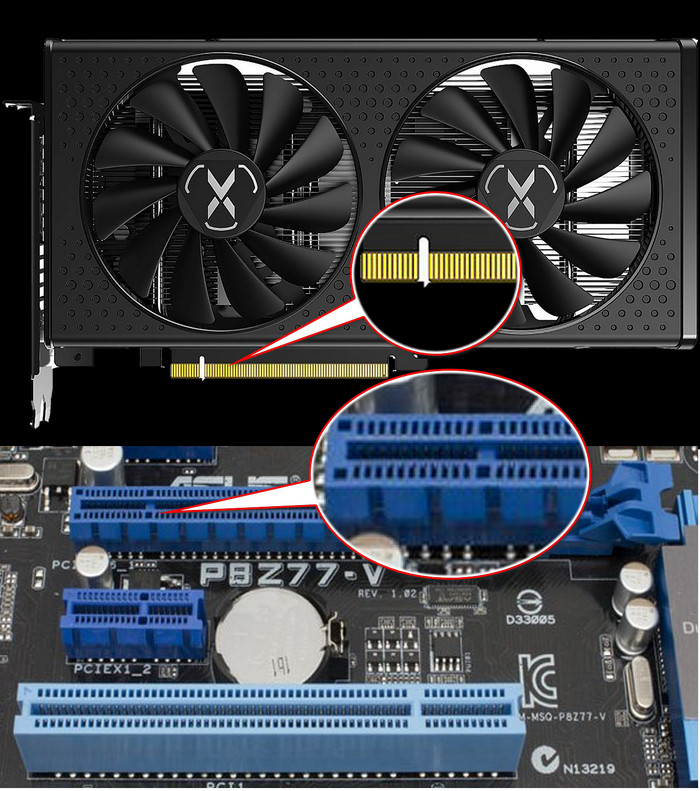
When you see both the notches match perfectly, gently push the card toward the motherboard.
Bazinga!
With a click, the GPU will perfectly snap into the slot locked by the latch. So satisfying, isn’t it?
If it doesn’t, however, re-align the GPU with the PCIe slot again.
It’s just like a piece of the puzzle. So, don’t force it. If you do everything correctly, it should work without a hitch.
Also, check our epic post on how to fix Nvidia Graphics Card not detected in Windows 10.
Step 4: Secure the GPU on the System
When the GPU is connected to the motherboard, it may sag a little bit. Nothing to worry about.
Take a Phillips head screwdriver and firmly attach the GPU to the case with the correct screw. 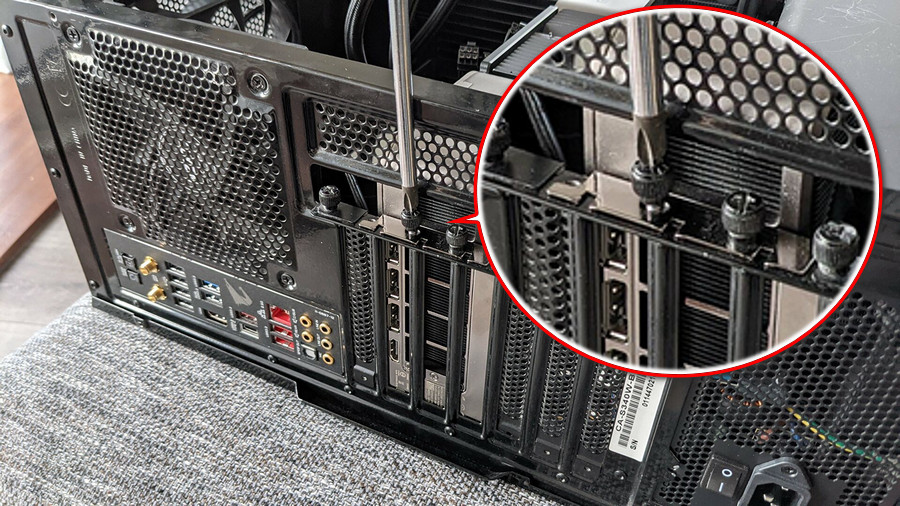
On another note, heavy GPUs may still sag and damage the slot on the motherboard. You need vertical GPU support in that case.
Simply tuck it under the card itself, and you’re good to go. It will provide proper tension, keeping the GPU and PCIe x16 slot intact. 
Step 5: Connect Power Cable to the GPU
Next thing to do is, connect the appropriate 6 or 8-pin PCIe power connectors to the GPU. 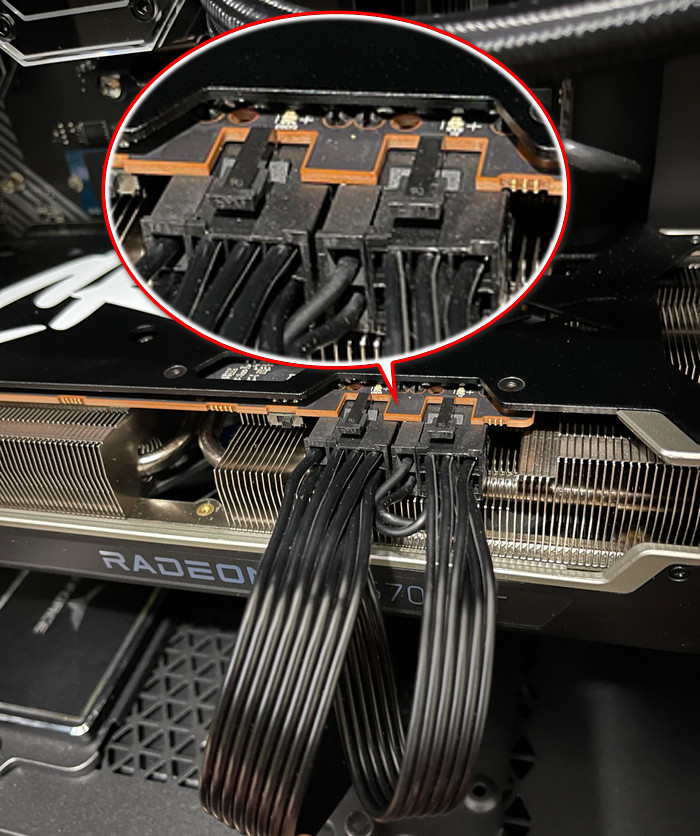 Make sure it is properly inserted, or else your card’s power port may burn due to a loose connection.
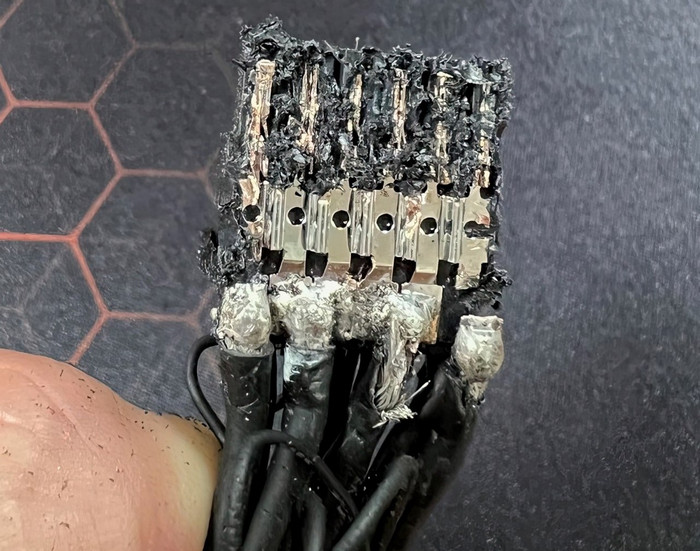
Step 6: Tidy up the Case & Connect Cables
You’re almost done. Clean up the interior a bit if you like. Close the side panel and screw it on.
The next thing to do is, connect all the cables, including the display and power. But here, newbies typically get confused; should I connect the display cable to the GPU or motherboard?
Well, connect the cable to the GPU’s HDMI or Display port, depending on your monitor’s input type compatibility. Go through the separate article to get a clear idea of this.
Related content you should read 7 signs of your Graphics Card Dying.
Step 7: Finish Up With GPU Driver Installation
It’s time to turn on your PC and check whether it boots up with a display signal. You’ll be in the OS in no time.
Do you notice anything unusual? Yep, the imagery looks a bit wider than it should. Now, that’s completely normal, given that you haven’t yet installed the driver for your GPU.
Go to the manufacturer’s website, such as AMD or Nvidia, and download the correct driver for your graphics card.
FAQs
Does the GPU Need to be Connected to the Motherboard?
Yes, the GPU needs to be connected to the motherboard, otherwise, it won’t work. After the connection, you must connect the display cable to the GPU.
Can A GPU Connect to Any Motherboard?
Yes, a GPU can connect to any motherboard as long as it has a PCIe x16 slot. Doesn’t matter which generation of PCIe it is. You will, however, see performance loss in older versions of PCI Express.
Ending Remarks
So, that’s all about connecting the GPU to the motherboard. This article is all you need, even if you upgrade from an older graphics card.
If you have further queries, let me know in the comments.