Is MSI Afterburner reporting higher-than-normal temperatures from your GPU during those long sessions in Valorant? Well, this points to the heat that your GPU cannot dissipate properly.
It could be that your GPU is in dire need of some good old cleaning which is long overdue. Dust build-up makes the fans work extra hard — makes that loud whirring noise.
To help clean your GPU, this article is the perfect guide. Once you are finished cleaning, your GPU will look no less than a brand-new unit.
So, get a can of compressed air ready, and let’s start.
How to Clean your Graphics Card
To clean your GPU, you must remove the dust and grime that is present between the heatsinks and the fan. A can of compressed air or a soft cloth can do this. Next, change the thermal paste present on top of the GPU die to improve its heat dissipation.
So, let’s first round up the things that you need today.
A can of compressed air, a soft cloth, some Q tips, a tube of thermal paste, and a small paintbrush.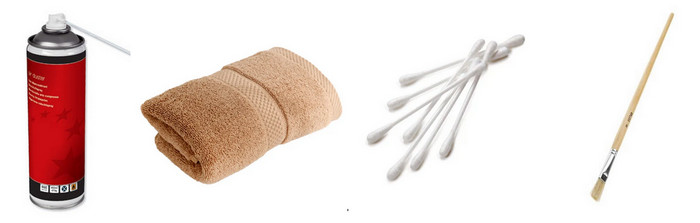
You can use any thermal paste and you will be good to go. But if you are willing to spend some bucks and ensure maximum cooling performance, go for either Noctua or Arctic as your choice for the thermal paste. They make some of the best thermal paste on the market that you can buy.
Once you have everything ready, start with the first step.
Step 1: Turn off your Computer and remove all the cables
First, shut down the computer properly and wait till all the LEDs go down. Unplug all the cables, and take the case outside. It is not recommended to dust off the case in the same spot as you keep your computer. You wouldn’t want your keyboard getting all the dust from the dirty casing.
Before opening the case, it is a good idea to turn off your PSU. Most PSUs come with a switch that you need to flick off. This removes any current flowing from the PSU. If your PSU does not have any switch, you don’t need to perform this.
Now, open the case by removing the screws. Normally there are 4 screws that you need to remove. If your case has a hinge, you can just slide it open.
Step 2: Remove the GPU and open up its fans and heatsink
Remove the GPUs power cable. It looks similar to a CPU cable, except it has 4, 6, or 8 pins attached to them. If the clips are attached, press them and gently pull the cable. It should come off easily.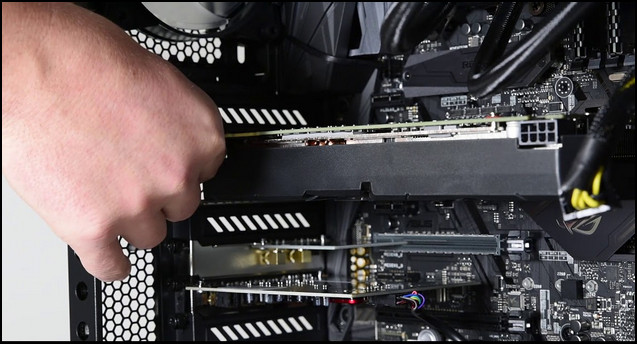
Now remove the screws holding the GPU with the I/O shield. Some motherboards have additional clips holding the GPU in its slot. You need to release that and then pull the GPU upwards.
To remove the heatsink, remove the screws on the back of the GPU backplate. This should loosen up the heatsink. Carefully remove it as the fan connector is still attached to the mainboard. Once you see it, pull the connector upwards. The connector can be very small, so you need to proceed slowly here.
The fans are also attached to the heatsinks using screws. Turn the heatsink upside down and unscrew them. Now the fans can be removed and cleaned separately.
If your GPU’s fan is specifically making loud noises, check our separate guide where we fix this issue.
Step 3: Clean the dust and remove the thermal paste
Use the can of compressed air to remove specks of dust. The heatsinks have tiny ridges which are extremely difficult to reach. The pipe attached to the compressed air can help you blow that out.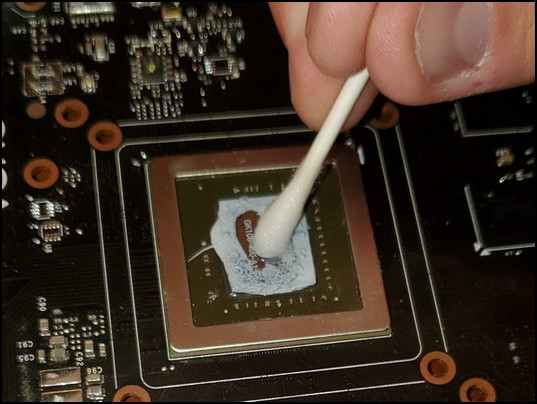
Repeat the same procedure with the fans. But hold the fans while you clean them. This should protect its internal circuitry and bearings from unwanted damage.
When you have removed all the dust, spray some cleaning alcohol on the PCB. Use Q tips to gently wipe off any existing dust particles. The alcohol evaporates quickly, so this should not pose any risks to the GPU circuit. You can also use a cloth to clean the fans using rubbing alcohol.
When you are done, it is time to remove the thermal paste. The GPU die is much smaller than a CPU, so it has less thermal paste on it. Wipe some alcohol on a lint-free cloth and rub it on the old thermal paste. With some force, it should come off. Appy some extra alcohol is needed. Again, this is totally safe for your GPU.
There is some thermal paste remaining on the back of the heatsink too. Use the same method to remove it too.
You can also clean a CPU thermal paste similarly. Read our separate guide to do that.
Step 4: Re-apply new thermal paste and Re-assemble the Graphics Card
Place a little blob of thermal paste in the center of your GPU’s die. Use a Q-tip to spread it evenly. If some extra thermal compound seeps over to the sides, remove them.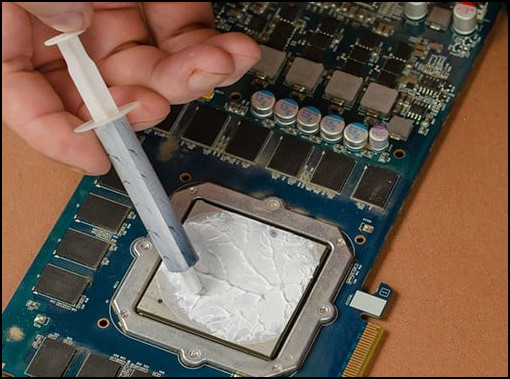
Now it’s time to connect the GPU back together. Basically, you need to go in the reverse order of disassembling the graphics card.
That is, hook the fans to the heatsink > connect the fan header to the GPU mainboard > and finally install the heatsink.
Remember to put all the screws in the correct places at each step. When completed, you have successfully cleaned your graphics card.
Put the GPU back on your case and insert the power cables. You can run benchmarking software such as 3D Mark or Unigine and check the temperatures. Not only the temperatures will be down but your fans should spin without making loud noises as before.
How to Clean Your Graphics Card Without Taking it Apart?
If you do not want to take your GPU apart and clean it, you can also do that using compressed air. Just insert its tube into the smallest corners and blow out the dust. Repeat the same with the base of the fans. Blow some air on the GPU’s HDMI and Display Ports too.
Clean the fan blades using a cloth and wipe them using cleaning alcohol. However, do not spray the alcohol inside the GPUs PCB. As you are not opening up the heatsink entirely, this is not recommended. The alcohol will not damage the internal parts though. It will evaporate almost immediately.
If your NVidia GPU is not detected on Windows, surely check our troubleshooting guide where we get to the bottom of this issue.
How Often Should You Clean Your Graphics Card?
If you keep your computer in a place that does not accumulate dust regularly, cleaning your GPU once a year is okay. Some people even clean theirs every two years. As long as you keep the thermals in check, you are not obliged to clean them every few months.
But remember, it is not just the GPU that you need to clean. The case fans, radiators, CPU coolers, etc. are all responsible for the temperature that you see on your GPU.
If your GPU is tidy but the other components are not, the warm air inside the case will build up. The GPU’s fans may remove the heat from its chips, but that heat needs to be removed. This is when your case fans come into the party. If they do not push out the warm air, every component inside your case will be affected.
So, make sure all the components don’t have any dust building up. And when cleaning the GPU, allocate some additional time and clean all of the components together. That way, your computer will require less maintenance and perform optimally.
Frequently Asked Questions
Can dust damage GPU?
Dust can build up heat. This will cause your GPU to throttle. You will get lesser performance while heating up your components. While it wont kill your GPU instantly, its lifespan will be lowered significantly.
Is it easy to clean GPU?
It is quite easy actually. Just get a can of compressed air, and remove all the dust out of the GPU. And you are done. It’s as simple as that.
Can I clean my GPU with air?
Yes, a can of compressed air can help you clean up your GPU. It provides a stream of air at high-speed to dislocate dust that build-ups on your GPU.
In Conclusion
Your GPU will definitely appreciate the breath of fresh air. Like literally. And add in better thermals and consistent frame rates too.
I hope if you follow the steps above you should not face any issues. But remember, we are here for you. Drop in a comment and we will try to resolve any issues that you are having.
With that said, it’s time for goodbye.