From students to employees, Microsoft Excel has been of the most popular and effective software for making spreadsheets. That is exactly why there is no surprise if you had any queries regarding Microsoft Excel on Windows 11.
To use all the features of Microsoft Excel, you need to purchase it online from the official Microsoft website.
You will notice that spreadsheet documents are being opened using notepad n your system.
So you might ask, why are the excel documents opening in Notepad on your Windows 11 system?
Notepad is not the optimal software to open spreadsheet files and I can relate to your situation.
That is why I have written the best methods you can follow to open Excel documents in Excel on your Windows 11 system after conducting thorough research. I have also tested these methods to check whether they are legit.
Read this post for more details.
Check our latest post on how PC won’t go to sleep mode in Windows 11.
How to fix Excel Documents Open in Notepad on Windows 11 easily
You will find the best ways to make Microsoft Excel your default Spreadsheet file viewer on your Windows 11 device.
All the processes mentioned consist of very simple and straightforward steps, So there is no reason for you to be tensed or doubt yourself.
Even a child can pull off all the methods given below, so keep calm and go through the procedures provided below in this post.
Here are the different methods to fix the Excel documents opening in Notepad issue on Windows 11:
1. Use the Open with Option
Making Microsoft Excel or any other software the default software to open spreadsheet documents is an extremely easy thing to do.
All you have to do is install Microsoft Excel on your device and then you will be prompted to use Excel as the default spreadsheet file software. You need to turn that option on.
If you have did not make Excel the default software to open spreadsheet documents, do not worry you can just right click on a Spreadsheet document and use the Open with function.
You can use the Open with option to make Excel the default spreadsheet software on your Windows 11 operating system.
Here are the steps to use the Open with option to make Excel the default software:
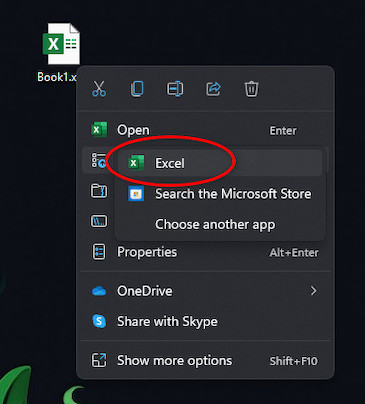
- Right-click on any spreadsheet document.
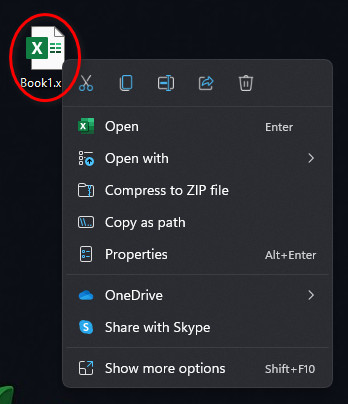
- Click on Open with. If you see Excel after clicking on Open with, select Excel. IF you do not see Excel as an option, continue on with the next steps.
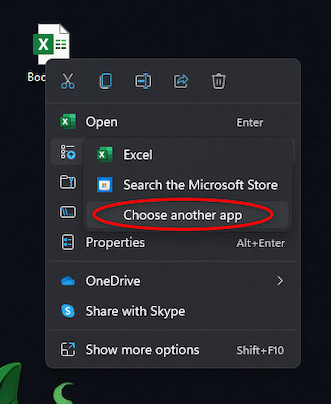
- Select Choose another app.
- Click on Excel. If Excel is not an option but you have installed it on your system, click on More apps and open Excel.
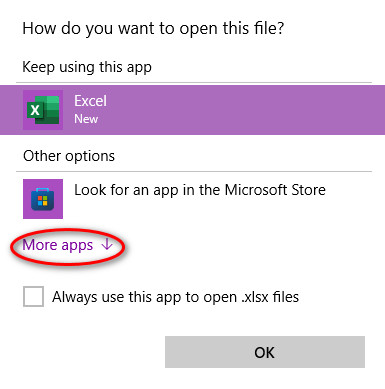
- Open another file and see whether Excel is being used.
If this method did not work for you, do not worry, as I have given other ways in this post. So, please go through them.
Follow our guide to fix keyboard not working on windows 11.
2. Change the Default Software for Spreadsheet Documents
If you have Excel on your system, but notepad is still being used to open spreadsheet files, you need to go to the Settings menu and change the default software to open spreadsheet documents.
The great thing is that it is very easy to set Excel as the default software to open spreadsheet documents on Windows 11.
All you need to do in this procedure is go to the settings menu from the Start menu and change a few settings. Do not be nervous, as this is a very simple process consisting of straightforward steps.
Keep calm and go through the steps given below and you will be all set.
Here are the steps to set Excel as the default software to open spreadsheets:
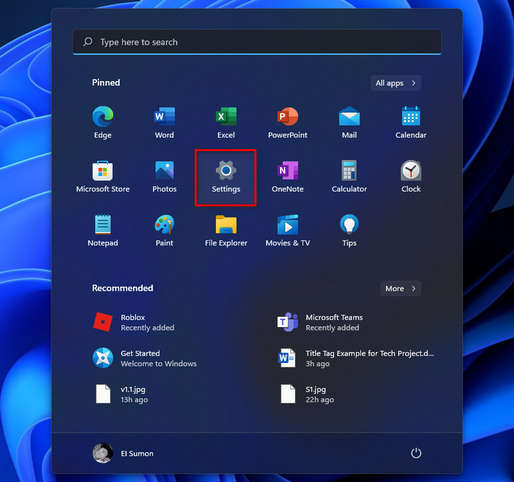
- Click on the Start
- Open the Settings menu by clicking on the Settings button icon.
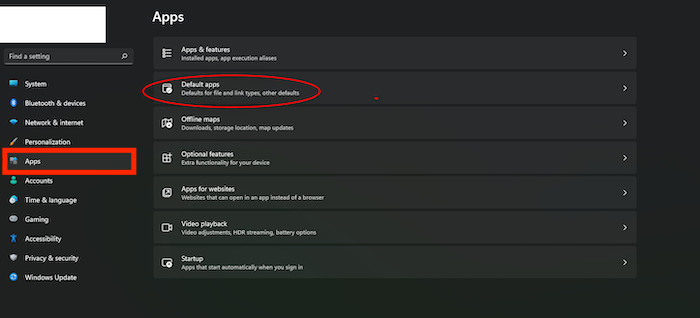
- Click on Apps from the left menu pane.
- Navigate to the Default apps option and click on it.
- Search for Excel in the list of apps displayed to you.
- Navigate to and click on the Choose a default A Dialog box will be shown to you.
- Click on the More apps
- Choose Excel from the list of options and if it is not available, then click on the Look for another app on this PC
- Open an Excel document to check whether Excel is being used as the default software or not.
If this method did not work for you, there is no reason to be sad as I have written other fantastic procedures that you can follow in this post as well.
You may also like to read: Show Folder Size in Windows 11.
3. Use the Show File Extensions Option
If the previous methods did not work, this is the best method that can fix this problem.
Maybe the file you are trying to open is not a spreadsheet document. IF you try to open a file that has a format unsupported by Excel, it will not open.
For example, Microsft Word is a word processing software that is mainly used to open files with the extension ”.docx”.
If you try to use Word to open a file that has the ‘.xml” extension, which means the file is a spreadsheet document, Word cannot open it.
Every software provided in Microsoft 365 has the ability to open certain kinds of files. So it would be wise to check the file extension of the file you are trying to open.
Here are the steps to check file extensions on Windows 11:
- Open File Explorer or enter This PC.
- Click on the View option at the top. A drop-down menu will be displayed to you.
- Navigate to Show and Select File name extensions.
- Check the File extensions and see whether the file format is supported in Excel.
How to Lock/Unlock Cells in Excel
If you want to know how you can lock or unlock cells on Excel, look no further as the steps on how to do that are given below.
Here are the steps to lock or unlock cells in Excel:
- Select the cells you want to edit.
- Click on the Home
- Navigate to the Cells section and then select Format.
- Click on Format Cells.
- Go to the Protection
- Uncheck the box beside the Locked
- Click on OK.
Read more on how to Copy Values Without Formulas on Excel
How to Hide/Unhide Rows and Columns in Excel
If you want to hide some rows and columns in excel, look no further, as the steps on how you can do that are given below
Here are the steps on how to unhide/hide rows and columns in Excel:
- Select the columns/rows that you want to edit.
- Click on the Home
- Go to the Cells section and select Format.
- Click on the Hide and Unhide
- Select the Unhide Columns or Unhide Rows option, whichever you desire. The columns and rows you selected will be displayed or hidden depending on your selected option.
Here’s a complete guide on how to Set Notepad/Notepad++ to Be Always on Top
Conclusion
I hope that this post has served you well in informing you about how you can make Microsoft Excel the default software for spreadsheet documents on your Windows 11 system.
Although I am a computer science student, I had to use Excel to make some spreadsheet documents in my life.
This shows you how essential excel is that people not even in fields requiring Excel use it even to this day. Excel has been here fr a long time with us and I do not see Excel becoming irrelevant in the future.
I hope you can now use Excel flawlessly and I also hope that you never face any issue using Excel in the future.
I wish you luck in whatever you do in the future. Take care and stay safe!