In this magical world of technology, there is a way to connect with other’s computers remotely through an app called Remote Desktop Connection. The good thing is Windows 11 has built-in Remote Desktop functionality.
You can enable it from Windows 11 Settings or use the dedicated inbuilt app instead. But certain steps are required to perform before enabling this feature.
Do you want to know every method and step to enable a remote desktop connection?
Keep reading till the end of this article to know. Let’s begin!
Check out our separate post on how to fix Windows 11 remote desktop authentication error.
How to Enable Remote Desktop in Windows 11
Remote Desktop helps to access any PC remotely, where distance is just a myth. Anyone can establish a remote desktop connection from the Windows Settings app or Control Panel. It is also possible to achieve it from CMD or Powershell.
A Remote Desktop Connection app is available in Windows only for accessing PCs remotely. IT experts and system support engineers use the remote desktop connection to fix things on the client’s PC.
It’s not possible to crack & fix problems by handling each PC physically. That’s why fixing issues on several PCs from a single workstation requires a Remote Desktop connection. There are several methods by which you can easily enable a remote desktop connection to any PC.
Note: It’s impossible to enable a Remote Desktop connection from Windows 11 Home edition. To use this functionality, upgrade to the Windows Pro or Enterprise edition.
Here are the methods to establish a remote desktop connection in Windows 11:
1. Enable Remote Desktop from Windows Settings App
Go to the Windows Settings app to enable a remote desktop connection with any PC. There is a Remote Desktop option under the System section.
Here are the steps to enable Remote Desktop from Windows Settings:
- Go to Windows Settings by pressing the Windows key + I.
- Navigate to System > Remote Desktop.
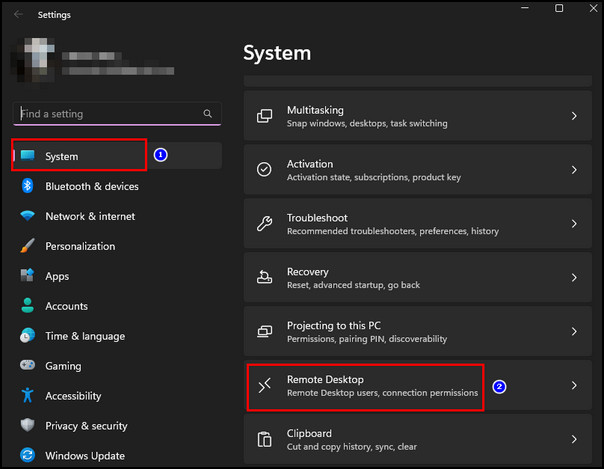
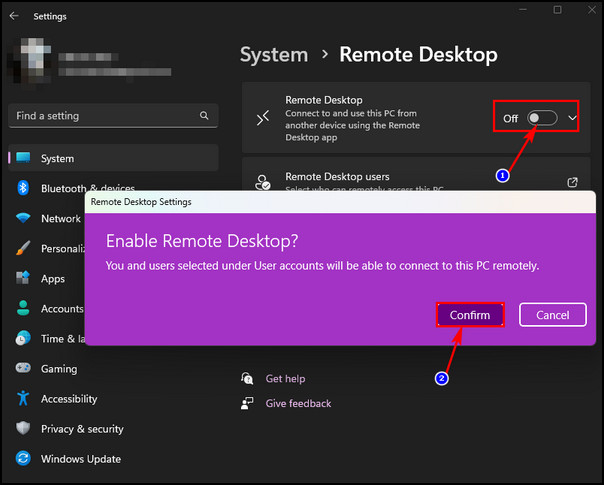
- Click on the toggle switch to turn on Remote Desktop.
- Select the Confirm button from the prompt.
While using the Remote Desktop, check the Network Level Authentication option to make the connection more secure. On this settings page, there is a port number 3389 to configure a router outside the network to allow remote connections. This port number is unchangeable. 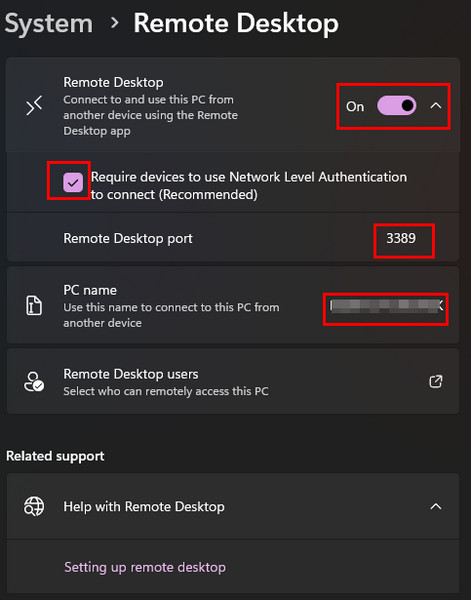
You may also like to read how to enable remote desktop RDP in Windows 10 home edition.
2. Use the Remote Desktop Connection App
Go for the built-in Remote Desktop app if both the host and client PC are on Windows OS. The built-in app is very straightforward, and you can connect to other’s PCs quickly. So, let’s hop into the steps.
Here are the steps to use the Remote Desktop Connection app:
- Go to Windows search from the client’s PC.
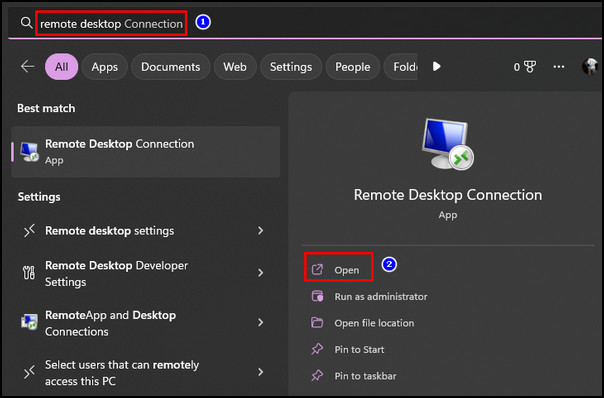
- Search for Remote Desktop Connection and launch the app. You can also launch the app from Run by the following steps:
- Type mstsc.exe in the Run and Hit Enter.
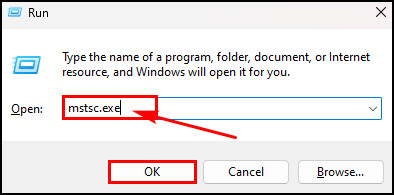
- Type mstsc.exe in the Run and Hit Enter.
- Launch the app from your PC, also.
- Type the name of the computer you want to connect to in the Computer field.
- Click the Connect button to establish the remote connection.
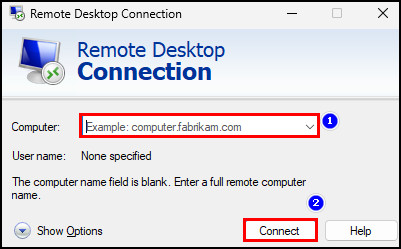
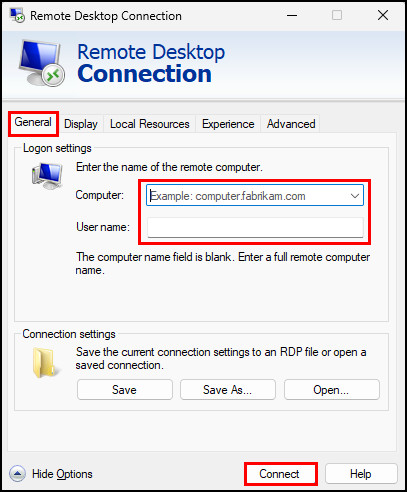
- Click on the Show Options button to customize the remote desktop experience.
- Select the General tab and enter the username & password of the PC you want to connect.
- Hit the Connect button to enable the connection.
The remote desktop connection is successfully established if everything is set perfectly. Click on the Close icon to exit from the remote desktop.
3. Enable Remote Desktop from Control Panel
Windows 11 still got the old-style Control Panel. In the Control Panel, there is an option to allow Remote Desktop. With that option, anyone can easily access another’s PC remotely. So, follow the steps below to allow Remote Desktop from Control Panel.
Here are the steps to enable the remote desktop from Control Panel:
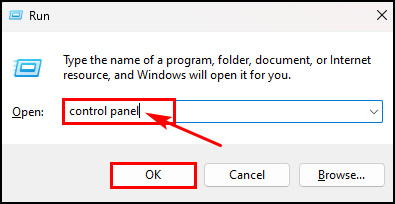
- Press the Windows key + R and type Control Panel.
- Hit Enter or OK button to launch Control Panel from Run.
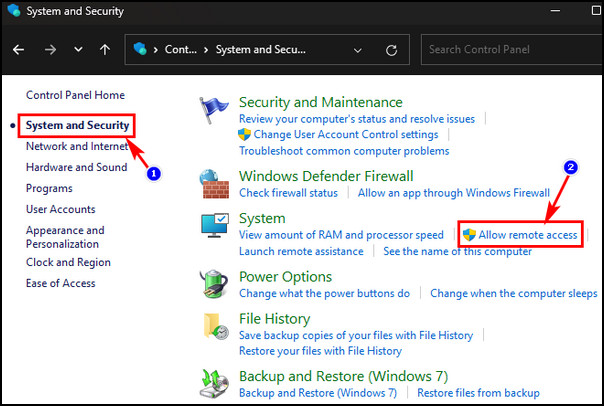
- Click System and Security on the left pane.
- Select Allow remote access under the System section from the right panel.
- Check the box for Allow remote connection to this computer.
- Click Apply and then the OK button.
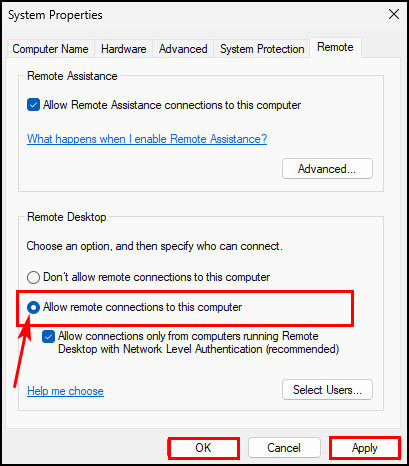
After enabling the Remote Desktop from the Control Panel, choose a client from another computer to connect the PC remotely. The Network Level Authentication is also selected by default while enabling this feature. This option is a must for establishing a secure connection with other PCs.
Also, read how to fix update error code 0x80004005 in Windows 11.
4. Establish Remote Desktop Connection from CMD
The command prompt (CMD) is the best way while performing any tasks or actions from the root level. It only requires some command lines to enable remote desktop connection from the CMD. So, let’s look at the commands for CMD to do that.
Here are the steps to establish a Remote Desktop connection from CMD:
- Press the Windows key and search for CMD from the Windows search bar.
- Launch CMD by selecting the Run as administrator option.
- Paste the following command line to enable remote desktop protocol and hit Enter key:
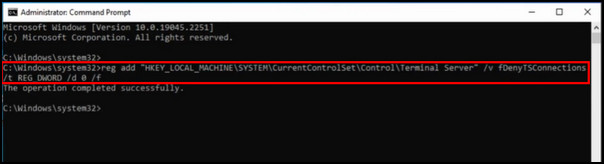
reg add “HKEY_LOCAL_MACHINE\SYSTEM\CurrentControlSet\Control\Terminal Server” /v fDenyTSConnections /t REG_DWORD /d 0 /f
- Copy and paste the following command line to enable remote desktop through Windows Firewall and press Enter key:
netsh advfirewall firewall set rule group=”remote desktop” new enable=Yes
The remote Desktop feature will turn on after executing the command line successfully.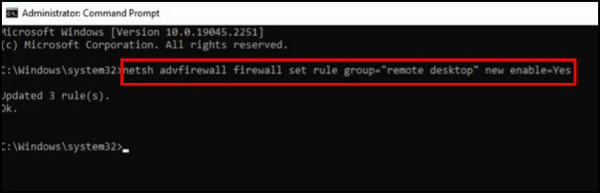
5. Enable Remote Desktop Connection from PowerShell
Not only from the command prompt, but you can also use PowerShell to enable the remote desktop feature in Windows 11. Just follow the steps below to enable it.
Here are the steps to enable remote desktop from PowerShell:
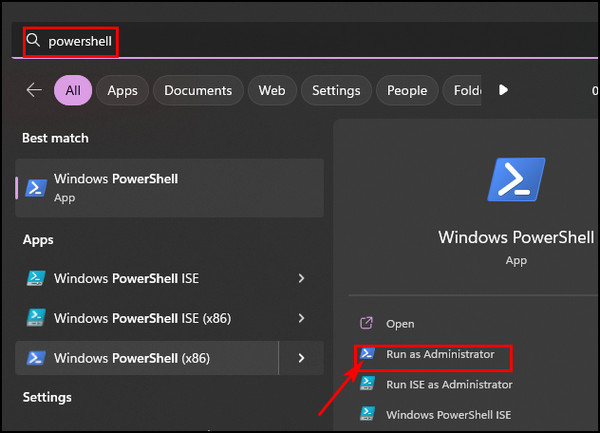
- Click on the Windows logo icon and search for PowerShell in the search bar.
- Select the Run as administrator option for PowerShell.
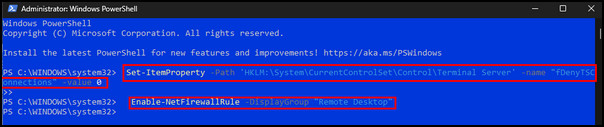
- Paste the following command to enable remote desktop protocol and press Enter key:
Set-ItemProperty -Path ‘HKLM:\System\CurrentControlSet\Control\Terminal Server’ -name “fDenyTSConnections” -value 0
- Type the following command or paste it to enable remote desktop through Windows Firewall and hit Enter:
Enable-NetFirewallRule -DisplayGroup “Remote Desktop”
Once the command line is executed successfully, you can use the remote desktop without any interruption, even when the Firewall is ON.
Also, read how to schedule Windows 11 to wake from sleep automatically.
What is Remote Desktop & How Does it Work?
A remote desktop is a system feature or program that enables a user to connect with another computer in a different location. The connection establishment is so smooth that it looks like both PCs are connected through a local network.
This remote desktop software captures another PC’s screen, mouse and keyboard inputs and transmits all the captured things to the connected PC. the user who makes the connection can control the connected PC remotely.
Fascinating, isn’t it?
Mainly IT professionals and support engineers use remote desktop programs to fix clients’ issues remotely without physically going to the client’s place. Some remote desktop connection app supports file sharing, and it’s a great addition to this app.
Another thing is some remote desktop tools support transmitting audio from the host to the client PC.
Benefits of Remote Desktop Connection
There are many benefits to using the remote desktop connection app. A remote desktop user can access the main workstation PC while traveling or from home. IT professionals can easily fix clients’ PC or server-related issues remotely using this program.
There are hundreds of employees in big organizations, and an IT expert can’t go from person to person to fix their PC issues. That’s where the remote desktop app comes to play by establishing connections from the IT expert’s PC to other employee’s PC for fixing issues.
File transfer is available in most remote desktop apps, and that’s a great addition to this app. Many companies maintain BYOD (Bring your own Device) policies, and one can easily access their home computer with the remote desktop app.
This improves staff productivity by accessing multi computers from any location.
Remote desktops program maintains a secure connection between the host & client PC. Due to the Network Level Authentication feature, data is passed securely with advanced key encryption. It also saves money & time because employees don’t need to go to the place to access another PC.
It has become highly popular because you can easily access your home or workstation PC’s data anywhere in the world. IT professionals can set and block rules on the staff’s PC through a remote desktop.
So, the benefits of using the remote desktop program are limitless.
Also, check our latest post on how to enable go back button in Windows 11.
FAQs
Does Windows 11 have a Remote Desktop Connection?
All versions of Windows 11 have a Remote Desktop Connection except Windows Home. To enable it, you must go to the Windows Settings app.
Do I need Windows 11 Pro to use Remote Desktop?
Yes, you must need a Windows 11 Pro or Enterprise edition to use the Remote Desktop program.
How can I enable Remote Desktop?
Go to the Windows Settings app and click System from the left panel. Scroll down and look for the Remote Desktop option. Select it and click on the toggle button to enable Remote desktop.
Which Windows versions support Remote Desktop Connection?
The following Windows version support Remote Desktop Connection:
- Windows 11 Pro.
- Windows 11 Enterprise.
- Windows 10 Pro.
- Windows 10 Enterprise.
- Windows 8 Enterprise.
- Windows 8 Professional.
- Windows 7 Enterprise.
- Windows 7 Ultimate.
Wrapping Up
There are many remote desktop apps available in the app market. But Microsoft provides several remote desktop features in Windows 11. Anyone can enable it from the Windows Settings app. Otherwise, use the built-in Remote Desktop Connection app.
The app is GUI-based, where you manage all things with many options. In this article, I have also shown how to enable remote desktop from the CMD & PowerShell.
Please comment in the box below if you face any problems regarding the remote desktop. Best of luck establishing the connection!