Maybe you want to make some major changes to a file but don’t want to modify the original one. That’s where copying or duplicating a file kicks in.
With a duplicate file, you can do whatever you need. And keeping that in mind, SharePoint supports duplicating a file by copying it just like what you do in Windows File Explorer!
So, if you want to duplicate a file in SharePoint, read till the end of this article; it won’t take long.
Let’s begin!
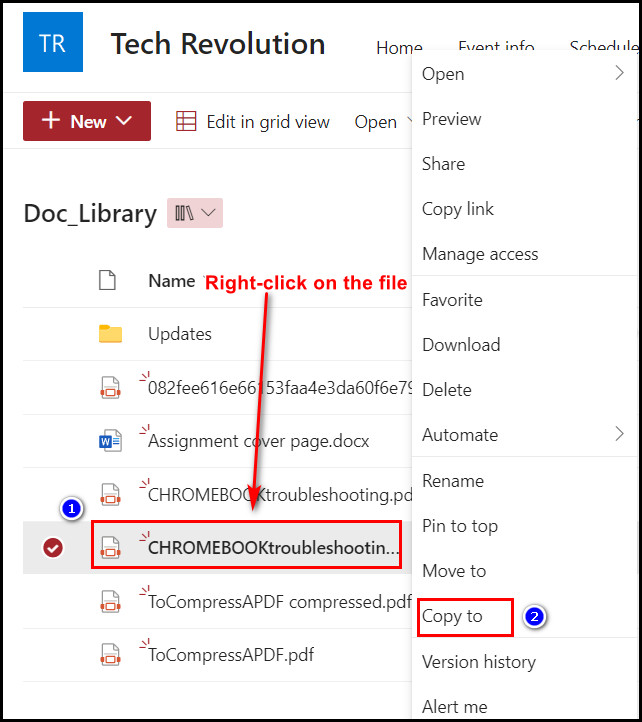
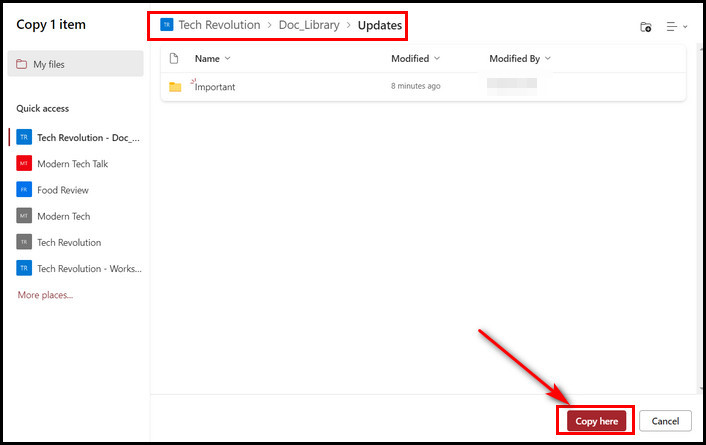
To make a duplicate file, right-click on the file you want to make a copy of and choose the Copy to option. Select the path where you want to paste it from the pop-up window. Then click on the Copy here button. If you select the exact path where you copied from, you must click on the Keep both option.
Moreover, if you want to move a file or folder to the SharePoint site, the process is the same as copying one. But instead of Copy to option, you must select the Move to option after right-clicking the file. Now let me show you the steps real quick.
- Right-click on the file or folder that you want to copy or make a duplicate one.
- Select the Copy to option from the context menu. Now, a window will open, and you can select the location to copy the files from there.
- Select the location where you want to place the copied file.
- Select the Copy here button.
Now, the duplicate file or folder gets saved in the selected location. Moreover, if you want to keep the copied file in the exact place you copied it from, you must choose the Keep both option from the prompt.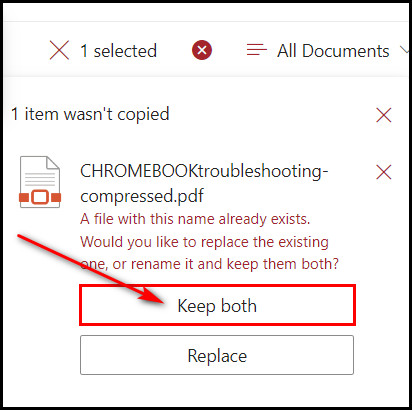
Selecting that option will rename the file or folder and paste the duplicate one with the original one.
The significant advantage of using SharePoint is you can copy or move a file in SharePoint within a library, a site, or another site.
You can move files or folders in the SharePoint site within a folder, library, same site, or another. The process is simple; just drag and drop the file into the library folder. Or else, right-click on the file and choose Move to option. Then select the location and click on the Move here button.
SharePoint also supports moving any file or folder to other sites. Now, let me show you the proper instructions to move SharePoint files to another folder in the same library, a different library, and into the other SharePoint site.
1. Move Files to Other Folders in the Same Library
- Select the file or folder that you want to move to another location.
- Drag and drop the file or folder to another folder of the same library.
Once you drop it, you’ll see the progress and successfully moved message as a prompt in the upper right side beneath the header option.
2. Move Files or Folders to Another Library Folder
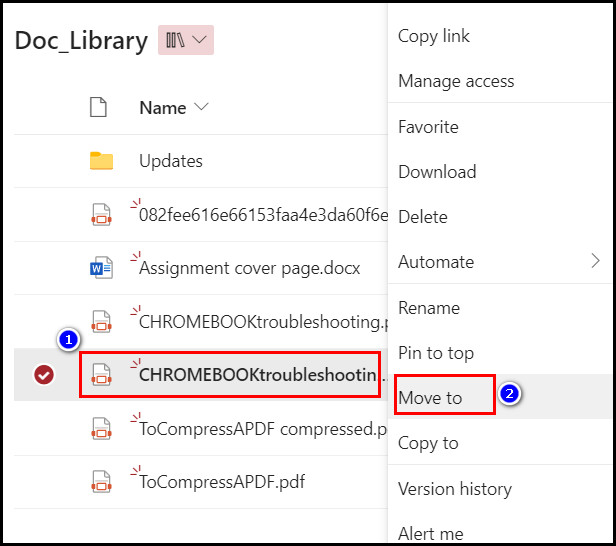
- Right-click on the file or folder you want to move to another library.
- Choose the Move to option from the list of options.
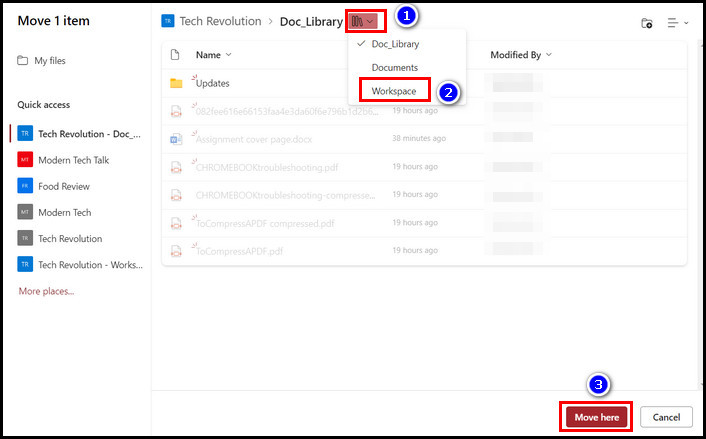
- Click on the switch to another library drop-down icon from the top of the appeared window.
- Select the library where you want to move the file.
- Click on the New folder icon to create a new folder if you want to move that file to a new folder.

- Select the Move here button to complete the moving process.
You can also move files or folders to another site in SharePoint. SharePoint allows moving files within the other libraries of the same site and to the other SharePoint site.
- Right-click on the file and choose Move to option.
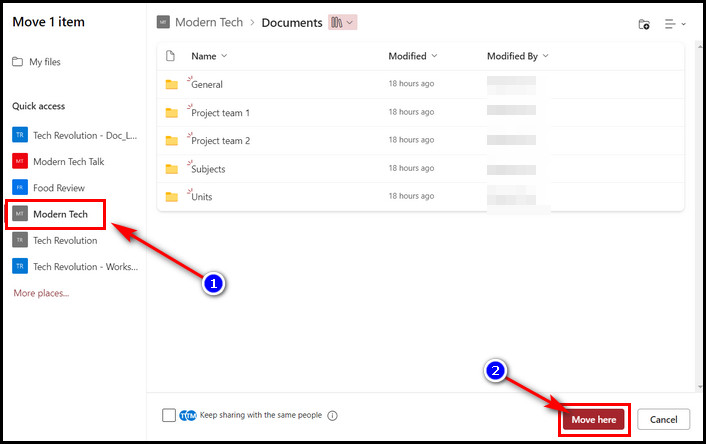
- Select the other site from the left pane.
- Choose the folder of the other SharePoint site where you want to move the file.
- Select the Move here button.
Keep the Moved Files File Sharing Access
The access is removed automatically when you move a file to another library, folder, or site. But you can give access to the files again to those you have given access to while moving them. To give access to the files while moving, follow the below instructions.
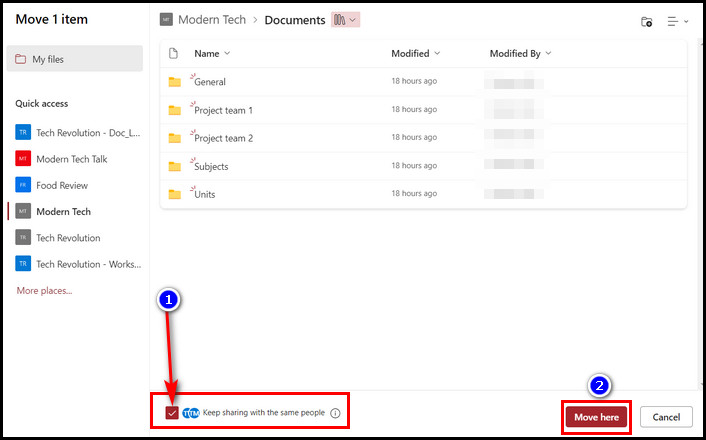
- Check the box beside the Keep sharing with the same people option before hitting the Move here button.
- Select the Move here button after that.
Now, all the members can access the file even after you moved the file to another location.
To fix SharePoint Online creates duplicate files with the PC name, go to the Windows tray and right-click on the OneDrive icon. Go to Settings and look for the Sync conflicts option underneath the Office tab. Select the Let me choose to merge changes or keep both copies option.
Due to this, the OneDrive sync client app saves one file name with the PC name at the end to distinguish which file has been changed from which location. But you can fix this by choosing the right sync conflict option for OneDrive. Let me show you the procedure with quick steps.
- Click on the Windows tray arrow icon.
- Right-click on the One Drive icon.
- Select Settings and look for the Sync conflicts option under the Office tab.
- Click the radio button beside Let me choose to merge changes or keep both copies option.

That’s it! From now on, OneDrive won’t create duplicate files with the PC name synced from SharePoint document files.
FAQs
Can I duplicate a file in SharePoint?
To copy or duplicate a file in SharePoint, right-click on the file and select Copy to option. Then choose the location to paste that file from the prompted window. After selecting the location, hit the Copy here button.
Why does SharePoint Create duplicate files?
SharePoint creates duplicate files due to the OneDrive sync client app. This sync client app can’t merge files when two users upload files from different locations. So for this conflict, the app adds the computer name at the end of the file name to distinguish between the file versions.
Can I move a file to another site in SharePoint?
You can move files from one SharePoint site to another. To do that, right-click on the file and select Move to option. Then choose the site from the left pane of the prompted windows. After choosing the location, select the Move here button.
Final Words
In the SharePoint document library, you can upload any files and organize those as per your requirement. Like Windows or any other file explorer system, you can create folders in it and copy or move files in those folders.
But beginners might not know how to duplicate a file in SharePoint. And this article will aid those on how to do that. If you have read till the end, you already know how to duplicate a file and move files in SharePoint.
Yet, for more help, leave a comment below. Enjoy using SharePoint!