Do you see the Verify Member button whenever you click any user on your Discord server?
Well, you are not alone. Every server admin who enabled the member screening service gets this option for new and existing members.
But what does this feature do? Or even how to verify someone using this button? Let’s find out.
The Verify Member button bypasses the filtering rules you set up on your Discord server for new members. With this option, the server moderators can verify members manually, and the user doesn’t have to follow the verification process.
Previously, when the new user couldn’t verify your server’s verification system, you could bypass that security measure by giving them a role.
However, after the update, roles don’t verify any members. Instead, you need to use this Verify Member option as a replacement. So you don’t need to give people a role now just to skip verification, making your server more secure.
This feature helped me to access my friend’s server quickly. After giving a join request, I just contacted my friend to enable this verification button for my ID. And I became a member of his server without any issues.
Using the verify member button in your Discord server is very simple. Here’s how:
- Log in with your Server admin account in Discord.
- Go to your server.
- Right-click any member you want to verify.
- Select the Verify Member button.
After completing the steps, the members will get access to your server without verifying themselves.
However, you won’t see the verify member button in your discord server if you don’t have any verification process enabled. Read the following section to know more.
You will only get the Verify Member option in Discord when you set a new verification method for members who wish to join. Also, only the admin and the moderator get this option on their account.
Setting up a new custom rule is a lengthy process. But don’t worry; I’ve divided the process into five segments to simplify it.
Caution: To set up a security rule, you must use a 3-party bot and give it full access to your channel. If you are uncomfortable using any 3-party bot, you should avoid this method entirely.
Follow these 5 steps to set up a custom rule and enable verify member button:
1. Create New Role
The first step of the verification process is creating a new role in your discord server. These roles will help you to segment your members according to the given permission. To set up new roles:
- Open Discord and click on your server title.
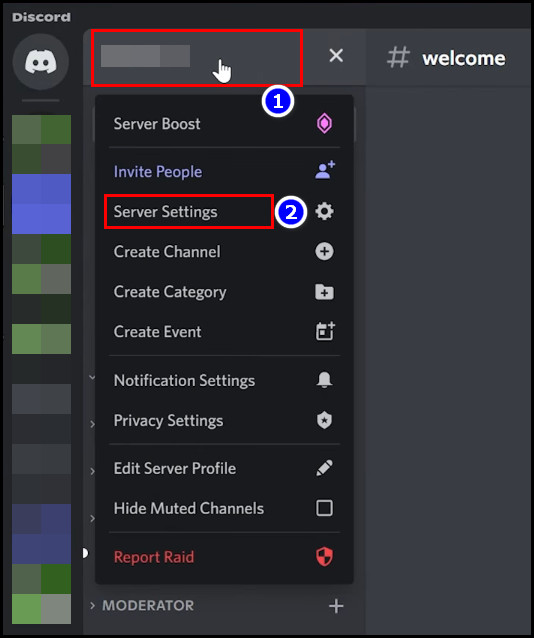
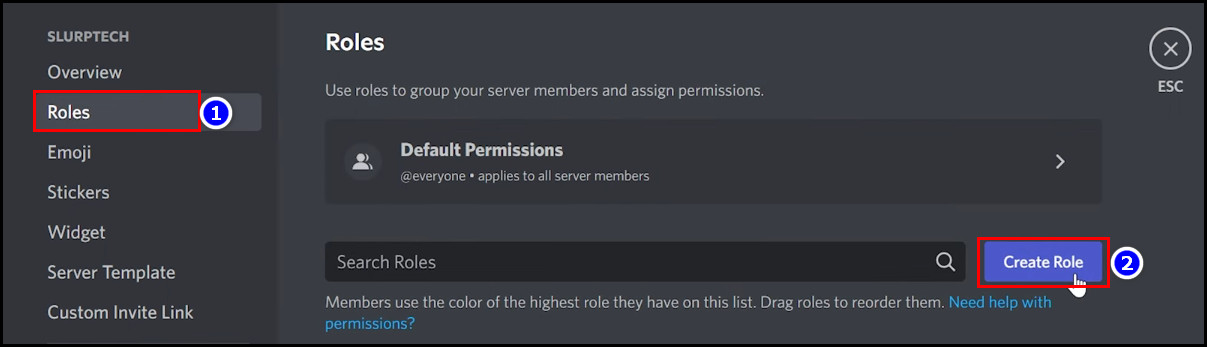
- Go to your Server Settings > Role.
- Select the Create a Role option.
- Insert name and set color for your Role.
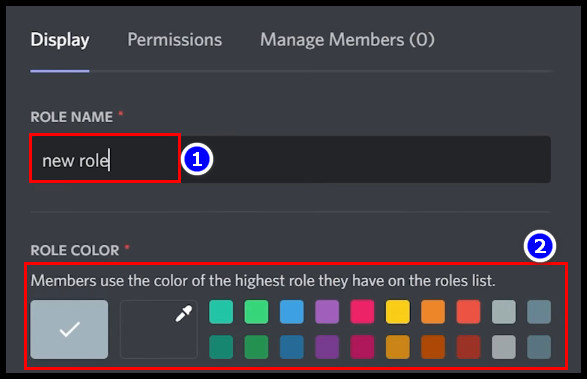
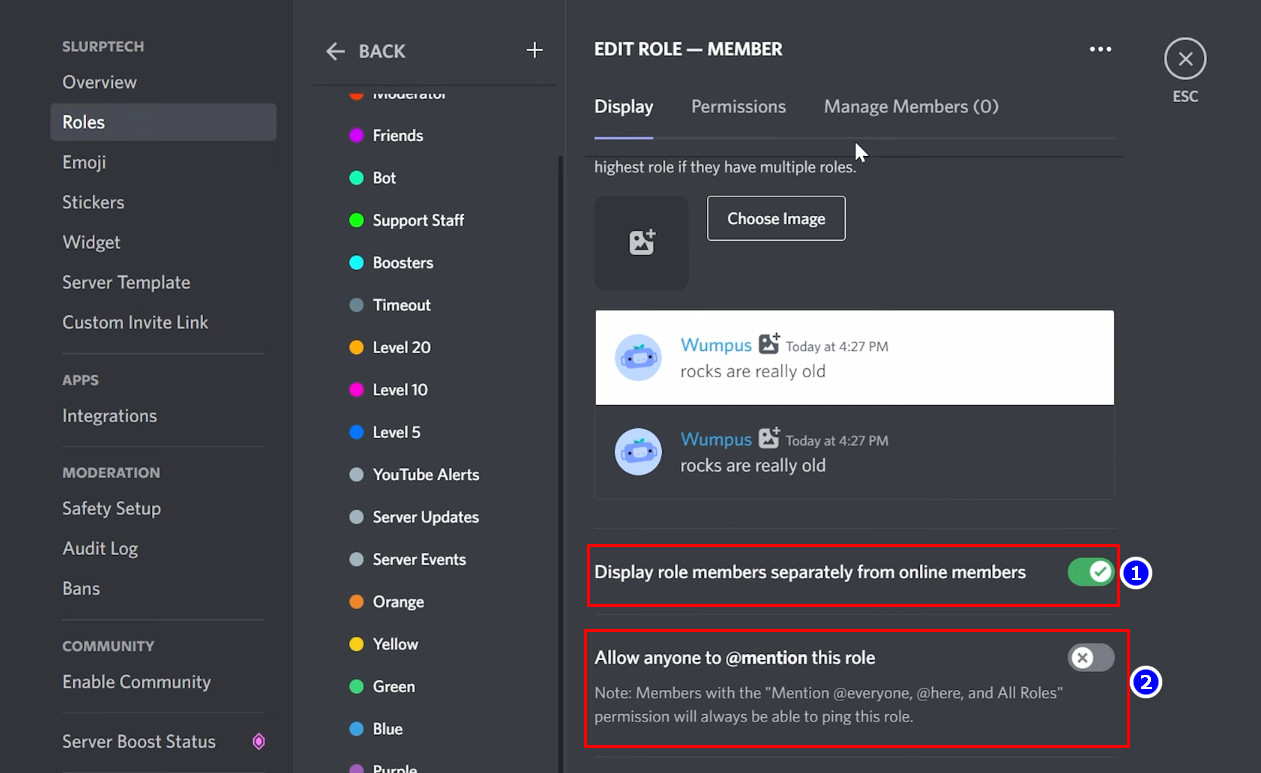
- Turn on the Display role members separately option and disable the @mention slider.
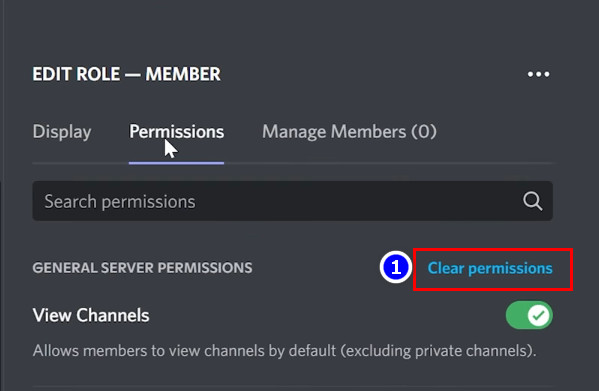
- Go to the Permission tab from the top and click the Clear all permission button.
- Pull up your created role above the @everyone role and below the other roles.
- Click the Save Changes option.

- Select the @everyone role from the side and click Clear all permission.
- Select the Save Changes option to store your changes.
This method will prevent members without any role from getting unwanted permissions on your Discord server. After completing the steps, click the ESC key on your keyboard to close the window.
2. Setup Channel with Verification
After setting up a new role, you must build a new channel on your Discord server to use the created role with custom permission. Here’s the process to do so:
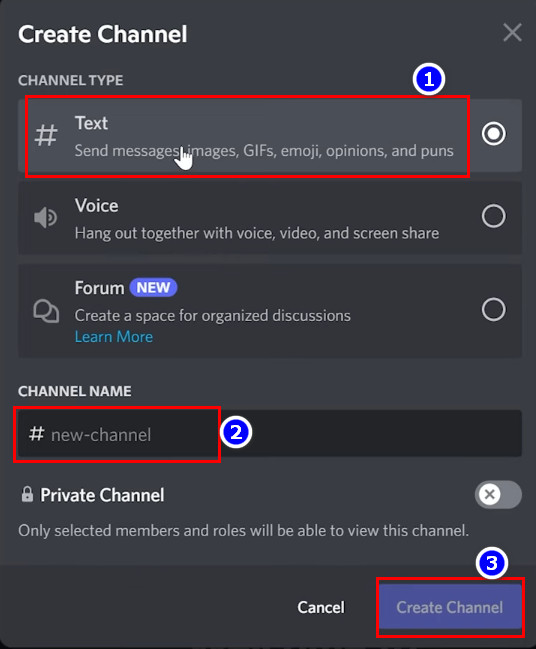
- Right-click on the side panel of Discord and select the Create channel option.

- Select your channel type and insert the channel name.
- Click on the Create Channel option.
- Type the verification message that every new user will get.
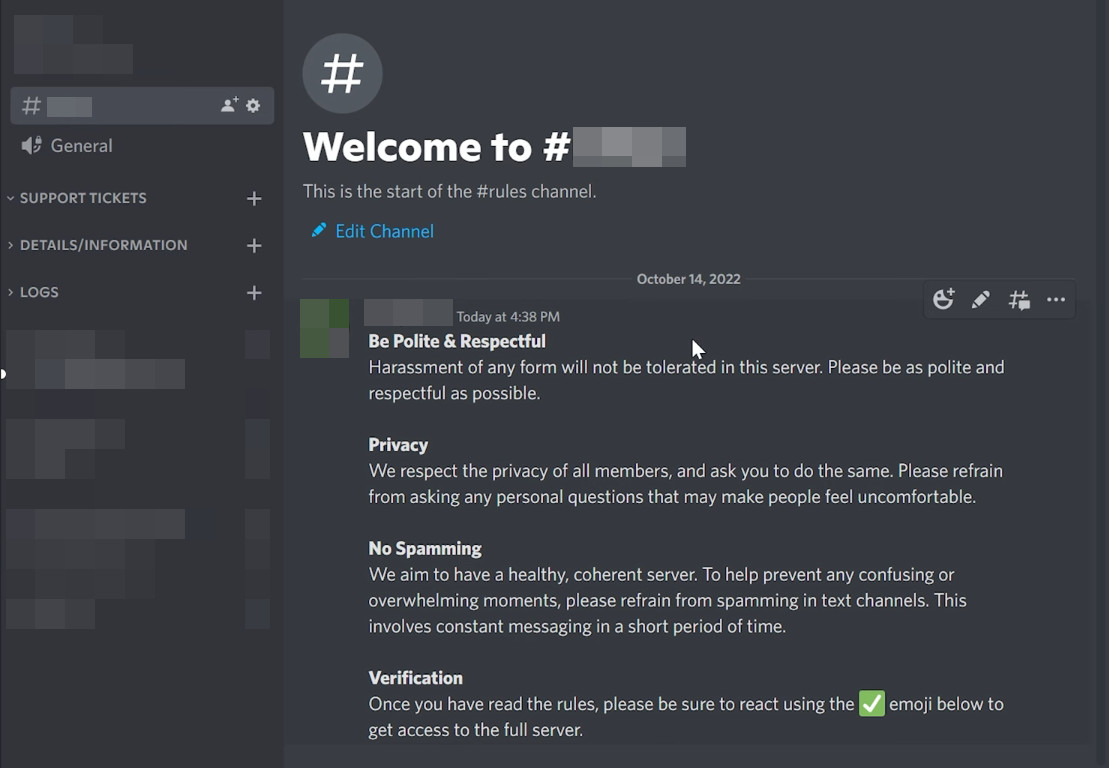 (you can also choose the template message if you like)
 - Right-click on the typed message and select the Copy ID option.
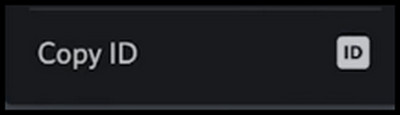
- Store the ID in a safe palace.
Note: you will only see the Copy ID option if you enable the developer option from your Discord account.
To enable the Copy ID option:
- Open Discord and go to your user settings.
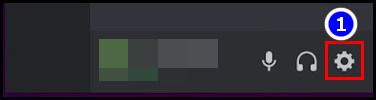
- Click the Advanced option from the side panel.
- Toggle on the Developer mode.
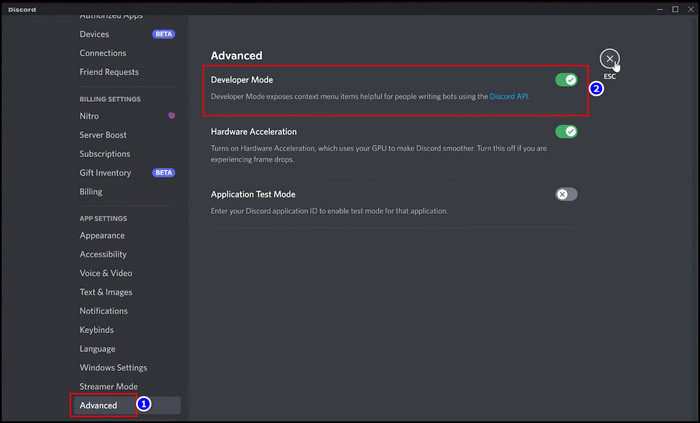
After completing the steps, you will see the copy ID option in your Discord application.
3. Insert CARL BOT into Your Channel
After successfully getting the Copy ID from your Discord server, you have to give CARL BOT access to your Discord server.
CARL BOT is a 3rd-party bot of Discord that has been serving users since 2018. I’ve personally verified this bot and determined it’s very safe to use. So you can use this bot and give it your server access.
However, if you do not like to use any 3rd party app at all, you must avoid this step. But you may not see the verify member button without using this bot.
To give your discord server access to CARL BOT:
- Open your browser and go to the CARL BOT website (carl.gg).
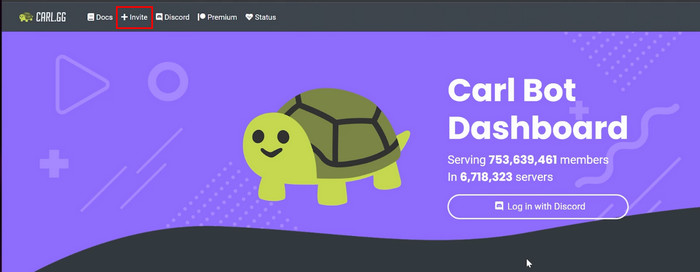
- Click the Invite option and sign in with your Discord account.
- Click on the Add to Server dropdown menu and choose the server.
- Select the Continue option.

- Modify the permissions if you like (I’ve selected all the permissions in the menu. And you must give CARL BOT the Manage Role permission for Verify Member button).
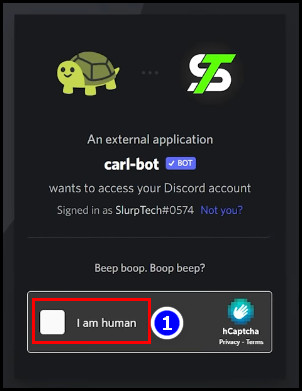
- Select the Authorize option and verify you’re human in the captcha option.
- Click the Authorize option again and select the server again in the new window.
- Skip the tutorial (if you get it).
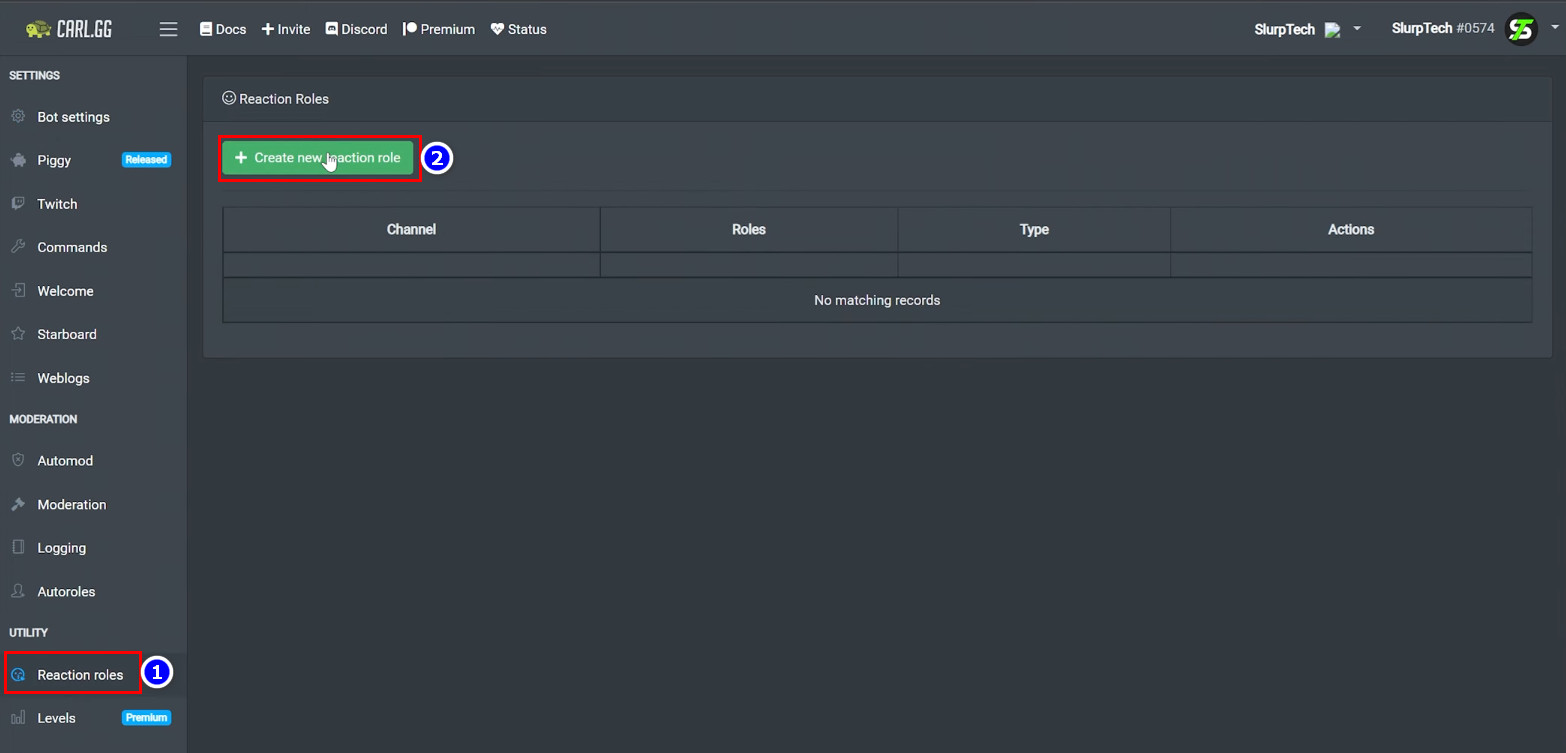
- Select the Reaction option from the side panel and pick the +Create new reaction role button.
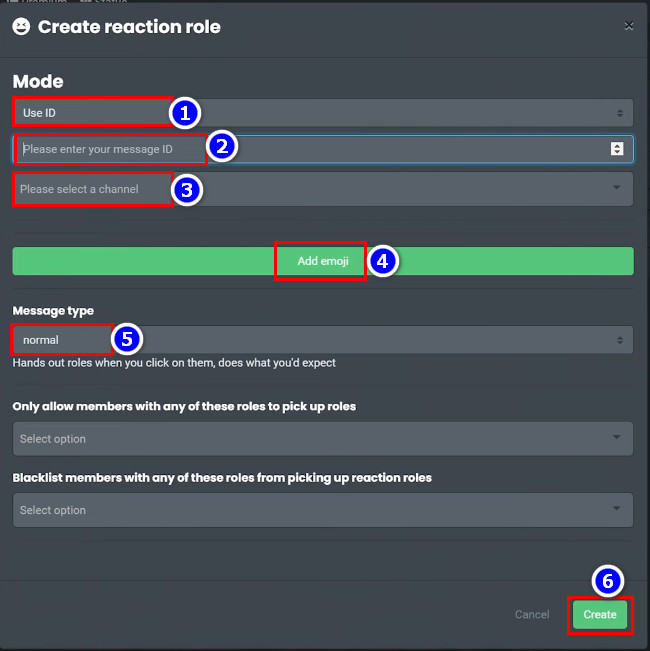
- Select the Use IP in the Mode section.
- Paste the ID you copied during the channel verification.
- Expand the Channel menu and select the channel you’ve created previously.
- Click the Add Emoji option and choose the emoji you want members to use for verification.
(I used the check mark as a verification emoji) - Click the following option box and select the role you’ve created previously as a verification role.
- Set the massage type to Verify.
- Leave the two following option box blank:
- Only allow members with any of these roles to pick up option box.
- Blocklist members with any of these roles from picking up reaction roles option.
- Click the Create option in the bottom window.
After completing the steps you must go back to the Discord app to complete the next process.
4. Modify Server Settings
When you complete the CARL BOT implementation in your Discord server, you will get the reaction option in your message. When you enable this feature from your server settings, the new members will need to click the reaction option to get access.
Follow this process to do so:
- Click on the Server title on Discord and open the server settings.
- Go to the Roles page and drag the CARL BOT role above the member role.
(you must put the CARL BOT role just above or just below the moderator roles.) - Click Save Changes and press the ESC key on your keyboard.
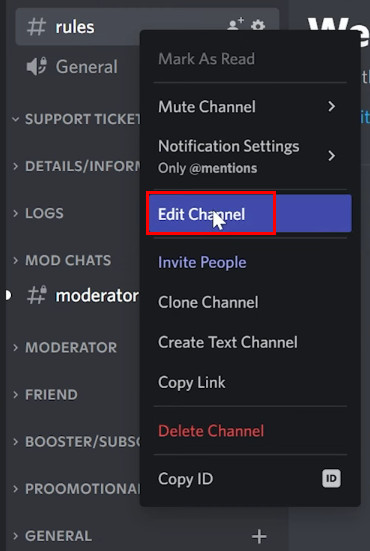
- Right-click on the channel you previously created during this process and click Edit Channel.
- Go to the Permission tab and expand the Advanced Permission option.
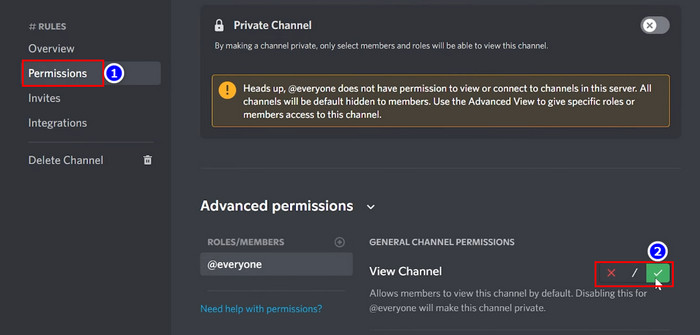
- Enable the View channel and Read message history options.
- Disable the Send Messages and Add Reactions options.
(You can tweak other permissions from the Advanced Permission option if you like.)
- Click the Save Changes option.
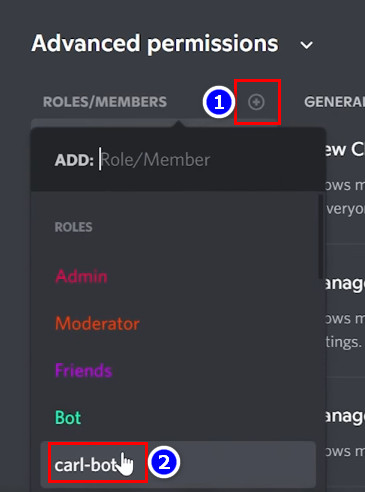
- Click the +(Plus icon) and choose the CARL BOT option.
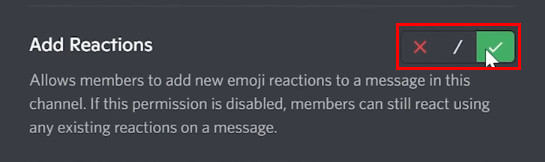
- Enable the Add Reactions option and click Save Changes.
Now you need to set up the rest of your channels so that the verification process works. To ensure security, you must prevent members without a role from viewing most channels on your server.
Typically, members without a role can see only the info channel in a secured server.
To set up this verification process:
- Right-click on the channel you don’t want unverified members to access and pick the Edit Channel option.

- Go to Permission > Advanced Permission.
- Disable the View Channel option and click Save Changes.
- Click the + icon and add the role you previously created as the verification role.
- Enable the View Channel permission and tap Save Changes.
When you complete this process, members without verification can’t access your channel.
If you set up all of your desired permissions into a category, then setting up verification will be quicker for all of your channels.
To do this, you can simply drag a channel with enabled permission into a category and click the Sync permission option.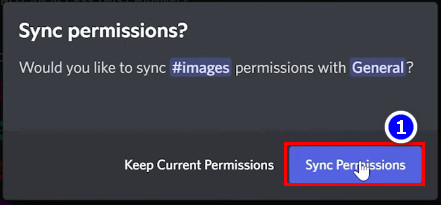
After that, all the channels in the category will use the same permission structure.
5. Build A New COMMUNITY
To finalize the security process you need to establish the membership screening system. And for membership screening, you must enable the community feature on your server.
Here’s the process to enable the community feature in the Discord server:
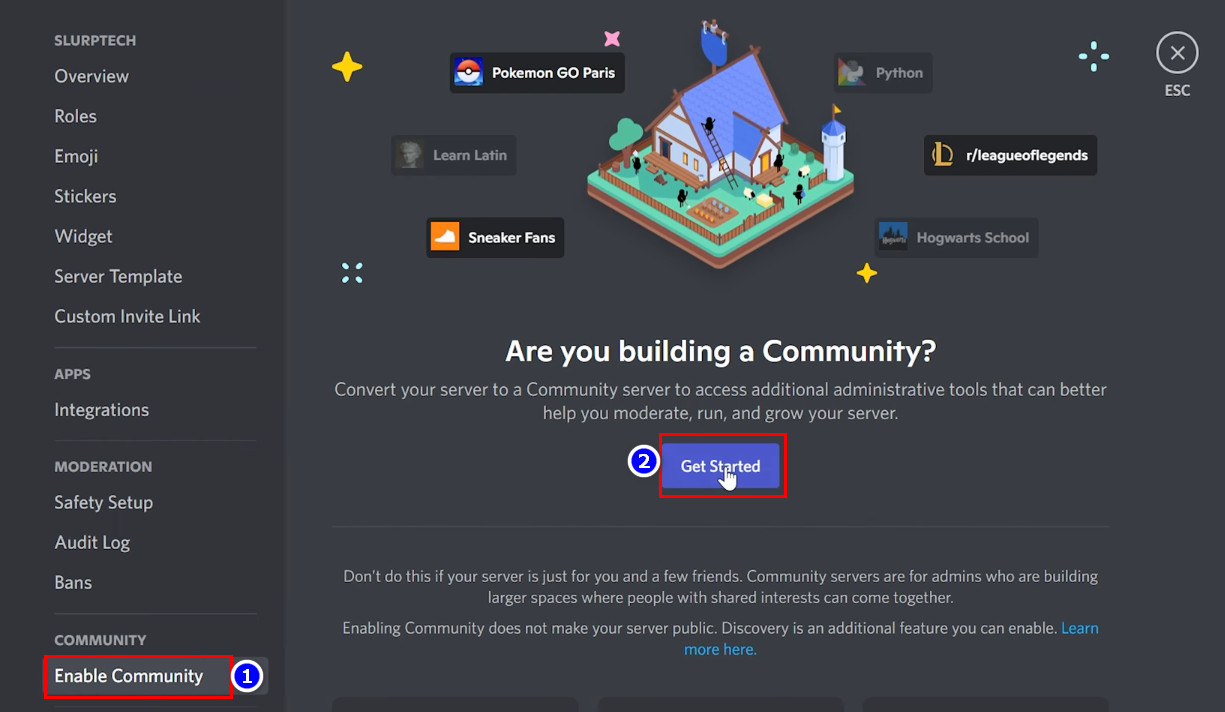
- Click on the Server title on Discord and open the server settings.
- Go to the Enable Community page and click the Get Started option.
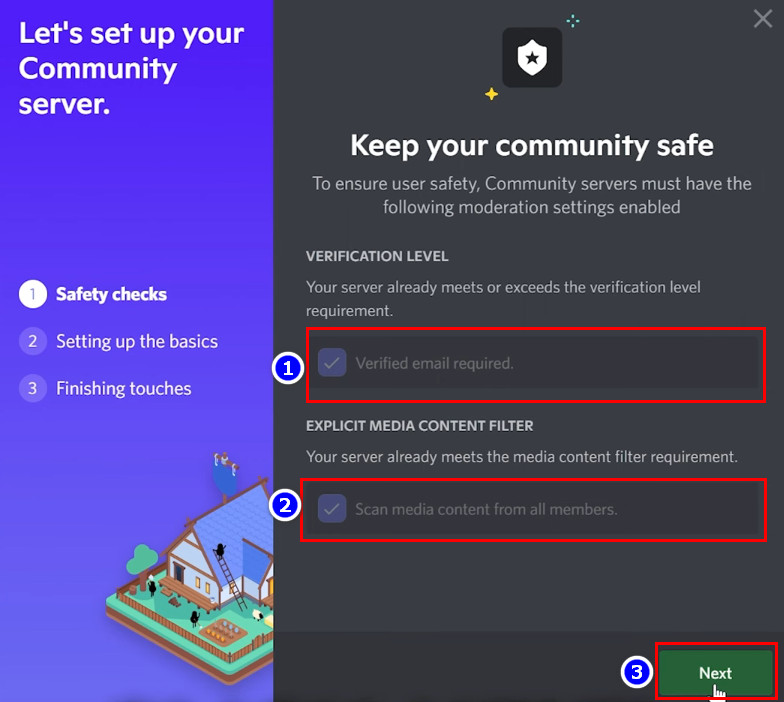
- Enable the Verification level and Explicit Media content filter and click the Next button.
- Use the dropdown menu in the Rules and Guidelines channel and select your Rules channel.
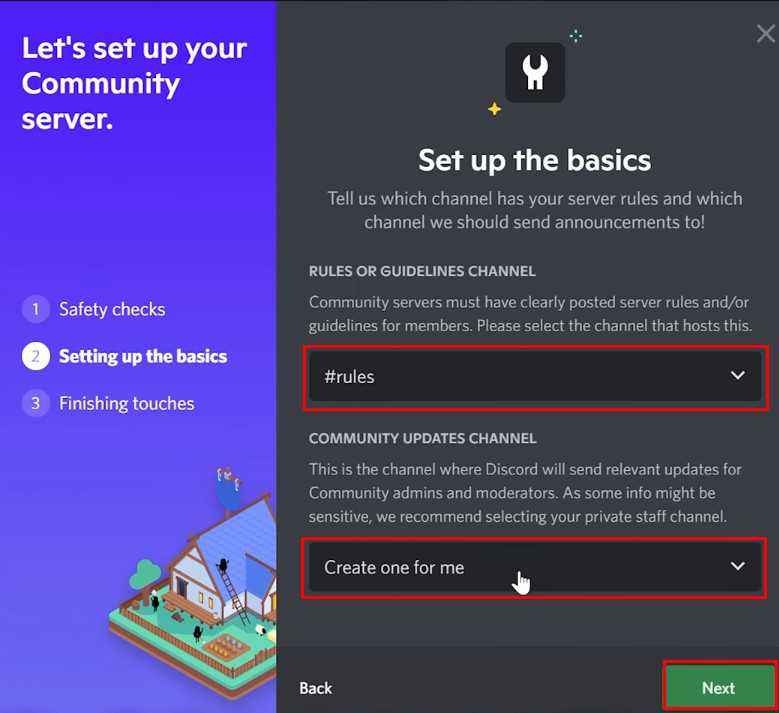
- Click the Next switch.
- Enable I agree and understand checkbox then click Finish.
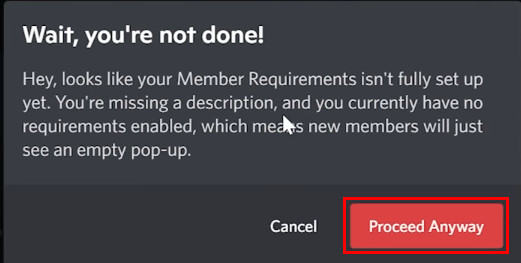
- Navigate to the rule screening page and click the Enable opinion.
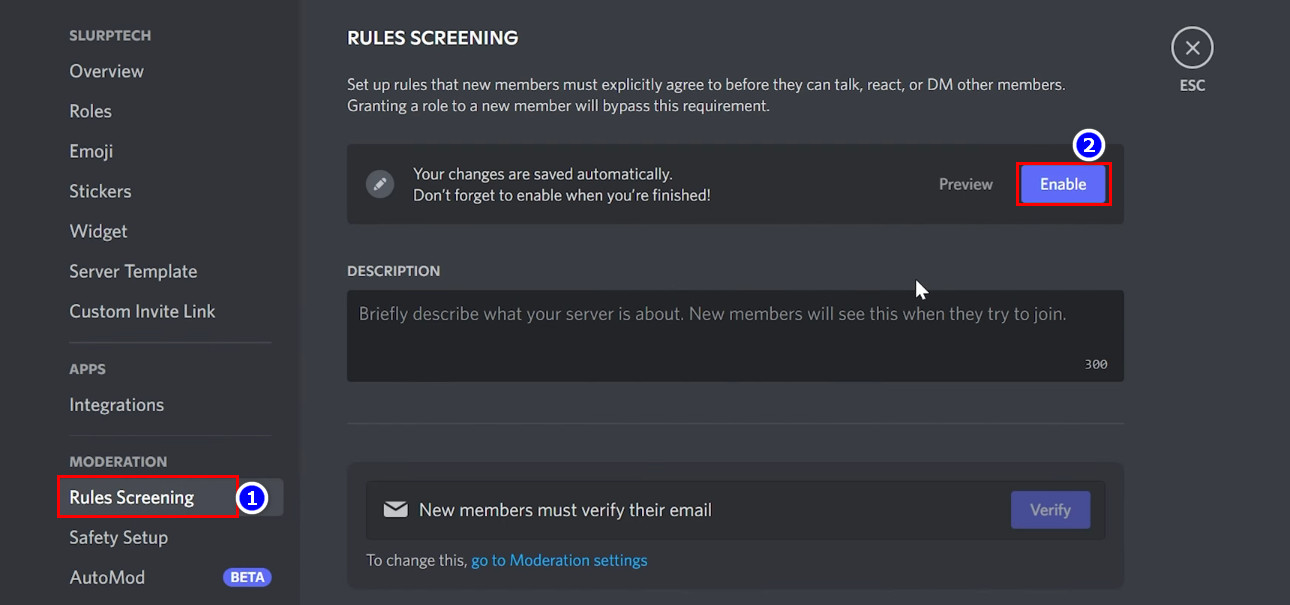
- Select the Proceed Anyway button in the new window.
- Add a description to your server and click Get Started.
- Input your server rules in the box and Click Add a new rule to add additional rules.
- (you should also include the verification emoji in the rules section)
- Tap Save to preserve your changes.
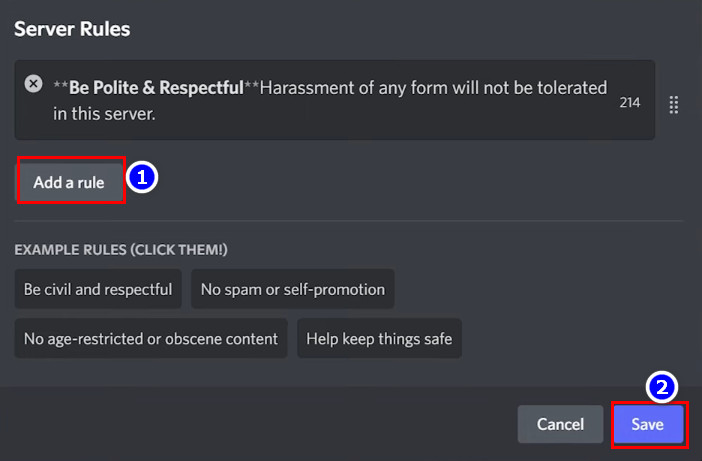
(members will now have to verify that they have read and agreed with the server rules)
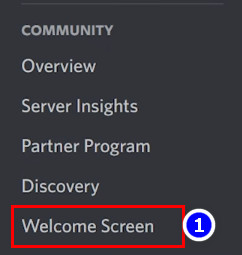
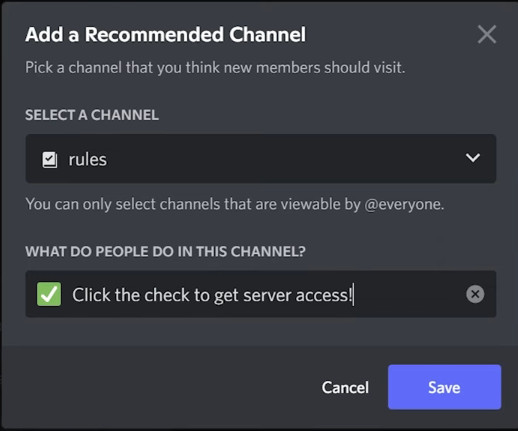
- Click the Welcome screen option from the side panel and click Add another channel.
- Choose the channel with verification massage in the Select a channel section.
- Select the emoji you’ve selected for verification (mine was the check mark emoji).
- Describe the verification method in short and click Save.
- Add a Server description and click Enable to activate the Welcome screen.
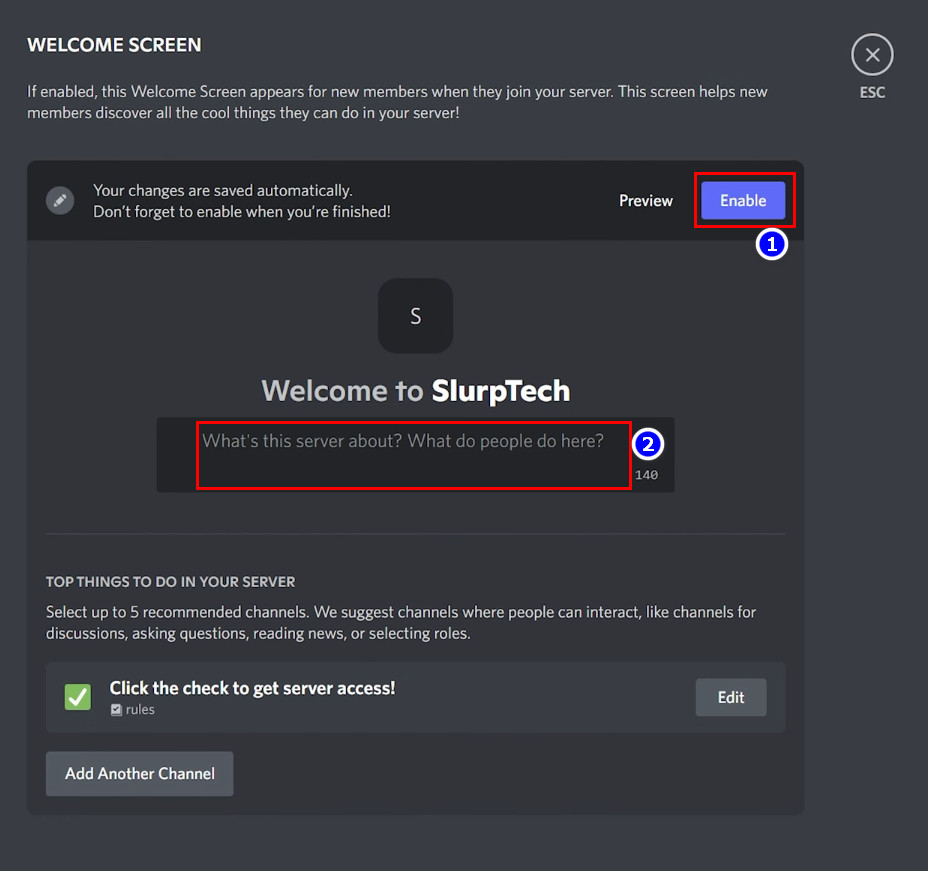
- Press the ESC key to finish the process.
And voilà! The verification system in your Discord server has been set up and running.
Now whenever any new member gives a join request to your server, you and other moderators will see the Verify Member button. They can bypass the verification option for any users if they click it.
FAQs
Can you use Discord without verification?
In most cases, you don’t need any verification to use the Discord application. However, you may need to verify your identity on some servers because those admins enabled the verification process on their channels.
Can you verify multiple members at once on Discord?
No, even with the new Verify Member button, you can’t verify multiple users at the same time on a Discord server. You need to verify each user one by one manually.
What does Verify Member button do in Discord?
The Verify member button helps admin & moderators bypass the security system of a discord server. When the new members couldn’t verify your server’s security system, you can use this service to verify the members without giving them any roles.
Why is Discord telling me to verify?
The Verification Required message is part of the Discord security system that protects you and your communities. Discord sends you this message when it can’t verify your location automatically or detect some abnormal activity.
Conclusion
In short, the verify member button is a relatively new feature for bypassing the security requirements in a Discord server. Any owner or moderator of a server can only use the option. However, You will only see this feature if your Discord server has a member verification system.
After reading this article, I’m sure you’ve successfully established a member verification system in your Discord server and can use the verify member button easily.
Comment if you don’t understand any steps mentioned above. And for everything else, stick with 10scopes.