After upgrading the SSD as a boot drive to boost the PC’s performance, you did notice file transfer speed is still not up to the mark. Later experimenting a bit, you found your SSD is running on IDE, not in AHCI!
Now, you need to enable AHCI on your Windows 11 system, but you don’t know how to do that.
In this article, I have shown how to enable AHCI with easy steps. So, read till the end to enable it on your Windows 11 or 10.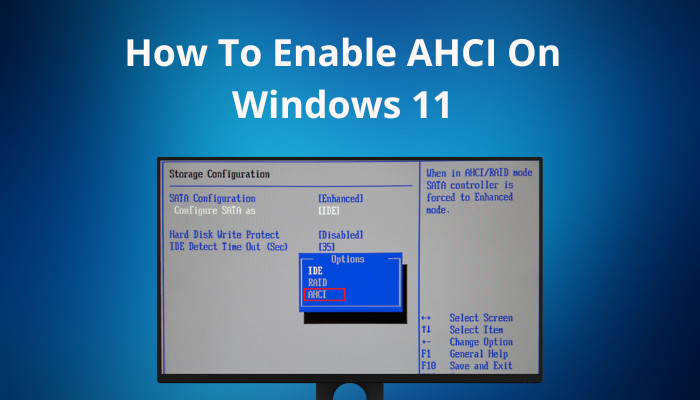
Let’s turn it on!
Follow our guide on how to disable accidental drag and drop in Windows 11.
What are the Differences Between AHCI & IDE?
AHCI stands for Advanced Host Controller Interface, and IDE stands for Integrated Drive Electronics. The AHCI is a standard technical term, and Intel defines it. It’s a register-level interface of SATA host controllers in a non-implementation-specific manner within the motherboard’s chipset.
On the other hand, IDE stands for Integrated Drive Electronics, and it’s an interface through which the motherboard connects to a hard drive or other storage devices.
The IDE system is built with a combined circuit and disk drive controller unit, which helps to increase the data transfer speed and reduce storage drive-related issues.
The AHCI & IDE is a communication system between the storage device and the rest of the system through a SATA controller. However, IDE is the older interface to transfer data between the system memory and the storage drive. It also doesn’t support modern technologies.
But AHCI is the latest interface and is compatible with modern high-end storage technologies like RAID. It’s conveniently faster than the traditional IDE interface. AHCI supports hot-swapping hard drives and Native Command Queuing (NCQ), whereas IDE lacks all of these features.
With hot swapping, you don’t need to shut down the computer to swap out the SATA drive. NCQ feature minimizes the movement of the read & write head and accelerates the access time faster on the hard drive using AHCI. NCQ helps to improve the performance while transferring large files on SSDs.
How to Enable AHCI on Windows 11
You need to enable AHCI from the BIOS before installing Windows 11 or 10. But if you didn’t enable it, cheer up because you can still enable that with some Registry Editor modification. After modifying the Registry Editor settings, you must go to the BIOS and enable the AHCI.
As I told you earlier, two types of interfaces are liable for communicating the system with the storage drive. Once you have enabled the AHCI mode, the hard drive will run faster than the IDE mode. So, let’s see how to enable AHCI mode in Windows 11.
Here are the steps to turn on AHCI from the Registry Editor:
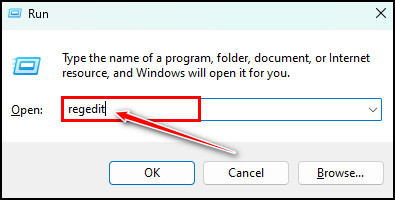
- Press the Windows key + R and type Regedit the Run text command field.
- Hit Enter to launch Registry Editor from Run.
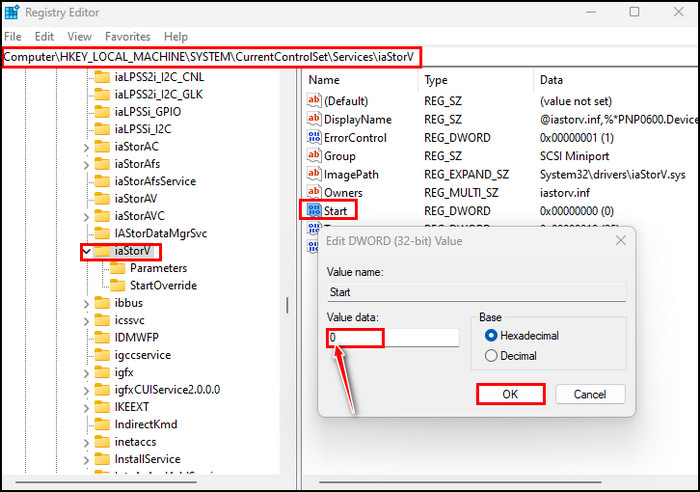
- Copy & Paste the following location path to the address bar and Hit Enter:
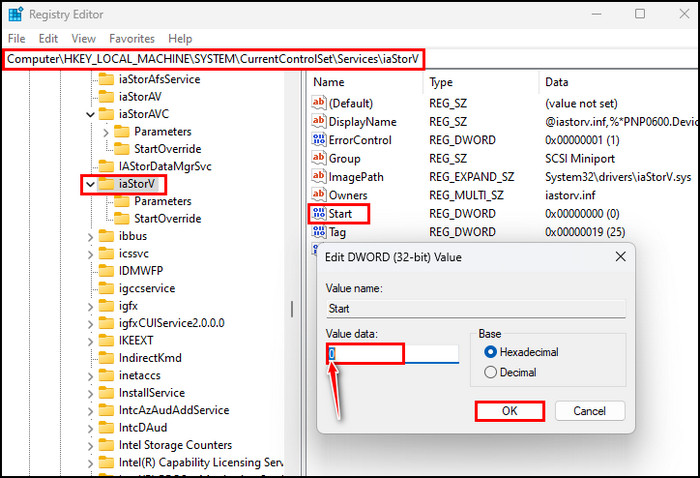
HKEY_LOCAL_MACHINE\SYSTEM\CurrentControlSet\Services\iaStorV
- Double-click on Start DWORD from the right panel, and a small Window will open.
- Change the Value data to 0 and Click OK.
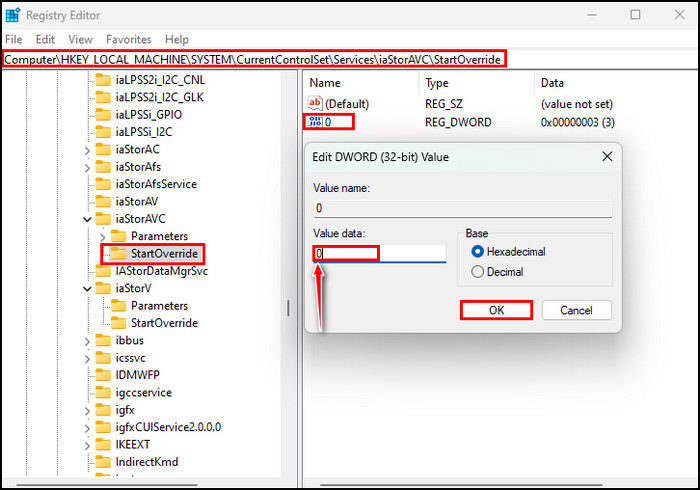
- Paste the following location path again in the address bar and Hit Enter:
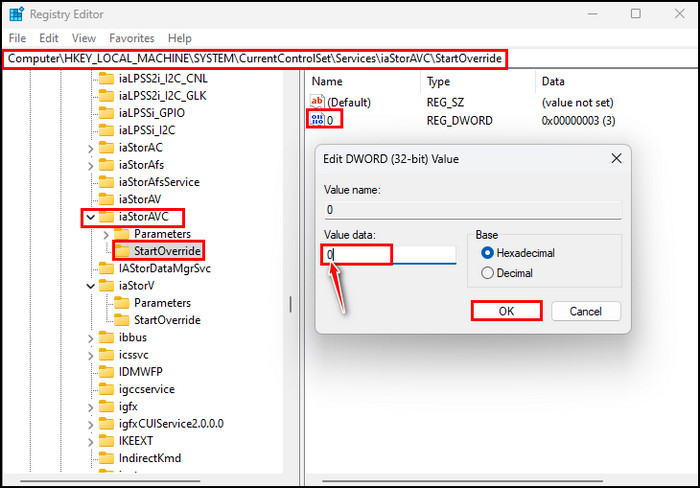
HKEY_LOCAL_MACHINE\SYSTEM\CurrentControlSet\Services\iaStorAVC\StartOverride
- Double-click on the 0 DWORD from the right panel and Change the Value data to 0.
- Click OK afterward.
- Navigate to the following location by pasting it in the address bar and hitting Enter:
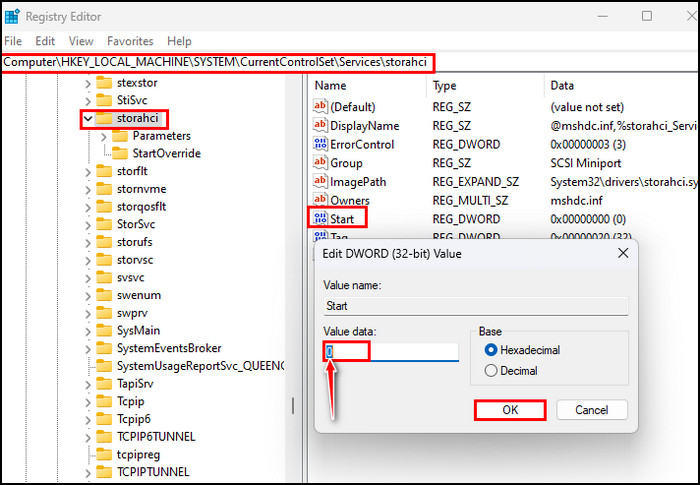
HKEY_LOCAL_MACHINE\SYSTEM\CurrentControlSet\Services\storahci
- Double-click the Start DWORD and change the Value data to 0. Click OK.
- Navigate to the following location from the left pane:
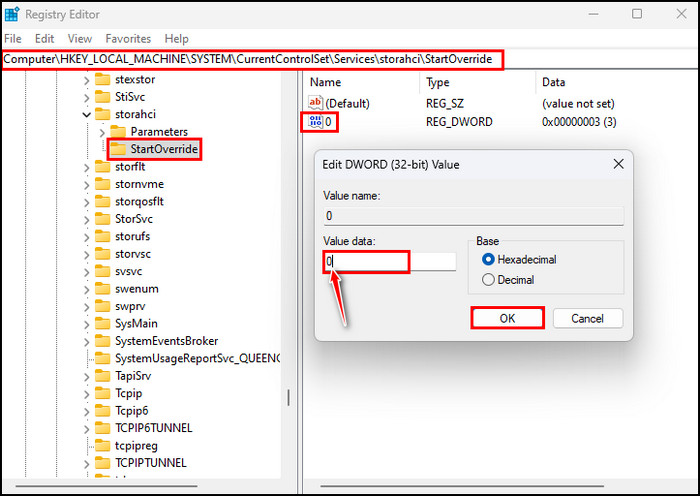
HKEY_LOCAL_MACHINE\SYSTEM\CurrentControlSet\Services\storahci\StartOverride
- Check if the StartOveride folder is present or not. If not, exit from Registry Editor.
- Click on the StartOveride folder and double-click on the 0 DWORD if the folder exists.
- Change the Value data to 0 and click OK.
- Navigate to the following path from the left pane:
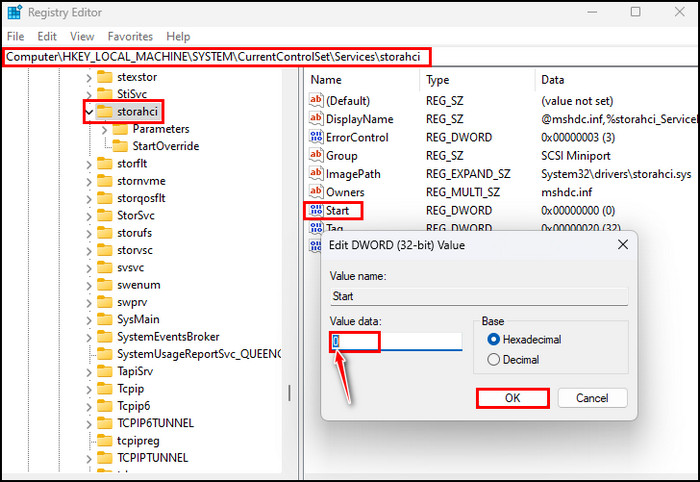
HKEY_LOCAL_MACHINE\SYSTEM\CurrentControlSet\Services\storahci
- Double-click the Start key and change it’s Value data to 0.
- Continue navigating the following path:
HKEY_LOCAL_MACHINE\SYSTEM\CurrentControlSet\Services\iaStorV
- Double-click on Start and Change it’s Value data to 0.
- Navigate to the following path again:
HKEY_LOCAL_MACHINE\SYSTEM\CurrentControlSet\Services\iaStorAV\StartOverride
- Select the StartOveride key and change the 0 DWORD Value data to 0. If the StartOveride key isn’t found, do the followings:
- Navigate to HKEY_LOCAL_MACHINE\SYSTEM\CurrentControlSet\Services\iaStorAVC
- Select the StartOveride key and change the 0 DWORD Value data to 0.
- Close all the expanded paths and the Registry Editor.
- Restart the PC to boot the PC into the BIOS or UEFI settings.
- Enable the AHCI mode and hit the Save & Exit button.
- Restart the PC again.
After the reboot, Windows will automatically start installing AHCI drivers. Once all the drivers are installed successfully, you’ll see a prompt for restarting the PC. So, restart the PC, and you are good to go with the AHCI mode turned on.
Related contents you should read: how to fix cFosSpeed driver preventing Windows 11 installation, how to fix reset this PC stuck in Windows 11/10, fix user profile cannot be loaded error in Windows 11.
FAQs
Can I enable AHCI after installing Windows 11 or 10?
Yes, you can enable or turn on AHCI after installing Windows 11 or 10 by modifying Registry Editor. After modifying, you must enable the AHCI from the BIOS/UEFI settings.
AHCI or IDE, which interface supports faster drive speed?
AHCI is faster than the traditional IDE interface. IDE interface doesn’t support hot-swapping the storage drives & Native Command Queuing (NCQ) technology.
Can I enable the AHCI interface?
You can enable AHCI from the BIOS setup utility. You’ll find an option under the Advanced > ATA Controller setup page. Once you have enabled the AHCI mode, you can access all 6 SATA ports on the motherboard or the server board.
Bottom Line
For many people, AHCI is an unknown term. Those who have been using computers for many years they are familiar with the IDE interface. However, IDE has become old technology and lacks supporting top-notch storage drive technologies, so users are moving towards the AHCI interface.
I have shown detailed steps to enable AHCI from the Registry Editor settings in this article. I hope you find all the steps straightforward.
Do let me know if you face any trouble while applying the steps. See you at the next one.