If you want to edit your MS installer file and have a smooth experience as a bonus, you have to use an MSI editor. But are the editors available in the market poorly developed?
Don’t worry! As a technological geek, I researched it and found Microsoft ORCA MSI editor the best in this regard. I guarantee your experience will also be the same while creating and editing MSI files.
So, keep reading. Don’t skip any section, as I will unearth the easiest ways to download, install and run the Orca MSI editor on your system.

What is Orca MSI Editor?
MSI file stands for Microsoft Installer file. It is an attribute of Microsoft. Hence, MSI editor means editing or customizing the properties of the MS installer file. This is a tool that used to be an asset of Microsoft, but they are not ready to support and continue it anymore.
MSI is presently known as Windows Installer SDK (Software Development Kit).
As MSI editor is a tool you will use to modify your MSI file, you should be extra careful about this.
In short,
You may create an MST (Microsoft Transform) file to preserve the changes temporarily instead of making the changes on the MSI file directly. When you edit, you will find this an exclusive idea, I am sure.
For your information, an MST file is just an extension of an MSI file used mainly for editing the installer file.
Download Orca MSI Editor
It is no hassle to download Orca MSI editor. So, to download Orca Microsoft Installer alternatively used as Windows Installer, go to the following link:
The link will redirect you to the further step. But, for your convenience, I will share the process with you.
Here are the steps to download the Orca MSI editor for your system:
- Click on the download link above.
- Go to the site.
- Find out the Download MS Installer or Windows Installer button.
- Click on it and confirm the file location.
- Extract the files from the zipped one when the download process is finished. You can use WinRAR or some contemporary other software to unzip it.
Now, you have the file downloaded on your system.
How to Install Orca MSI Editor
When you have Orca MSI editor downloaded in your folder, you are ready to install it. You have the downloaded and unzipped folder in your hand.
But, before installing, you need to confirm that your system has the minimum configuration required to install the MS installer.
You will require Microsoft .NET Framework 3.5 (the later version you have, the more smooth installation and user experience you will receive). It is a prerequisite.
Let’s dive into the installation process.
Here are the steps to install the Orca MS installer:
- Find out the Orca MSI from the files and double-click on it. It will open a dialog Orca Setup window.
- Click on Next from the window.
- Read the ORCA Licence Agreement carefully and select I accept the terms in the License Agreement from the two options.

- Choose any setup types that perfectly suit your needs among the three, i.e., typical, custom, and complete.
- Click on Install from the Ready to install dialog box. Your download will start.
- Wait till the download is finished.
Well done. You now have an Orca MSI editor installed on your computer.
How to Uninstall Orca MSI Editor
You may want to uninstall Orca MSI editor once you have completed your work. The process of removing the MSI editor from your system is pretty straightforward. Let me give you ideas on how to uninstall the editor.
Here are the steps to uninstall Orca MS installer editor:
In this case, we will use PowerShell.
- Right-click on Command Prompt and click on Run as Administrator. An Elevated Command Prompt will appear.
- Enter the command MsiExec.exe /x Orca-x86_en-us.msi /qn.
- Hit the Enter.
Uninstalling of Orca MSI will automatically be started. Now, I will show you the conventional process of uninstalling software.
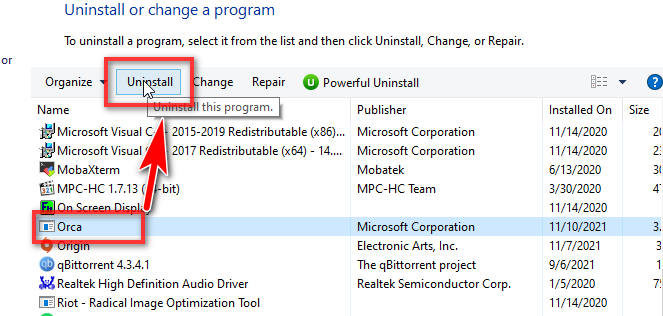
Here are the steps to uninstall the Orca Windows installer editor using Control Panel:
- Go to the Start menu.
- Type Control Panel on the Search bar. Click on the first option from the suggestions.
- Navigate to Programs and Features. You will see the list of all installed applications on your computer.
- Click on the Orca MSI Editor from the appeared list.
- Tap to Uninstall/Change next to Organize.
Wait a bit until the process is not finished. Once you are done, enjoy!
How to Run and Use Orca MSI Editor
It is naive to run Orca MSI editor. Most probably, you will use it to edit MSI files. So, I will note down some guidelines so that you can feel comfortable while using them.
- Open Orca MSI editor by double-clicking it. Having the window opened, you will find the keys on the left and the properties on the right.
- Click on the File menu.
- Select Dialog from the left pane and select an MSI file that you want to edit from the right.
- Press the Transform menu to edit the file.
- Select a feature from the list on your left. The files and their properties and values will appear on the right when you click on an option.
- Double click on the current value and enter the new value. Now, you will see tables on the left and properties on the right.
- Select the Property under the Table column to set the properties with the following values: AgreeToLicence = Yes; ISCHECKFORPRODUCTUPDATES = 0; RebootYesNo = No
After completing all the features needed, navigate to the Menu and click the transform option. Generate a transform to save the new MSI package modification. This is how you can efficiently perform your adjustment.
FAQ
Question: What is Orca Microsoft?
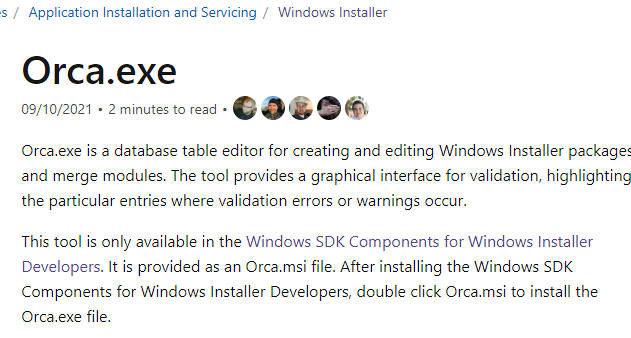
Answer: Orca.exe is a database table editing tool initiated by Microsoft for creating and editing Windows Installer packages. This tool provides a Graphical User Interface (GUI) to highlight the entries where validation errors occur or require changes.
Question: Are MSI files safe?
Answer: An MSI file is a Windows installer package that stores information pf a particular installer. So, it is, of course, safe. As MSI files are commonly used for software installations, someone rarely reported malicious files in them.
Question: Where can I find Orca MSI?
Answer: Immediate after installation, you can find it in the SDK’s install path. In my system, the location is C:\Program Files (x86)\Windows Kits\10\bin\x86\Orca-x86_en-us. msi.
Conclusion
Well. You should have sound theoretical experience regarding the Ocra MSI editor, its safe download, install or uninstall, and utilization from the discussion above. In Orca, you need to manually change or customize the data and properties of your MSI file that you may find a bit time-consuming. But, the benefit is, Orca edits the Windows registry to disable settings post-installation.
I hope this article was helpful. If yes, please share this with your friends. And, if you have any further queries, feel free to ask via commenting on the comment box below. I will try to get back to you soon.