Quick access is an essential feature in Windows 11, and it helps to access all the recent items within File Explorer. But often, it gives a messy look and throws away privacy by showing recently browsed folders.
Many users find it awkward and want to get rid of it.
So, if you are not a fan of Quick access and want to remove it, go through this article. I will show you the best ways to disable Quick access from File Explorer.
Let’s give File Explorer a clean look!
Go through our epic guide on fix: secure boot enabled but Windows 11 says it’s not.
How to Turn Off Quick Access in Windows 11
You can turn off Quick access from Windows 11 and the previous version. To do that, you must go to the File explorers Folder options and find Quick access under the Privacy option. Unchecking all the Quick access showing options will turn it off.
After unticking all the options for Quick access, all the recently visited files and folders won’t be visible anymore in the left pane. So, if you don’t want to remove it completely and only turn it off, follow the steps beneath.
Here are the steps to turn off quick access in Windows 11:
- Go to File Explorer by pressing the Windows key + E.
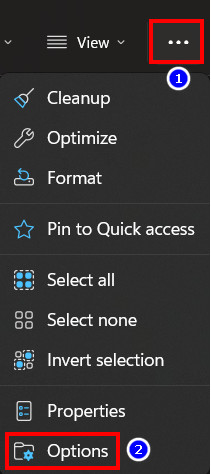
- Click on the three dots from the upper toolbar.
- Choose Options from the context menu.
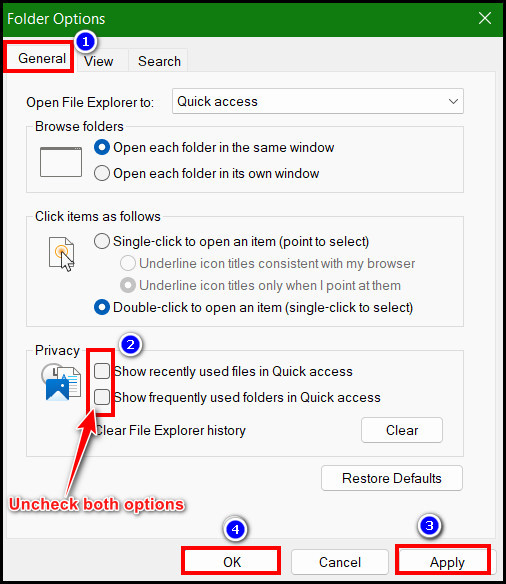
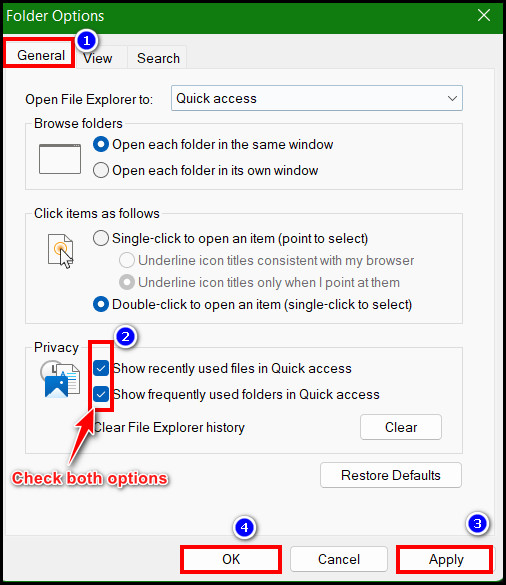
- Go to the General tab and untick the following options under the Privacy section:
- Show recently used files in Quick access
- Show frequently used folders in Quick access
- Hit Apply > OK.
From now you won’t see the recently accessed folders in the Quick access section. But you’ll see the pinned folders in Quick access in the File Explorer’s left pane.
How to Disable Quick Access in Windows 11 from File Explorer
Instead of turning off the Quick access feature, you may want to disable it. It’s possible to disable this feature to give the File Explorer a clean look. Disabling Quick access will remove it completely from the left pane. But you’ll need to go to Windows 11’s Registry editor.
First, go to the Windows Registry Editor and navigate to the File Explorer registry section. Next, find the Locate to string from the list and change its value. Then you’re good to go.
Here are the steps to disable the Quick access in Windows 11 from Registry Editor:
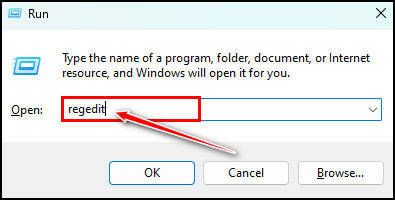
- Press Windows Key + R and type Regedit into the Run command box.
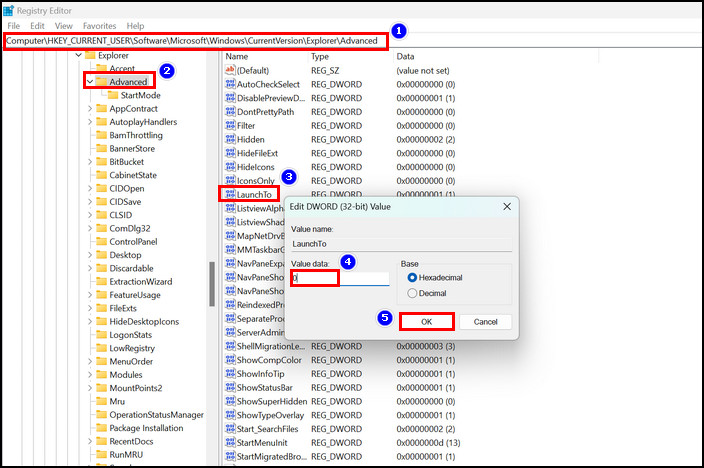
- Copy & paste the following path to the Registry Editor address bar and Hit Enter:
Computer\HKEY_CURRENT_USER\Software\Microsoft\Windows\CurrentVersion\Explorer\Advanced - Look for a string labeled as LaunchTo from the right panel.
- Double-click on the LaunchTo string to open it, and a small Window will open.
- Change the data value of the string to 0.
- Hit the OK button.
Now close all the expanded paths and restart the PC. After turning on the PC, you’ll find that Quick access is disabled from the left pane of File Explorer.
Follow our guide to fix cFosSpeed driver preventing Windows 11.
How to Completely Remove Quick Access from File Explorer
If you don’t want to see the Quick access in the File Explorer again and disable it completely, you can do that from the Registry Editor. To do that, you must go to the HKEY_LOCAL_MACHINE and navigate to the Explorer path. Then create a new DWORD string.
After that, assign a value to that string, and you’re good to go. The whole process may look a bit difficult, but it’s not. Just follow the steps below to disable Quick access permanently.
Here are the steps to permanently disable Quick access from File Explorer:
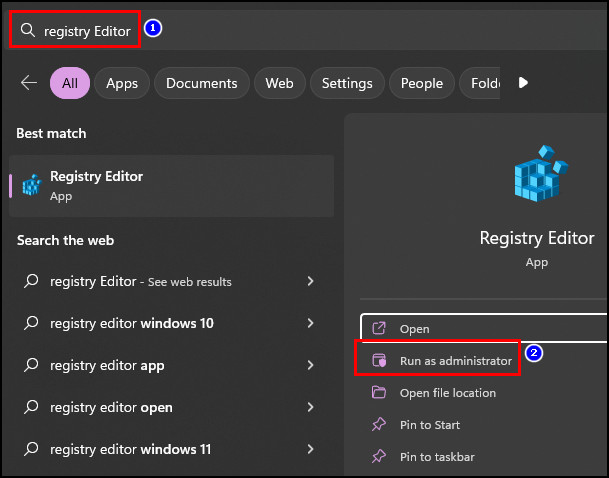
- Press the Windows key + S and search for Registry Editor.
- Click on the Run as administrator option.
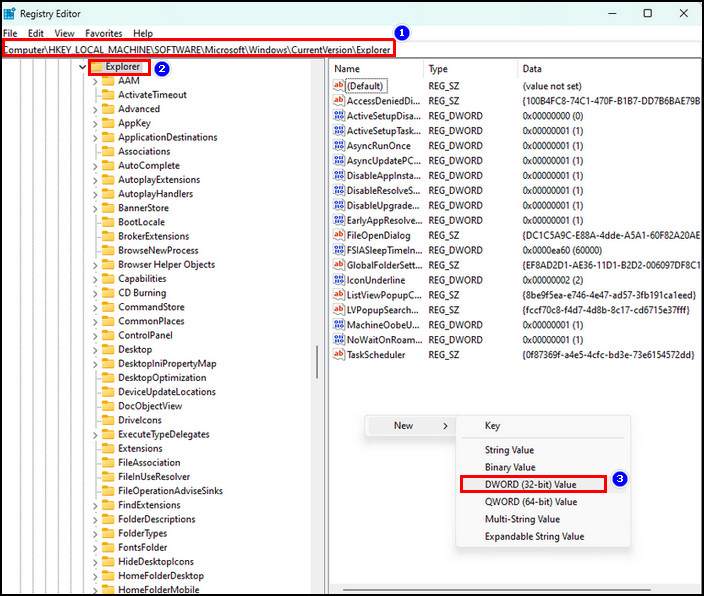
- Copy & paste the following path to the Registry Editor address bar and Hit Enter:
Computer\HKEY_LOCAL_MACHINE\SOFTWARE\Microsoft\Windows\CurrentVersion\Explorer - Right-click on any empty blank space in the right panel.
- Choose New > DWORD (32-bit) Value to create a new string.
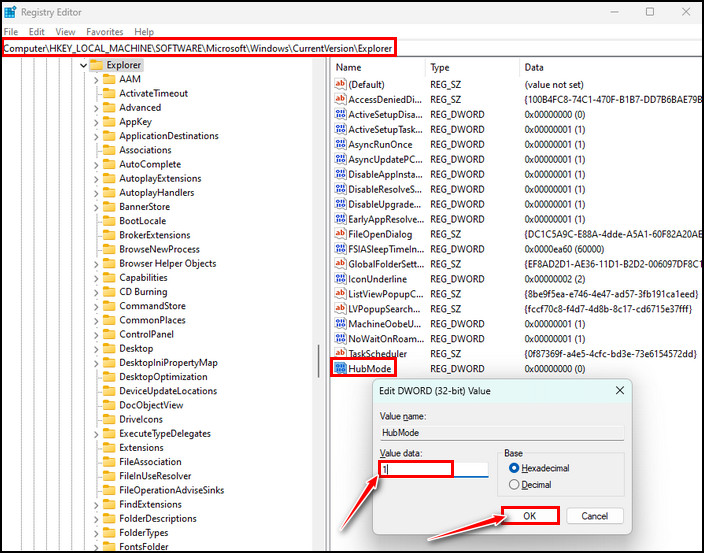
- Rename the new string to HubMode.
- Double-click on the HubMode string and assign 1 to the Value data.
- Hit the OK button afterward.
Now close all the expanded tree paths and restart the PC for the change to take effect. After the restart, you’ll not find that Quick access in the File Explorer because it’s disabled forever.
You may also like to read about why does Windows 11 crash so much?
How to Enable Quick Access in Windows 11
The mind keeps changing, and you may want to enable Quick access again to move to the recently browsed folders immediately.
If that’s the case, you can enable it from the folder options after turning it off. Plus, you can reverse the disabled Quick access by changing the Registry value.
Here are the steps to enable Quick access in Windows 11:
- Click on three dots from the File Explorer toolbar.
- Choose Options from the context menu.
- Go to the General tab and tick the following options under the Privacy section:
- Show recently used files in Quick access
- Show frequently used folders in Quick access
- Hit Apply > OK to finish the process.
You’ll get back your desired Quick access feature in the File Explorer.
Pro Tip: If you have disabled Quick access from the Registry Editor, you must go to that path and change the LaunchTo string value data to 1. To reverse the permanent disable, delete the HubMode string.
Related new solution guides on fix reset this PC stuck in Windows 11/10.
FAQs
How can I turn off Quick access in Windows 11?
To turn off Quick access, click on three dots from the File Explorer toolbar. Choose Options and go to the General tab. Untick the Show recently used files in Quick access & Show frequently used folders in Quick access options under the Privacy section. Click Apply and then OK.
How to pin a folder in Quick access?
Right-click on the folder that you want to pin in Quick access. Choose the Pin to Quick access option from the context menu.
How can I get rid of Quick access links in File Explorer?
To get rid of the Quick access link in File Explorer, follow the below steps:
- Open File Explorer and click on three dots from the toolbar.
- Click on the General tab and choose This PC from the upper drop-down menu.
- Untick both options beneath the Privacy section.
- Click on the Clear button to clear all Quick Access history.
Wrapping Up
Windows 10 brings up the Quick access feature first, which is fabulous. Windows 11 adopted that feature and let you move to the recently browsed folders by clicking a button.
But it makes the File Explorer messy and may also spoil your privacy. So, I have come up with this article to help you disable it. I have shown the best ways and hope you read them all.
Do you find any difficulties while disabling Quick access? Just leave a comment below, and I’ll reach you instantly. Let the clean look shine on your File Explorer!