Although there are far fewer reports of hardware issues on Chromebook compared to typical Windows laptops, they’re still not free of technical errors. Don’t be surprised if you notice your Chromebook is not charging anymore. The same happened with mine.
But don’t worry. In this article, I have listed the solution that has worked for me, along with some additional methods that have been proven useful for other users as well.
So without further delay, let’s dive in.
Reasons Why Your Chromebook Is Not Charging
The most common reason why a Chromebook stops charging and shows no light is when any of the following components become defective: battery, charger, cable, and motherboard power IC.
Charging issues can also occur due to bugs or glitches in ChromeOS. But it’s mostly related to hardware.
Here are the reasons why your Chromebook is not charging:
- Faulty battery
- Defective or unsupported Charger
- Faulty cable
- Loose/defective power outlet
- Fried power IC on the motherboard
- Issues within the operating system
- Malware
Knowing the cause of an issue is the first step toward troubleshooting it. Now that we know the reasons why a Chromebook can have charging issues, let’s see how we can fix it as quickly and effortlessly as possible. Not to mention, such grounds can also lead to Chromebook not turning on problem.
How to Fix Chromebook Not Charging Issue
Since the most probable reason why a Chromebook might not charge anymore is due to a defective adapter or charging cable, make sure you’re using a proper/official charger and power cable to charge your device.
Also, check whether the charger or adapter cables are plugged in properly to the Chromebook and the wall outlet. You can also try resetting the Chromebook to its factory default and running the diagnostic app to see the battery health status.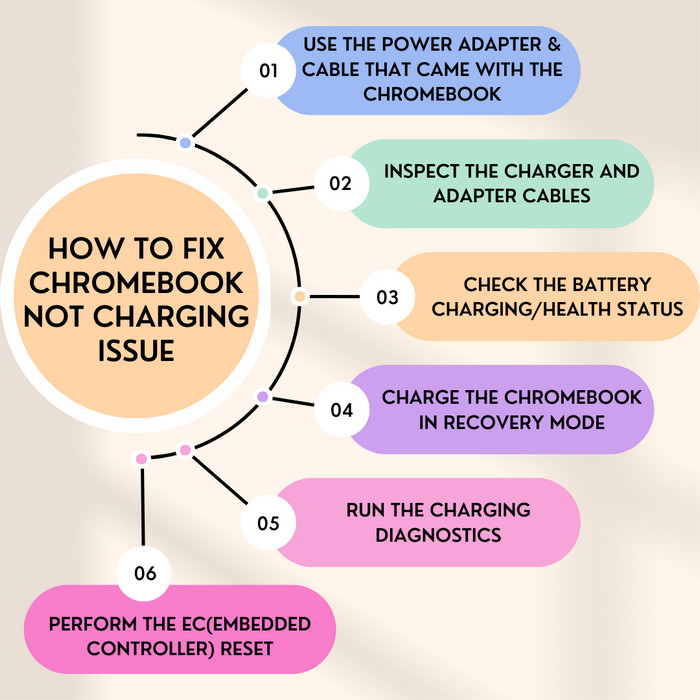
Here are some other fixes that you should try to fix the Chromebook charging issue:
1. Use the Power Adapter & Cable that Came with the Chromebook
Chromebooks from different manufacturers require a specific amount of wattage for charging. The charger and the cable that comes with the device are designed to deliver that specific amount of power.
Many third-party vendors use low-powered chargers that don’t usually have enough juice to charge up certain Chromebooks. Not to mention, some cables have different power delivery rates that might not match your device.
So, in conclusion, make sure you’re using the power brick and the charging cable that came with your Chromebook.
2. Inspect the Charger and Adapter Cables
The next thing you need to do is a thorough visual inspection of the charger and the adapter cables of your Chromebook. No bluff; mine, as well as many other Chromebook users, faced this same issue.
Check the charging port for any kind of physical damage or oxidation. Do the same for the charging pins of the adapter and cable. Use another charging cable to see whether the laptop charges or not.
In case the power adapter or the cable has become faulty, buy a new official power brick/charger from your Chromebook’s manufacturer.
3. Check the Battery Charging/Health Status
If you’re using an official charger and cable, which are perfectly fine, the issue might lie with the battery itself. To be sure, check the battery’s health and charging status by using the crosh command. You can either type the command or copy and paste it on Chromebook.
Remember that your Chromebook needs to be turned on to do this test.
Follow these steps to check the battery health/charging status of your Chromebook:
- Plug in the charger to your Chromebook from a power outlet.
- Press Ctrl+Alt+T to open crosh.
- Type the following command line in the dialogue box: battery_test 1
- Press Enter.
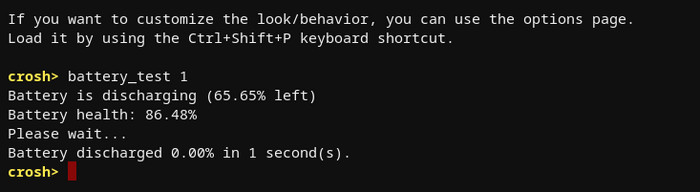
You’ll be able to see the battery’s health and discharge rate in the dialogue box. If the battery health is too low or the discharge rate is too high, you might need to replace the battery as soon as possible.
4. Charge the Chromebook in Recovery Mode
If your Chromebook is functioning normally but isn’t taking even a 1 percent charge, go to the recovery mode and charge the device in that state. First, shut down the Chromebook. Then press and hold Esc+Refresh simultaneously.
Now, press and release the power button while holding down the Esc+Refresh button. This should put the Chromebook into recovery mode. Close the lid and properly plug in the adapter to the power outlet.
This should effectively start charging the device if the battery and the charging cable/adapter are not faulty.
5. Run the Charging Diagnostics
Hardware-related problems are also a probable cause when your device stops charging. To resolve this issue, you should run the diagnostics test to check for any hardware issues.
Here’s how to run diagnostics on Chromebook:
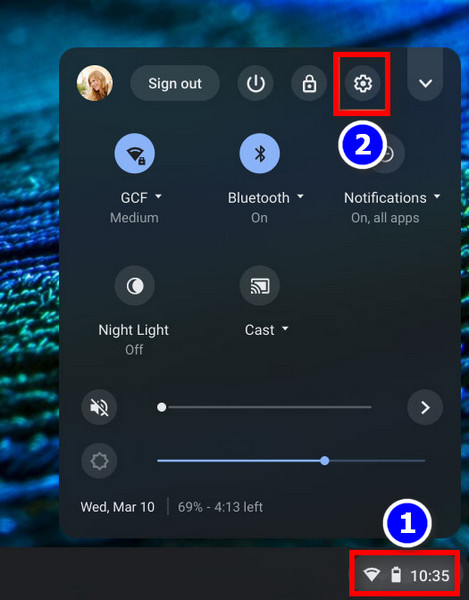
- Click on the Time of your Chromebook at the bottom right corner of the screen.
- Select the gear icon to open Settings.
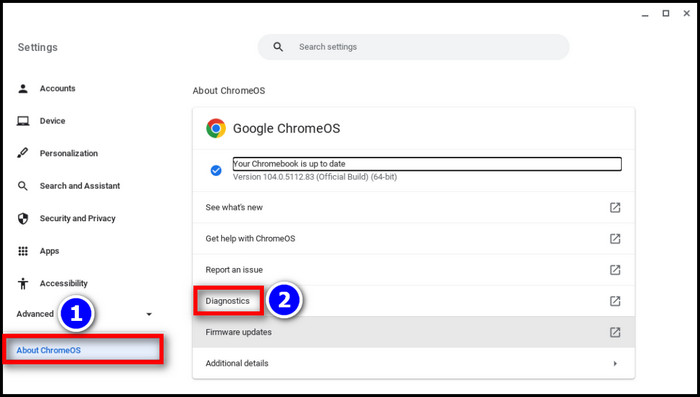
- Click on About ChromeOS > Diagnostics > System.
- Select Run Discharge Test from the Battery section.
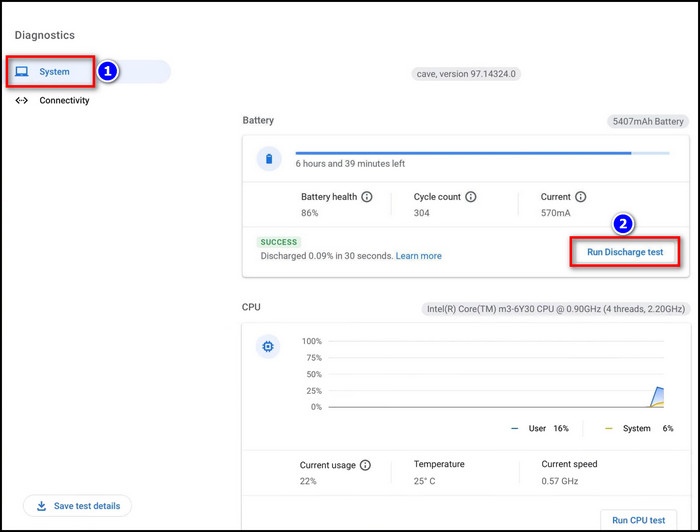
Now, wait till the diagnostics test is complete. The device will notify you in case it detects any hardware errors.
6. Perform the EC(Embedded Controller) Reset
If all else fails, perform an Embedded Controller reset, which is basically a hard reset option for all the software and hardware settings of your Chromebook. Here’s how:
- Turn off the device and plug in the charger.
- Press and hold the Refresh and Power keys simultaneously.
- Release both buttons when the device turns on. This should only take around 5 seconds.
In case the device doesn’t power on due to running out of battery and won’t charge either, contact the device manufacturer or take the device to your nearest reliable repair shop.
That said, before you pull the trigger on going to a service center, try to reset the Chromebook in other ways.
FAQs
How to run the AC adapter charge verification on Chromebook?
Chromebook users can run the AC adapter charge verification by pressing Ctrl + Alt + T to open the Chrome OS terminal. Then type battery_test 1 in the dialogue box and press Enter. You’ll see the battery charging and health status.
Why won’t my Chromebook charge light come on?
The charging light on your Chromebook won’t turn on if the charging adapter or cable has become faulty. The power IC on the motherboard can also cause such an issue when it becomes defective.
Conclusion
That’s all for today. Despite a few technical issues, a Chromebook is still a solid budget-friendly device for simple tasks.
Anyway, I hope this write-up has helped you resolve any charging-related issues on your Chromebook. Which method has worked for you? Let me know.
And don’t forget to share your thoughts in the comments below.
Have a nice day!