BlueStacks, a well-known and widely-used Android emulator, provides users the flexibility to use Android apps and games on their personal computers.
It creates a virtual environment in your PC, which can sometimes spiral out of control and consume an excessive amount of CPU resources. It slows down your device and affects your overall experience.
However, in this article, I’ll provide effective methods that can resolve BlueStacks’ high CPU usage and optimize your computer’s performance to its fullest potential.
Let’s begin!
Why is Bluestacks Causing High CPU Usage?
Bluestacks uses a lot of the computer’s brainpower and memory to work properly. Because it requires more energy to run Android programs on a Windows computer. However, outdated software, not using enough CPU cores, and conflict with other apps can cause high CPU usage.
Here’s why BlueStacks is using so much CPU:
Old Bluestacks Software
If the program is old, it might have problems that make it use more processing power than it needs to.
Unable to Meet System Requirements
Bluestacks needs a lot of resources to run Android applications. So if your computer doesn’t have enough brainpower, Bluestacks won’t work well.
Background Apps
If you have other programs running in the background of your computer, especially, heavy ones, they might use up some of the CPU and memory that Bluestacks needs.
A high CPU usage from Bluestacks may induce this question, is Bluestacks safe for your computer? Well, read our article where we answer this particular question.
How to Decrease CPU Usage While Using BlueStacks
To make BlueStacks use less CPU, turn on virtualization on your device, assign more CPU cores & memory to the software, lower the priority, disable background apps, and use the latest version. If BlueStacks still consumes a high CPU, use the program in Eco mode.
Here are the methods to decrease CPU usage while using BlueStacks:
1. Enable Hardware Virtualization from BIOS
To lower the BlueStacks processor utilization, you need to that virtualization is enabled on your device. Without it, you cannot assign multiple CPU cores to the software.
Follow the steps to enable the hardware Virtualization from BIOS:
Enter BIOS
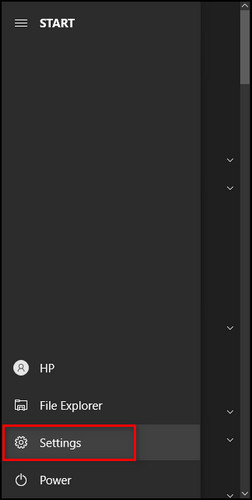
- Click on the Start icon and choose Settings, or press the Windows + I key.
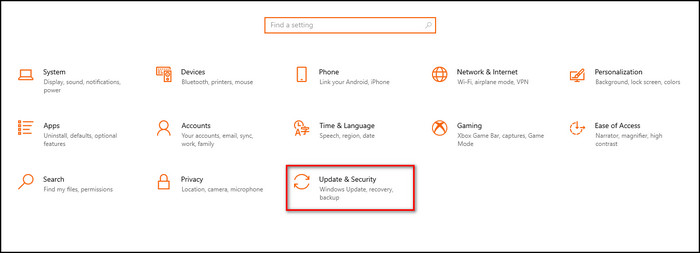
- Select Update & Security.
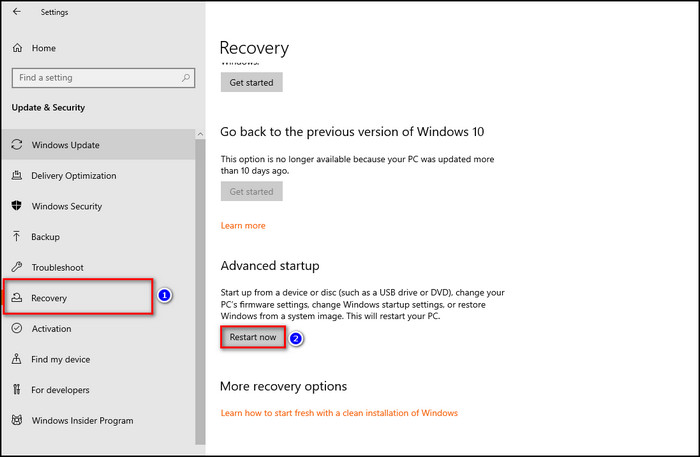
- Go to the Recovery tab from the left menu.
- Click on the Restart now button under Advanced startup.
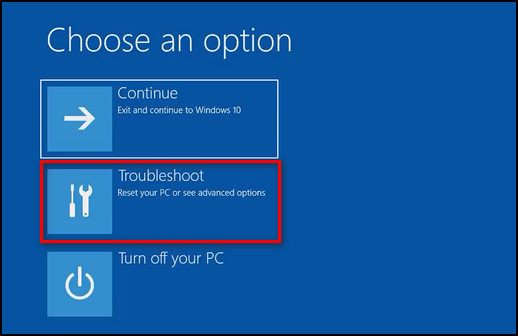
- Select Troubleshoot.
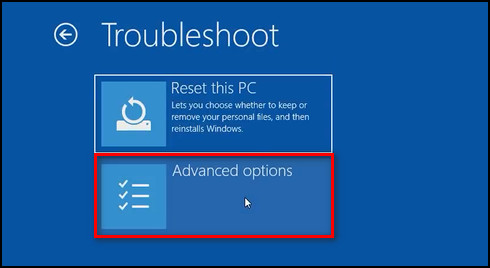
- Choose Advanced options.
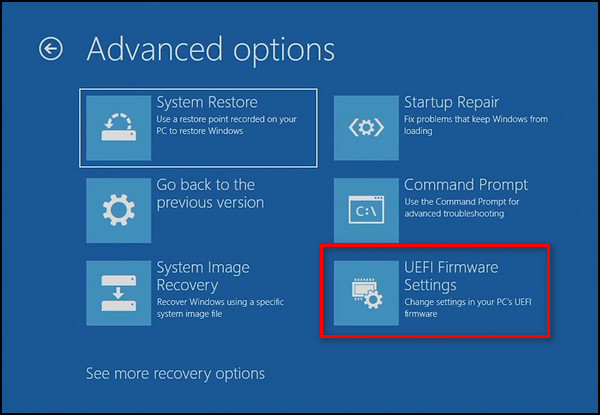
- Select UEFI Firmware Settings.
- Click on the Restart button to enter the BIOS mode.
Are you getting high CPU usage consistently? To help you out, we have compiled all the possible reasons why this can happen and what to do to mitigate this issue in a separate article.
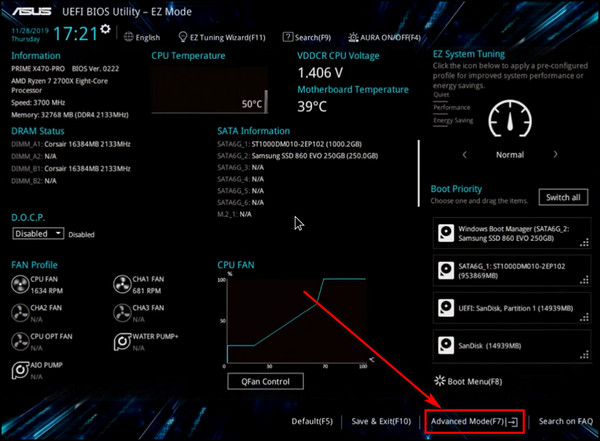
Enable Virtualization for Intel-Based Systems
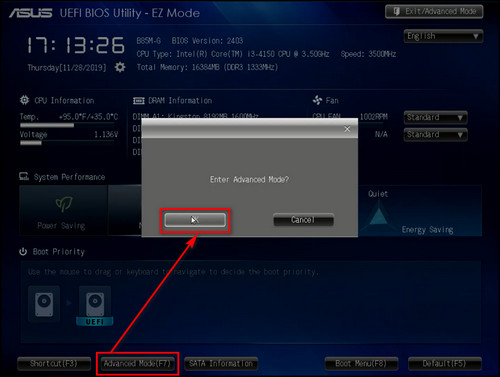
- Select Advanced Mode in BIOS and click OK to confirm.
- Proceed to the Advanced tab and select CPU Configuration.
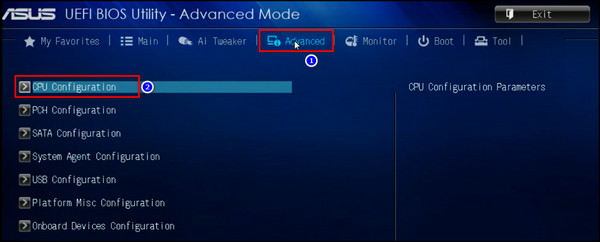
- Choose Enabled for Intel Virtualization Technology.

- Save the changes, exit BIOS, and boot up the computer.
Depending on the manufacturer, your BIOS options can have different names.
So, if you don’t see the Intel Virtualization Technology option, enable any of these or similar options from the list below:
- Intel VT-x.
- Virtualization Extensions.
- Vanderpool.
Turn on Virtualization for AMD-Based Systems
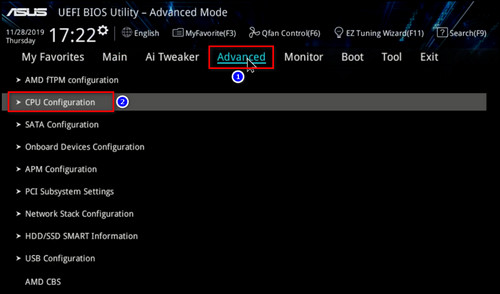
- Enter the Advanced Mode in BIOS.
- Move to the Advanced tab and select CPU Configuration.
- Set Enabled for SVM Mode.
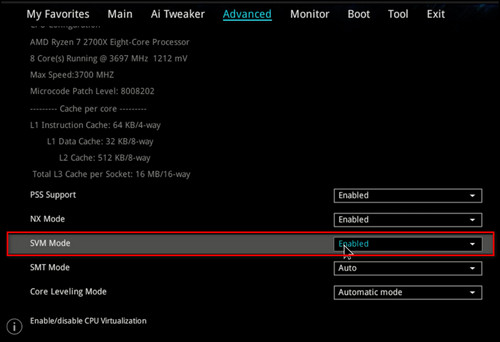
- Save the changes, and exit the BIOS.
So, if you don’t see the SVM Mode option, enable any of these or similar options from the list below:
- AMD-V.
- AMD Virtualization Technology.
- Virtualization Extensions.
- Vanderpool.
You may ask if a high CPU temperature is bad for your PC. Well, it is, actually. To find out what you can do to reduce the temps, read our separate article.
2. Allocate CPU Cores to BlueStacks
BlueStacks allows you to choose how many cores you want the program to use. The bigger the number, the better the performance will be without putting too much pressure on the CPU.
Here’s how to allocate CPU cores to BlueStacks:
- Launch BlueStacks on your device.
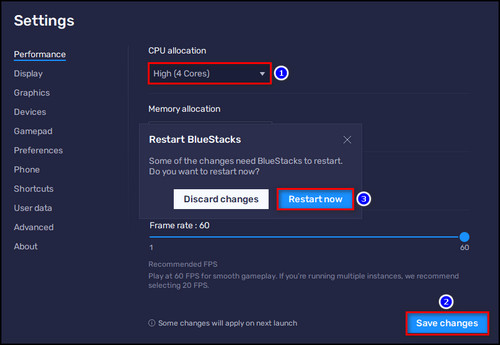
- Click on the Gear icon on the right sidebar.
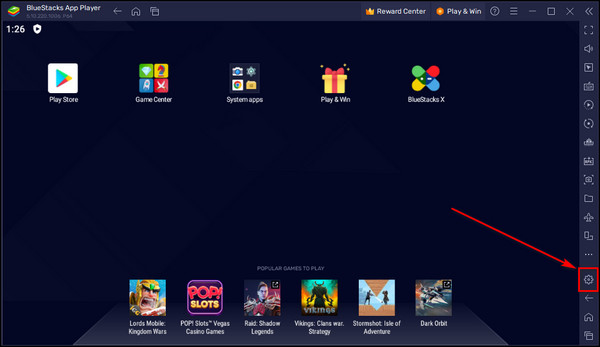
- Use the dropdown menu under CPU allocation to set the number of cores.
- Select Save changes.
- Click on the Restart now button.
Now BlueStacks will close and open again with the updated settings.
As a rule of thumb, I like to assign half of the total processor cores and RAM to BlueStacks and leave the rest for the OS and other processes.
Read our separate article, where we give you the fixes for Discord’s high CPU usage on Windows.
3. Increase the RAM Allocation for BlueStacks
Just like the CPU core, you can choose how much memory will BlueStacks use.
Here’s how to increase the RAM allocation for BlueStacks:
- Open BlueStacks.
- Click on the Gear icon.
- Use the dropdown under Memory allocation to assign RAM to BlueStacks.
- Select Save changes.
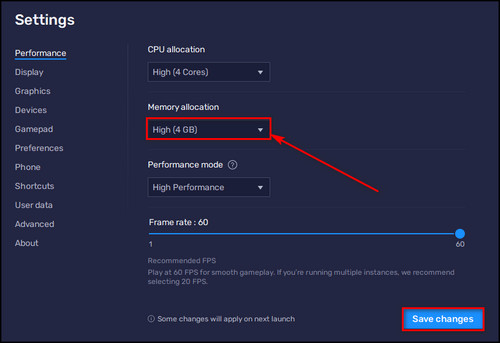
- Click on Restart now.
4. Reduce the Process Priority for BlueStacks
High or real-time process priority can make BlueStacks use more CPU resources than it needs. So, it is better to use the software at a lower priority.
Here is the instruction to reduce the process priority for BlueStacks:
- Right-click on the taskbar and choose Task Manager, or press Ctrl + Shift + Esc on the keyboard.
- Go to the Details tab.
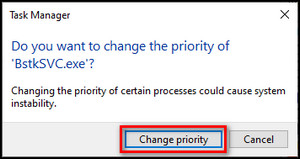
- Right-click on BstkSVC.exe and select Set priority to Below normal or Low.
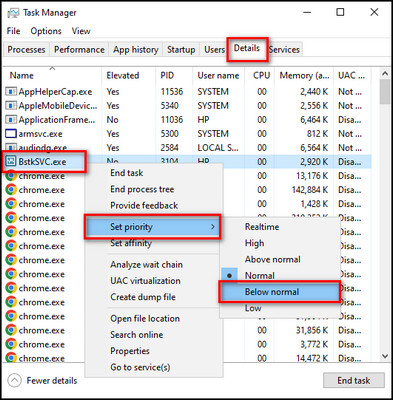
- Select Change priority to confirm your decision.
5. Turn Off Background Apps
Unnecessary background programs consume the CPU and prevent BlueStacks from working correctly.
Follow the steps below to turn off background apps on Windows:
- Click on the Windows icon and choose Settings, or press Windows + I on the keyboard.
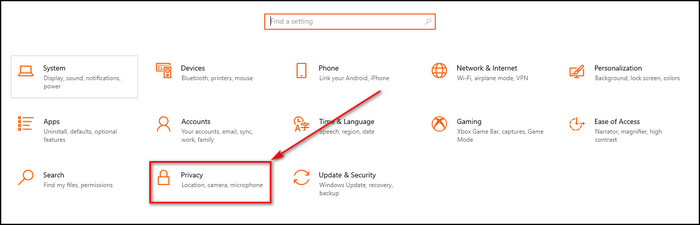
- Select Privacy.
- Go to the Background apps tab from the left menu and toggle off Background Apps.

6. Disable Hyper-V
The programs that create a virtual environment on your computer like BlueStacks, cannot operate correctly when Hyper-V is turned on. So, disable it and check if BlueStacks utilizes high CPU or memory.
Here’s the process to disable Hyper-V:
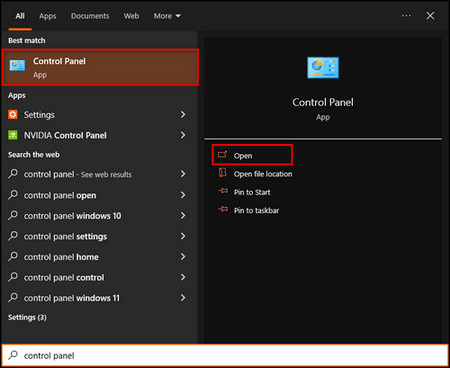
- Click on the Search icon.
- Search for Control Panel and open it.
- Select Programs > Programs and Features.
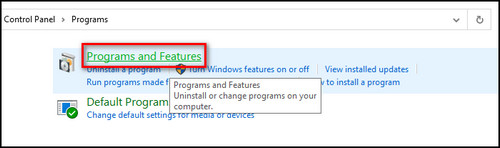
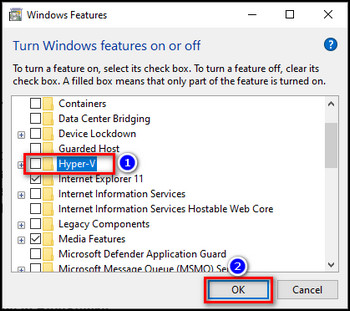
- Choose Turn Windows features on or off from the left menu.
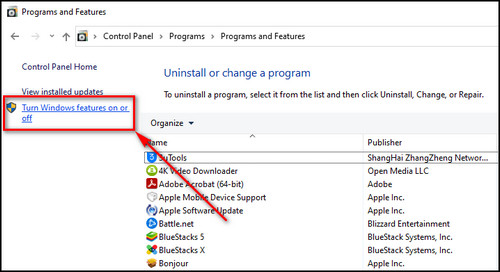
- Uncheck Hyper-V and click on the OK button.
WMI Provider host can sometimes use all the CPU and in the process, make the other running applications slow. As a response, you can check out our troubleshooting article and fix this issue yourself.
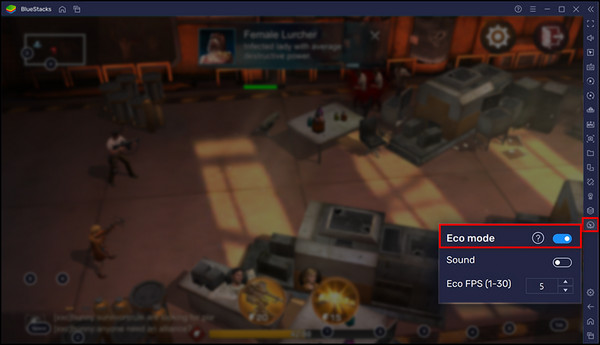
7. Enable Eco Mode
The Eco Mode lowers the BlueStacks CPU consumption by a massive 87%. But you are stuck with 30 fps max.
Here are the steps to enable Eco Mode in BlueStacks:
- Launch a game in BlueStacks.
- Select Eco Mode from the right-side toolbar.
- Toggle on the Eco Mode slider.
8. Update BlueStacks
If BlueStacks is not up-to-date, it might have problems that make it use more processing power than it needs to. So, consider updating your Blustacks to resolve the high CPU usage.
Follow the instruction below to update BlueStacks:
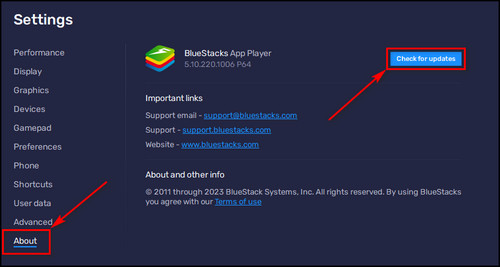
- Open BlueStacks on your device.
- Click on the Settings icon from the right-side menu.
- Choose About and click on Check for updates.
9. Remove & Reinstall BlueStacks
Reinstalling the software will eliminate any bugs or glitches that are causing BlueStacks’ high CPU consumption.
Here’s how to remove and reinstall BlueStacks:
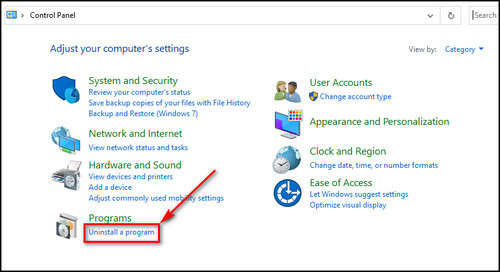
- Click on the Search icon.
- Search for Control Panel and open it.
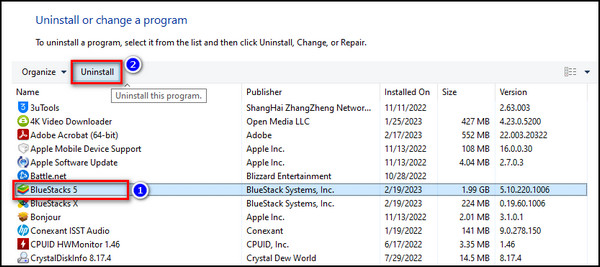
- Select Uninstall a program.
- Choose BlueStacks and click on the Uninstall button.
- Go to BlueStacks’ official website from your browser.
- Click on the Download button to download the installer file.

- Open the newly downloaded setup file and complete the BlueStacks installation process.
FAQs
How to reduce CPU usage in BlueStacks?
To reduce CPU usage in BlueStacks, turn on virtualization on your device, assign more CPU cores & memory to the software, lower the priority, disable background apps, and use the latest version. If BlueStacks still consumes high CPU, use the program in Eco mode.
How much CPU does BlueStacks take?
BlueStacks uses normally about 50%+ CPU power.
Is 16 GB RAM enough for BlueStacks 5?
Yes, 16 GB RAM is enough for BlueStacks 5. In fact, you can play Android games smoothly with just 8 GB RAM, assuming you have a dedicated graphics card on your device.
Final Thoughts
High CPU usage is a common problem with BlueStacks, but it can be fixed through the methods in this article.
Just by adjusting BlueStacks settings, disabling unnecessary background applications, and turning on virtualization, you can significantly reduce BlueStacks’ CPU usage and enjoy a smoother experience while using the emulator.
Leave a comment below if you have further questions, and we’ll get back to you.