Nowadays, gathering feedback and conducting surveys has become easier with tools like Microsoft Forms.
With its intuitive interface and comprehensive features, MS Forms enables users to create and distribute surveys effortlessly.
However, effectively managing responses is crucial for extracting meaningful insights. In this article, I’ll explain the step-by-step process of viewing and giving access to responses on Microsoft Forms, ensuring you make the most of this powerful survey tool.
Let’s dive in and unlock the full potential of response management!
How to Collect and View Results of Your Microsoft Form
To review the results of a form, start by opening the form you wish to assess and go to the Responses tab. Scroll down to access an overview of the responses received for each question. If you want more detailed information from each respondent, select View results.
Additionally, select Open in Excel to view a spreadsheet that you can edit, containing all the responses to your form.
Follow the steps below to collect and view results on your MS form:
- Open the form for which you want to see the responses in Microsoft Forms.
- Navigate to the Responses tab from the top bar, and you’ll see a dashboard showing how all the questions were answered.
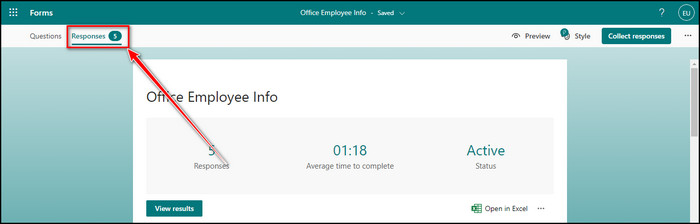
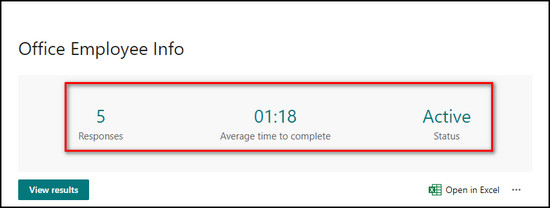
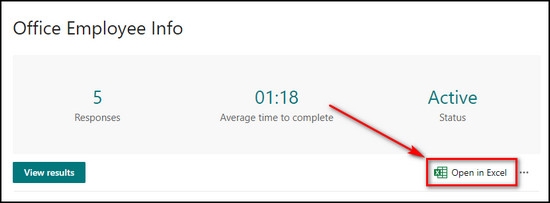
- Observe the top section of the response dashboard to see how many responses you’ve got, the average time to complete them, and the status of the form. Each question will have its own summary.
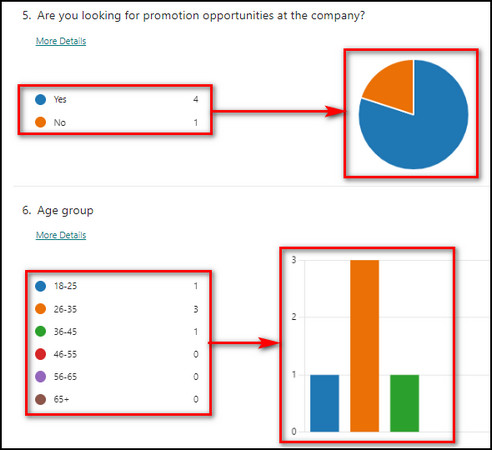
- Click More Details of a question, and you’ll see a table containing who has answered what for that question.

- Check that the answers are all presented differently according to the question type. Choice questions have a pie chart with color-coded legends on the left. Hover over the chart to view the names of the choices and the percentage. Range questions have a bar chart.
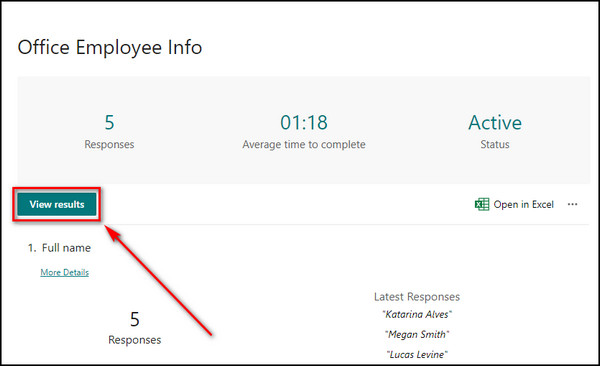
- Click the View results button to see how each responder completed the form in detail.
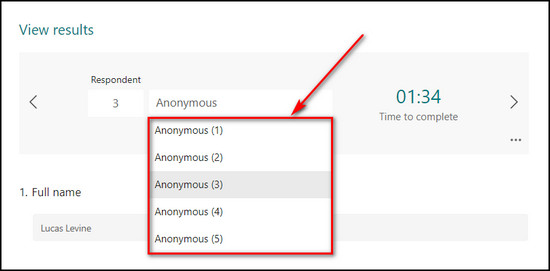
- Use the arrow keys on the left and right corner to page through each response.

- Select a specific responder from the dropdown to see what the user has answered.
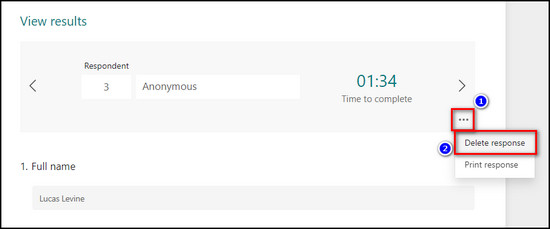
- Click on More options for Responses and select Delete response. Use this option if there are any entries that you want to remove.
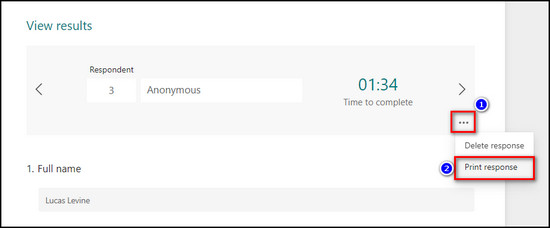
- Choose Print response if you want a paper copy of an individual response. Or you can save it as a PDF and share it digitally.
- Select Open in Excel and open the downloaded file to view and modify all the responses in an Excel spreadsheet.
Now that you know how to open all your form responses, let’s see how you can share them.
How to Give Access to Responses in Microsoft Forms
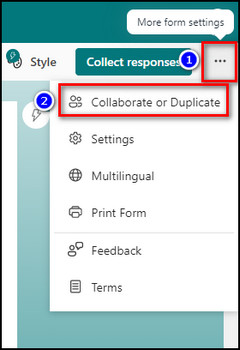
Open the desired form or quiz to share and collaborate on a form or quiz in Microsoft Forms. Then, click More form settings and choose the Collaborate or Duplicate option. Next, select Share the link to collaborate and view the results, copy the link, and share it.
Inviting different users to cooperate on your form enables your co-authors to contribute content, review answers, and promote the form to a broader audience. You can add up to 100 collaborators on a single form.
Below I’ve provided how to give access to responses in Microsoft Forms:
- Open the quiz or form you want to share in MS Forms.
- Select More form settings from the upper right corner and choose Collaborate or Duplicate.
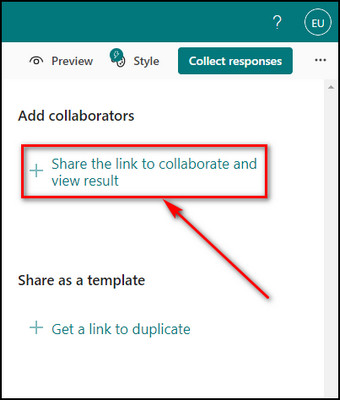
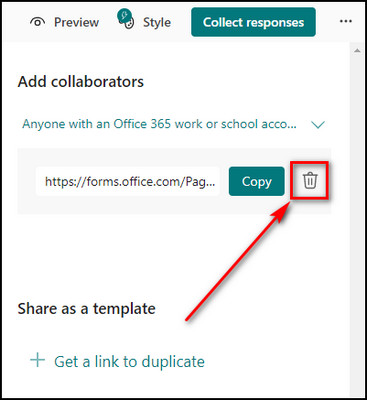
- Click on Share the link to collaborate and view the results from the Add collaborators section.
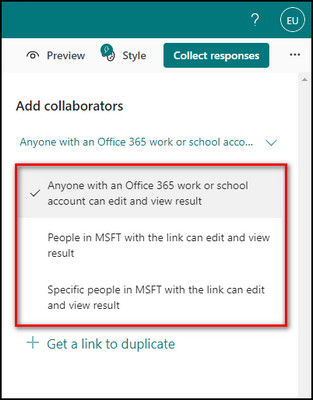
- Choose one of the following available options regarding collaboration permissions:
- Anyone with an Office 365 work or school account can edit and view result — Users with an Office 365 work or school account, regardless of their affiliation with your organization, are granted co-authoring privileges to both view and edit your form.
- People in my company with the link can edit and view result — All members have co-authoring permissions within your organization, enabling them to both view and edit your form.
- Specific people in my company with the link can edit and view result — Co-authoring permissions and access to observe and modify your form are exclusively granted to specific individuals or groups within your organization as per your specification.
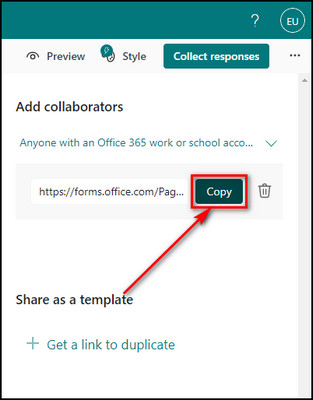
- Click Copy and share the link with the users you want to collaborate with.
When you distribute a form or quiz for collaborative purposes, you keep the ownership of the form, which remains in your Forms portal. However, your co-authors can access and modify it through the shared link. But they cannot change the permission level of the form.
To stop sharing a form or quiz:
- Click on More form settings at the top right and select Collaborate or Duplicate.
- Select the Trash bin icon in the Add collaborators section.
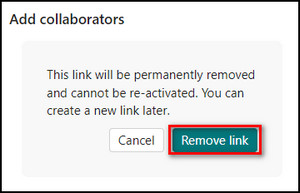
- Click on the Remove link button to remove all the collaborators from modifying the form.
How to Send Forms Responses to Multiple Email Addresses Using Power Automate
To send form responses to multiple email addresses using Power Automate, sign in, and create a new flow. Choose the form trigger, connect it, and add the Send an email action. Add the multiple recipient email addresses in the To field and customize the message using dynamic form content.
For more details, check out the steps below.
Here’s how to send Forms responses to multiple email addresses using Power Automate:
- Open Microsoft 365 and login to your account.
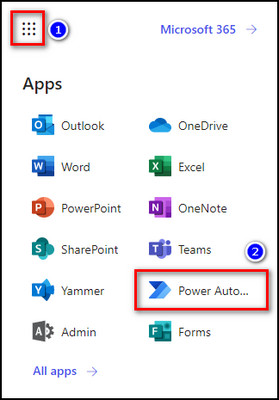
- Select App launcher from the upper left and choose Power Automate.
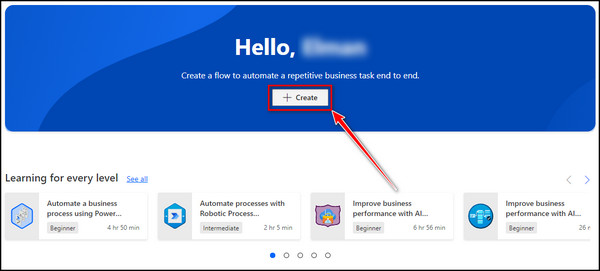
- Click on the Create button.
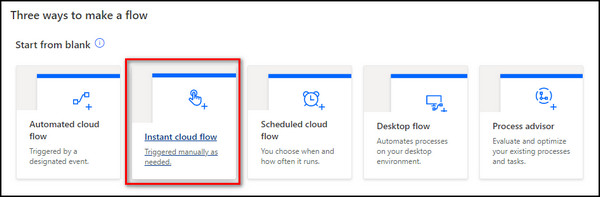
- Choose Instant cloud flow.
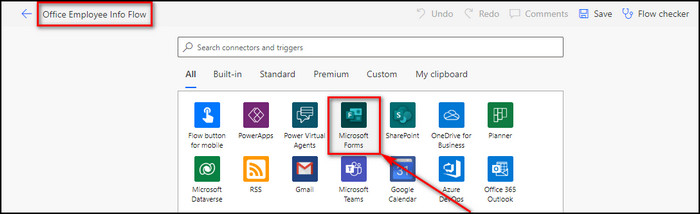
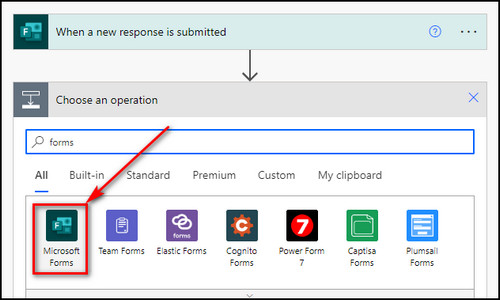
- Provide a flow name and select Microsoft Forms.
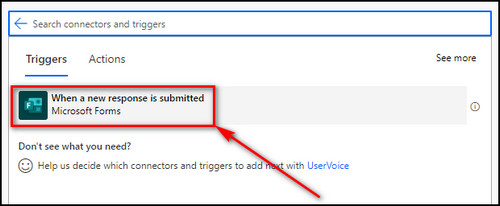
- Select When a new response is submitted as the trigger point.
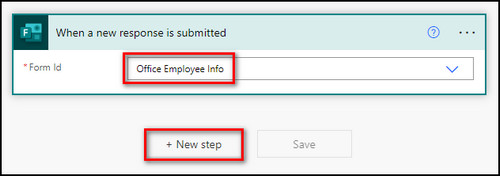
- Choose your form for the Form Id field and click the New step button.
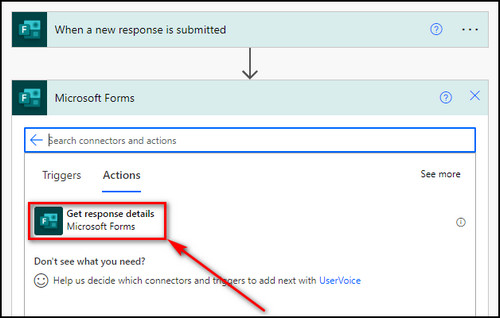
- Select Microsoft Forms again.
- Choose Get response details as Actions.
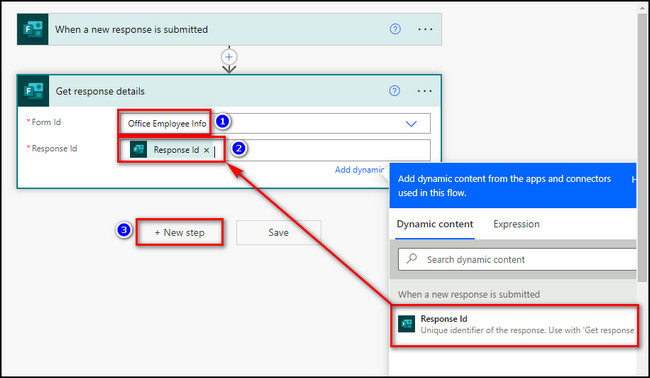
- Select the form for the Form Id again, select Response Id, and click New step.
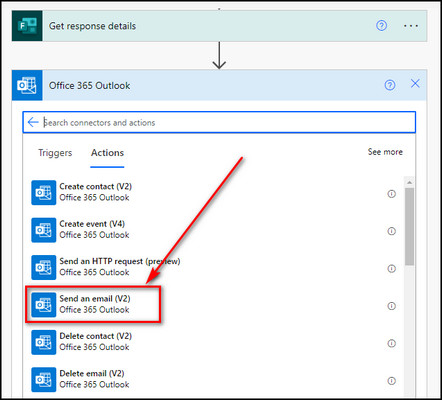
- Click on Office 365 Outlook.
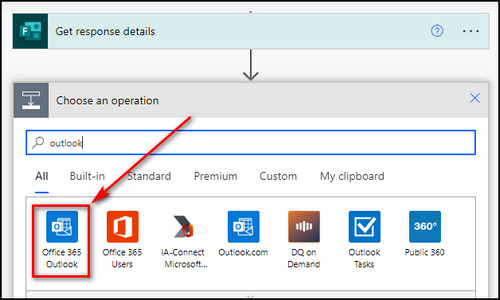
- Choose Send an email (V2) as an action.
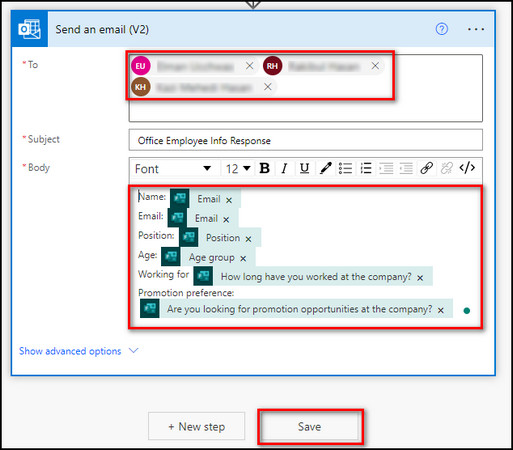
- Specify the email addresses where you want to send your form responses in the To field.
- Select the form questions whose answers you want to share in the Body field and click Save.
Now every time someone submits your form, the responses will be automatically sent to the email addresses you’ve entered in the Power Automate Flow.
How to Fix Microsoft Forms Responses Not Showing
If you’re facing issues with Microsoft Forms not displaying responses, try resolving it by obtaining a fresh workbook containing updated data. Clearing your browser’s cache and cookies or using another browser to open your form can also fix the problem.
Here are the steps to fix MS Forms responses not showing:
1. Get a New Workbook with Updated Data
If you encounter a situation where your live data connection is interrupted, don’t worry. You can still retrieve and synchronize your latest response data with a new workbook. This feature is exclusively available for Microsoft 365 Apps for Business and Office 365 Education users.
Below I’ve provided the process of getting a new workbook with updated data:
- Open your form in Microsoft Forms.
- Proceed to the Responses tab.
- Select More options for Responses and choose Sync all responses to a new workbook.

After these steps, Excel will automatically open a fresh workbook containing your latest response data. This new workbook will be stored alongside your original workbook on SharePoint Online or OneDrive for work or school.
Sometimes, cached data stored in your browser can stop you from opening responses in Microsoft Forms.
Follow the instructions below to delete the browser cache & cookies:
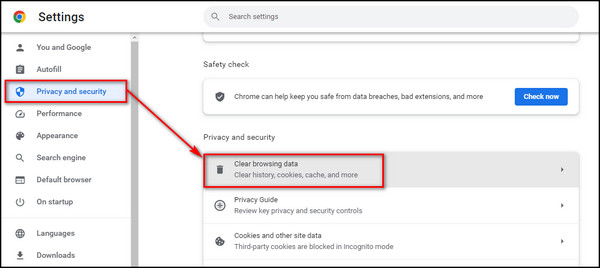
- Open your browser’s menu and navigate to the Settings.

- Find the Privacy and security tab and select Clear browsing data.
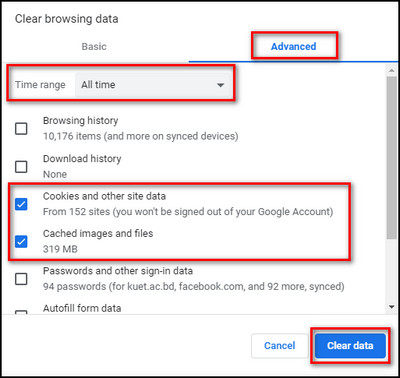
- Choose All time as the Time range in the Advanced tab.
- Check the options for Cookies and other site data, as well as Cached images and files.
- Click the clear data button to remove the cached data.
Remember that the names for the cache removal options may vary depending on your browser, but the overall process is similar.
If the problem persists, open Microsoft Forms on a different browser.
FAQs
Can you see individual responses on Microsoft Forms?
To locate individual responses and their associated respondent IDs, navigate to the Responses tab of your form and choose View results. Any adjustments made to your workbook will not impact the content of your form. Name and email addresses will not be shown if you enable anonymous responses.
How do I extract responses from Microsoft Forms?
You can extract responses from Microsoft Forms by navigating to the Responses tab and clicking Open in Excel. This action will open your form responses in an Excel spreadsheet. Once in Excel, you can export or save your form responses as a PDF file.
How do I export Microsoft form responses to PDF?
To export Microsoft form responses to PDF, open the form you want to export, go to the Responses tab, and select More options for Responses > Print summary. Set Destination to Save as PDF and click the Save button.
Final Thoughts
Microsoft Forms enables individuals and organizations to make data-driven decisions, collect valuable feedback, and enhance productivity.
Accessing response data in real-time, analyzing it through the built-in analytics tools, and sharing it with collaborators enhances the overall survey experience.
By following the steps provided in this article, you can easily view and share responses on Forms. Comment below if you have further questions, and we’ll get back to you.