Microsoft Excel has dominated the spreadsheet software industry since its launch in 1985. After introducing version 5 in 1993, it became more popular than ever.
You can easily build your desired chart or table with the help of this Excel application. Also, you can print them if you have a printer. But when you print a chart from MS Excel, the lines known as gridlines don’t appear on your printed paper.
But if you want to print the Excel sheet with lines, you must read this article. Because here, I will show you some super simple and quick methods, such as Gridline Print or Page Setup, with which you can easily print Excel with lines.
So don’t skip any part of this article, and let’s begin!
Do Gridlines Appear in a Printed Document on MS Excel?
The gridlines don’t appear in a printed document on Microsoft Excel. Because, by default, no gridlines printing option is implemented on Excel. When you print an Excel sheet, only the words or sentences on that page appear on the printed paper.
Suppose you want to check some MS Excel documents, then the gridlines can help you quickly sort out a large amount of data. But without gridlines, it is difficult to map out massive data on Paper. So it’s pretty clear that gridlines on Excel are helpful in some cases.
Therefore, if you want the gridlines to appear on your printed document, you must enable some checkbox before hitting the Print button. Enabling the appropriate functions from the menu can solve your Microsoft Printing issue.
Follow the next heading if you want to know how you can easily print the Excel sheet with lines.
Check out our separate post on how to Copy & Paste Objects in Excel.
How to Print Excel with Lines on Windows & Mac
Printing the Excel sheet with lines is a straightforward process. You can quickly complete this operation using the Page Layout menu, or you can use the Page Setup window. Let’s find out how to print gridlines on MS Excel.
Here are the steps to print the Excel sheet with lines:
1. Enable the Page Layout’s Gridlines Print Checkbox
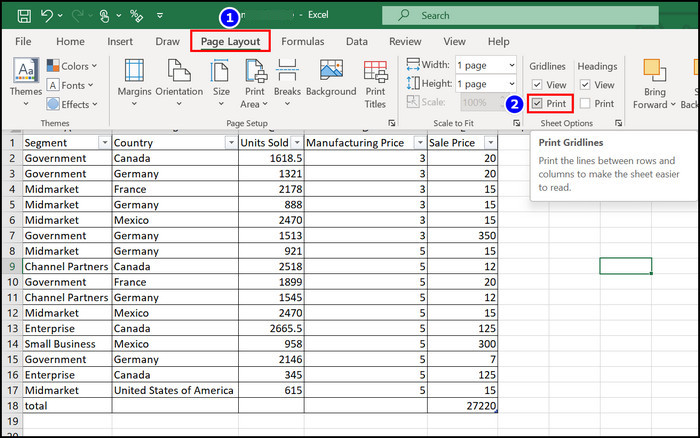
The easiest way to print the gridlines on Excel is by enabling the Print checkbox from the Sheet Options section. Let’s see how to complete this action.
Here are the steps to enable the page layout gridlines print checkbox on Excel:
- Launch the MS Excel application.
- Create your desired Excel document.
- Navigate to the Page Layout menu.
- Enable the Print checkbox from the Sheet Options segment.
- Type CTRL+P buttons to open the Print menu.
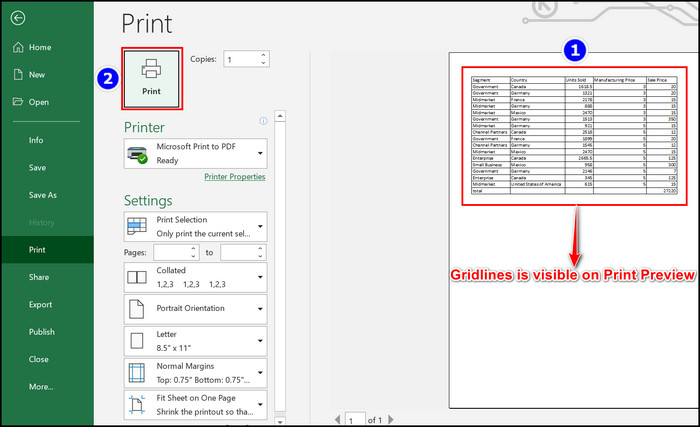
- Look at the Print Preview, and if the Gridlines are visible, hit the Print option.
Immediately you will see that printed pages contain gridlines. Both for Windows & Mac, the Excel options are the same. Just press ⌘+P on Mac to open the Print section.
Follow our guide on how to Mail Merge in Outlook with Excel & Word.
2. Use the Sheet Options Dialog Launcher
You can use the Sheet Options dialog launcher to print the Excel sheet with lines. Follow the instructions stated below to complete the process appropriately.
Here are the steps to use the sheet options dialog launcher:
- Open the Microsoft Excel program.
- Move to the Page Layout section.
- Click on the Sheet Options dialog launcher.
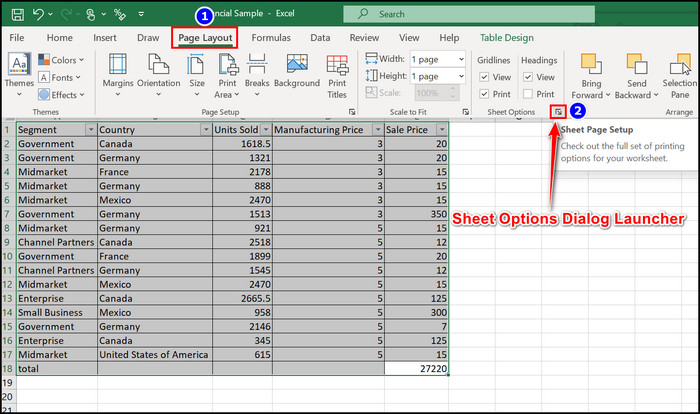
- Enable the Gridlines checkbox.
- Click on the OK button.
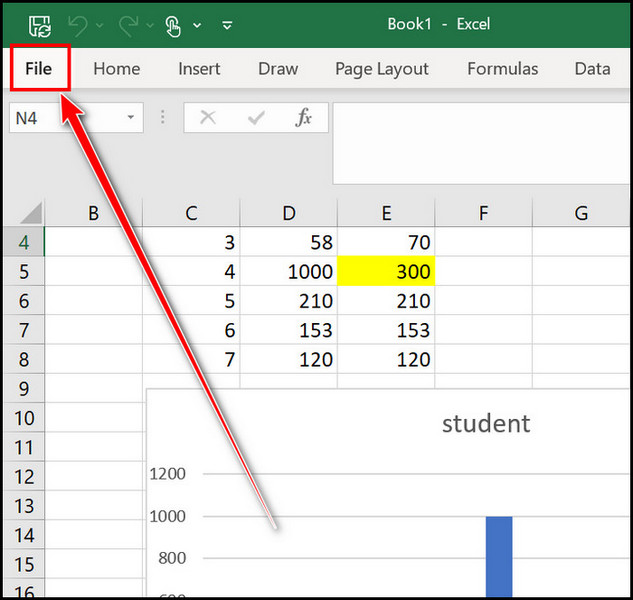
- Navigate to the File menu.
- Select the Print section.
- See the Print Preview, and if the Gridlines are on the preview, click on the Print option to complete the process.
See how easy it is to print an Excel sheet with lines. Now apply these steps to solve your issue.
Check out our separate post on how to Install Macro in Excel.
3. Apply the Page Setup Function
The Page Setup function can help you to print your desired Excel sheet with lines. You must hover through the Print section and choose the Page Setup box. Also, you can move to the Page Layout menu and select the Page Setup Dialog Launcher.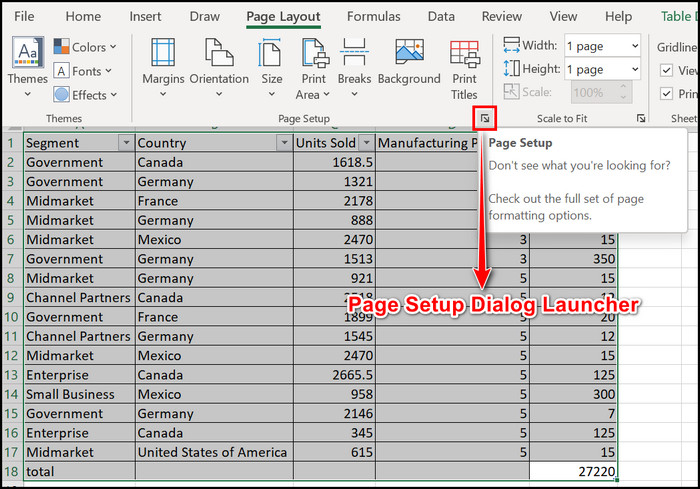
Here are the steps to apply the page setup function to print lines on Excel:
- Launch the Excel app.
- Navigate to the File menu.
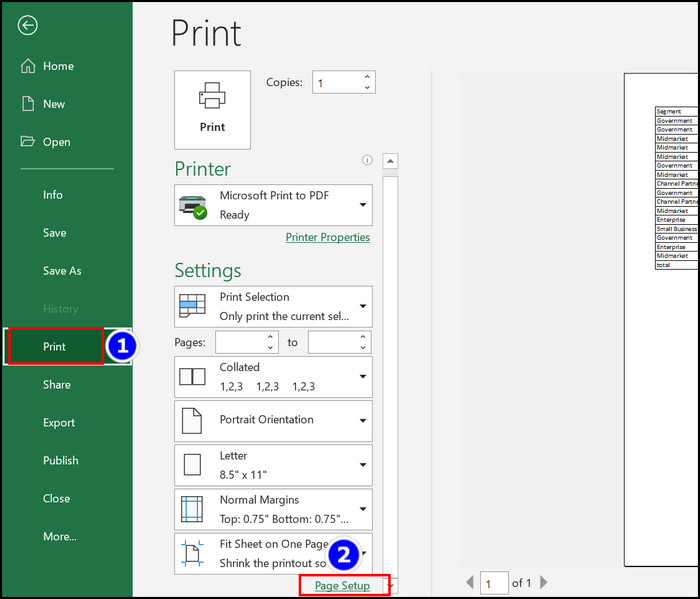
- Click on the Print section.
- Scroll down and click on the Page Setup hyperlink.
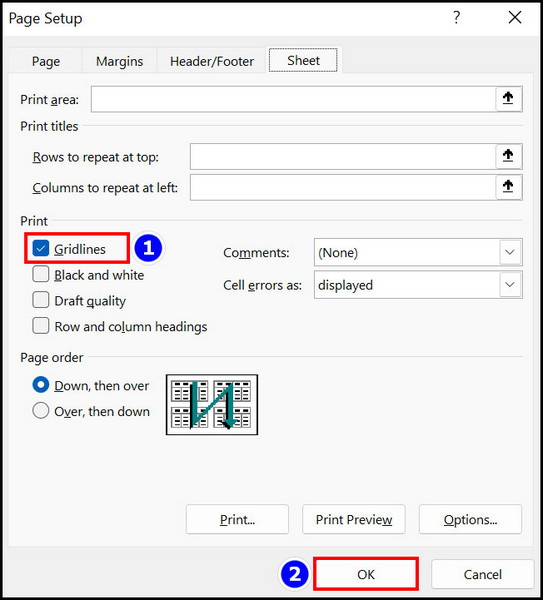
- Move to the Sheet section.
- Enable the Gridlines checkbox.
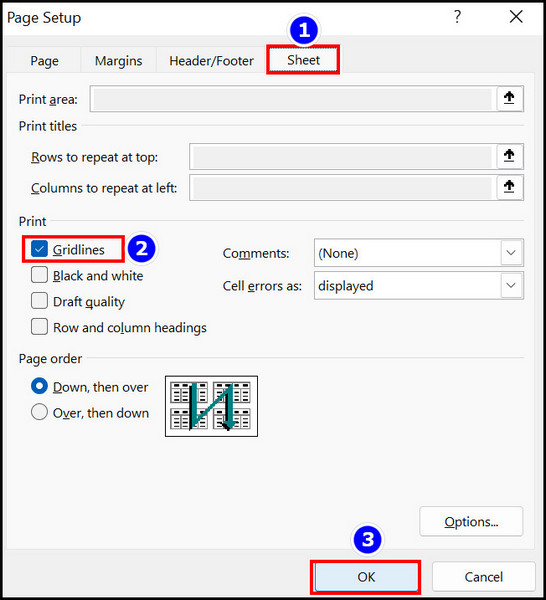
- Hit the OK key.
- Click on the Print button when you see gridlines on the Page Preview.
Your desired Excel sheet with lines is printed now on paper. If you are facing some printing issues, read the next heading to solve that.
Here’s a complete guide on how to Copy Values Without Formulas on Excel.
Troubleshoot Printing Issue on MS Excel
If you have a printing issue on your Microsoft Excel program, track down the below steps where I stated how to troubleshoot a printing problem.
Here are the steps to troubleshoot printing issue on Microsoft Excel:
- Launch the Microsoft Excel application.
- Move to the Page Layout menu.
- Select the Page Setup dialog launcher.
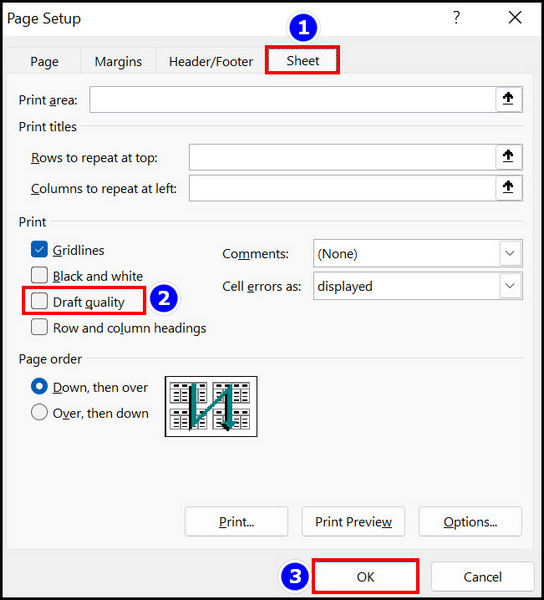
- Navigate to the Sheet section.
- Uncheck the Draft quality checkbox and hit the OK box.
Check whether your issue is solved or not. If your problem still persists, follow the steps below:
- Download the latest printer driver from the manufacturer’s website.
- Apply borders to all of your Excel cells if nothing works for you.
- Move to the Home menu from the MS Excel spreadsheet to apply borders on your cells.
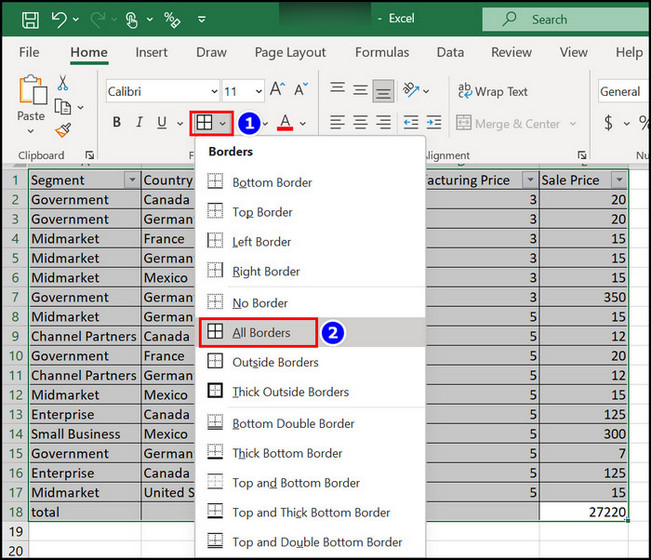
- Expand the Borders option from the Font section.
- Choose the All Borders option.
You can see that Excel cells are highlighted with black borders. Now you will get your desired lines when you print them.
Also, check out our separate post on Fix Microsoft Excel Freezing or Slow.
Change Gridline Color on MS Excel
If you want to change the gridlines color, use the Excel Advanced settings to achieve it. Let’s sort out how to shift the gridline’s color on Microsoft Excel.
Here are the steps to change gridline color on MS Excel:
- Open the MS Excel program on your device.
- Click on the File menu.
- Select the More > Options section.

- Move to the Advanced menu.
- Scroll down and Enable the Show gridlines checkbox from the Display options for this worksheet section.
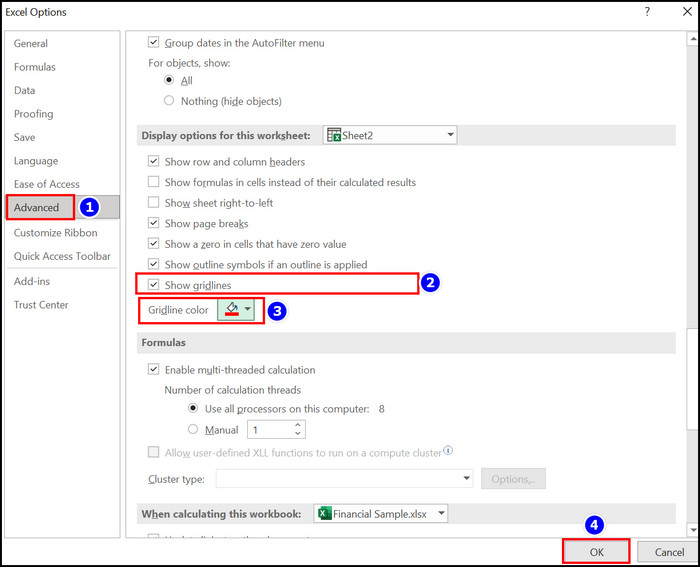
- Click on the Gridline color to choose a specific color.
- Hit the OK key when your color selection is complete.
Instantly, you will notice that your Excel lines color is now changed according to your selection. Follow the next heading to learn how to print lines on one page in MS Excel.
How to Print Microsoft Excel Sheet with Lines on One Page
Suppose you want to compose and print your Excel sheet with lines on one page, then read along. Because in this segment, I will demonstrate how you can acquire that with some simple yet functioning steps.
Here are the steps to print an MS Excel sheet with lines on one page:
- Launch the Microsoft Excel app.
- Click on the Page Layout section.
- Check the Print option under the View option.
- Type CTRL+P buttons to open the Print section.
- Select the Fit Sheet on One Page option from the Settings section.
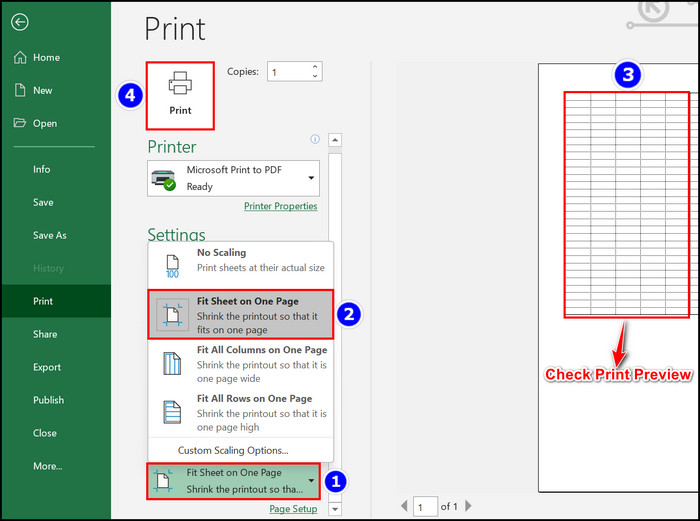
- See the Print Preview.
- Hit the Print Option when all the modifications are complete.
With the help of these quick steps, you can easily print an Excel sheet on a single page with lines.
FAQs
Why is my Excel not printing with lines?
Your Excel sheet is not printing lines because you must manually activate the gridlines option. To do that, follow Page Layout > Print > CTRL+P > Print Preview > Print.
Why is Excel cutting off text when I print?
The Excel cut off your printed text because your selected cell’s width and length are not appropriate enough for printing. You must check and set the print preview properly before printing it.
How do I print selected cells in Excel?
To print only the selected cells on MS Excel, Enable the Print checkbox from the Page Layout section. Then press CTRL+P keys and choose the Print Selection option from the Settings menu. After that, Select the desired cells and Print them.
Final Thoughts
In some cases, there may be a need to print the Excel sheet with lines. You can quickly solve this printing issue with some simple yet working methods.
Use the Page Layout option to resolve this printing line problem efficiently. Also, you can apply the Page Setup function to complete the stated issue. Overall you will get three straightforward methods to print lines if you read and follow this article properly.
If you have any queries regarding this article, let me know in the comment box.