Are you trying to enjoy the virtual world with your Oculus Quest 2, and the only thing that is preventing you from doing so is the error message, the device is unplugged from HDMI? Regardless of the fact it is still plugged?
You don’t need to describe how annoying that can be. I have been in your shoes.
I was fascinated when VR technology became accessible to me, and from that time, I have been using every VR device that I could afford. Apart from my mental satisfaction, one thing I learned from experiencing VR headsets is to troubleshoot them in a proper manner.
You might get puzzled to know about how many times I have faced the HDMI issue on my Oculus Quest 2, and solved the issue till it disappears permanently. In this article, I will be sharing the methods I have used to get past the issue.
Before that, you must know, why is HDMI not working on your Quest 2 headset?
So, should you start to panic? Absolutely not! Keep reading to find the best possible solution for you.
How to Fix Oculus HDMI Connection Issue
Before I share the solutions for HDMI not working with Oculus quest 2, I must declare that it is a common problem for every quest 2 user. Solving the situation won’t take much of your time. You will be able to resolve the matter on your own. Just read the instructions carefully, and that would be sufficient.
The first thing I would recommend is to plug out all the cables and replug them. It is found common that most of the users don’t plug their HDMI cable appropriately. So the connectivity issue occurs.
Have some time to spare? Check out our latest fix for Fix Oculus Quest 2 not Charging
Here are the other methods you can try when HDMI is not working on Quest 2:
Method 1. Re-Insert Your HDMI Connector
It sounds basic, but you will be amazed when you perform this simple little trick. If you are using an HDMI cable to connect your Chromecast TV to Oculus quest 2, only the HDMI cable won’t be workable.
For that, you utilize an HDMI connector. If that connector is loose or not properly compatible with your cable, you might encounter a connectivity issue.
To avoid that, plug out the connector from your VR headset, disconnect the HDMI and reconnect again. Also, double-check if it is properly joined with the graphics card of your computer. If anything is wrong with the connectivity, it will be resolved by now.
If your oculus mic is not working, then quickly check out our epic guide Fix Oculus Quest 2 Mic Not Working
Method 2. Stop Oculus Immediately
If there’s something wrong with the Oculus software, you might get a connectivity error. To recheck the issue, stop oculus from running from the computer.
Here’s the process to stop the Oculus server:
- Press Ctrl + Alt + Delete altogether from your keyboard.
- Select Task manager from the appeared list.
- Go to the process tab, and look for OvrServer_ 64.exe activities.
- Right-click on the process and select End task.
Don’t hesitate to perform the instructions. Oculus has another server launcher service. It will be activated when necessary.
Restart your computer once you have completed those steps. Follow the first method again, and your issues with the HDMI cable might be gone.
Method 3. Update the Graphics Card Drivers
If your graphics drivers are outdated or contain a corrupted update, you are very likely to encounter the issue. Updating the drivers to the latest ones should solve your problem.
Here are the steps to update your graphics driver:
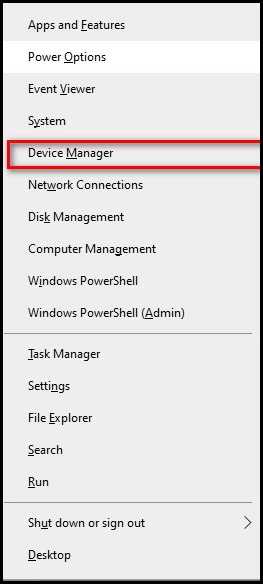
- Press the Windows + X button to launch the windows menu.
- Select Device Manager from the menu bar.
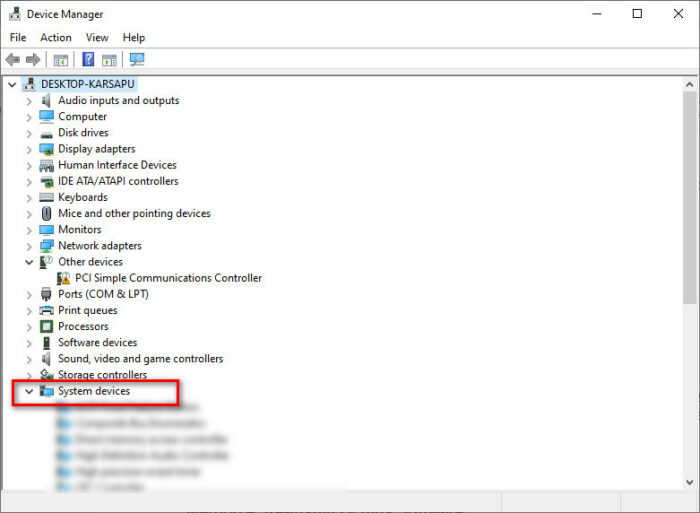
- Expand the System Devices menu.
- Locate your graphics card driver, e.g., AMD driver.
- Right-click on the driver and select Update driver from the list.
- Select the option Search automatically for drivers.
Follow the on-screen instructions to complete the process. Once the downloading has been finished, install the updates and restart your computer. You shall face no issues afterward completing the process.
Method 4. Re-Install Oculus Software
When you encounter No HDMI error on your quest 2, re-installing the Oculus runtime utility is one of the best solutions you can apply. Re-installing the software would reset the settings of the device.
Plug out the oculus quest 2 as well as the related cables.
Here are the steps to re-install Oculus Runtime:
- Press Windows + S button to open up the windows search box.
- Type in the Control panel and select the result.
- Click on uninstall a program from underneath the Program menu.

- Locate Oculus runtime in the list and click on it.
- Select uninstall from the upper dashboard and follow on-screen instructions.
- Restart your computer and download the application from the official website.
- Install the latest version of Oculus software.
Plugin every cable you have disconnected and check if the issue resolves after re-installing the software. If not, perform the following methods.
Here’s a complete guide to know the difference between Gear VR vs Oculus Quest.
Method 5. Update Quest 2 Firmware
If you haven’t updated the Oculus VR firmware for a long time, it is possible that you face the HDMI not working on your headset. To avoid that, try updating the firmware from time to time. Read the following steps to update your headset’s firmware.
Here’s the process to update Oculus Quest 2 Firmware:
- Turn on the headset and wear it on.
- Press the Oculus button from your controller to launch the headset menu.
- Click on the gear icon (Settings icon) from the bottom of your display.
- Scroll down and select About with your controller.
- Select the Install Update option and wait for a while to complete the process.
If you can’t install the update due to HDMI reasons, you can always install the update using your mobile phone.
Here are the steps to update Oculus software using your mobile:
- Download and install the Oculus software on your mobile.
- Launch the app and click on settings.
- Tap on Oculus Quest 2, then on More Settings.
- Scroll down a bit and select Advanced settings.
- Select update software automatically and exit the app.
Whenever a new update arrives for your VR headset, it will be installed automatically.
Check if the issue resolves after updating Oculus firmware. Hopefully, this method has resolved your problem. But, don’t get tense if it has not. I still have some tricks left. Continue reading to find out.
Method 6. Fix the Operating System
If the HDMI issue appeared right after installing a new version of OS, then it is possibly because of the OS installation. You can either update to the latest version, or you can roll back to the previous OS version.
To update to the latest on your windows PC, select the settings icon from the Windows menu. Click on Update & Security from the bottom of the settings window. Select Windows Update from the left[4] pane and check if there’s any update available for you. Install the update and restart your computer.
If there’s no update available, you need to roll back to the previous windows version. That will likely solve your issue.
Here are the steps to roll back windows:
- Select Settings from the windows menu bar.
- Select Update & Security from the settings window.
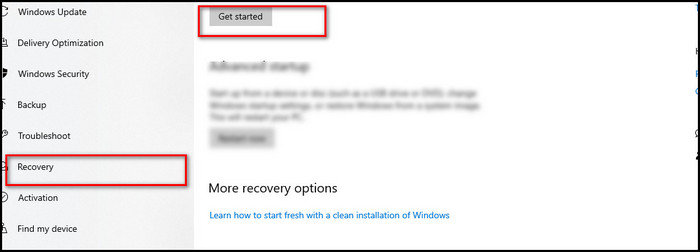
- Click on Recovery from the left pane.
- Select Get started under the Go back to Previous Version option.
Wait till the process is completed. You will require to restart your computer several times.
These are the methods I have tried on and became successful in solving the HDMI not working issue. If you follow my instructions, you will also be able to do so. But, even after following the instructions doesn’t solve the matter, there is one last thing you can attempt.
Contact Oculus Support
You can contact the Oculus support team by writing them an Email (if the issue hasn’t been resolved). Write down what attempts you have taken so far, including your PC specification.
As soon as they are aware of the problem, they will contact you. But be prepared; some of your components might require changes. The support team will handle the issue at this point.
Conclusion
Throughout the article, I have tried to explain why your HDMI is not working on Oculus quest 2, and how you can overcome the situation without even worrying much.
I will be glad to know that you have followed my instructions and solved the issue on your own. Write down anything unusual you have encountered in times of solving the matter.
And again, if there’s anything I can do to help with any tech-related issue, feel free to comment below.