Nvidia Control Panel is the only tool for adjusting the graphical settings of all Nvidia cards. Not only it lets you set the preferred graphics processor for every app separately, but it enables antialiasing for that app also.
So when the application keeps closing on startup or during 3D-settings editing, the situation becomes a pain in the neck.
But don’t worry; after many trials and errors, I’ve found the 4 quickest methods to solve the issue. It’s time to fix yours!
How to Fix Nvidia Control Panel That Keeps Closing
Usually, the Nvidia Control Panel keeps closing due to a bug in Nvdrsdb0 & Nvdrsdb1 Bin files or a conflict between the graphics software. You can quickly solve this issue by deleting these two Bin files, updating the GPU drivers, or moving everything from your desktop.
If any of these fixes don’t work, resetting Windows to its default settings is the only option.
Go through the following section to know the steps for every available fix for Nvidia Control Panel closing on startup or during Manage 3D option.
Here are the 4 methods to fix Nvidia Control Panel that keeps shutting down or not opening:
1. Rename/Delete Nvdrsdb0 & Nvdrsdb1 Bin Files
The Nvdrsdb0 & Nvdrsdb1 are two bin files that maintain the runtime of the Nvidia Graphics control panel. But those files easily get data corruption, and the app becomes unusable when that happens.
But if you rename or remove those Bat files, your PC automatically restores the files, and the app becomes stable.
Follow the steps to rename/delete Nvdrsdb0 & Nvdrsdb1 bin files:
- Open the File manager and go to the Nvidia DRS location. (The default location is; C:\ProgramData\NVIDIA Corporation\Drs)
- Find the nvdrsdb0.bin & nvdrsdb1.bin files.
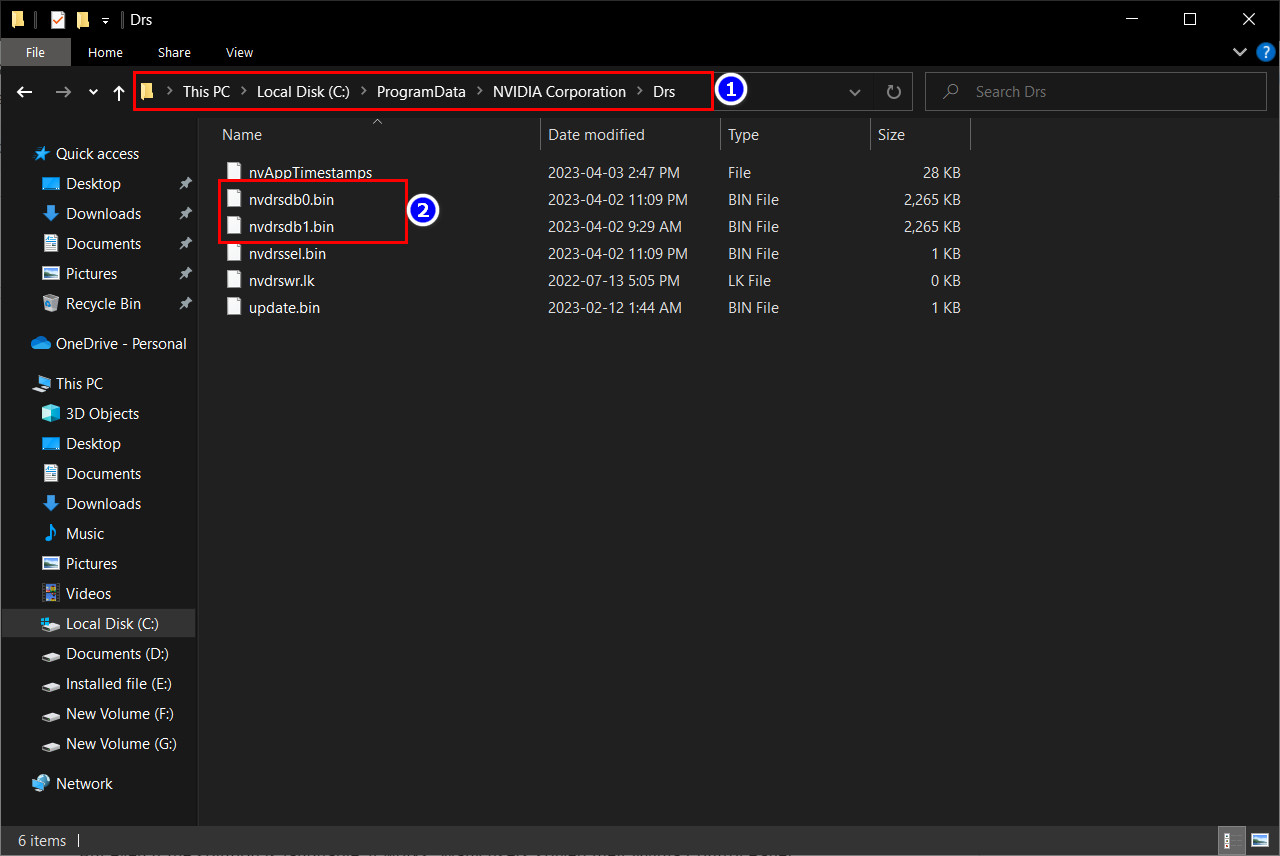
- Rename or Delete those files as you choose and close the file window.
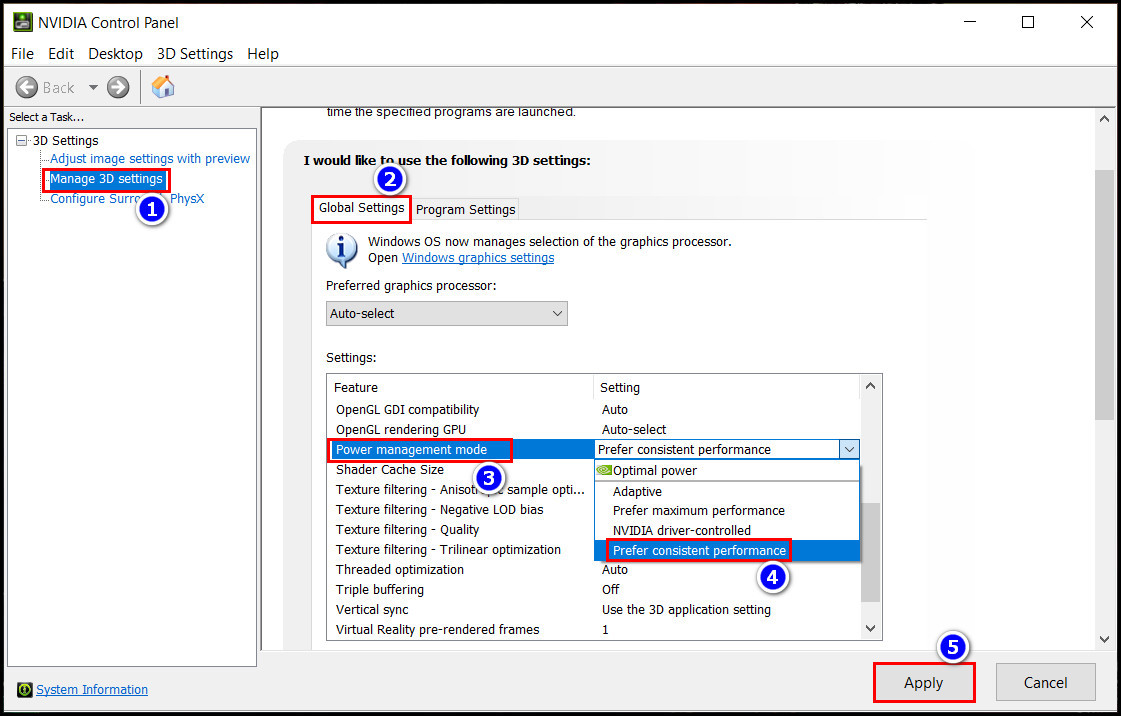
- Open the Nvidia Control Panel and go to Manage 3D settings.
- Tweak any settings from the window.
- Click Apply > Ok.
As you can see, the app is running smoothly after completing the steps. But if you can’t tweak the settings in the app, jump to the next solution.
Check out our separate post on how to enable RTX Nvidia GPU.
2. Move Everything on Your Desktop
You can solve the unresponsive Nvidia Control Panel issue by moving all your desktop contents to other drives. Sounds hilarious, right?
But even if the solution is laughable, it works. Many users solved their Nvidia Control Panel problem using this method and posted in different recognized tech forms.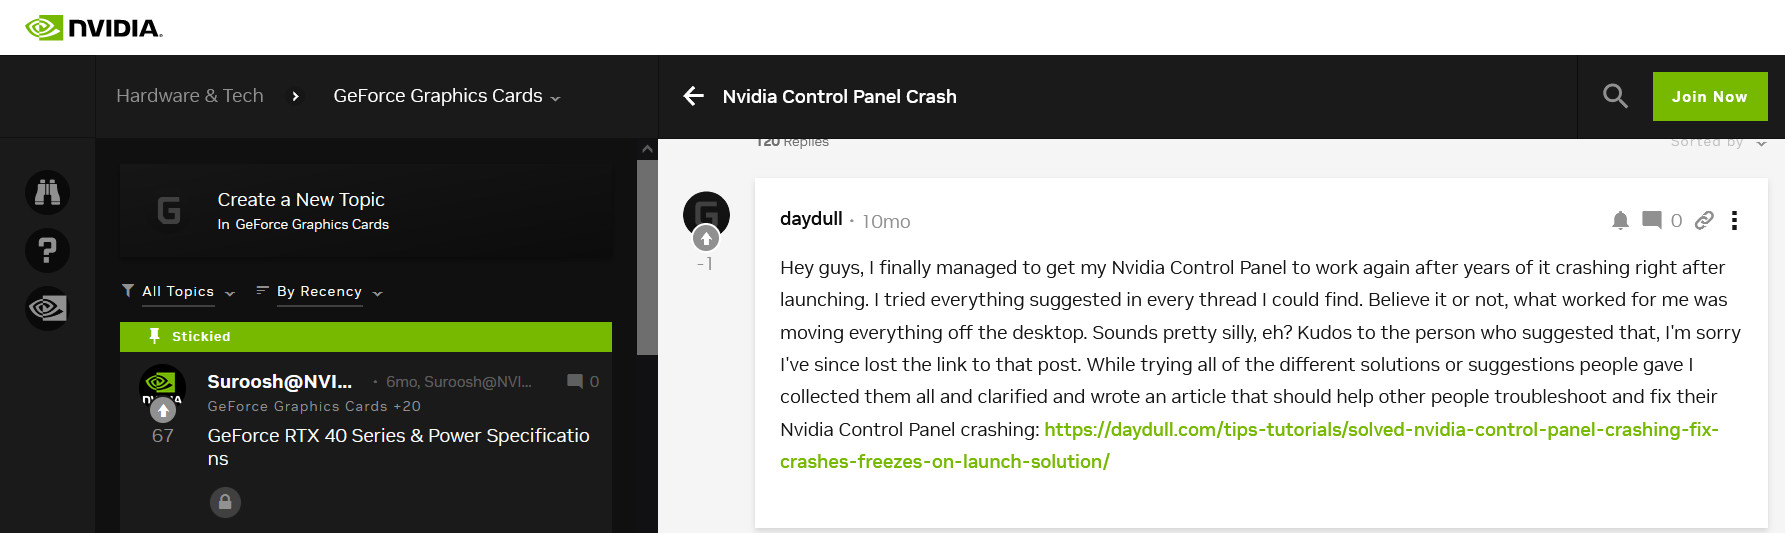
To move everything from your desktop:
- Select all the files on your desktop except the system icon (This PC, Control Panel, Recycle Bin, Networks, etc.).
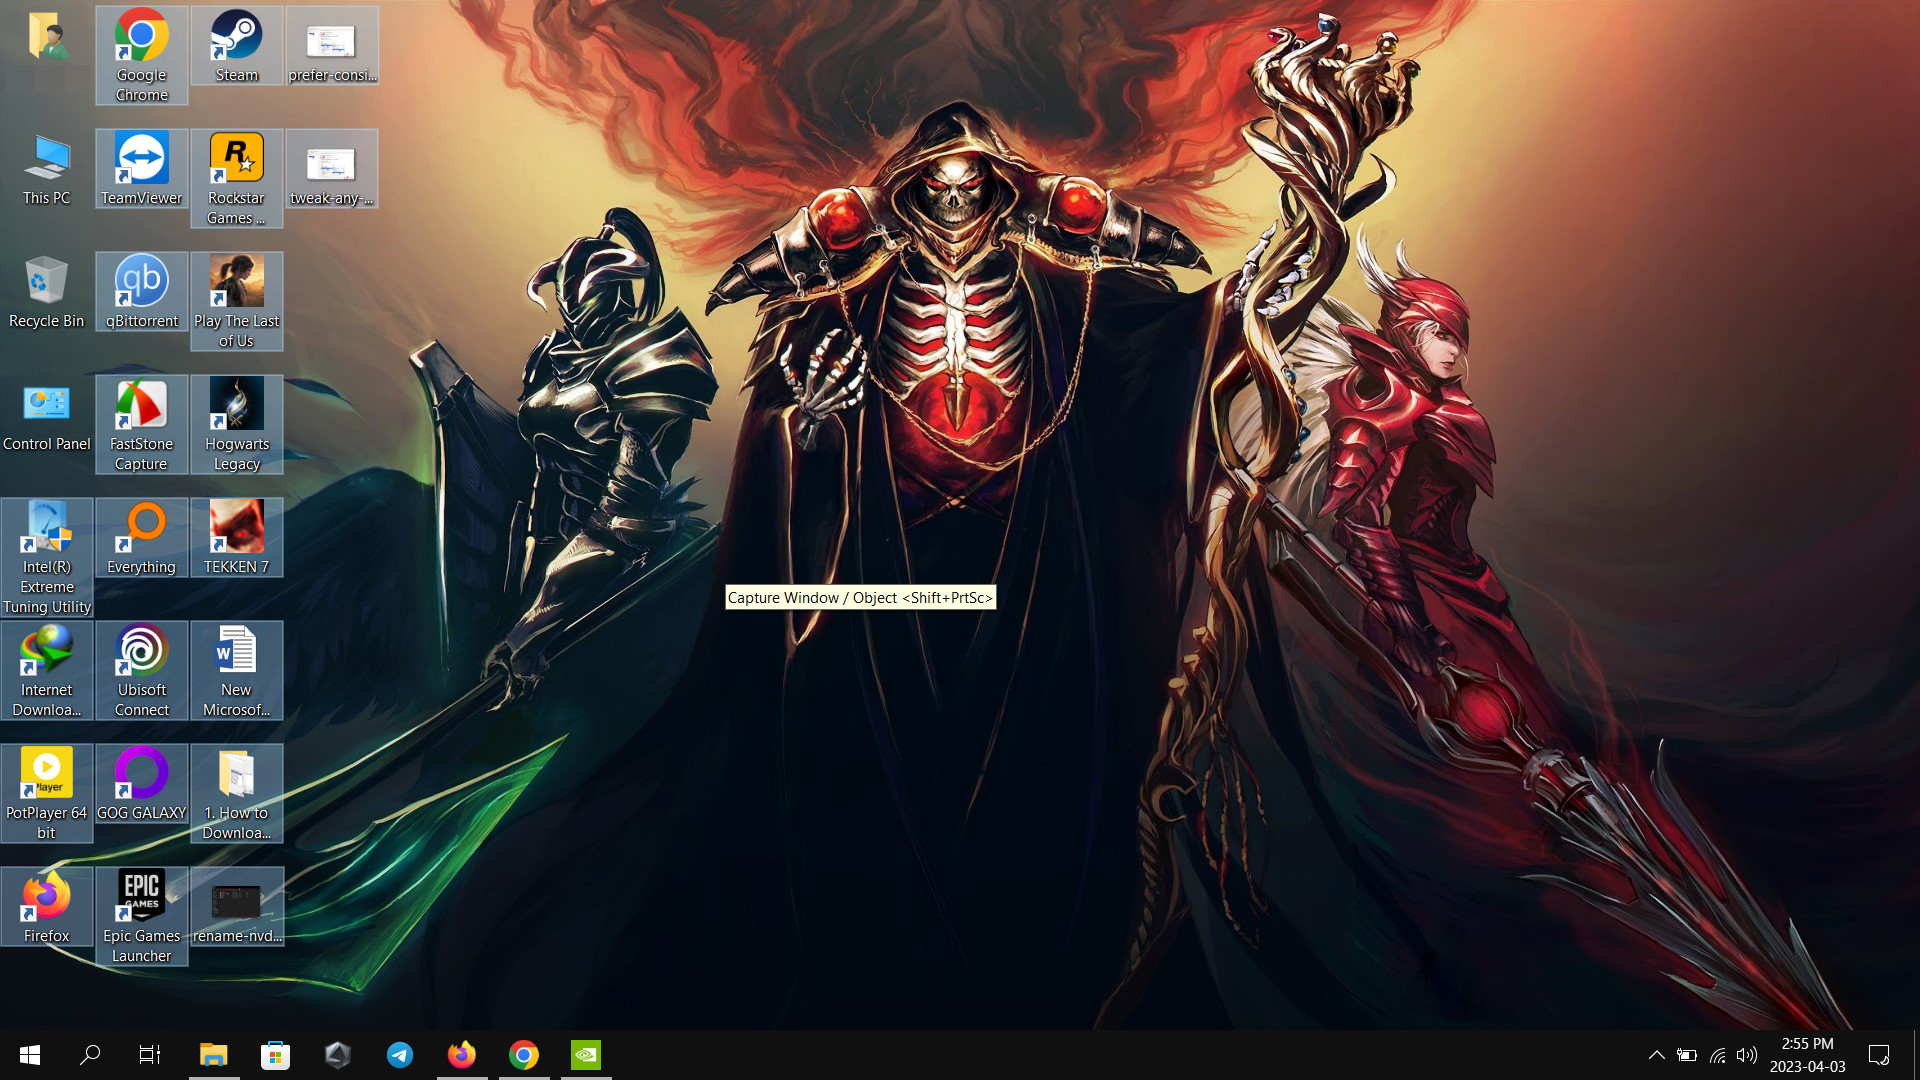
- Press CTRL + X key.
- Create a Folder in any drive and paste the files in it.
- Restart your PC.
- Go to the Nvidia Control Panel and tweak any settings.
If you can easily tweak the graphics settings, the application runs smoothly. But in case the problem remains, follow the next solution.
Read more on does freeSync work with Nvidia.
3. Reinstall Geforce Drivers
If the unresponsive Nvidia Control Panel issue happens for drives conflicts re-installing the Geforce Drivers will solve your issue.
Go through the steps to reinstall the Geforce drivers:
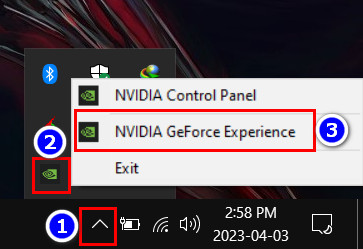
- Click the Up arrow in the Taskbar and right-click on the Nvidia icon.
- Choose the Nvidia Geforce experience from the pop-up menu.
- Go to Drivers and click the vertical 3-dot icon.
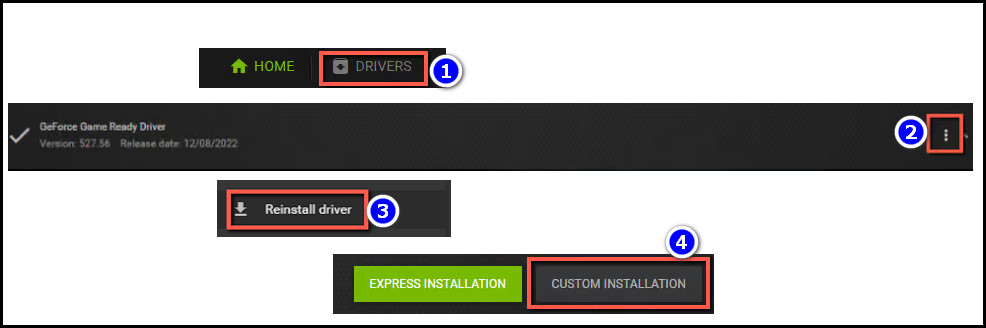
- Select the Reinstall driver option and choose the Custom Installation option.
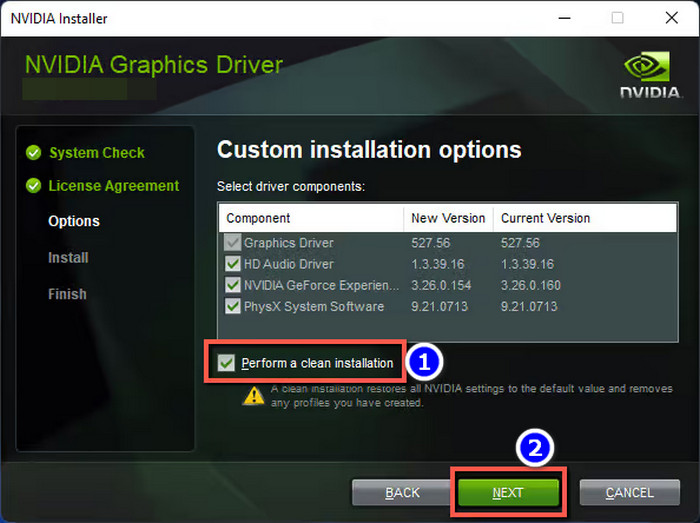
- Check the Perform a clean installation box and select the Install Option.
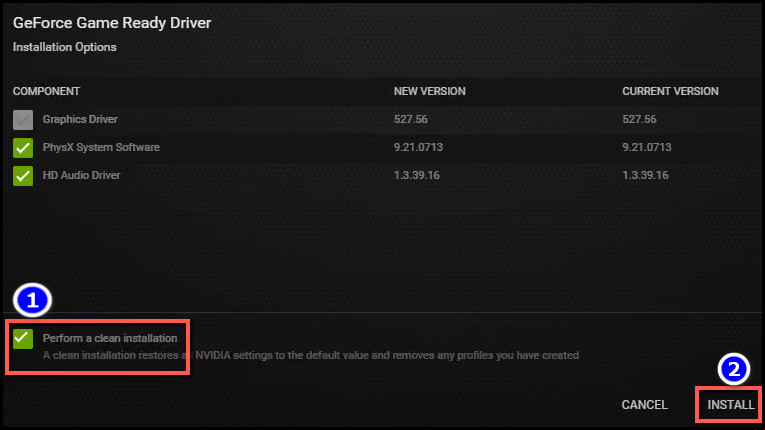
After completing the steps, the GPU driver will start installing automatically.
You can also use the Nvidia driver download website to update the GPU drivers.
Use the following steps to do so:
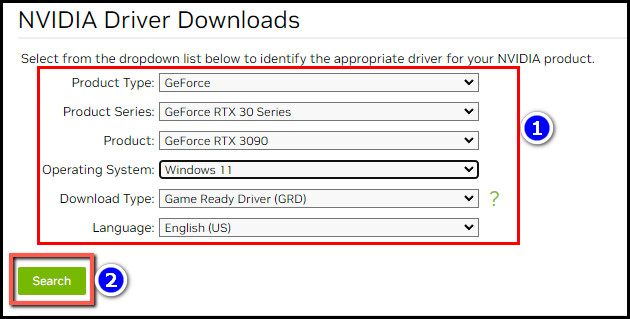
- Open your browser and go to Nvidia Driver download website.
- Choose your GPU model using the dropdown menu and tap the Search icon.
- Select Download to save the file and Run it after downloading.
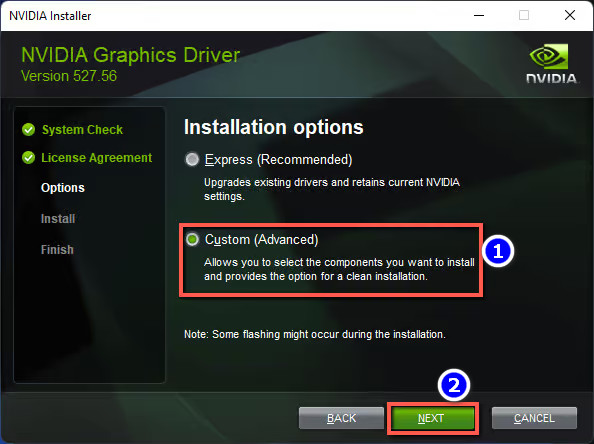
- Click Ok > Agree and Continue option and choose Custom (Advanced) installation method.
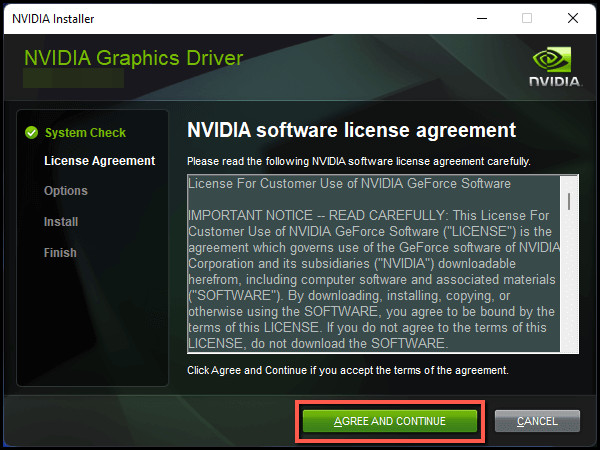
- Press Next.
- Tick-mark the Perform a clean installation option box and tap the Next button.
- Select Close after completing the installation process.
After completing the steps, the problem will disappear completely.
Follow our guide to fix Nvidia Graphics Card not detected in Windows 10.
4. Reset Your Windows
When the above solutions don’t solve your issue, you must reset your Windows to factory settings. But remember resetting the Windows will remove all the applications and change all the settings to default.
So backup the settings before resetting the Windows on your computer.
Follow the steps to reset your Windows PC:
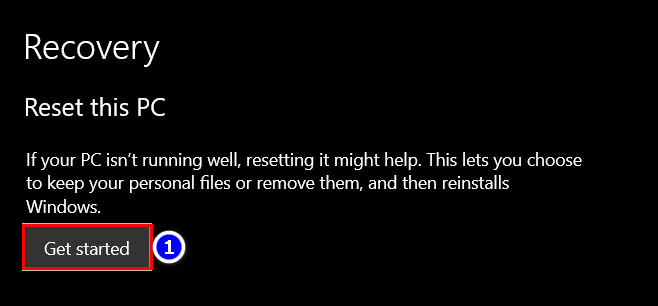
- Press the Win key and type reset.
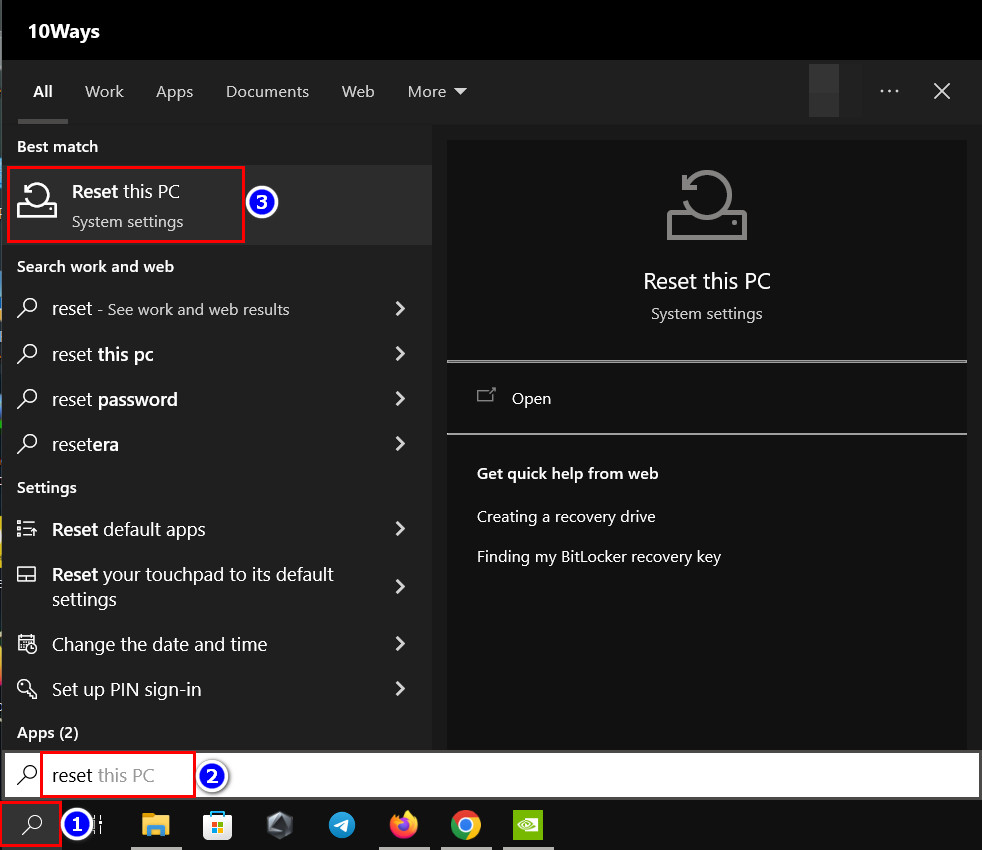
- Select Reset this PC option from the search result and click Get Started.
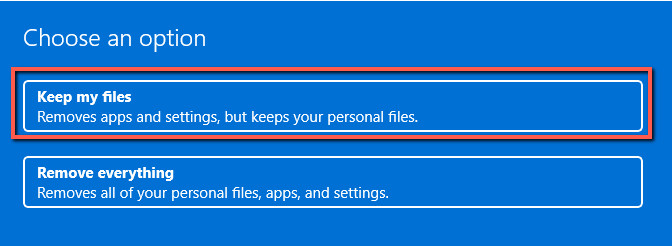
- Choose the Keep my files option and follow the on-screen instruction.
After completing the steps, your PC will become as good as new, and the Nvidia Control Panel app will start working again.
Why does your Nvidia Control Panel Close on Startup?
Usually, the Nvidia control panel application won’t open or exit on 3D settings for driver conflicts or data corruption. Also, old software bugs, administrative permission issues, or damaged files can cause similar problems. You can solve this issue by deleting the Nvdrsdb0 & Nvdrsdb1 files.
Here’s why Nvidia Control Panel closes on startup:
- The Geforce Drivers conflict with the default Windows display driver.
- The Nvdrsdb0 & Nvdrsdb1 bin files have data corruption.
- For using the old/outdated version of the Nvidia driver.
- The NVIDIA Control Panel isn’t getting administrative permission.
- Your PC has some damaged files in the Nvidia DRS folder.
These are the core reasons that cause errors in the NVIDIA Control Panel application.
You may also like to read about fix Nvidia Graphics Card not detected in Windows 11.
FAQs
Is the Nvidia control panel necessary?
Yes, the Nvidia control panel is required to tweak any settings of your Nvidia graphics card. But when you are using the other manufacturer’s graphics card (e,g; Intel, AMD), installing the Nvidia control panel is unnecessary.
Can I uninstall the NVIDIA Control Panel?
Yes, you can uninstall the NVIDIA Control Panel software using the control panel. But I don’t recommend you to do so. Because uninstalling the software will make your OS switch to the default display, you won’t be able to maintain your graphics card use.
Is Nvidia GeForce Experience free?
Yes, the Nvidia GeForce Experience software is free for all Nvidia card users. Using this app, you can now optimize your game more effectively.
Conclusion
In short, Diver conflicts or data corruption are the two main culprits causing errors in the Nvidia Control Panel. You can quickly solve this issue by deleting the Nvdrsdb0 & Nvdrsdb1 Bin files, updating the GPU drives, or moving everything from your desktop.
If that won’t solve the problem, reset your Windows version. But make sure to back up everything before doing so.
After applying the fixes, I’m sure your Nvidia Control Panel works perfectly. Comment if you need any other guide on Nvidia driver. And for everything else, stick with 10Scopes.