In modern times Microsoft Excel is immensely used for its super easy data composing feature. We can quickly sort out and rearrange our data sheet using this application.
If you are a regular Excel user and need to adjust your Excel sheets regularly, then the moving feature can come in handy. Moving a row or column in Excel without replacing them is simple.
You can use the Shift and Mouse drag method, which is the most straightforward process. Also, you can apply the cut, copy, insert option and the Ctrl+Mouse Drag feature if you are interested.
In this article, I demonstrate all the possible ways to move a row or column in MS Excel.
So don’t skip any part of this content, and let’s jump in!
Check out our separate post on how to Excel Round Up Numbers
What are Row and Column in MS Excel?
As the name suggests, the row in MS Excel is a straight line that consists of many sequent cells. The column is the vertical line that also contains several cells, but the main difference between row and column in Excel is that they both create a 90-degree angle with one another.
In MS Excel, rows and columns are equally important as the whole sheet is covered with them. To create your particular pivot table or pie chart, you can implement your specific data into them.
After inputting your desired value data into the rows and columns in MS Excel, you can construct your specific charts and table. Those charts can improve your document integrity and make it more eye-cache.
I hope you grasp the idea of rows and columns in MS Excel and their use. Now read through the article to learn how you can move a row or column in Microsoft Excel.
Read more on how to MS Excel Lock a Cell
How to Move a Row or Column in Microsoft Excel Without Replacing
There are several easy methods available by which you can move a row or column from a Microsoft Excel Sheet. I am giving all the solutions down below for your assistance. You can follow and apply any of them best suited for you.
Here are the steps to move a row or column in Microsoft Excel:
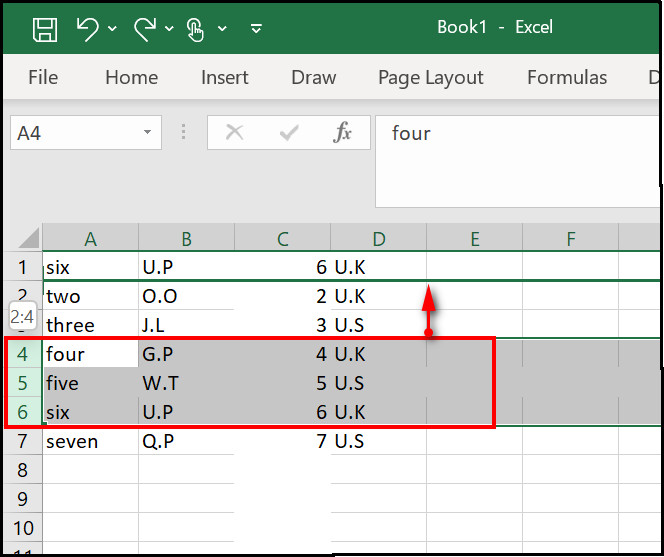
1. Hold the Shift Key to Move a Row or Column
The Shift key and mouse drag option is the most straightforward process of moving a row or column in Excel. Press and hold the Shift key, select the row or column and then move your row or column to the desired position.
Here are the steps to move a row or column using the Shift key and Mouse dragging:
To Move the Row
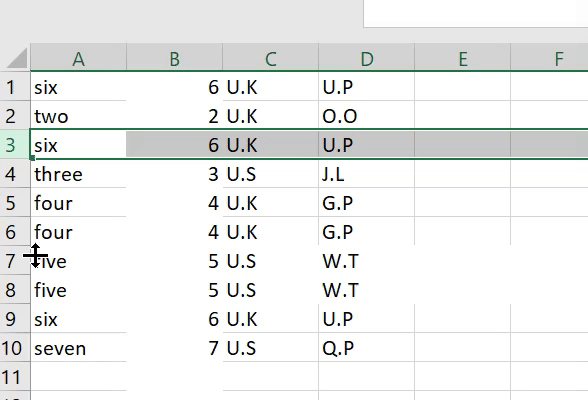
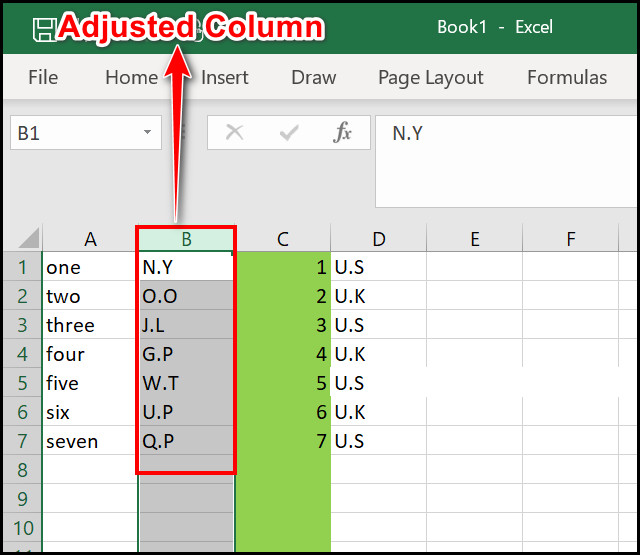
- Click on the Row Number to select the Entire Row.
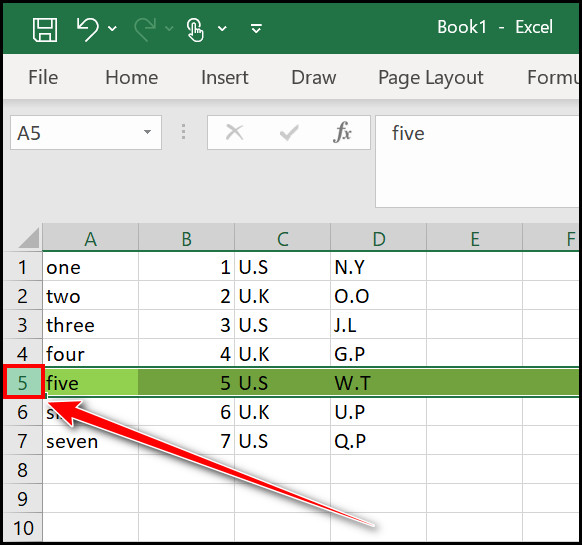
- Press and Hold the Shift key.
- Move your cursor to the Corner of the highlighted Row until you see the Move icon(4 directional arrow icon).
- Click the left mouse button and move the Row to your desired place until you see the Green Line above your specific row.
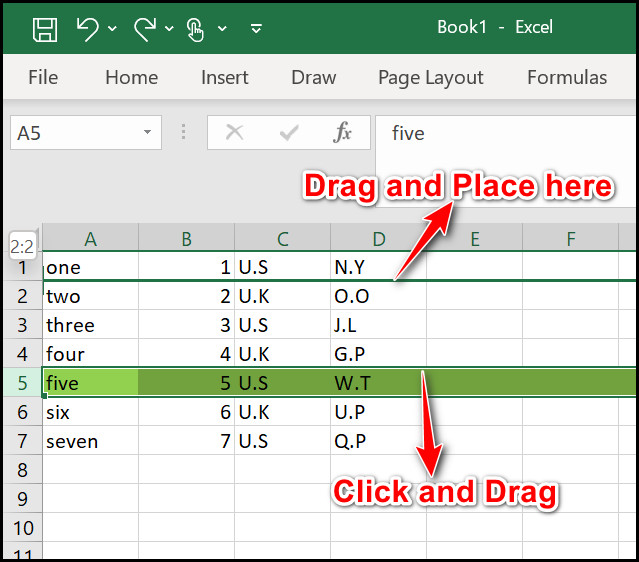
- Release the Mouse button and Shift key.

Also, check out our separate post on how to Sort by Date in Excel
To move the column
- Click on the Column Number to Highlight the Entire Column.
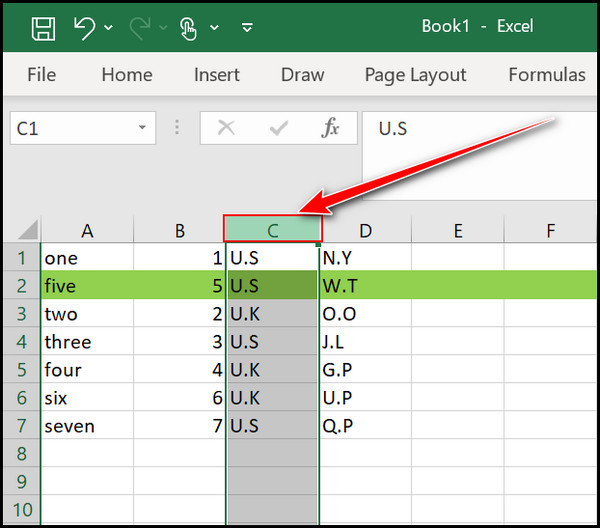
- Hold the Shift button.
- Move the cursor to the Edge of the highlighted Column, left-click on the mouse when you see the Move icon(4 directional arrow icon) and shift this column to your desired position.

- Release the Mouse and the Shift key when you see the Green Straight Line in front of your desired column.
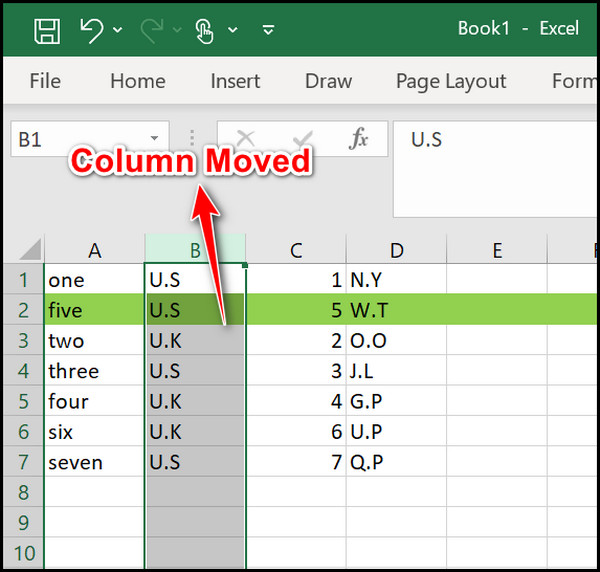
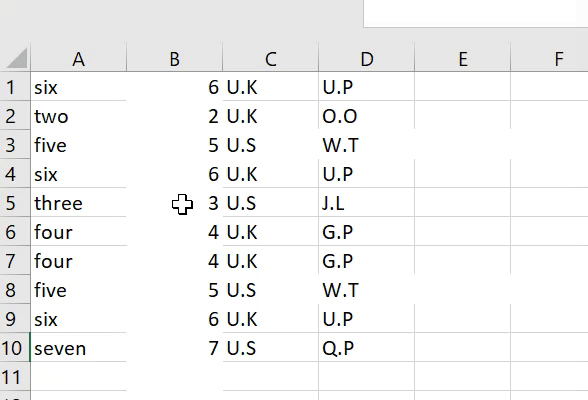
You will see that the particular selected row and column are now shifted to your specific location.
Read more on how to Copy & Paste Objects in Excel
2. Use the Insert Cells Option
You can also copy or cut a row or column and insert them into your desired position. Follow the instructions appropriately to complete the moving process.
Here are the steps to use copy cut or insert option to move a row or column in MS Excel:
For Row
- Highlight the particular Row from MS Excel.
- Right click and select the Cut or Copy option, also, you can use the shortcut Ctrl+X to Cut and Ctrl+C to Copy.
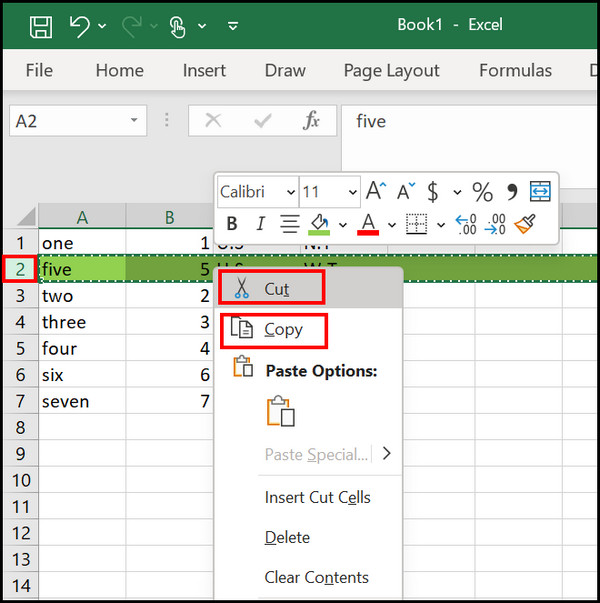
- Select the Row where you want to move your particular row.
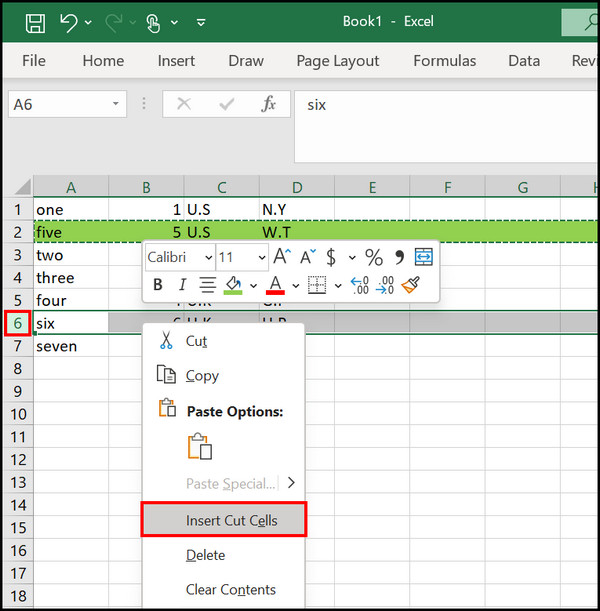
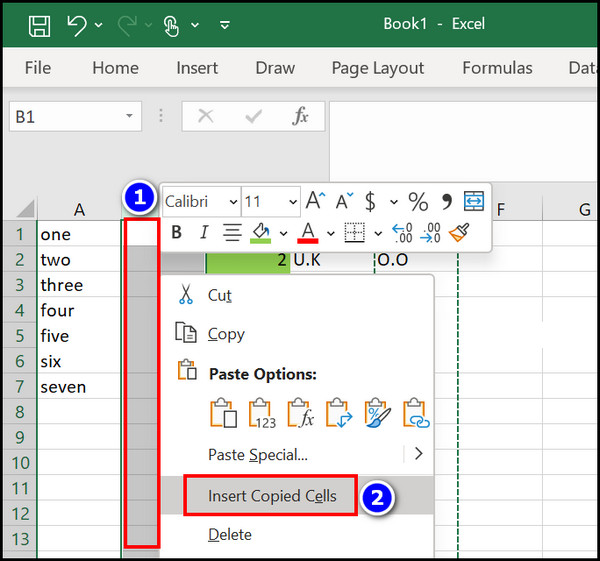
- Right-click and select the Insert Cut Cells or Insert Copy Cells option.

For Column
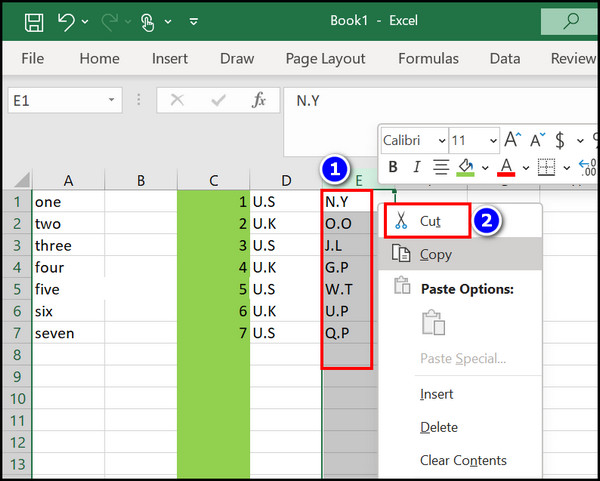
- Select the Column from Microsoft Excel.
- Right-click and choose the Copy or Cut menu.
- Move to the Column where you want to Shift your selected one, right-click, and choose the Insert Cut Cells or Insert Copy Cells option.
The row you copied or cut is now inserted into your specific position.
Follow our guide on how to Mail Merge in Outlook with Excel & Word.
3. Insert a Blank Row or Column
To move a specific section, you must insert a blank row or column into MS Excel. Then copy your desired row or column, and paste it into the empty box.
Here are the steps to use a blank row or column to move your desired section:
For Column
- Select the column where you want to put your particular column from the MS Excel application.
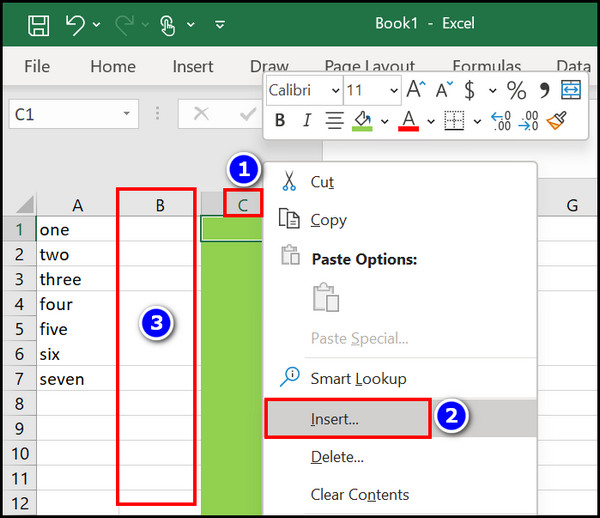
- Right-click and select the Insert option; instantly, you can see a new Blank column appear.
- Copy or Cut the desired Column.
- Move your cursor to the Blank column, right-click and select the Insert Cut Cells or Insert Copied Cells option.
Here’s a complete guide on how to Lock and Unlock Cells in Excel
For Row
- Highlight the Row where you want to shift your desired row.
- Right-click and choose the Insert menu, and a Blank row will open.
- Cut or Copy your specific row.
- Navigate to the Blank row, right-click, and select the Insert Cut Cells or Insert Copy cells option.
You are all set, and your specific column or row is now rearranged according to your plan.
4. Use the Ctrl Key to Move a Specific Row or Column
You can use the Ctrl key to move a specific Row or column in MS Excel. But the drawback is that while you are shifting your particular section, the existing row or column in that desired box will be removed.
Here are the steps to use the Ctrl key to move a specific row or column in MS Excel:
- Highlight the row or column you want to drag up.
- Press and Hold the Ctrl key.
- Move your cursor to the Border of the specific row or column.
- Click and drag the section to your desired position while you see the Move (Cursor+)icon.
- Release the Mouse when you achieve your specific place.
Your particular rows or columns are adjusted to the correct position.
Check out our separate post on how to Install Macro in Excel
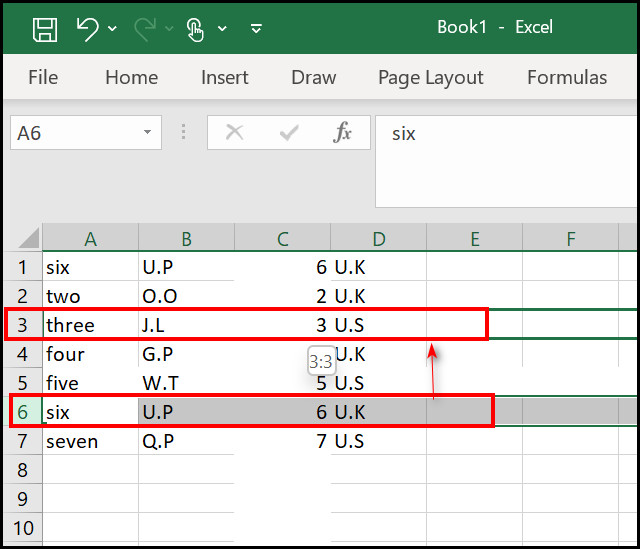
5. Select a Row or Column and Shift them
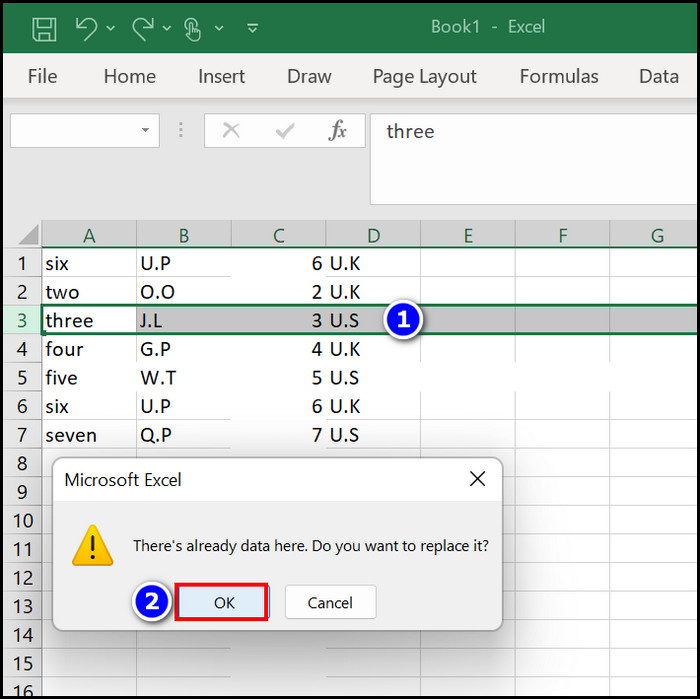
After manually selecting a row or column, you can move them according to your need. However, a pop-up window will appear when you shift the specific section into an existing row or column.
Here are the steps to select a row or column and move them:
- Click on the Row Number or the Column Number section from MS Excel.
- Place your mouse at the Top Edge of the Highlighted row or column.
- Select and Drag the unit to your specific position.
- Choose the OK button when the Replace Window appears.
Instantly you will see the selected row or column is adjusted appropriately.
Here’s a complete guide on how to Copy Values Without Formulas on Excel
6. Select Multiple Rows, Columns, or Cells and Move them Simultaneously
You can highlight multiple rows, columns, or cells and move them to your desired position. Follow the instructions below to learn about the moving process of Microsoft Excel.
Here are the steps to select multiple rows, columns, or cells and move them:
- Highlight various rows or columns from Microsoft Excel.
- Press and Hold the Shift key.
- Place your cursor to the Border of those selected lines and Drag the chosen unit.
- Set the highlighted section in your particular area.
The moving process is completed; now try it for yourself.
Also related to this guide on how to Lock and Unlock Cells in Excel
How to Move Row, Column, or Cell in MS Excel with Mac
Microsoft Excel is available for the Mac OS. So if you want to know how to move a row, column, or cell in Excel with a Mac, then follow the instructions below.
Here are the steps to move row, column, or cell in MS Excel with Mac:
- Select the specific row, cell, or column from MS Excel Mac.
- Press and hold the Option key.
- Place your pointer at the Border of those rows or columns and Drag them to your particular place.
- Release the Pointer and Option key to finish the moving process.
The rows, columns, and cells are rearranged according to your requirement in your Mac.
Check out our separate post on Fix Microsoft Excel Freezing or Slow
Frequently Asked Questions (FAQs)
Can you swap rows and columns in MS Excel?
Yes, you can swap rows and columns in the Microsoft Excel program. Highlight the rows or columns, hold the Shift button and click on the Border of the selected section. Drag the section to your desired place, and the Swap is complete.
Can you switch rows and columns in Microsoft Excel?
Yes, with the help of the Transpose feature, you can switch rows and columns in MS Excel. Copy the value data from any rows or columns, then Paste them into the Transpose mode to Switch them.
Can you change rows to columns in MS Excel sheets?
Yes, the Transpose feature on MS Excel offers a function with which you can change rows to columns in Excel and vice versa. Just Copy the data from the cells and Paste them into transpose mode.
Why is your paste transpose not working on MS Excel?
Your MS Excel Paste transpose feature may not work appropriately when your Excel application is outdated.
Wrapping Up
MS Excel is hugely used in offices and colleges for its outstanding data processing capability. There are many features implemented in this application.
Moving a row, cell, or column is one feature among many. You can use the Shift and Ctrl keys to move your desired rows and columns. Also, you can apply the Insert Cells option or blank Row or Column section to shift your particular unit.
In this article, I displayed some simple yet functioning methods by which you can quickly shift a row or column in Microsoft Excel.
Do you want to share your thoughts about this article? Or do you have any questions regarding this content? Let us know in the comment section.