In today’s changing market, tracking customer needs is the key to success. And when it comes to gathering valuable data, surveys are the most effective method.
Luckily Microsoft Forms lets you create and share online surveys, quizzes, and polls on the go and turns that feedback data into a spreadsheet for review.
In this guide, I’ll walk you through the key features and provide step-by-step instructions on how to make the most out of Microsoft Forms.
So without further ado, let’s jump in.
How to Create a Survey from Scratch with Microsoft Forms
Microsoft Forms is an online application that comes with the Office bundle. You can easily access Microsoft Forms from any browser if you have a Microsoft account. From there, you can create a survey form as needed.
Microsoft Forms helped me gather feedback from my teammates about their work environment and opinions about different organizational terms and policies.
With that feedback data, I could easily improve the situation.
Follow these steps to create a survey form using MS Forms and share:
- Open any browser and log in to your Office account.
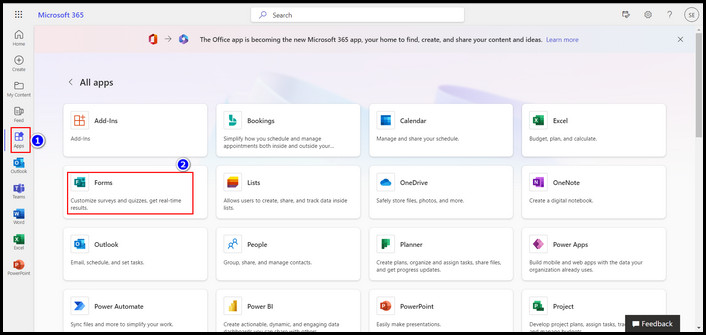
- Go to Apps > All Apps > Forms to access Microsoft Forms.
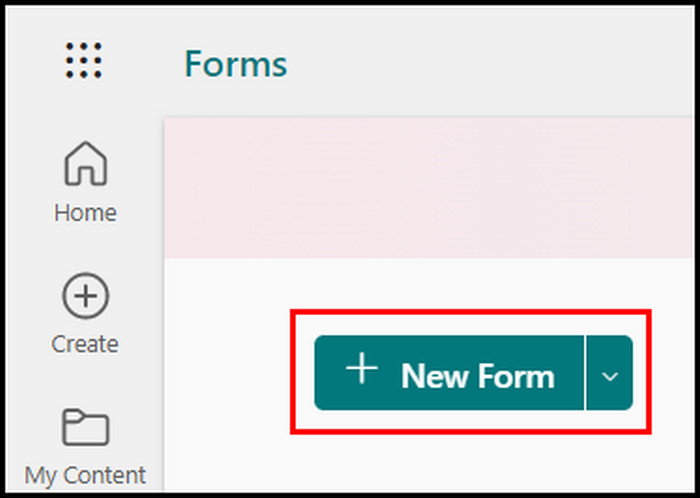
- Select the New Form option to start.
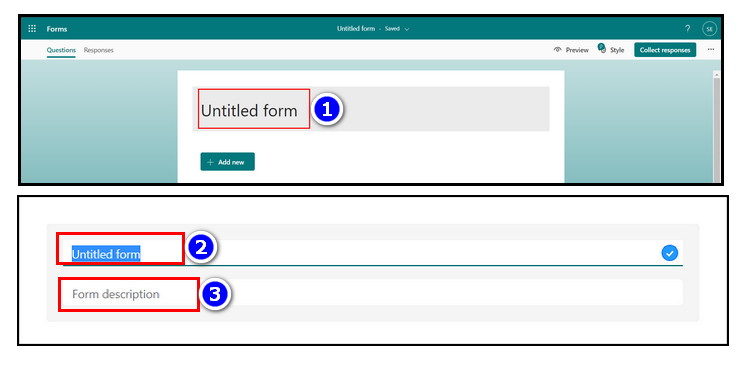
- Click on the Untitled form option and insert a form title & description.
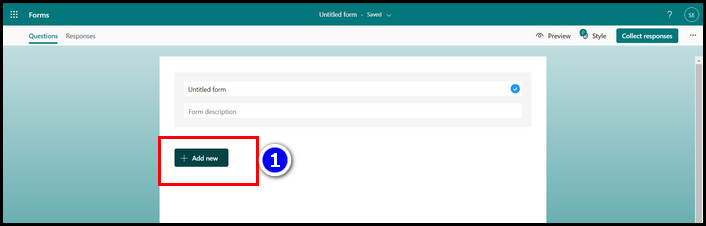
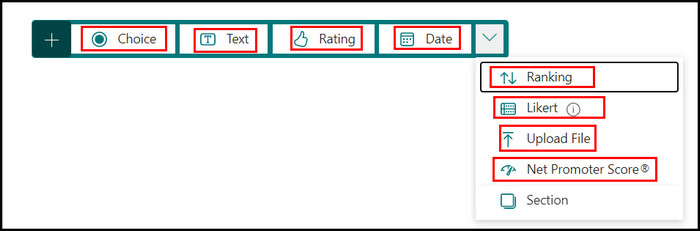
- Select +Add new option and select the necessary question patterns from the list:
- Choice: In this question type, users can choose a single answer option from a list of predefined choices. Usually, I use it for demographic information, preferences, or opinions.
- Text: When you require a broad answer to a question like address or opinion, you use this question type.
- Rating: This category includes all the star rating or numeric rating questions. It helps obtain feedback or opinions on a specific item or topic.
- Date: I use Date questions for collecting dates or scheduling information.
- Ranking: Ranking questions allow users to prioritize or rank items or products according to their preferences.
- Likert: Likert questions use a predetermined scale to get agreement or disagreement feedback from the customer/consumer.
- Upload file: The File Upload question type allows you to easily upload relevant files, such as supporting documents or images, as part of their response.
- Net promoter score: NPS questions help you measure customer loyalty for a product/company on a scale of 0-10.
- Insert the required number of questions in the forms.
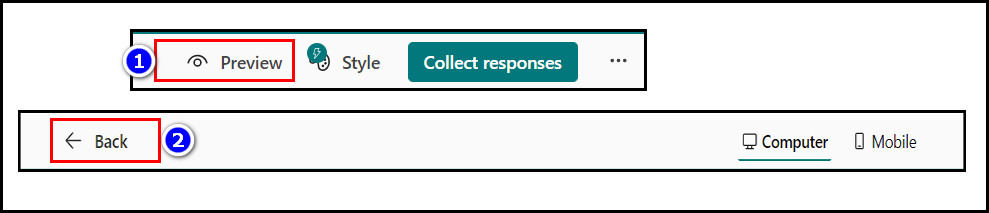
- Click the Preview option to see how it looks on a computer or mobile device, and select Beck afterward.
Congratulations! You’ve successfully created a survey form. You can now use it to collect opinions from your audience, consumers, or potential customers.
Furthermore, you can also develop a questionnaire using Microsoft Forms Template. Also, creating a form using the Microsoft Forms template saves you time and provides valuable questions you may not have thought of on your own.
To create a questionnaire Microsoft Forms template:
- Log in to your Office 365 account on any browser.
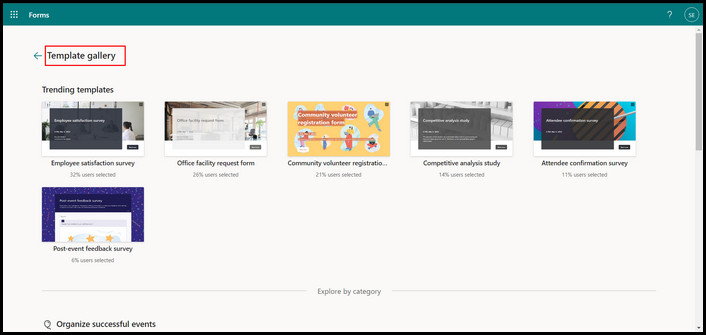
- Open a new tab and visit the Microsoft Forms Template Gallery.
- Choose any template and edit it as you like.
After completing the steps, your survey will be ready to get responses.
How to Create a Quiz and Add Points in Microsoft Forms
Though a survey form and a Quiz have a similar structure, there’s a core difference—There isn’t any wrong answer for a survey, but there are correct and incorrect responses in a Quiz. Educators from different sectors typically use the quiz option to evaluate their students.
Follow these steps to create a Quiz in Microsoft Forms:
- Open any browser, and visit the Microsoft Forms website.
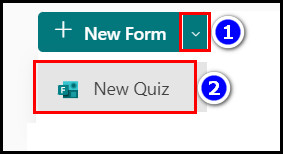
- Click on the New Quiz option from the upper left corner.
- Select +Add new option and select the necessary question patterns from the list:
Choice Ranking Text Likert Rating Upload file Date Net promoter score - Turn on the Required option from the bottom of the question.
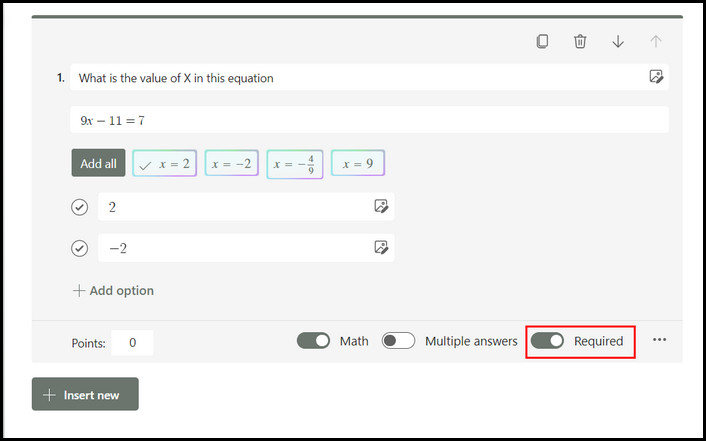
- To add a math question to your quiz:
- Click any question and turn on the Math option.
- Insert the question title in the Question box.
- Click the Inset media icon to add pictures and videos.
- Tap Enter the equation box and input the Math equation.
- Add the answers in the Options box.
- Press +Add Option to add new choices for the question.
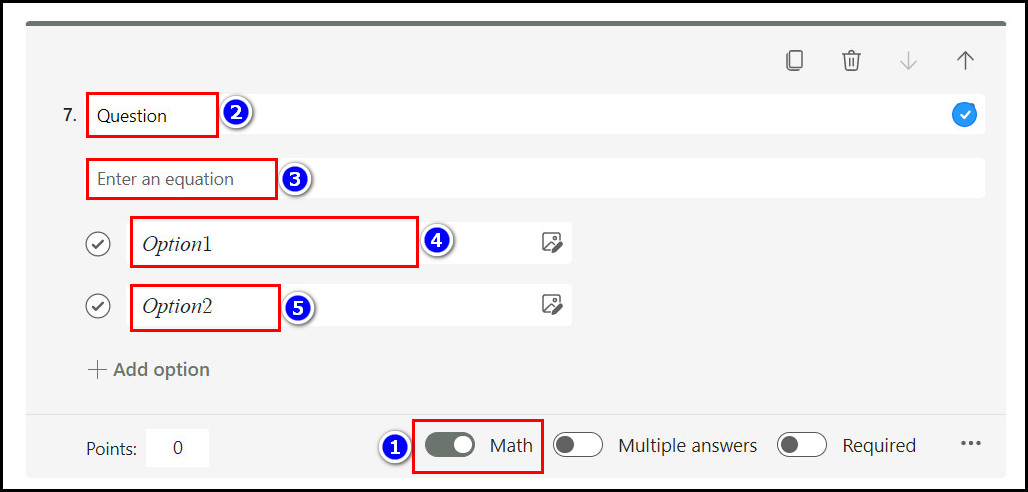
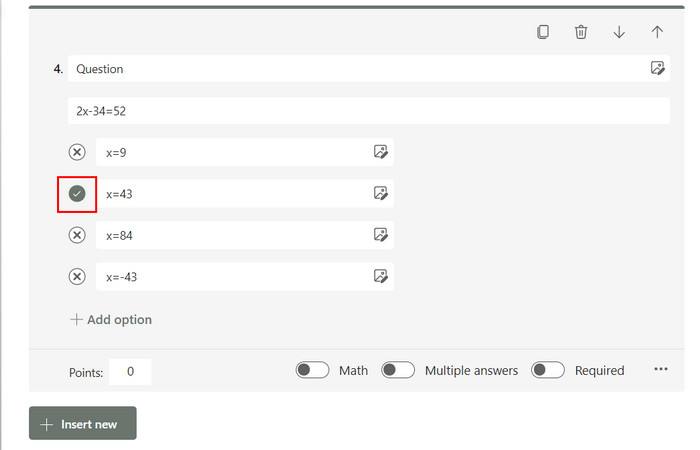
- Click the tick mark next to any option to set the correct answer.
- Toggle on the Multiple Answers option if there are multiple correct answers.

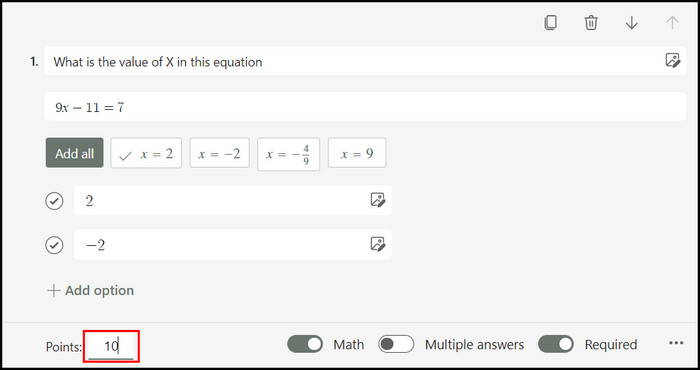
- Insert the Points of the question in the Points section.
- Click the outside of the question fluid to save the question.
And voila! You’ve successfully created a quiz for your students.
How to Customize Form Themes and Rules in MS Forms
The default look of Microsoft Forms is very basic, and sometimes it isn’t enough to grab your audience’s attention. In that case, you must alter your questionnaire’s looks and themes to make it more attractive.
You can also format any text inside the question, change its color and size, and many other things.
In this section, I will show you how you can tweak the looks and feels of your Survey Forms and set a custom rule for them. Let’s see.
Here’s the process to customize the Microsoft Form theme and rules:
Edit/Format Any Question
- Go to the Microsoft Forms website and open your Form.
- Click on a question you want to edit.
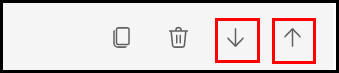
- Click the down arrow to move the question down and the up arrow to move it up.
- Select the text(s) and wait a second to open the formatting toolbar.

- Choose any option from the list:
- Bold: Use it to highlight.
- Italic: This option will help you to highlight quotes, conversations, or dialogues.
- Underline: Use it to underline any text.
- Font color: Change your font color to make your survey more colorful.
- The Frons size option changes the size of that selected text. It has three options in MS Forms:
- Small: 8 pt
- Medium: 10 pt
- Large: 12 pt

- The Bullets and Numbering option helps you to insert a list into the questionnaire.
- Tap the delete icon to remove the question.
Set Customized Rules/Settings
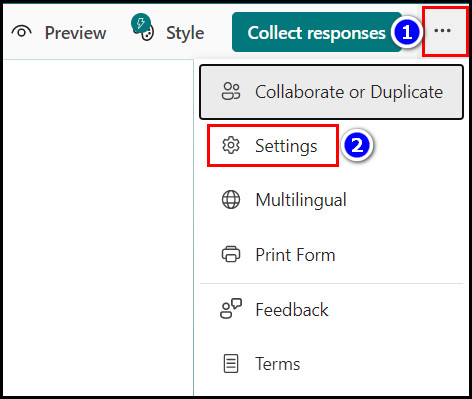
- Click the 3-dot icons from the top right and go to Settings.
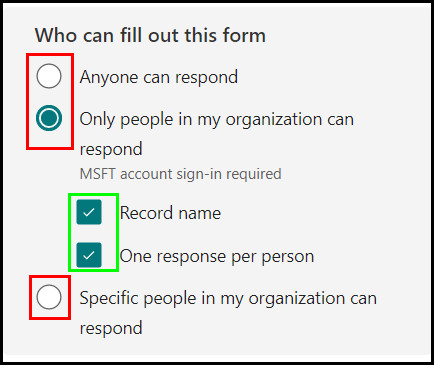
- Choose Who can fill out this form to select your audience.
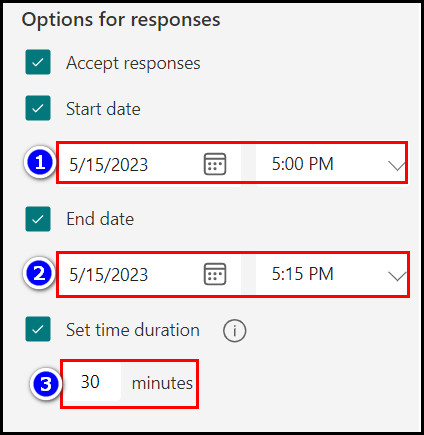
- Select a Start date, End date, and time duration.
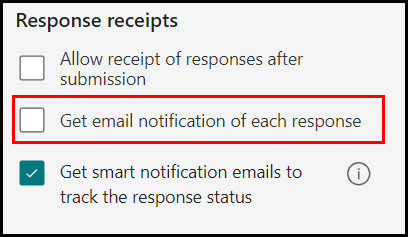
- Enable the email notification of each response if you want.
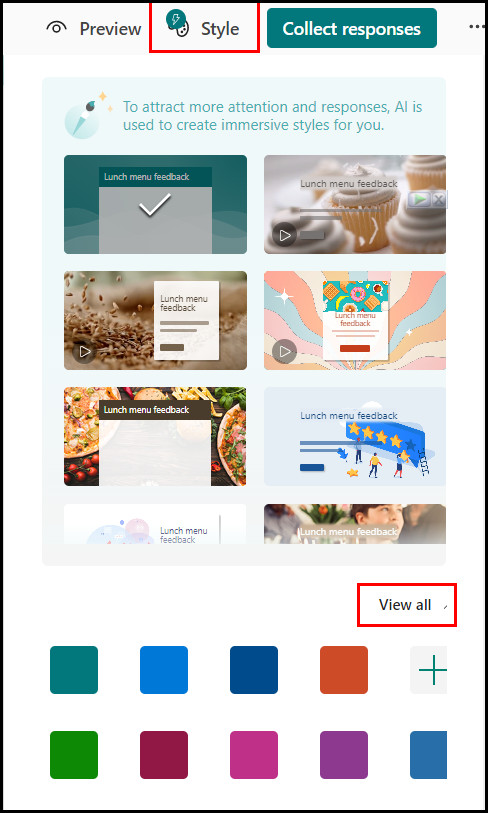
Change Theme
- Open your form and click the Styles/Theme option from the right.
- Tap the View All option to see all available themes.
- Click any themes/styles from the list.
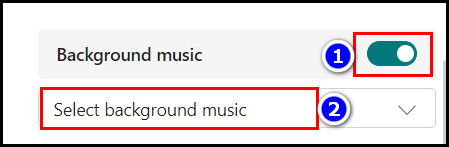
- Turn on the background music option and select any from the list to add custom music to the survey.
- Go to the Preview option to see how it looks on a computer or mobile device, and select Beck afterward.
These are the ways to customize your Microsoft form and make it more appealing to your participants.
After successfully creating a Form/quiz, the next step is to share that questionnaire to collect user responses. If you fail to share your questionnaire properly, your clients, employees, or other respondents won’t get access, making the form useless.
To share your form and collect answers, follow these steps:
- Go to the Microsoft Forms website and open your Form.
- Click the Collect Responses button from the top right corner.

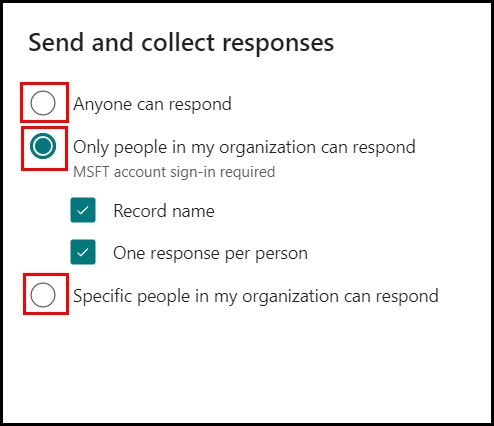
- Select the appropriate option based on your audience:
- Anyone can respond: If you want anyone, even those outside your organization, to respond to the form, choose this option.
- Only the people within my organization can respond: If the form is only for employees within your company, select this option.
- Specific people: If you only want feedback from specific individuals in your organization, choose this option and enter their names or email addresses.
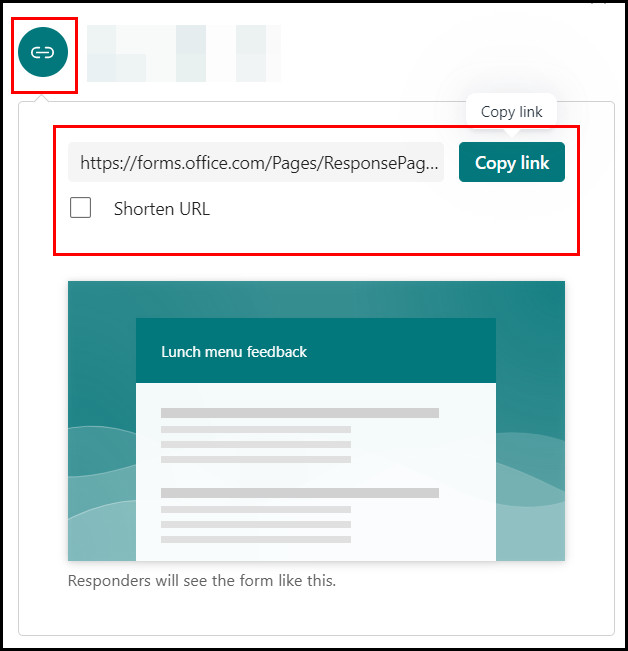
- Choose any of the sharing methods as you see fit:
- Go to the hyperlink option, copy the link, and paste it into any group, chat, or forum to get a response.
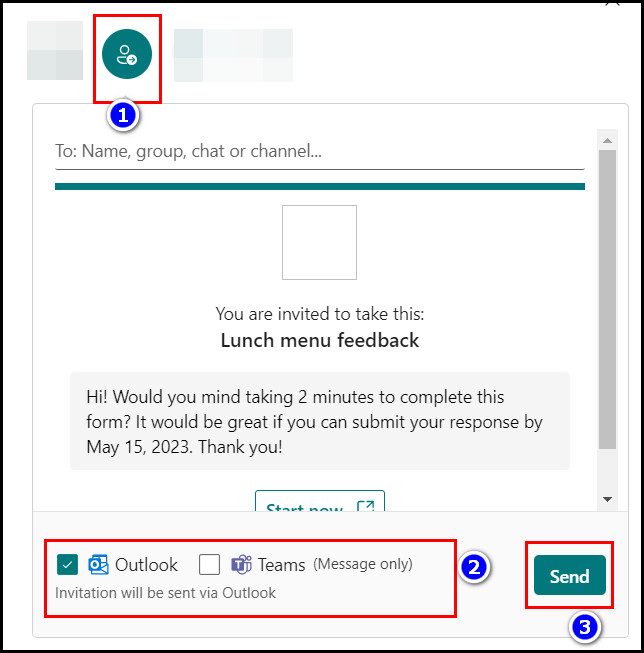
- Click the Invitation icon to share the forms via Outlook mail or teams group.
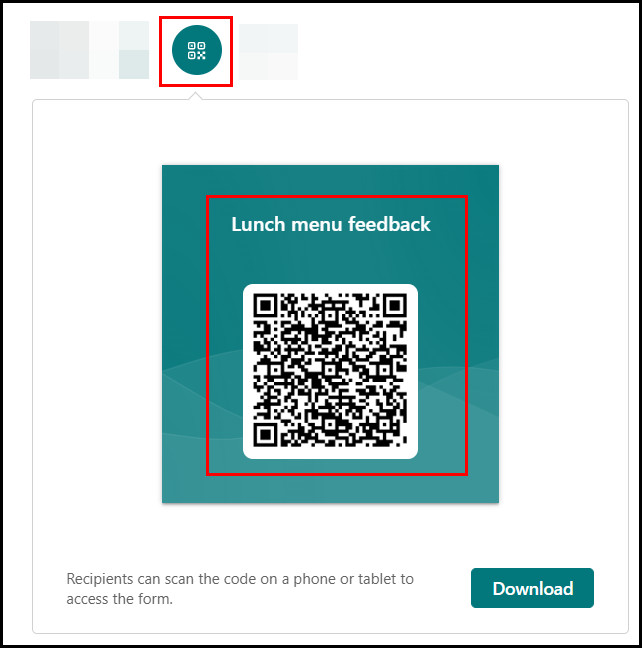
- Select the QR code option to get a Scannable QR code.
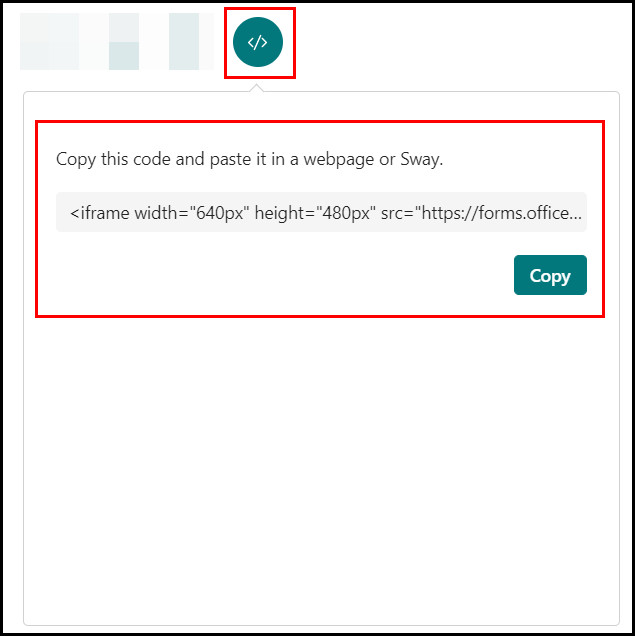
- Go to the Embed option, copy this code, and paste it into a website to link the Form with your Website.
- Go to the hyperlink option, copy the link, and paste it into any group, chat, or forum to get a response.
And you’ve successfully shared your forms among your audience. Now you just have to wait for the people to complete the survey/quiz.
How To Check Your Forms Results in Microsoft Forms
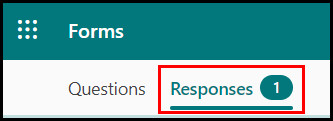
Microsoft Forms automatically records all the responses of your questionnaire. You can easily check the summary results using the Responses option.
Use these steps to check your results in Microsoft Forms quickly:
- Open the Microsoft Forms website in any browser.
- Go to your created form and click the Responses tab.
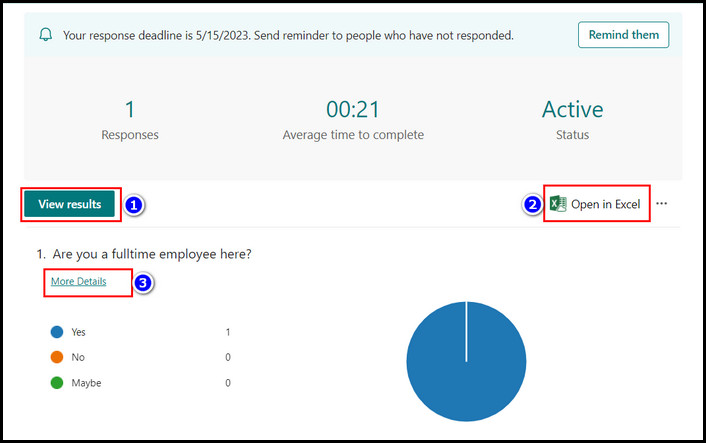
- Select any options as per your need:
- View result: Use it to view person-wise results.
- Open in Excel: Choose this option to get the result in an Excel sheet.
- More Details: Use the option under any question to get a detailed question-wise result.
These are the ways to view the outcomes in Microsoft Forms. Additionally, press the CTRL+P key to print the result.
You can also share your form result to get an expert opinion. To do so:
- Go to the Responses tab and click the 3-dot icon below the form title.
- Select the Share a Summary link option from the menu list.
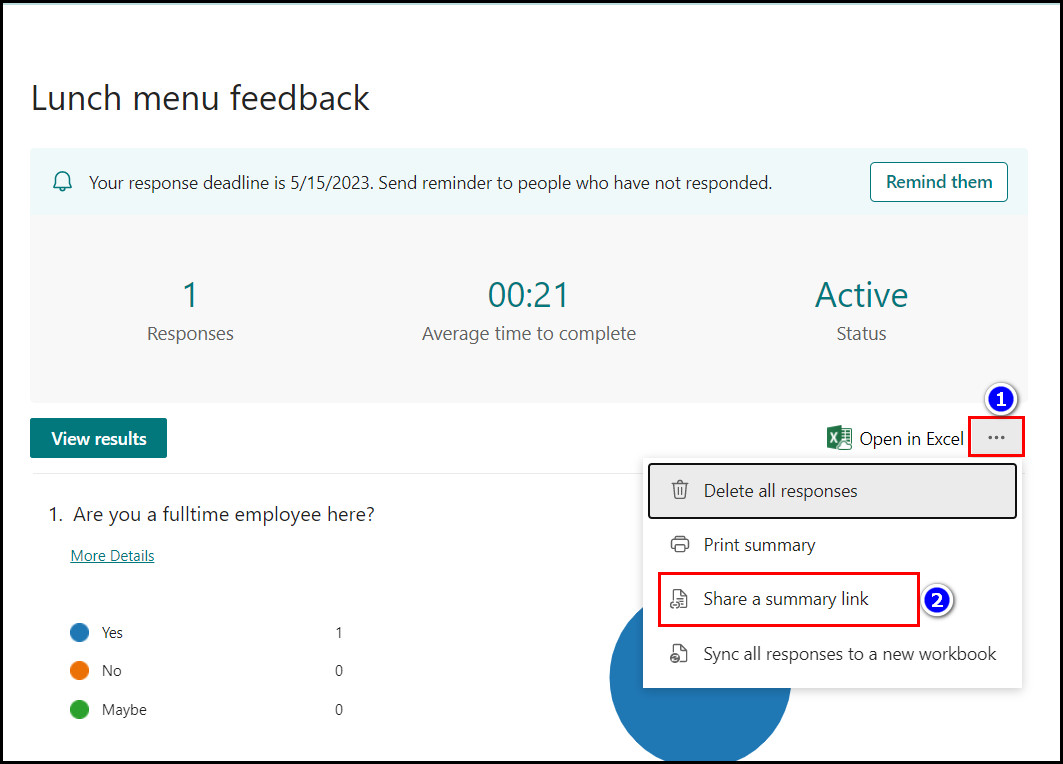
- Copy that link and send it to your chosen person.
Using that link, an expert can get an overall view and give you his opinion based on the data.
How to Integrate Microsoft Forms With Microsoft Teams
Not only is Forms an individual application, but Microsoft Teams has separate integration. This separate integration tool is very helpful for collecting feedback within your organization.
Whenever I need any opinion from my colleague, I use this Forms’ tool in my Teams channel because only the members of my channel have access. It’s because there isn’t any chance of data corruption.
Follow this method to blend Forms With Microsoft Teams:
- Create a form in Microsoft Forms.
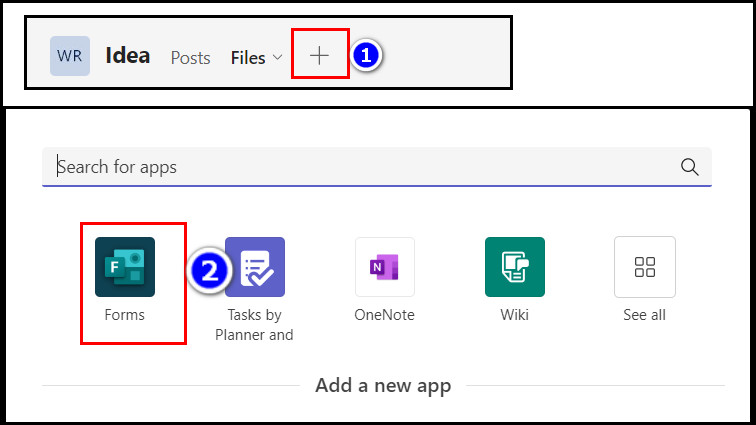
- Open Teams (app/web) and go to your Channel.
- Click the + icon and select Forms from the list.
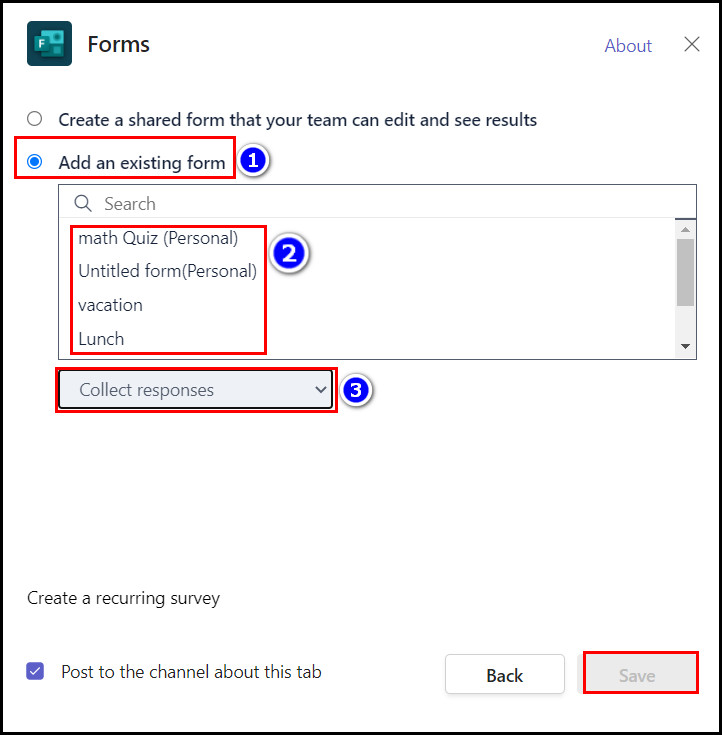
- Select the Add an existing form option and choose your created form from the list.
- Pick the Collect Responses option in the next box.
- Mark the Post to the channel about this tab option and click Save.
After completing the steps, all group members will receive a chat notification form. You can also create a multi-access form in Teams.
How to Add a Quick Poll in Outlook Using Microsoft Forms
As I showed you earlier, you can share your forms via Outlook using a shareable link. However, sometimes you need to get a quick vote on something from your clients.
In that situation, you can use a Microsoft Forms add-in for Outlook to create a poll and send it to your clients.
Follow these steps to add Microsoft Forms add-ins in Outlook:
- Open any browser and go to your Outlook account.
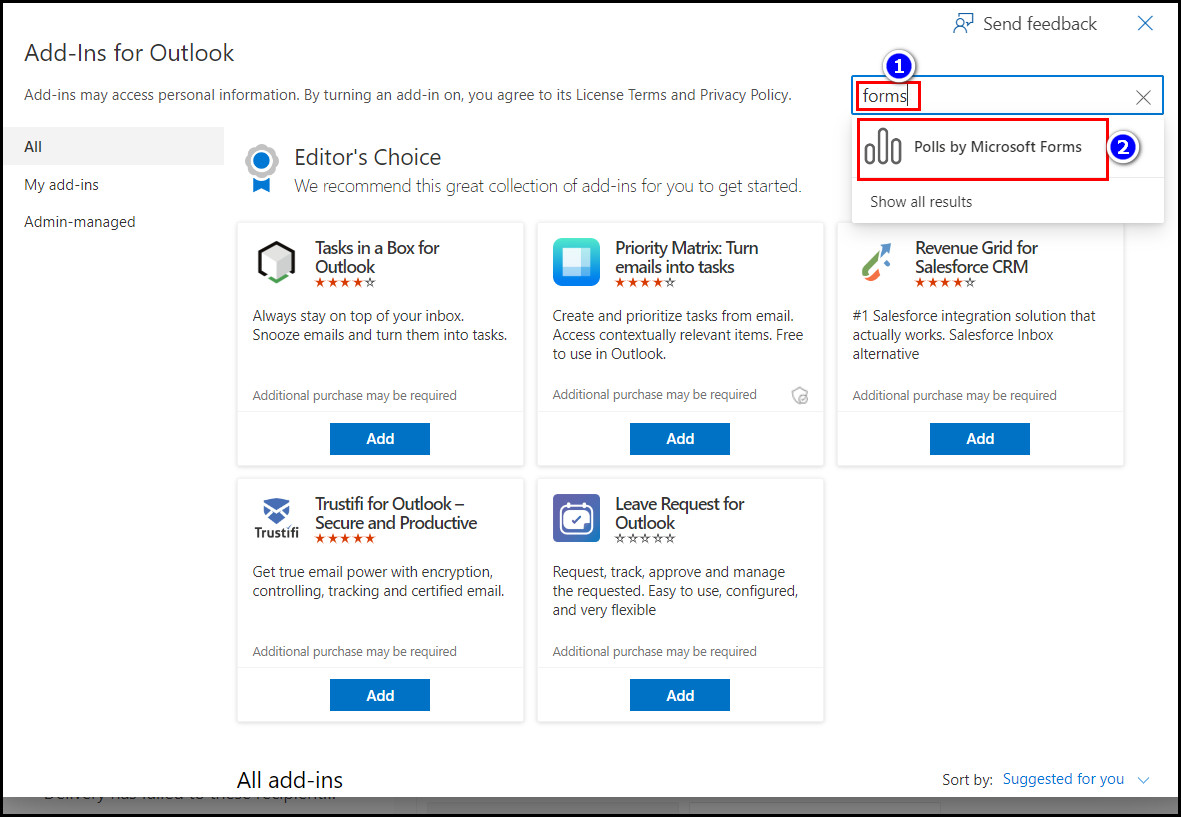
- Click the Get Add-ins icon from the main toolbar.
- Type Forms in the search box and find Quick Poll by Microsoft Forms add-ins.
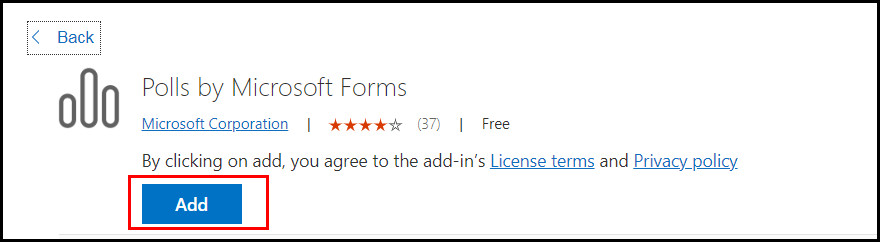
- Click the Add option and choose Continue (if appear).
- Wait for the process to complete.
After completing the steps, you can create a poll inside the Outlook application. Here’s how to do so:
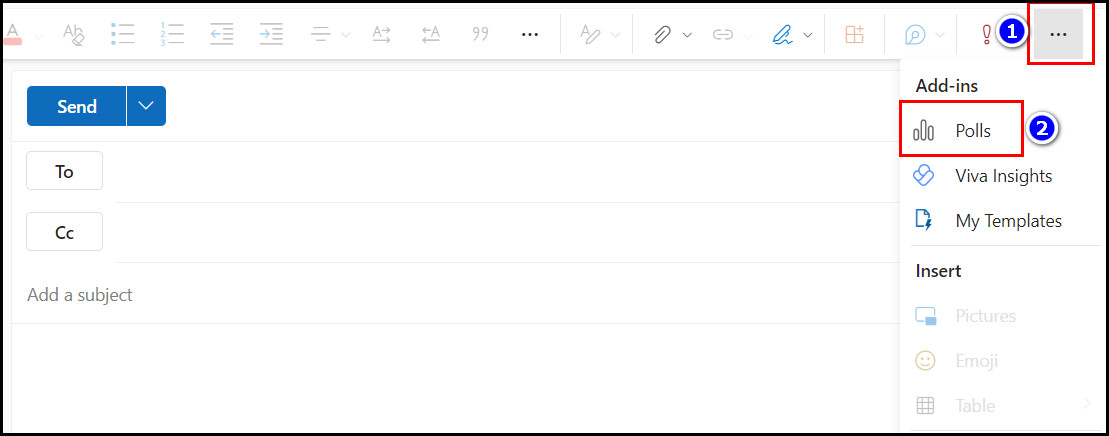
- Click on the New Massage option.

- Input your client’s email address and write your email.
- Click the 3-dot option and select Polls.
- Create the voting poll and click Next.
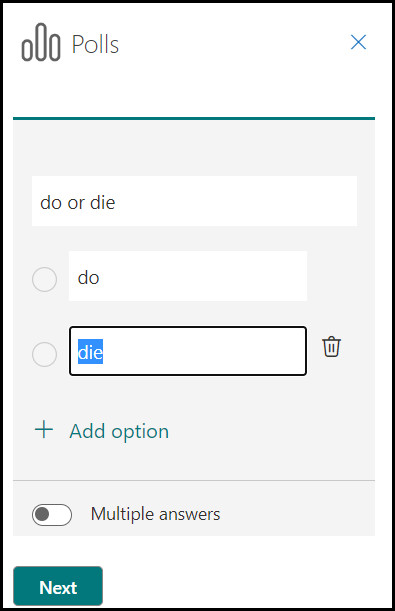
- Select the Add to Emails option, then send the email.
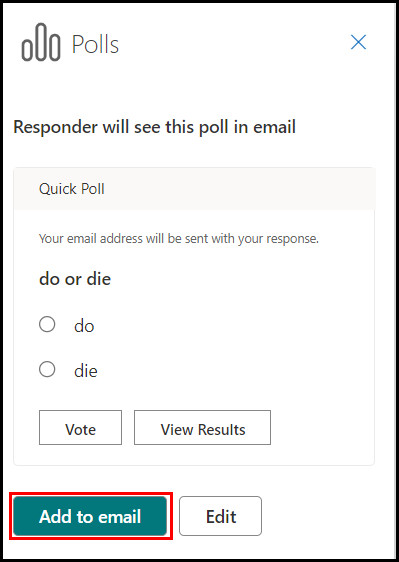
And that’s it. You can view the poll result in the Microsoft Forms app.
Conclusion
In short, Microsoft Forms is a powerful tool for creating surveys, quizzes, and polls. It also gives you a user-friendly interface where you can easily share your forms and analyze these results.
Microsoft also integrates with Teams and the Outlook application so that you can access its features from those applications.
After reading this post, I’m sure you now know all the basic functions of Microsoft Teams. Comment for further guidance. And for every else, stay with 10scopes.