With thousands of entries in SharePoint lists, it’s impractical even to try to manually find a data set or information based on a particular parameter between two or more lists or libraries.
Believe it or not, in SharePoint, your sought-after data is just a click away, thanks to dynamic filtering.
In this write-up, I’ll cover the nitty-gritty of connecting lists or libraries using dynamic filtering in SharePoint.
Key Takeaways
- Connect two Lists, two Document libraries, or a List and Document library via Dynamic filtering in SharePoint.
- Choose a value parameter to filter a child list, depending on the data selection on the parent list.
Before moving on to the dynamic filtering process in SharePoint, let’s find the answer to What is Dynamic Filtering in SharePoint?
Microsoft SharePoint bestows a user the ability to link two or more lists or libraries and track down data on a list based on a value from another list or library.
Sounds a bit complicated, isn’t it? Let me explain.
Let’s think about an educational organization, such as a school. It has individual student lists of a class and another list for their personal info, as well as a document library that includes complete family information.
Now, here’s the idea — I want to fetch every detail of a student from the Personal info list and Family info document library utilizing their unique ID from the class list.
See, SharePoint, in this case, allows me to find that particular student’s info from both the list and the library based on the ID found in the class list.
That’s all about the theory, let’s see this in action in the next section.
To demonstrate dynamic filtering, I made two SharePoint lists called Class of Grade 10, Student Detail, and a document library named Family Info beforehand. With a click on a student’s name, all the information will appear instantly.
Note: Your use case might be different, but the process remains the same. You can connect lists or libraries similarly.
Our Scenario: Find A Student’s Information Through Unique ID
Follow the steps down below to connect lists or libraries via Dynamic filtering SharePoint:
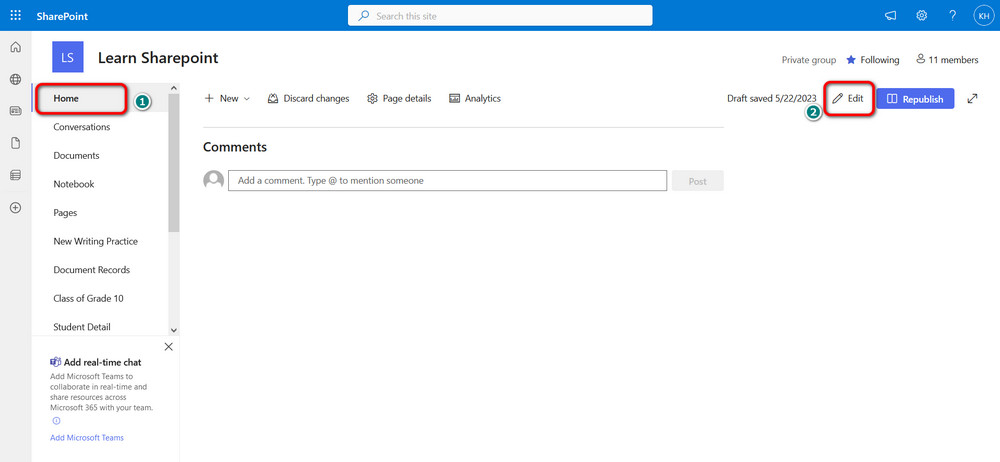
- Go to your SharePoint Home and click on Edit in the top right.
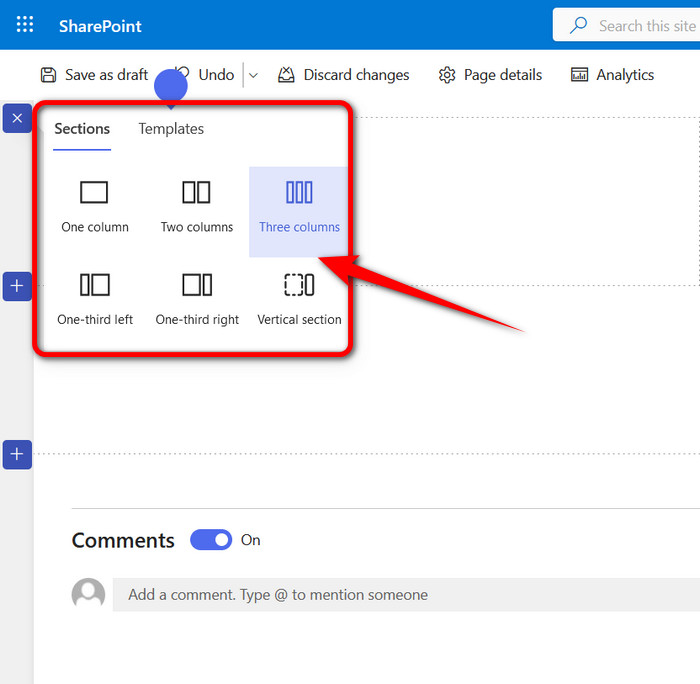
- Add a new section based on how you want to display your lists and libraries. In my example, I chose 3 column view to access all data from one place quickly.
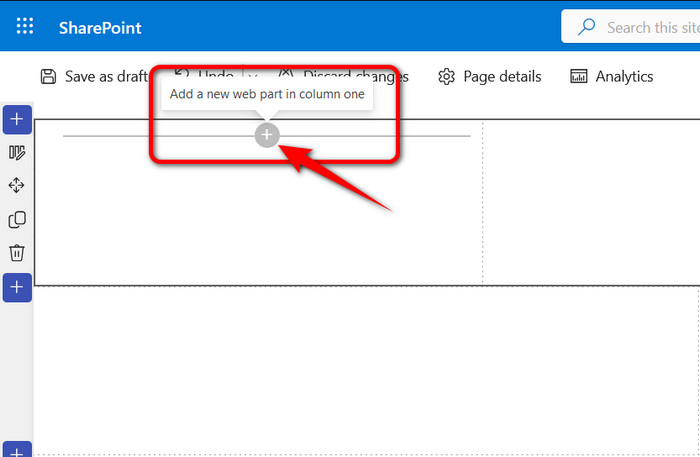
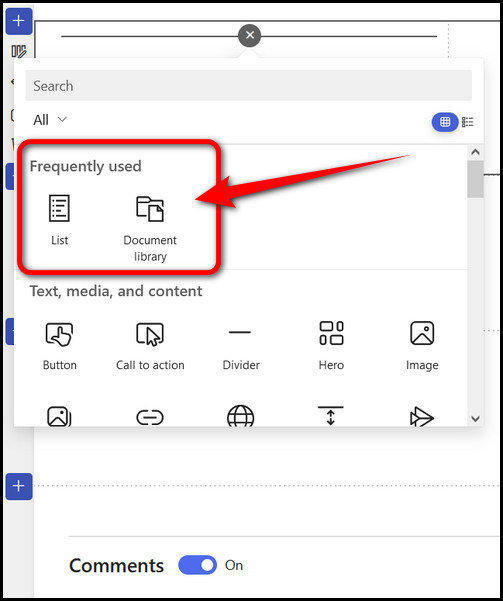
- Hover on the top section of each column and select the Plus (+) icon.
- Choose List or Document library from the new floating window as per your need.
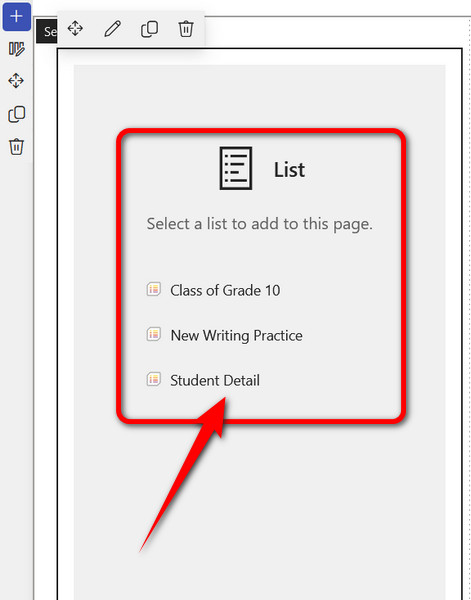
- Add your List or library from the next screen. Populate all the necessary columns similarly.
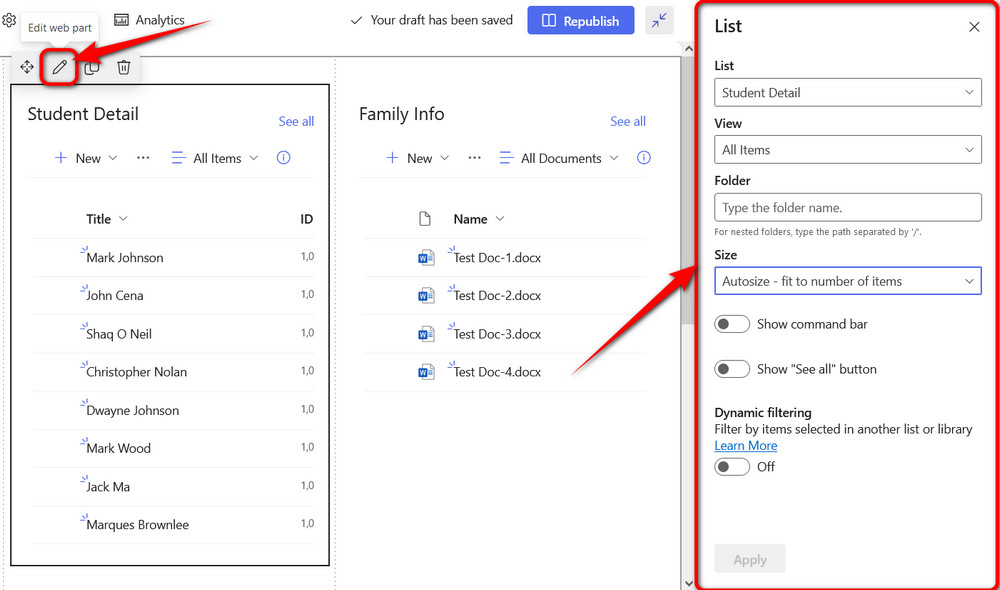
- Select a list or a library and click on the Pen icon from the top to access edit options. A new sidebar will slide in from the right of the screen. Once the edit panel is opened, click on any list to modify. You no longer need to click the Pen icon in this state.
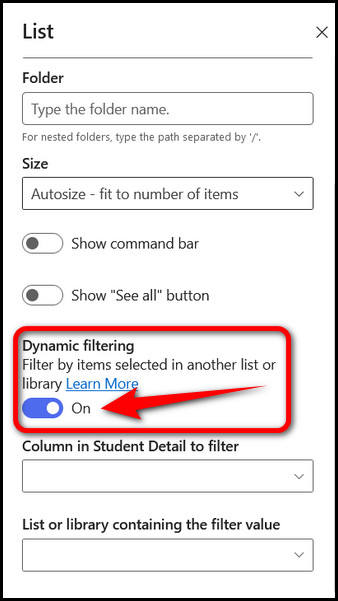
- Toggle on Dynamic filtering switch from the bottom of the right pane.
 Pay Attention
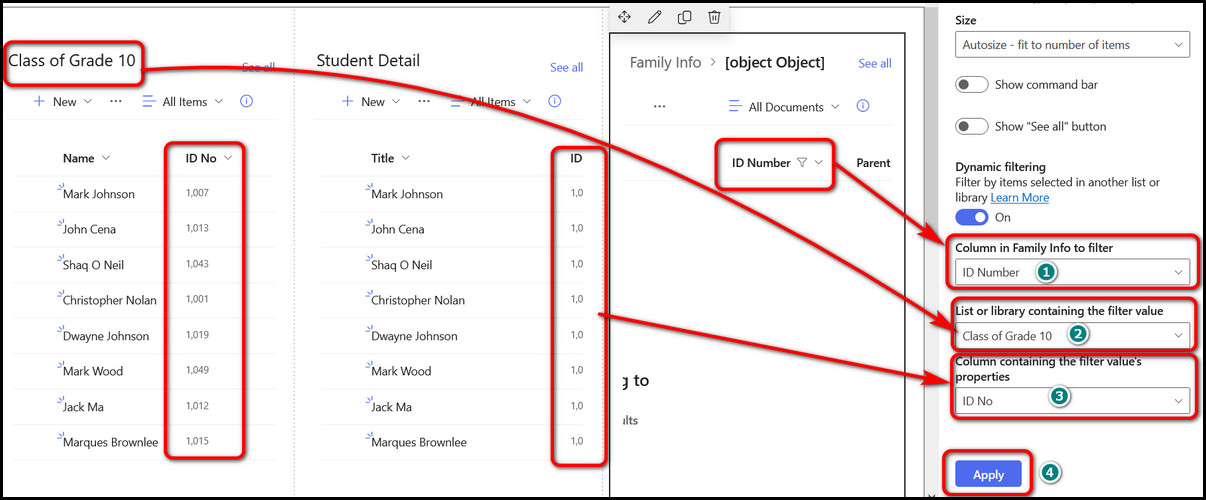
- 2 New options will appear — Column in [List Name] (Student Detail in our example) to filter & List or library containing the filter value.
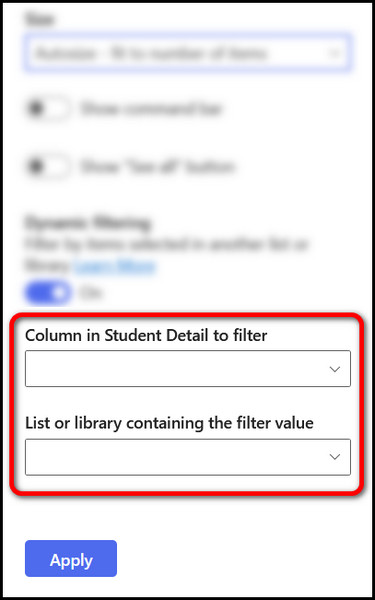
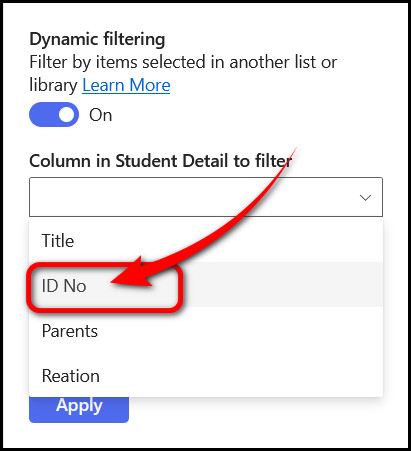
- Choose the column such as ID No from Column in [List Name] to filter field to organize the current list (or child list) depending on a parent list.
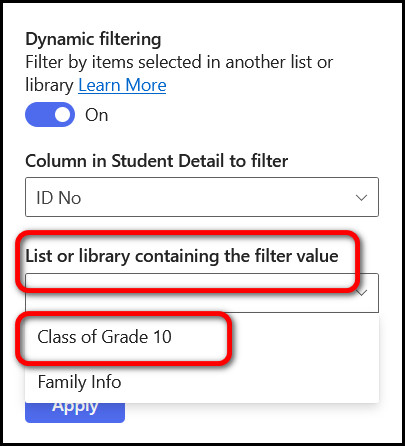
- Select a new SharePoint list from List or library containing the filter value field. This list will act as the parent list (Class of Grade 10). Based on what field you pick from, this list will sort the currently selected list (child list). In this example, it’s the Student Detail.
- Once you choose a parent list, a new field will appear labeled as Column containing the filter value’s properties. Pick a column of the parent list as the value for this box. SharePoint will match the value, which is the ID No, as per this example; of each content in this column and find the exact value from the child list, which is Student Detail. So, out of thousands of data, a simple click will fetch the necessary information.
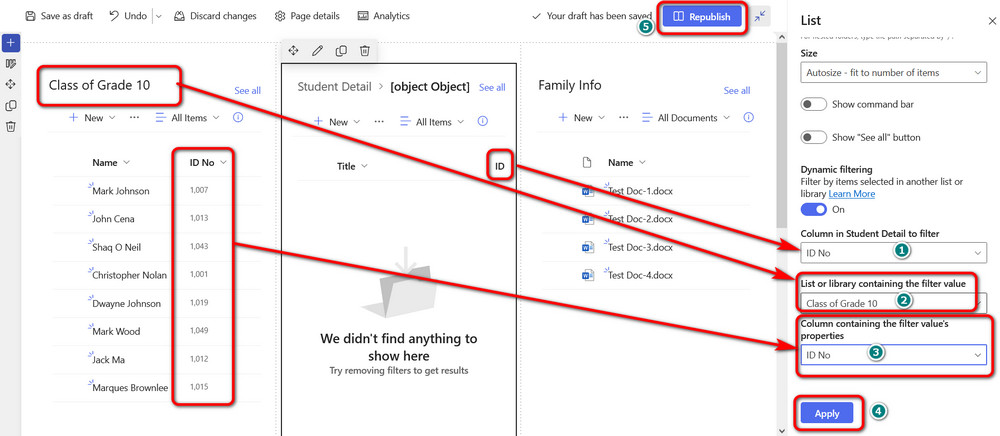
- Republish your website to make the changes effective.
- Likewise, set filters for your Document Library as well. In this tutorial, I filtered documents as per the student’s ID.
Once the changes are made, click on the little circle beside a name or title, and immediately, child lists and document library will show the filtered results.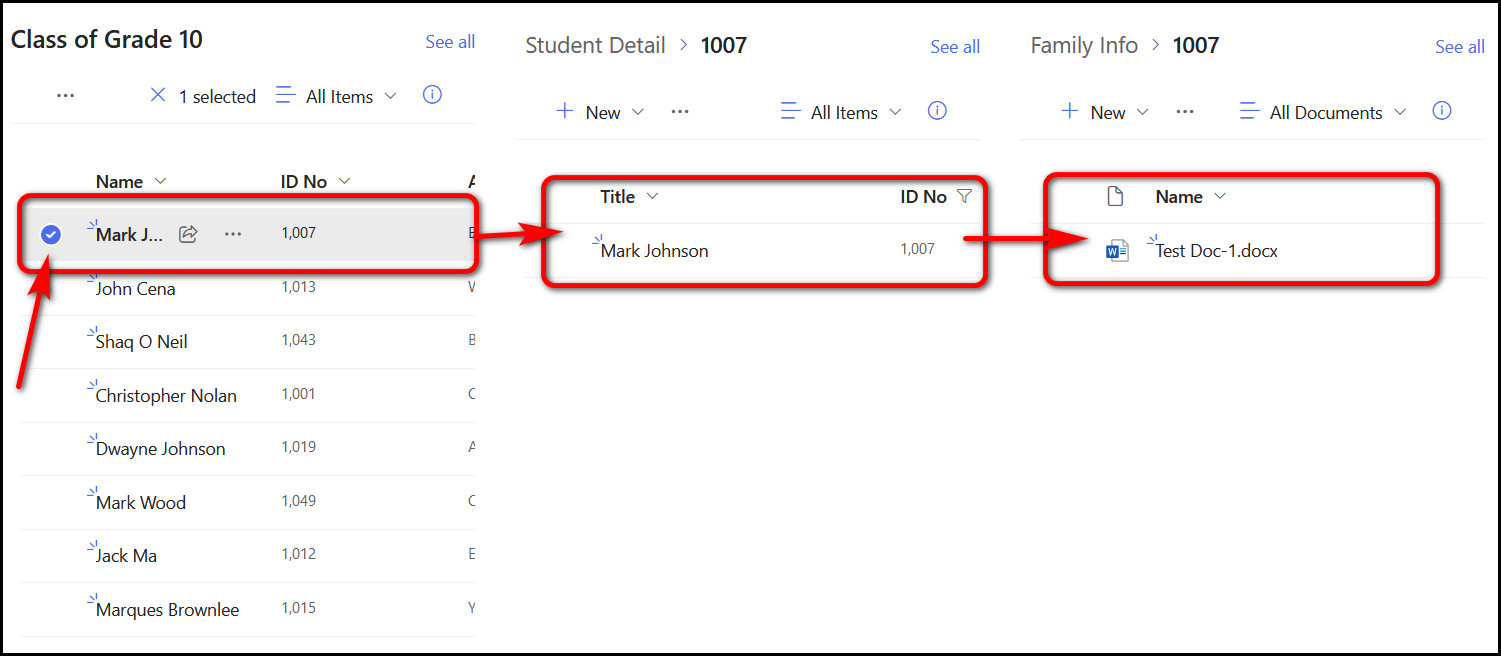
So that’s a wrap for this guide. If you are stuck and still confused, comment down below.